The best way to do a focus stacking:
Macro Focusing Rails vs Focus Variation
This tutorial is about how to obtain a large depth-of-field using focus stacking.
The main question is: Is it better to use a macro rail or is it better to vary the focus of the lens?
As Alex, I use focus stacking (or “deep focus fusion”) quite often and most of the time I just shoot a series of photos with varied focus instead of a series with varied distance, using a rail.
Until now I always thought, that approach is a bit dirty, because it introduces changes in the magnification, but often it was the only way, because the depth of the object was far too deep for any rail. Imagine for example shooting a landscape. : – )
But now, I wanted to know for sure what is the better method and and did some tests.
One thing I can say to start with: With complex scenes, it is a good idea, not to change the position of the camera!
But now let’s take a closer look:
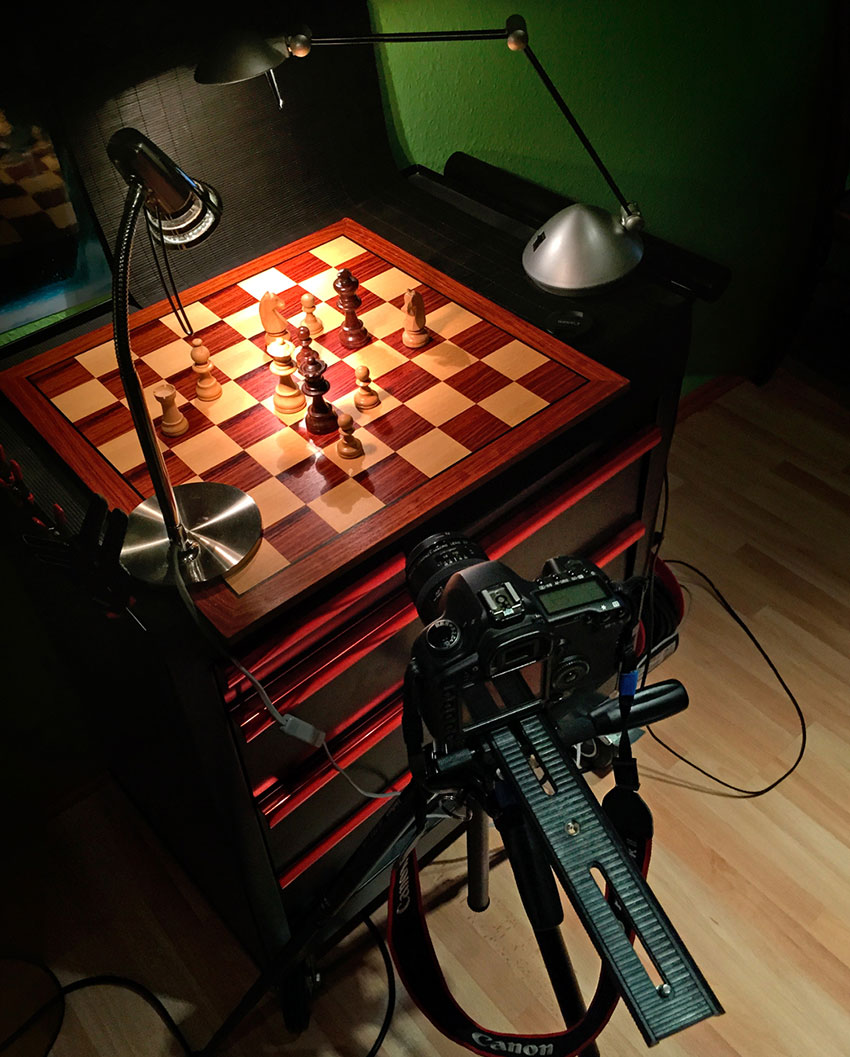
THE TEST SCENARIO
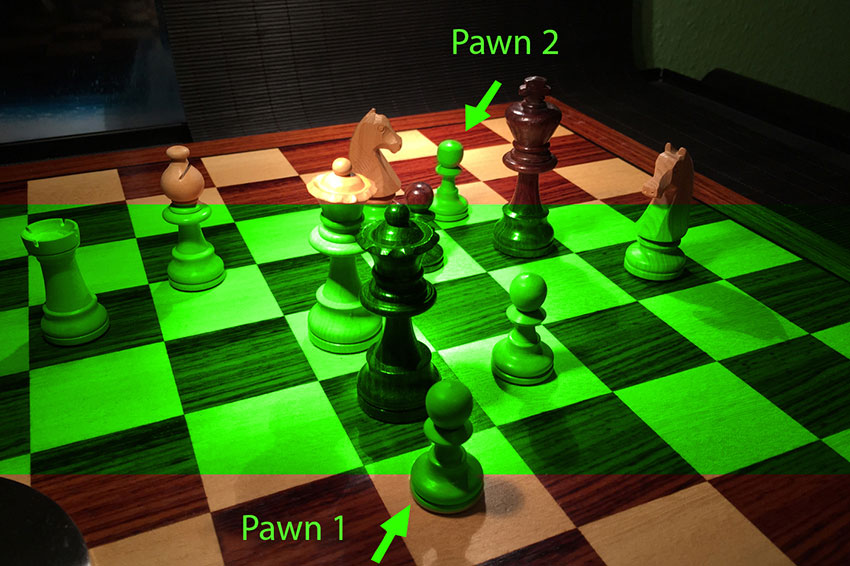
My little test scene is a chess board, and the view through the little chessmen is full of occlusions. This should be a really complex scene for any kind of stacking method, and so I think, it is a good choice.

I chose the distance, I wanted to render sharply from Pawn 1 to Pawn 2, as this is quite exactly the length of my macro rail.
Only for the very last test, I also did a scan of the complete scene including all the chess pieces.
For the tests I used my trusty old Canon EOS 5D Mark II on a tripod and a 50 mm macro lense EF 50 f/2,5. I then processed the shots with Photoshop CC 2014.
RESULTS WITH THE MACRO RAIL
(Note: all shots from now on are straight-out-of-camera)
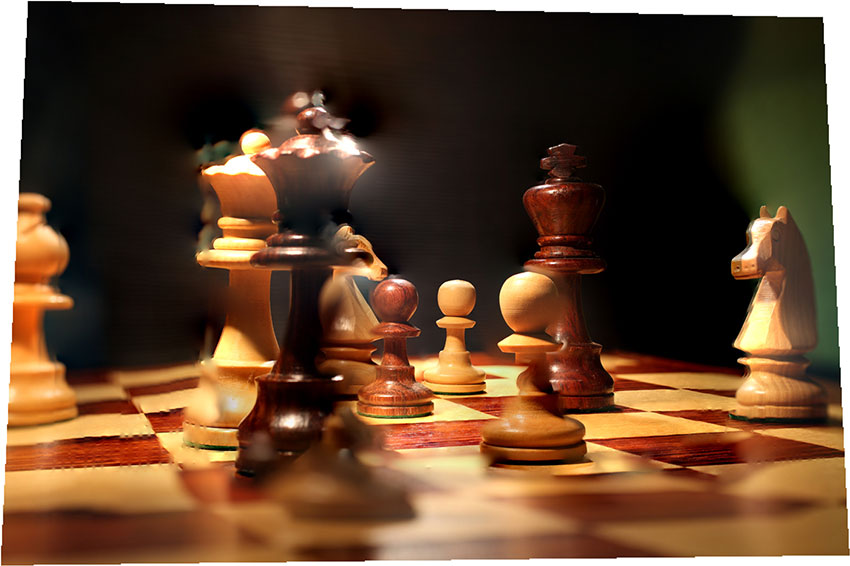
Whew, I did not expect *this* crazy result:
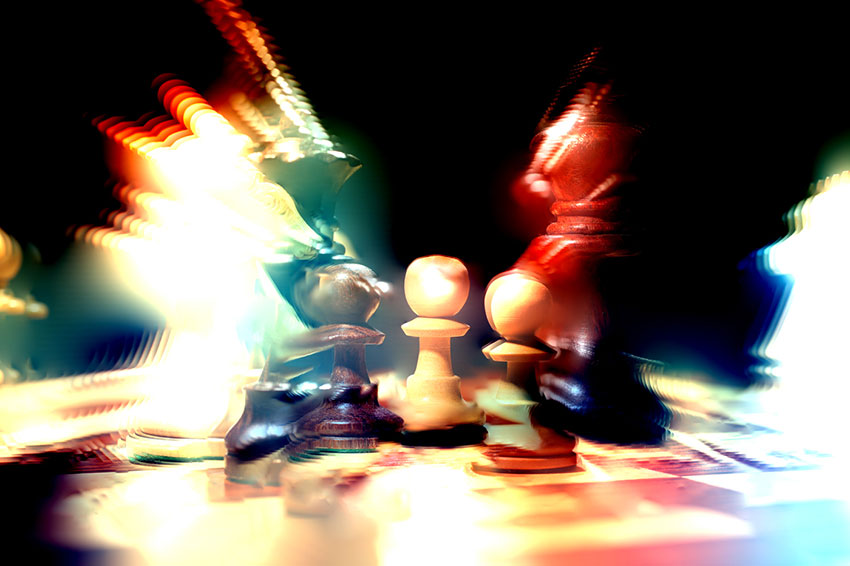
Well, it looks interesting. „Artsy“, so to say. But this is not exactly, what I wanted, and this is also surprising in some way, because – given the perfect “telecentric” perspective – all objects which have the same size in reality now also have the same size in the photo.
Normally, this should be a great advantage for the stitching algorithm, because now, all the stitching borders have the same size.
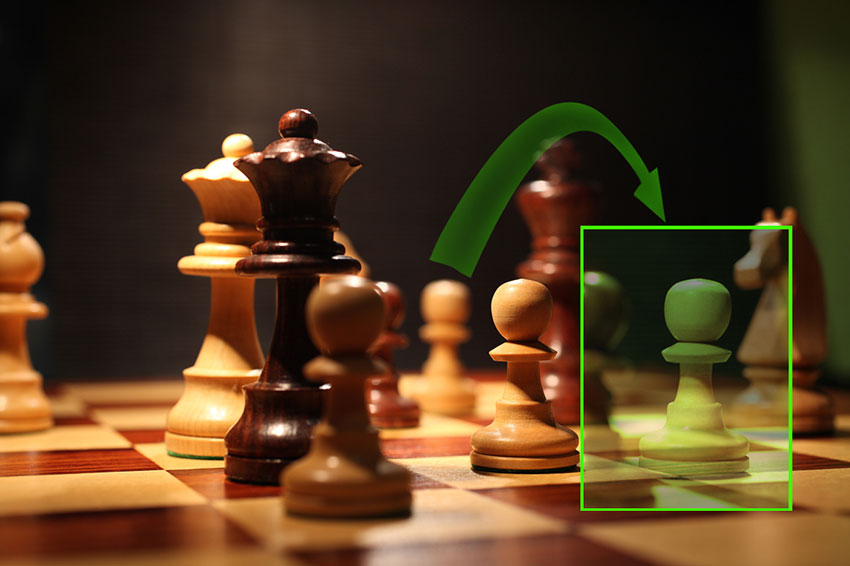
To prove this, I inserted Pawn No. 2 from the last shot in the series in to the first shot (see the green box).
Obviously, Pawn No. 1 and Pawn No. 2 have the same size.
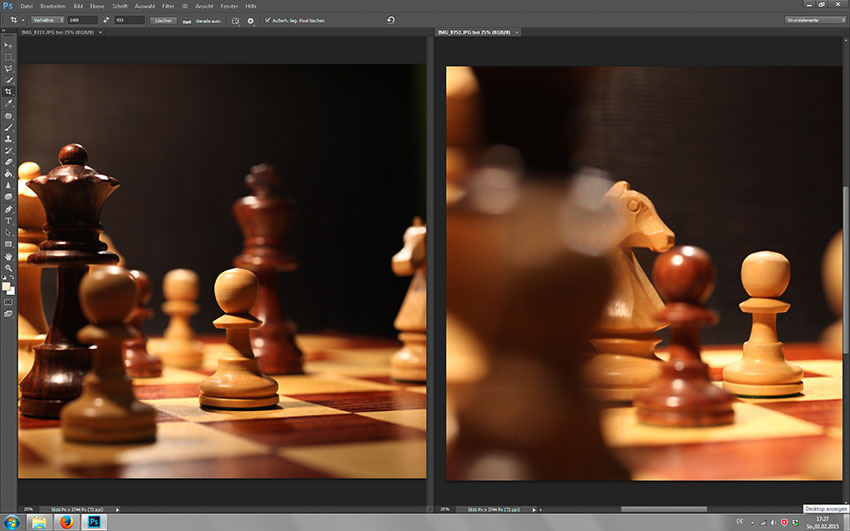
A closer look reveals the problem.
In the following screenshot I have arranged the first and the last shot in the stack side-by-side, and it can be easily seen, that the use of the focusing rail leads to changes in the perspective in a way, that no stitching program can solve this. The occlusions change.
Everything changes!
But a little trick might work, I thought: For the second test, I used the same stack but did an alignment step with Photoshop first.
See the screenshot of the resulting layer stack…. it looks sort of funny, how Photoshop tried to reconstruct a global perspective (a classic or so-called “entocentric” perspective):

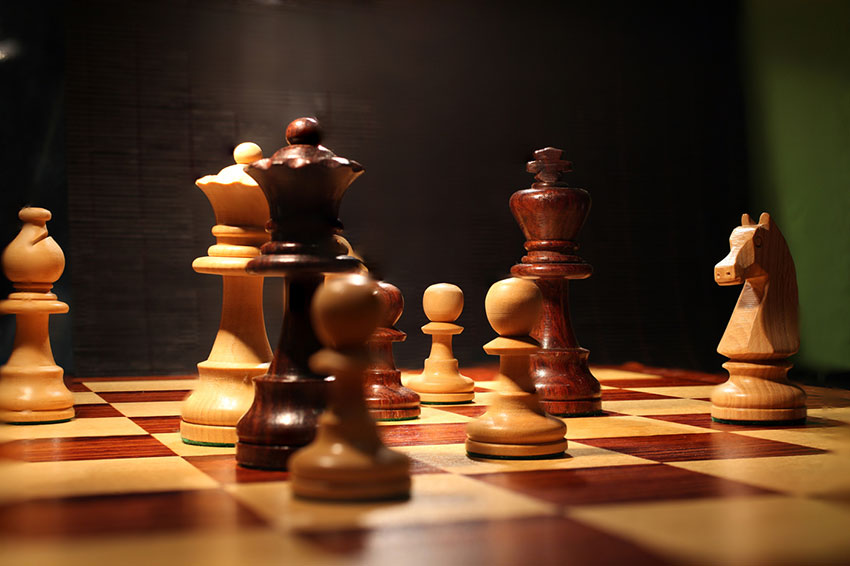
The result of the stacking with this layer stack is a bit better, but still not really good:
RESULTS WITH VARIED FOCUS
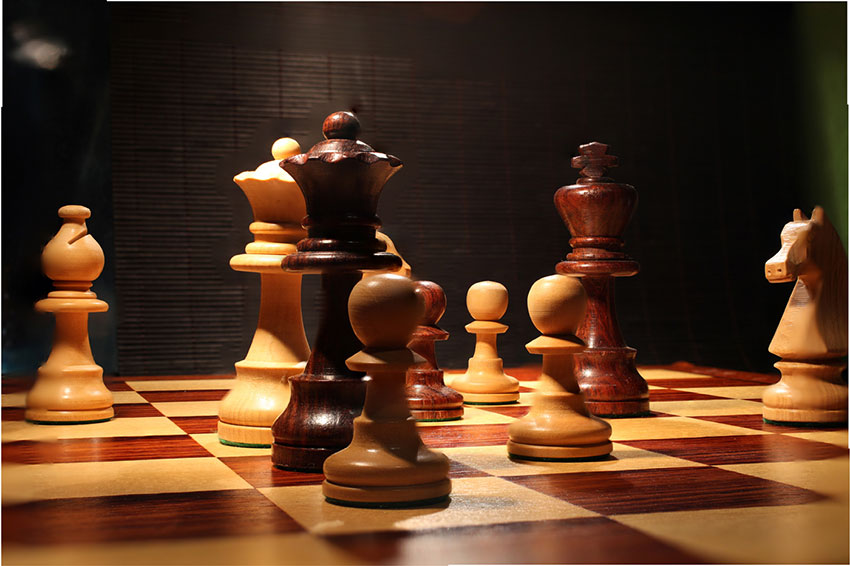
In the next experiment, I kept the position of the camera unchanged and recorded the series by variation of the focus of the lens:
Ok, this is better and this result encouraged me to also try the whole scene with all the chess pieces.
That took me 39 photos:
This result is still not perfect, but, as I said, it is straight-out-of-cam. With a tiny bit of touch-up, one could repair the little errors and the result would be quite nice (given the complex scene).
FINAL THOUGHTS
A macro rail is a good choice for tiny objects, shot with a tele macro lense of 100…150 mm. It is not a good choice for shorter focal distances, for bigger objects and for more complex scenes with occlusions. First the length of the rail limits the DOF, second the changes in perspective make it hard for the stacking algorithm. Imaging a carride through an urban canyon. The continuous changes in perspective show totally different views of the scene and also introduce changes in the occlusions.
Another disadvantage is, that using the macro-rail approach, a change in the perspective might also lead to a non-realistic impression: The telecentric perspective in the stacked and sharp area might collide with the classic entocentric perspective in the areas around. This means, in our example, that Pawn #1 and #2 have the same size, but the black pawn in the front is larger.
But there are also advantages using a macro rail: This method is much easier automatized, and automated solutions are already available (>Strackshot / Cognivision). And it is also much easier to maintain the same very small step width throughout the whole scanning process.
So, focus variation seems to be the perfect tool for everyday usage.
The little disadvantage of the changed image ratio is not a big hassle for the stitching programs and the advantage of the consistent overall perspective outweighs that by far.
I often use focus variation for my stacks, and sometimes even without a tripod. With the camera held against the eye, I just scroll through the focus sensors as I shoot the different images.
Not a big deal. The only thing, you have to do after that, is an alignment step in Photoshop afterwards.
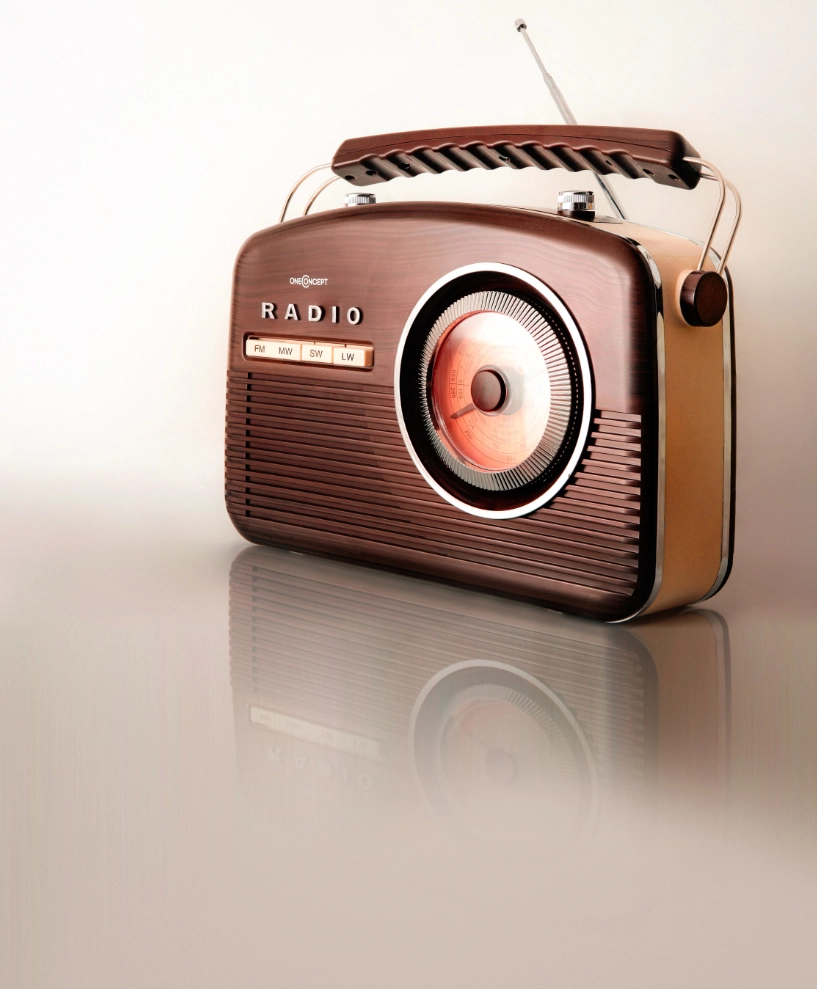
For the photo of the radio, I shot hand-held five images, and just changed the focus sensors in the camera for each shot (the reflection is synthetic).
An interesting source, that also compares “Ring” versus “Rail”, is the website from the software team of “ZereneStacker”. So, if you are interested in more information about focus stacking and about the advantages and disadvantages of macro rails, you might have a look at their website.
http://zerenesystems.com/cms/stacker/docs/troubleshooting/ringversusrail
PROFILE
Tilo Gockel is a professional photographer and expert in the field of photographic technique, lighting and flash lighting. He has published countless articles on photography and image processing in popular magazines (digit, DOCMA, DigitalPHOTO, Photographie) and has written several books.
His blog, www.fotopraxis.net, offers numerous tips and tricks learned from his extensive experience with photography.
Visit author’s website: www.fotopraxis.net (in German).
CONTACT
Tilo ~gallo~ Gockel, [email protected]
Also visit Tilo’s blog, fotopraxis.net, which offers numerous tips and tricks learned from his extensive experience with photography. (in German)
