Glue or Milk:
what is more useful for liquid photographer?
There are many useful tips and tricks that photographers use to improve their product shots. Liquid substitution is one of them. Replace one type of liquid with another to emphasize certain properties. Today – let’s talk about using glue to make milk pictures look better.
Elmer’s glue is all-purpose white glue that can be used for many kinds of projects. It works on lots of different materials including paper and other porous materials. Being glue it’s very thick. When mixed with a liquid it greatly increases the liquid’s viscosity. It also has a clear white color. For those two properties it is often used in ‘milk photography’ – whether it is just a glass of milk, beautiful milk splash or droplets of milk flying around cookies.
While milk is generally white it sometimes not ‘white enough’. When in a glass it usually looks nice and white. When we do milk splashes, however, milk may appear less ‘creamy’ than desired. The background light can show through the slightly thinner layer of milk making the shot look less than perfect.
Let’s experiment here taking splash pictures of real milk and splash pictures of Elmer’s glue mixed with water to see whether it makes any difference.
Splashes can be very different. It is much easier to reliably reproduce some than the others. Since we are not concentrating on making the most amazing splash right now and just trying to compare splashes of different liquids (milk vs. Elmer’s glue) let’s go with probably the most basic and easily reproducible type – we are going to drop berries into a glass full of milk and a glass filled with Elmer’s glue to produce similar splashes.
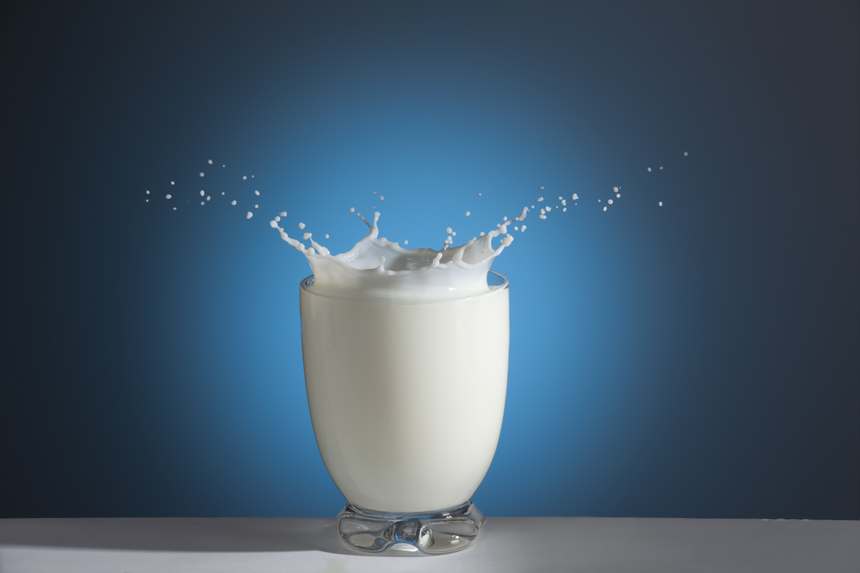
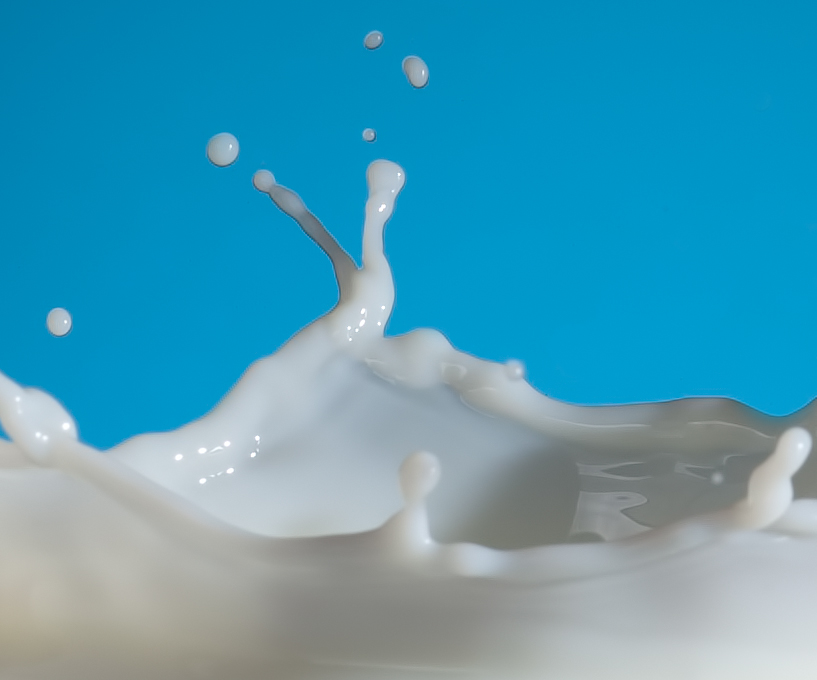
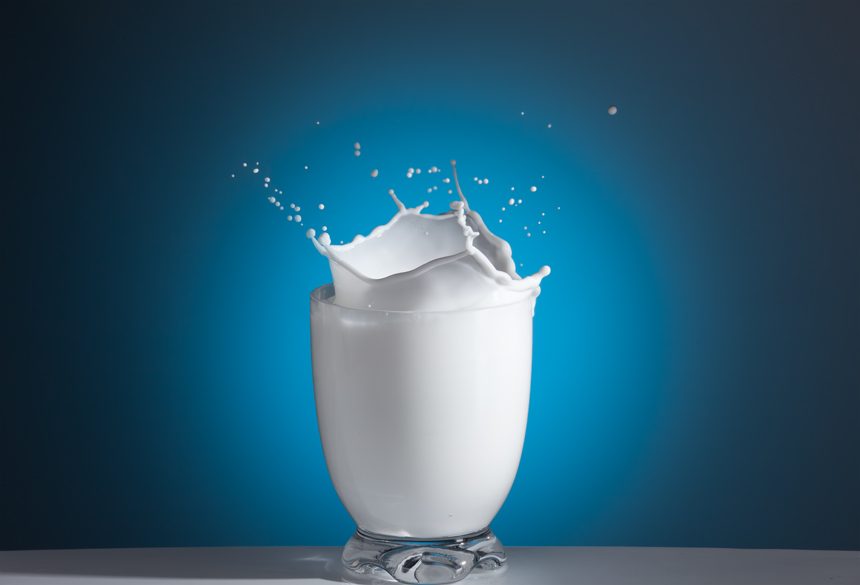
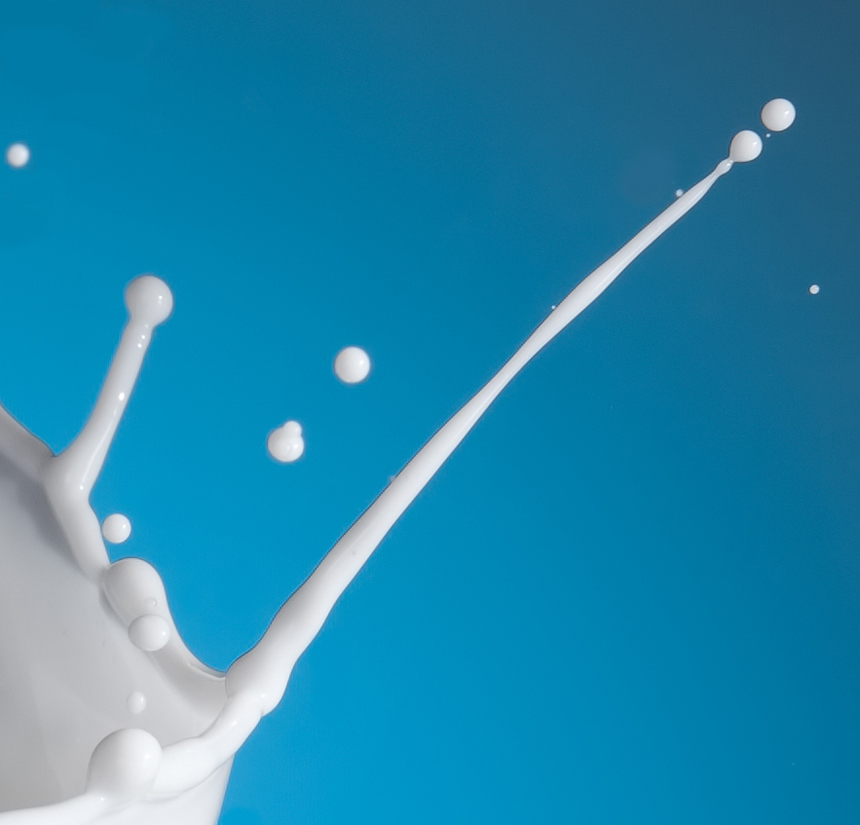
For the first picture regular milk is used. There are two images – the entire image and 100% crop for closer inspection – the first one:
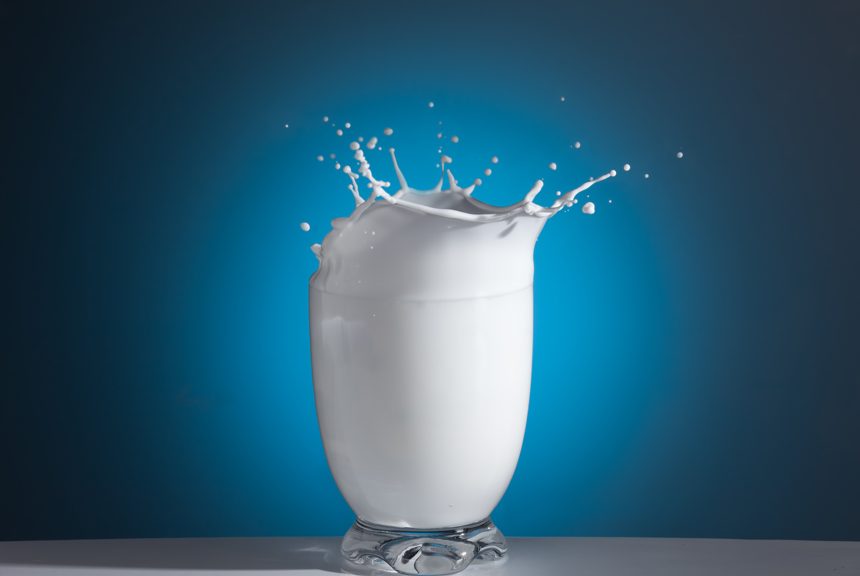
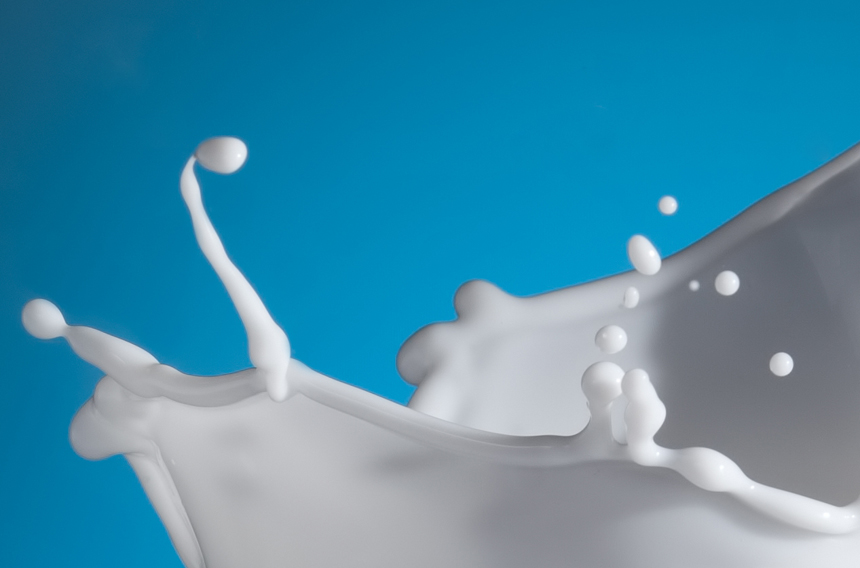
…and the second shot of pure milk:
It is easy to see how the blue background is showing through the milk splash – especially on the second image.
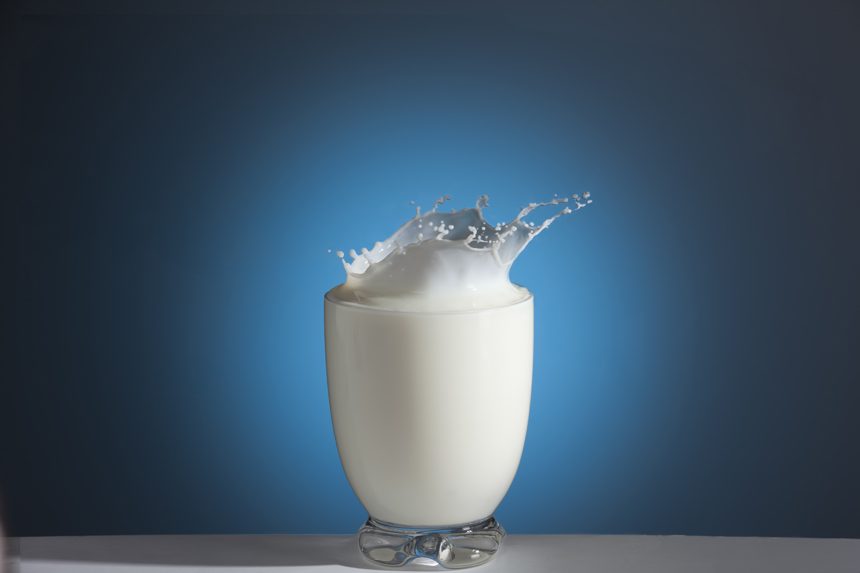
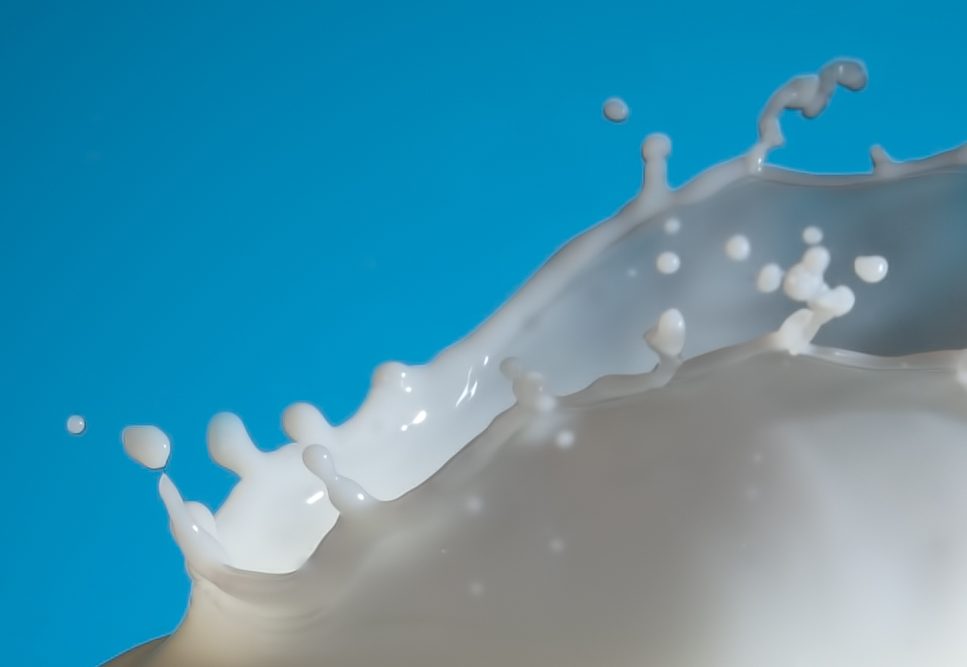
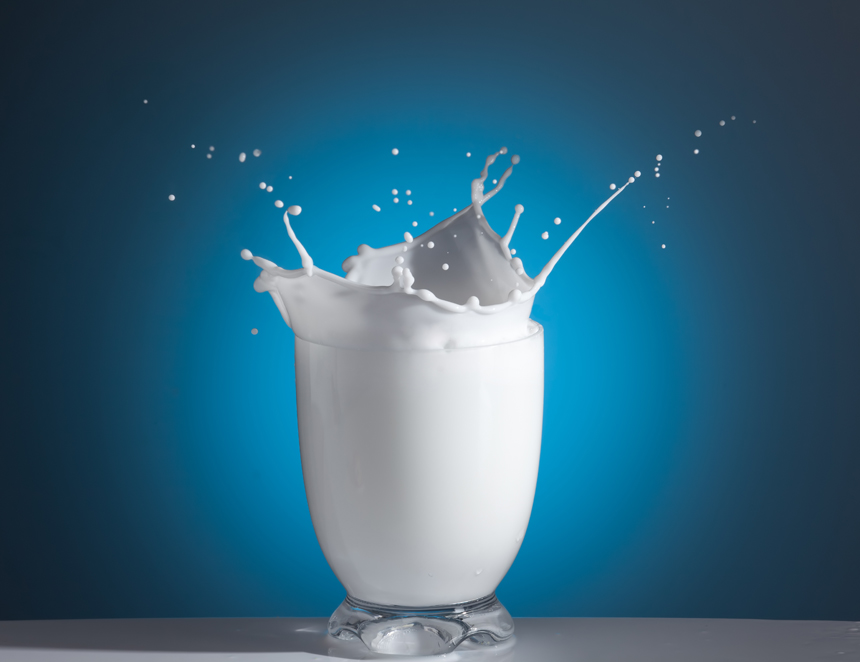
Now let’s try Elmer’s glue. For that test let’s use two parts of water and one part of Elmer’s glue to produce artificial milk. Two more shots – again the entire picture and 100% crop for more details:

And the second Elmer’s glue shot:
As expected the ‘artificial’ version of milk gives us a much cleaner look – the background doesn’t show through even very thin layer of liquid. Due to added viscosity the shape of droplets is a little bit different and the droplets start to develop columns. It all starts to look very nice
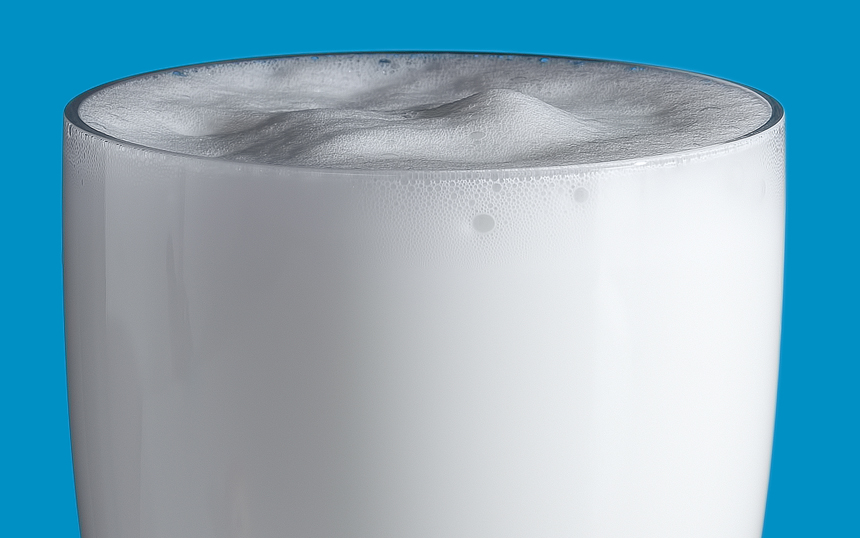
One thing to be aware of – mixing water with Elmer’s glue – especially when adding glycerine for additional viscosity – will create foam that may take a while to disappear. When using 2/1 Elmer’s glue mixture it takes about 15 minutes for the foam to go away. In case you also add glycerine – it may take up to an hour. So plan accordingly.
OK – now – keeping in mind that we need to wait for our foam to dissolve – let’s go a step further and try to add glycerine. Two parts of water, one part of Elmer’s glue and one part of glycerine – entire image + 100% crop:
Even thicker, nicer look.
Now go ahead and try it yourself – it’s a lot of fun – especially when you are making something more interesting with your milk splashes for a real shot. And – as aways – don’t forget to protect your gear!
And as a final note: there are different option to create milky splashes. Guess what Alex Koloskov have used fro this shot? It was not milk or Elmer’s glue…
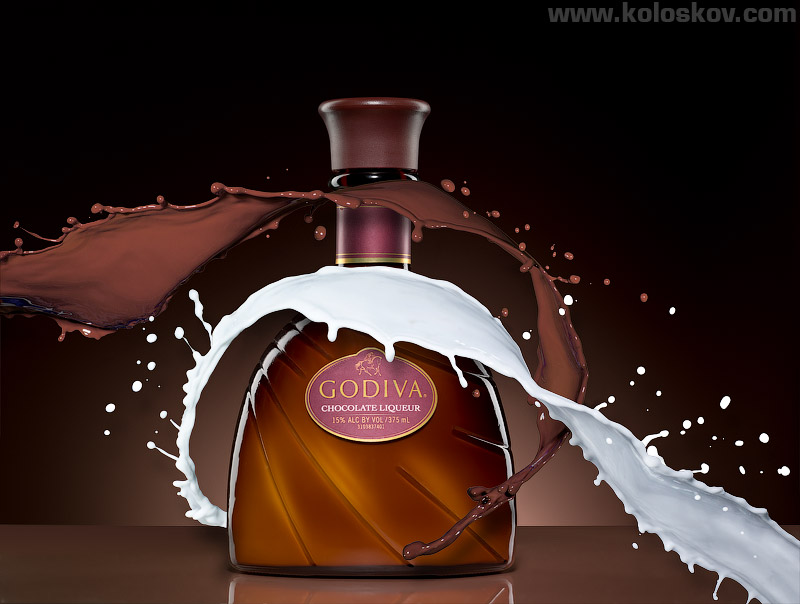
Godiva Chocolate splash by Alex Koloskov
