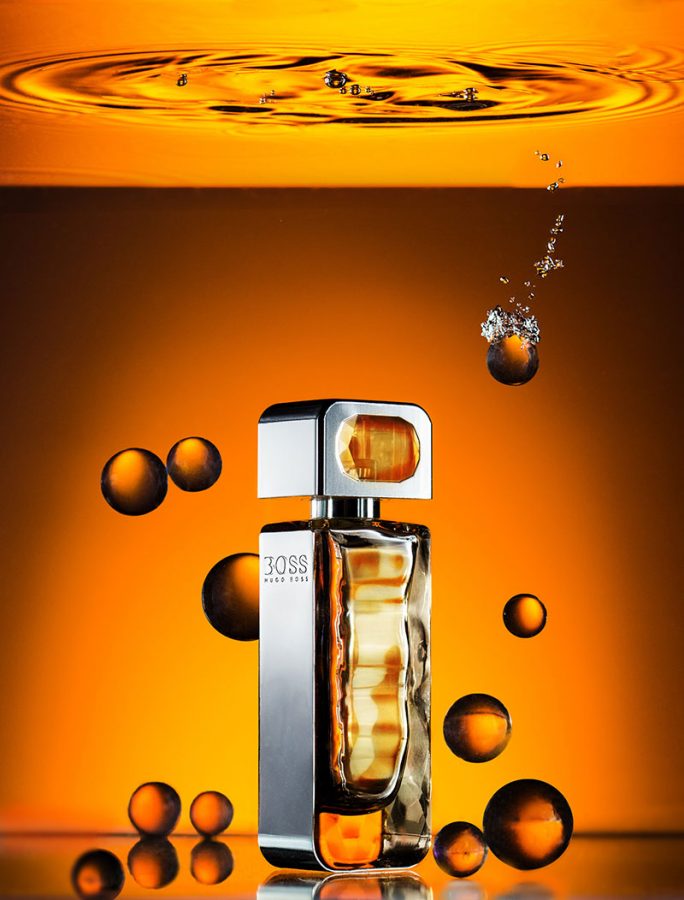
Making of “BOSS Orange” –
Product Photography Behind The Scene

I am Ian Knaggs.
An Engineer by trade working in the Aerospace industry and have a passion for producing high quality still life and product images.
I enjoy the technical challenges of building lighting setups and particular relish the challenge of creating images without the use of expensive equipment.
I also enjoy dance and family portrait photography. I am currently building a portfolio of product images with a view to soon gaining work in this field.

Having seen a huge number of excellent of product images using black plexiglass here on Photigy, I have created several myself, but have recently been investigating the possibilities of using alternative backgrounds.
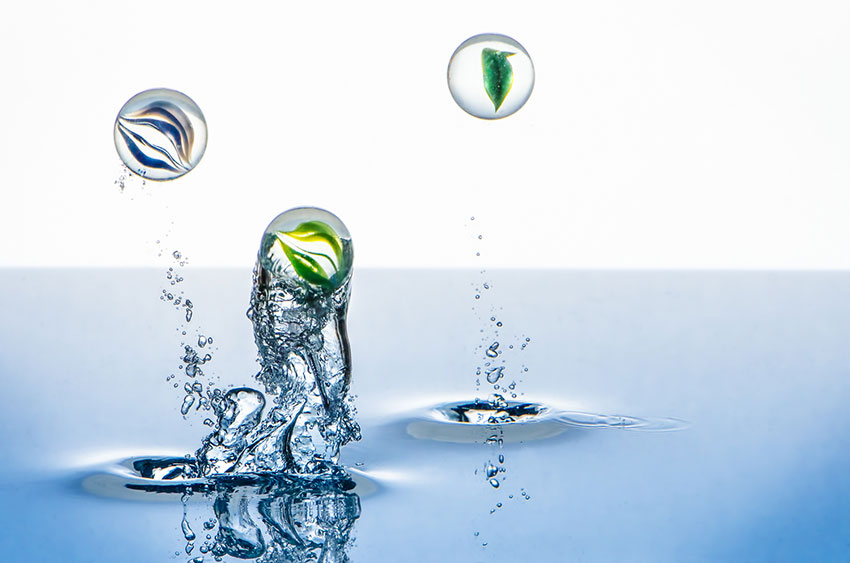
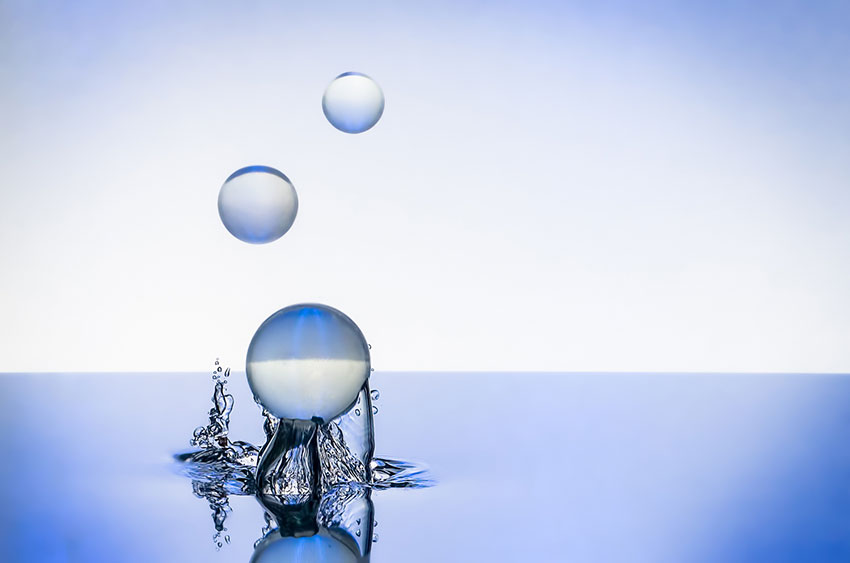
A few months ago, just for fun, I started creating images of marbles dropping into water. Alex has often used a similar technique in which the reflective qualities of the underside of the surface of the water as a mirror to reflect a background.
Using this technique and a single speedlight illuminating the background I created the following images:
Then I recently discovered the work of Nori Inoguchi (www.norimichi.com) and stumbled across the following image that obviously used a very similar technique:
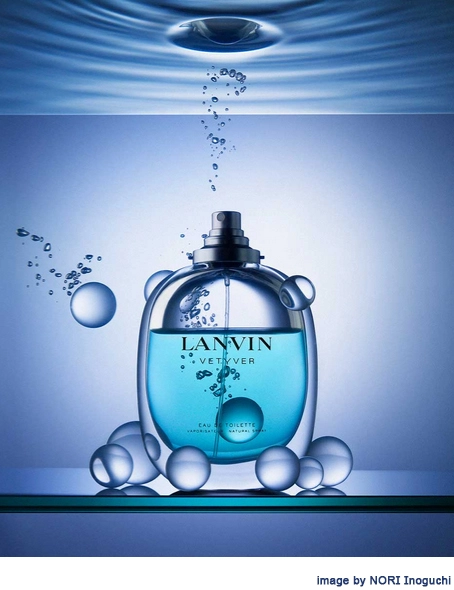
I realised that this image was created using a very similar technique to my marble splash images and decided to combine my marble setup into a product image.
I started looking around the house for a suitable product to use and soon found one of my wife’s Boss Orange perfume bottles!
SET UP
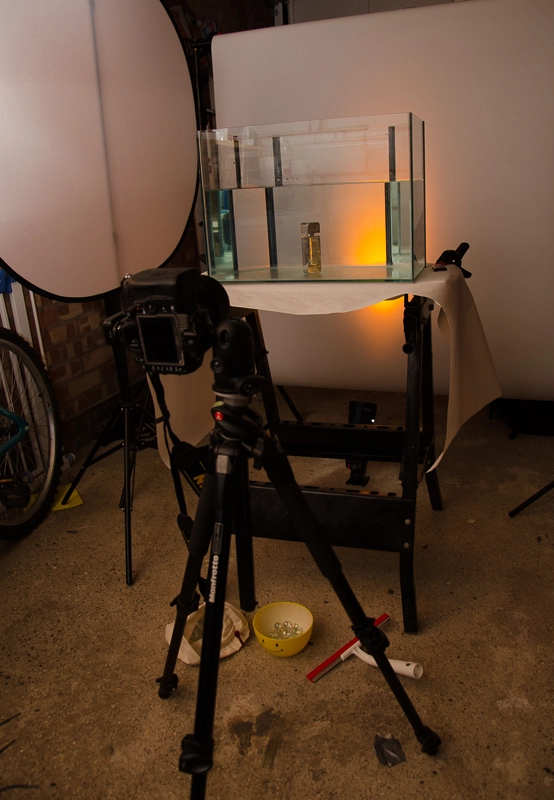
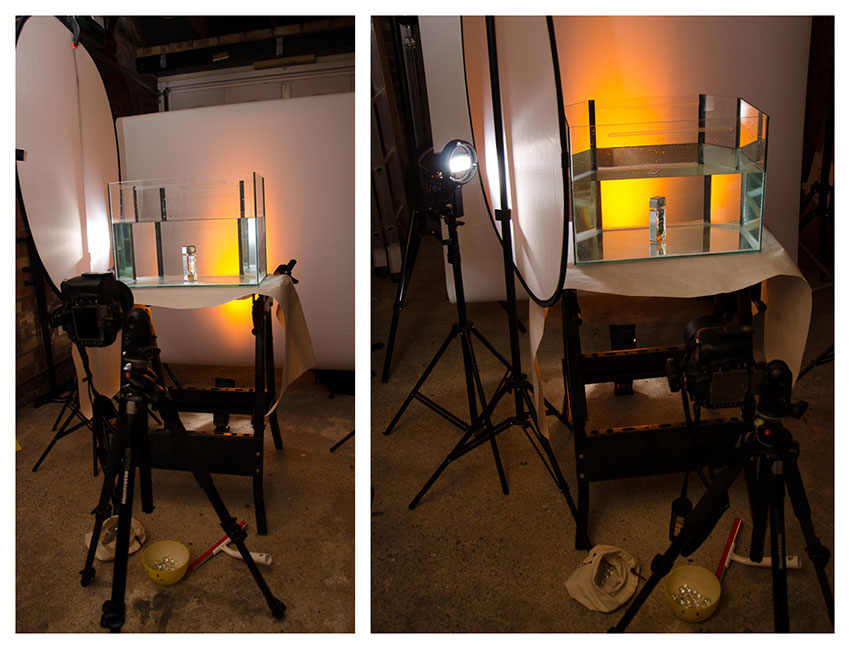
The basis of the set is an old fish tank that I use for a lot of my water related images. The tank was placed on a workmate on top of a white sheet of paper. The tank was filled so that the water was about 2” above the top of the perfume bottle.
A sheet of Translum was placed about 2 feet behind the tank and a single speedlig ht (YN560) was placed on the floor in between the tank and the background. This light was fitted with a Rogue 25deg grid with Rust coloured gel.
The camera was setup on a tripod about 1 foot in front of the tank with a Nikkor 50mm f/1.8G lens, focused and test shots taken adjusting flash power to produce an orange spot on the background with a radial gradient (1/4 power).
Camera setting were: 1/250, f/5.6, ISO250.
With just backlighting, the clear glass marbles looked just as I wanted, but obviously additional lighting was required to light the product.
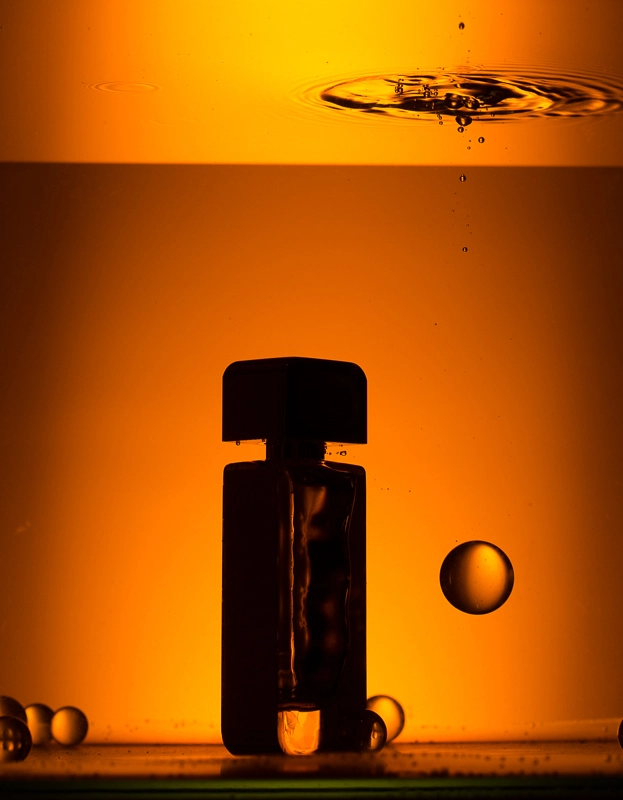
The logo on the side of the bottle needed to be visible and I also wanted to see as much of the orange background through the glass front of the bottle, so the angle of the bottle was adjusted.
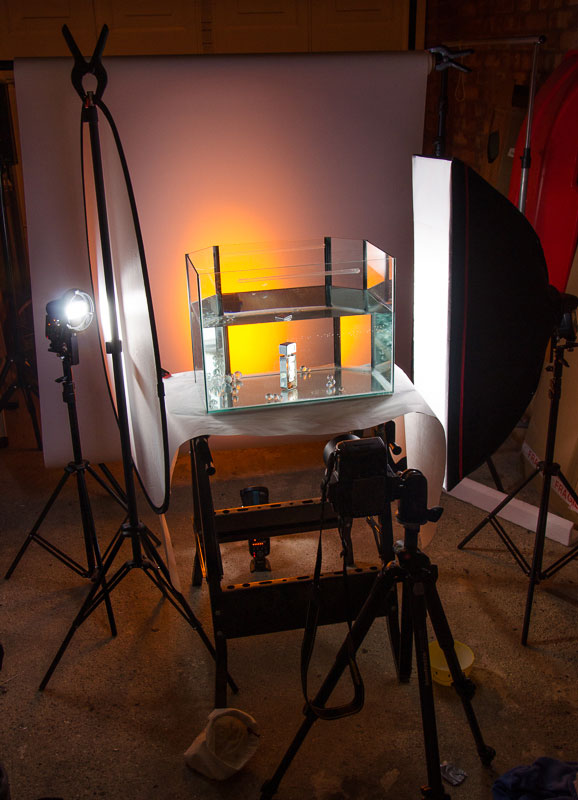
To create a bright reflection with a gradient on the shiny left side of the bottle a diffuser was placed along the left side of the tank and a speedlight with 90x20cm softbox placed behind the diffuser angled towards the camera.
However, as the bottle is only 1” deep it was not possible to create a gradient, so the softbox was removed and a bare speedlight, zoomed to 105mm used to create a smaller spot of light on the diffuser which created the gradient I was looking for.
All that was left was to add another light on the right of the bottle to create a gradient on the reflective surface on the bottle top and add some highlights onto the facets of the glass front of the bottle.
This was achieved using a 90x20cm speedlight soft box angled towards the camera.
This completed building the lighting setup.
All that was left was to start dropping marbles into the water whilst using a remote release to trigger the shutter. One of the lights was triggered using a Hahnel Combi TF radio trigger and the other two set to optical slave mode.
Changing the height from which the marbles was dropped changed the splash pattern in the water. The lower the marbles were to the surface of the water when dropped, the less air they carried with them.
Also, the larger marbles needed to be even closer to the water surface to make sure that there was no air trapped behind them as they fell through the water. To create the look I was aiming for needed most of the marbles to have no air trapped behind them.
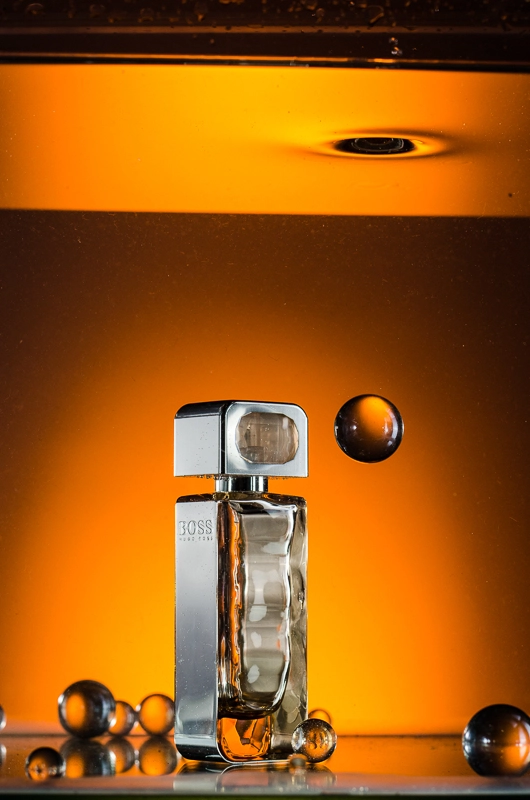
One problem that I encountered whilst dropping in the marbles was that, because the perfume bottle was not fixed to the base of the tank, if the marbles hit the perfume bottle the bottle moved from its’ original position.
Even small changes in the position of the bottle caused the gradients on the sides of the bottle to be lost. Therefore, I had to regularly reposition the bottle to keep it in the correct position. <!–- [et_pb_br_holder] -–>
POST-PRODUCTION
The images were imported into Adobe Lightroom 4 and small adjustments made to contrast and clarity and lens correction was applied. The images to be used in the final composite were opened in Photoshop CS5.
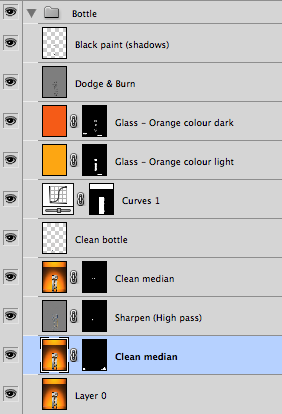
The image of the perfume bottle was given a quick clean using a combination of the Clone Stamp and Healing brush and dodge & burn layer to remove some bright highlights and reflections on the glass.
The glass front of the bottle was not reflecting any of the orange background because of the angle of the bottle so 2 coloured layers were added using a Soft Light blending mode and a layer mask used to colour the glass.
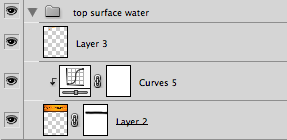
The under-surface of the water was selected using the Marquee tool and placed on a new layer and straightened to be horizontal. The water was also cleaned using a combination of the Clone Stamp and Healing brush.
A curves adjustment layer was added to increase the contrast.
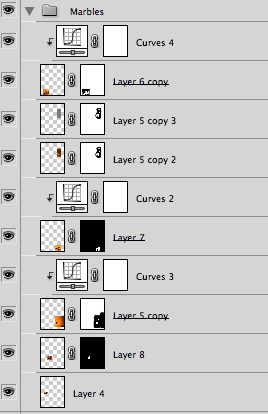
The marbles were selected from their individual images using the Marquee tool and loaded into the composite image and isolated using layer masks and positioned in similar places to keep the reflections consistent.
After receiving comments from the ever-helpful Photigy community and a short video from Alex I performed a final clean to produce the final image.

I hope that this insight into the creation of this image has inspired you to use low cost equipment and materials that are readily available around the house to create beautiful product images!
 |
In the Gearbox |
|
