What 3D printer can do for a studio jewelry photographer:
DIY invisible neck
In this article Victor Wolansky shares with us how 3D Printing technology can be used in product photography.
You will see how Victor created custom “Invisible neck” holder for his jewelry photography.
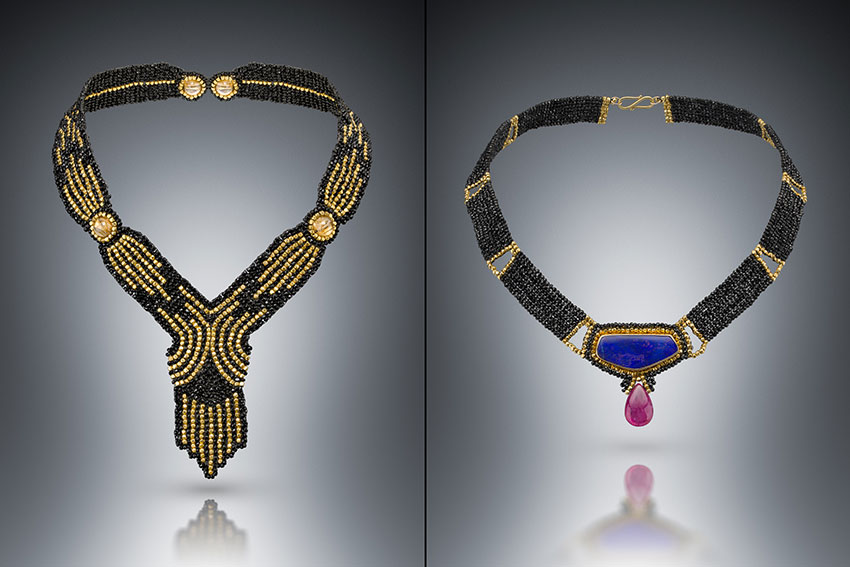
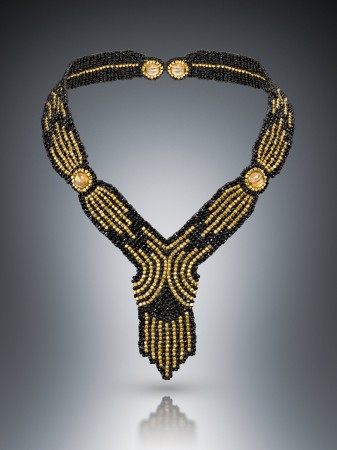
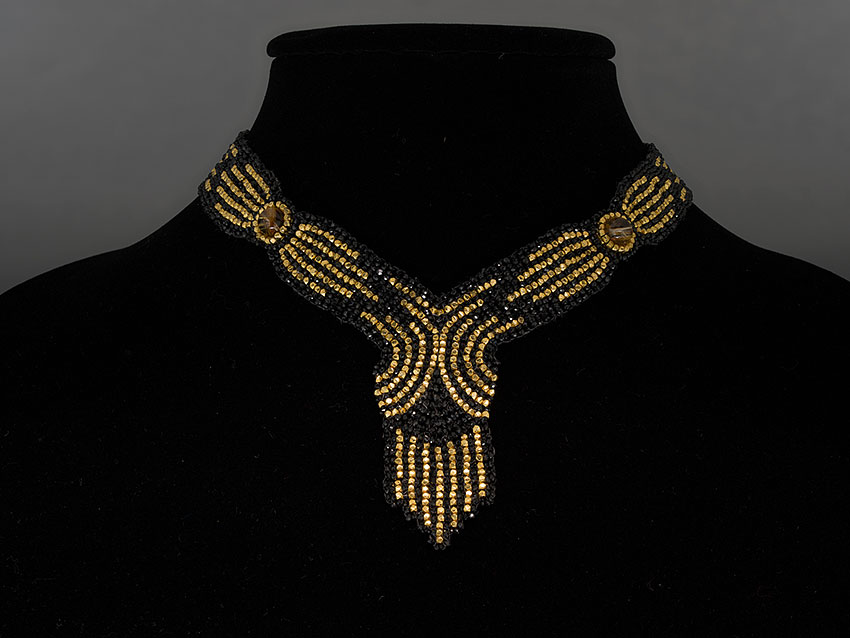
I was contacted by a new client, Beth Farber, who wanted something different, something that looked unique and at the same time show the best of her pieces, 2 beaded necklaces, with a cloth like drape, which makes very difficult to shape them, it is like trying to shape a strip of cloth, it might work if you lay it on a table, but we thought that the look we wanted was something that looks exactly like if the piece was it on an invisible neck, which will display the piece is it was intended to be used, hence, the best possible shape.
But when I had the pieces on my hands and I was able to fill how it was taking the shape of my palm and fingers, I figured nothing conventional would work. Hang the piece with invisible thread would give uneven shapes, and be way too complicated to do it again, if need, and takes too long, and just a little moving thing could make it wiggle…
So I thought that may be a display neck could be the solution, and made a few tests, but even if I was able to find a transparent one, which was important for me, since I wanted to be able to light it from behind too, not only the front, I was not happy with the shape, they were anatomically incorrect, or too wide for the piece, or to narrow and the piece hanged too much.
I liked very much the shape it had when my wife was wearing it, so I thought, I need my wife neck for the photo. How could I get that?
So I remembered that some time ago I purchased a 3D scanner that I never used, and I thought that I could scan my wife upper torso, with the necklace on, and then 3D print it. So was the perfect excuse to get that 3D printer I always wanted to have, plus I had another few ideas for which I needed to have a 3D printer.
Photos were taken with a Pentax 645Z and a 90mm Pentax 645 f2.8 lens, at f9 that is the sweet spot, about 30 shots stacked on Helicon Focus.
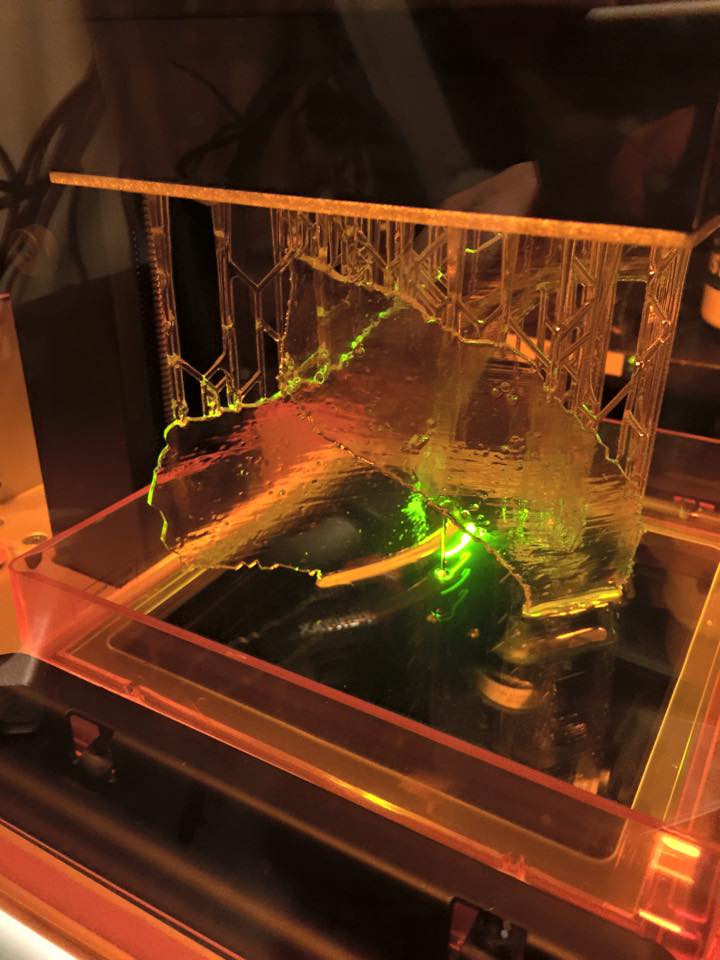
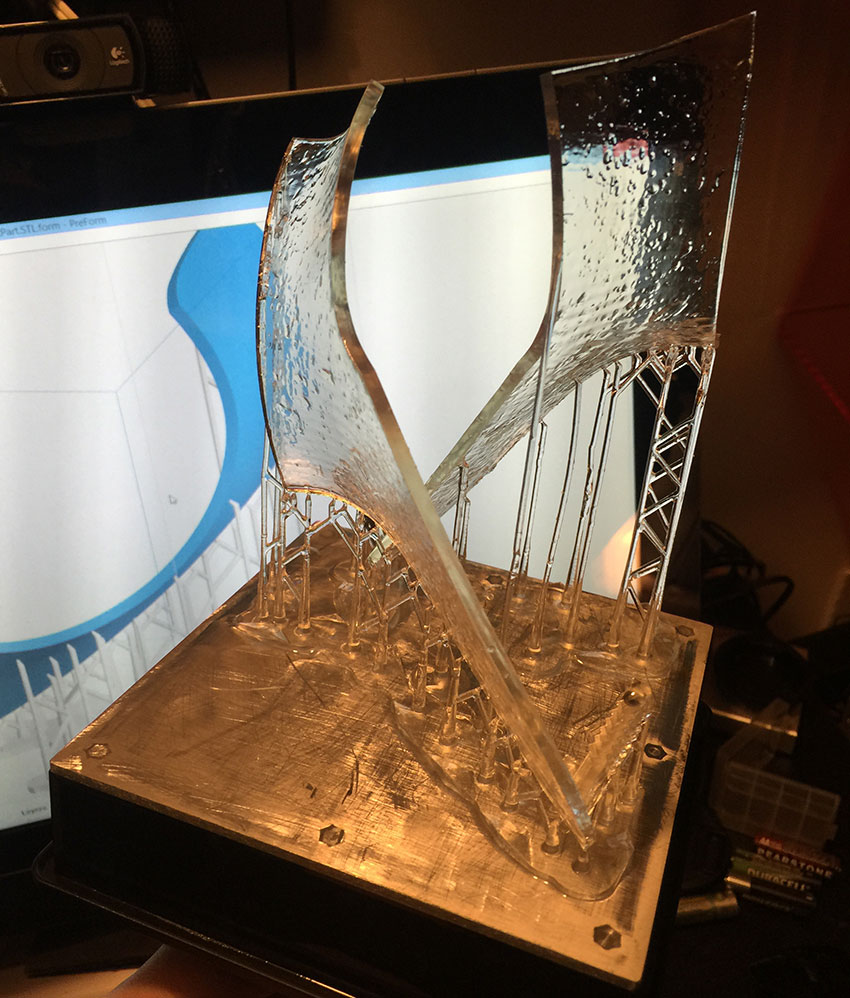
The 3D printer used, prints using a laser hardening a UV photosensitive resin in layers of .025mm so it has great precision, but it takes about 10 hours to print this piece, if polished enough, could be clear as a glass, but I concluded it was not worth the effort since I was going to have to clip the images anyway, but the advantage to have at least some level of transparency was that it would let me light the necklace from the back and have some edge lights, and an illumination that would let me also have a light background if needed.
Light was simple. Two rectangular softboxes on the sides, and a strip light on the top / behind with a big diffuser. Flashes are PCB Einstein. Light for the necklace with the stone was a bit more complex, but not too different, I just moved everything closer and added some white cards so have the nicest possible reflection on the stone. The kind of end use of these photos do not allow Photoshop manipulation other than basic background replacement, the essence of the piece need to stay true to the original, so look needs to come as it will be used out of the camera.
So here are some of the steps it took to make this happen.
This was one of the first tests, over a purchased neck, too wide, but in the right direction.
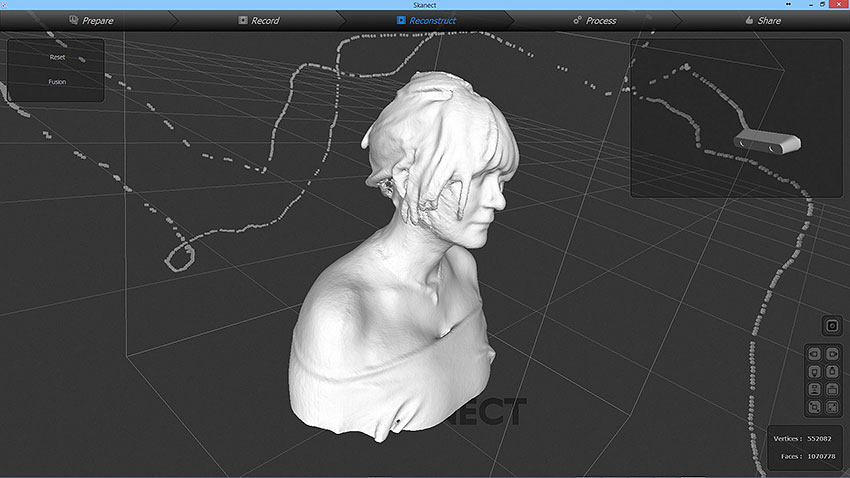

Based on this scan I did a first test 3D print.

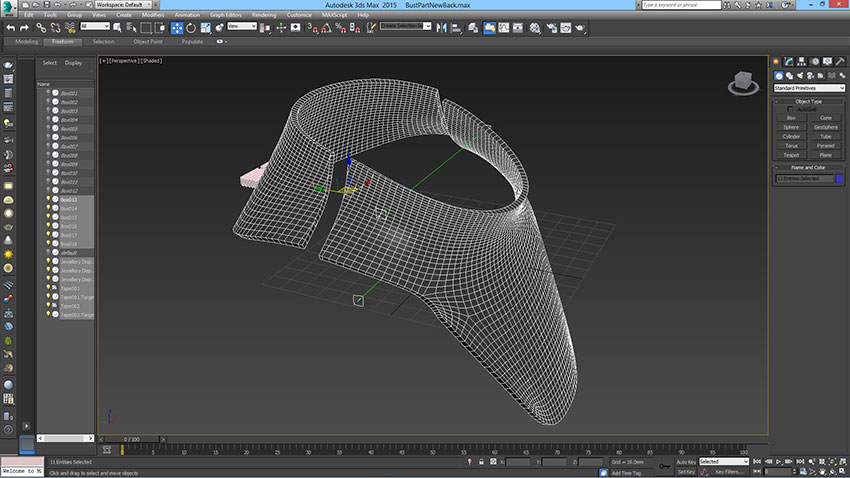
And after that model it, into something more useful and neat.
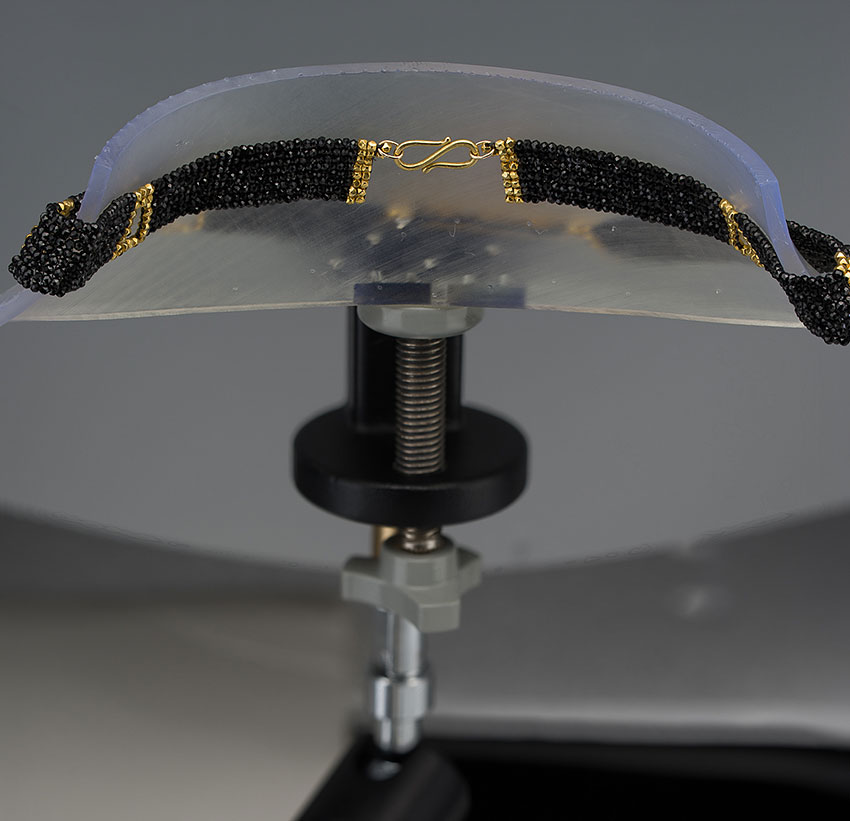
Here you can see the front part, plus a back part which is a bit bigger, enough to photograph the back side keeping the right shape.
And here is the photo of the front part
And the back part, which is actually exactly the same form, so it respects the true form of the necklace.
Here is the light setup I used.

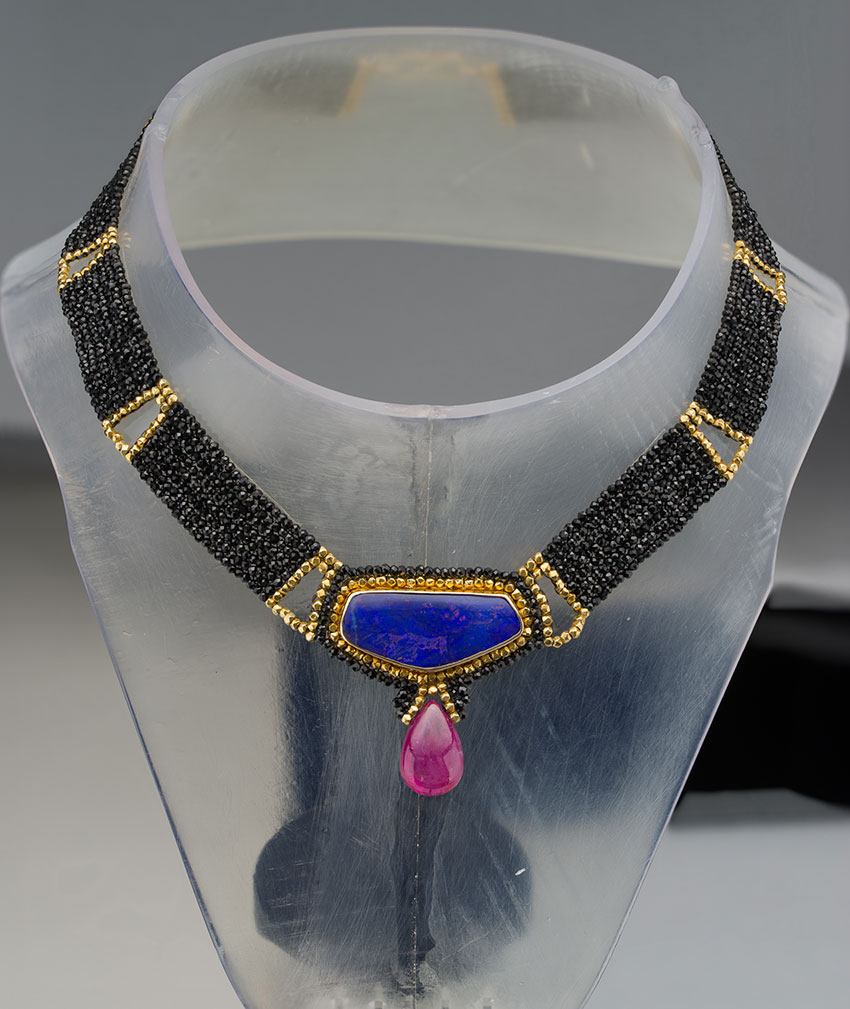
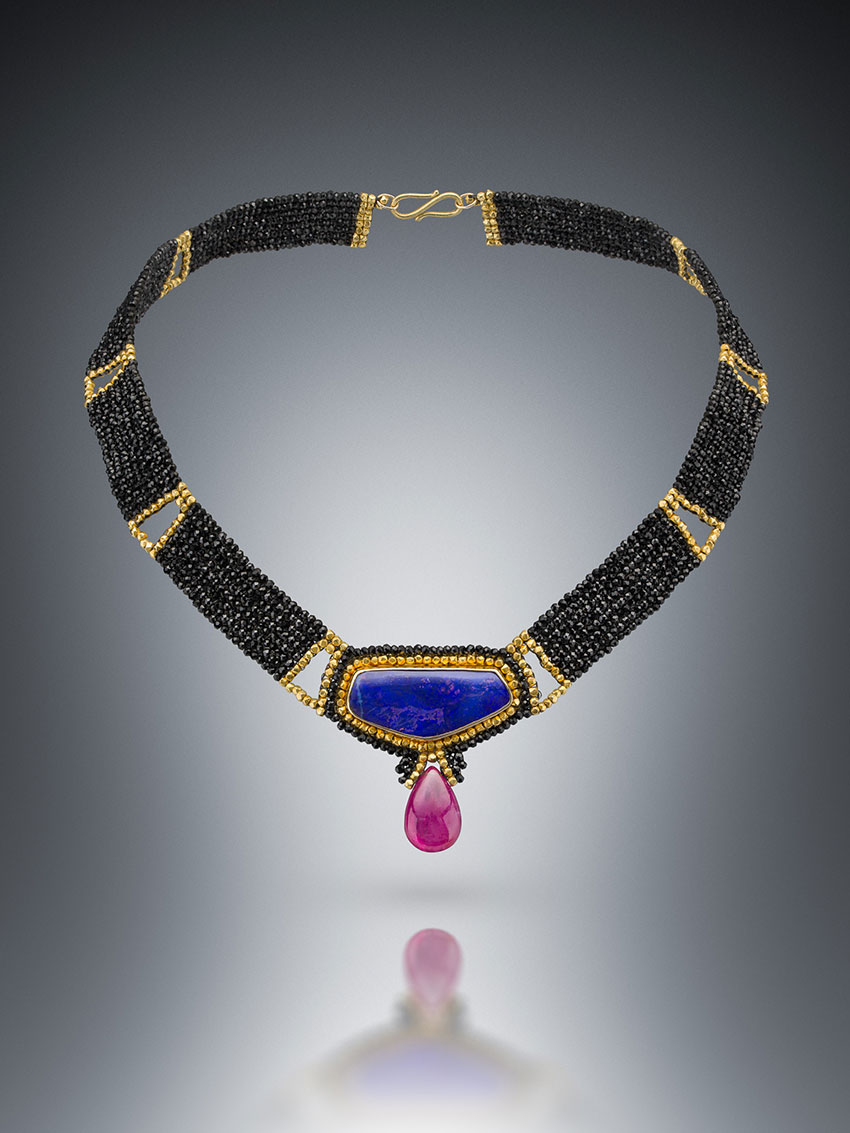
And here is the finished image
About author: Victor Wolansky, a Professional Jewelry Photographer
Originally from Argentina, living in the US for the last 10 years.
Got my first DSLR back in 2009 and started experimenting with different techniques, looking for something that really makes me feel happy. Tried many kinds of photography, but the product photography is what I ended specializing into. Found Alex Koloskov website when we was just starting with the splash photography, and that was what drove me to buy several studio flashes, after that, jewelry was what captured most of my attention.
At the end of 2013 I decided to start commercially with the jewelry photography, since then it has become my passion, I’m a freak of details, I look for perfection, and I repeat a shot as many times I need to be happy with it. Won’t show it until I’m happy and proud of it.
My specialty are independent artist that makes one of a kind pieces, and that is super fun because I never get two pieces that look alike, so every time is a new challenge. I also have another job which is actually my main job, where I work as colorist and visual effects artist, making TV commercials.
To see more of Victor’s work or to contact him please visit:
Facebook: Victor Wolansky Photography
Website: victorwolanskyphoto.com
— Photography Courses You May Like to Check —
