White Background Tutorial:
How to Create a White Background and Keep the Original Shadows
About the Author of this Post Production Tutorial: How to Create White Background

My name is Nenad Veljkovic. I’m a father of two, now adult children, that I also made interested for Photography and Post Production, at least in the hobby level. Photography was also my hobby and partially a job during my youth. I especially love portrait and Life (street) photography and, for a long time, I’m photographing numerous scenes from the streets of my home town Belgrade. In the early eighties I wrote articles for our first foto magazine (themes about wet processing techniques) in analog photography. Also, I was very interested in Ansel Adam’s Zone system. I continued with same interest in digital photography, following modern trends, especially processing in Photoshop, with special interest on selections.
Since 1995. I have been working for one of our computer magazines for which I write articles about various aspects of processing in Adobe Photoshop. Now, in my fifties, I became interested in Tabletop photography, but this finally became a passion after i was introduced to the work of Alex Koloskov, whose lessons and reviews I find very useful for any serious progress.
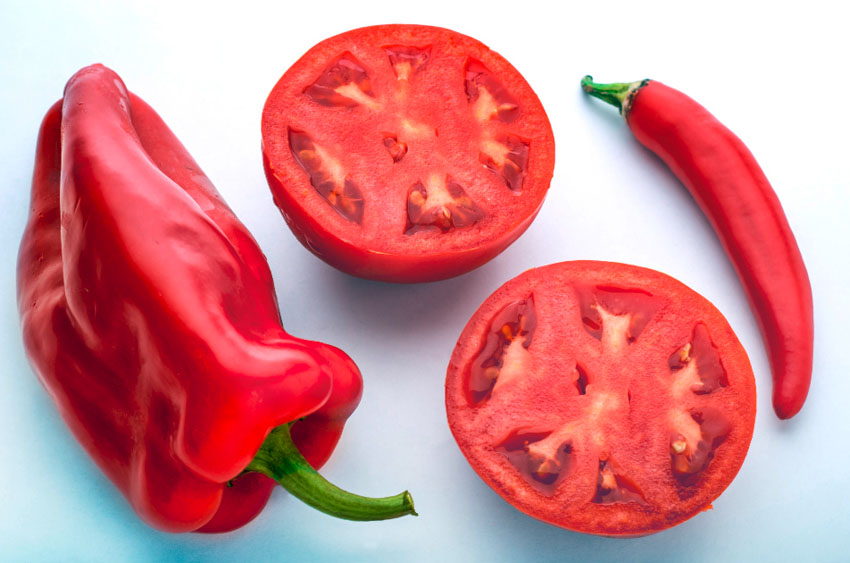
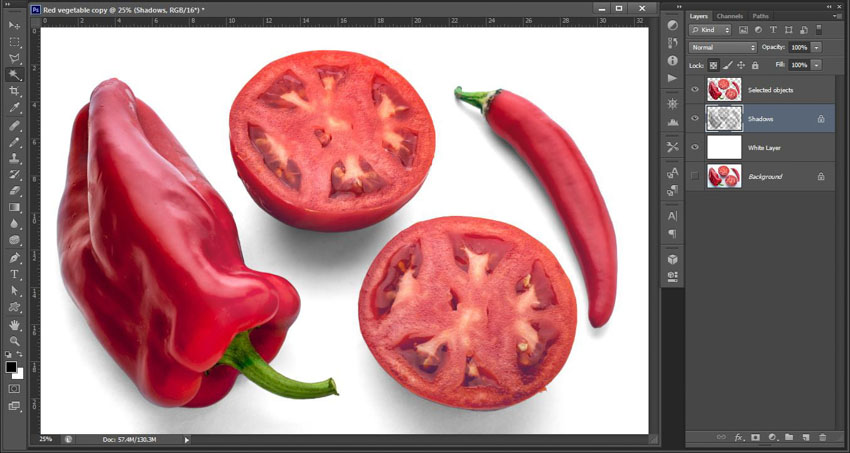
The Original and Final Image on White with Retained Shadows
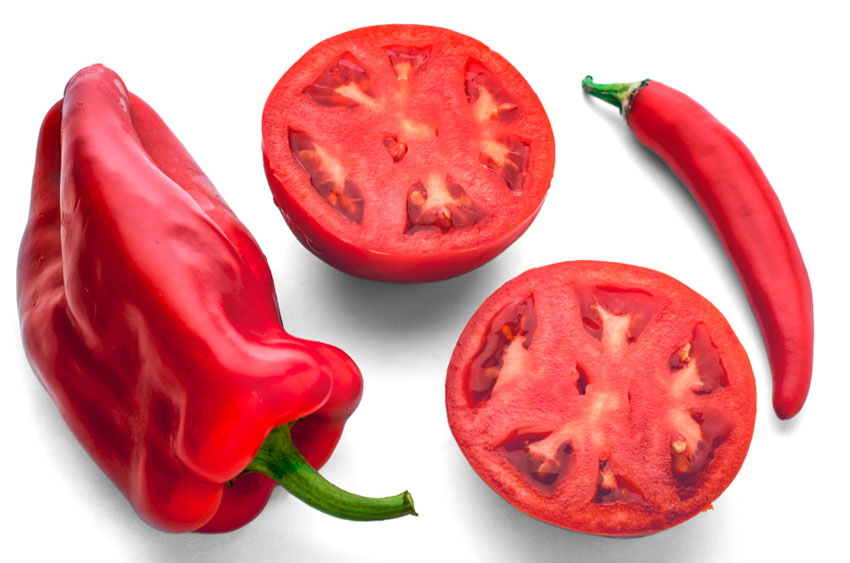
How to Make an Absolutely White Background and Keep the Original Shadows
When you get a correctly exposed pictured object, this also means that we want all the bright parts on that object to have details at the highlighted areas. If we succeed in that, almost definitely the current “white” backgrounds will also have some of the details, and sometimes we don’t want that. Therefore, the background will not be absolutely white. However, sometimes a correct picture demands an absolutely white background (for some catalogs, for example).
Getting back to the nittygritty!
On the other hand, it is sometimes necessary to maintain the original shadows on the picture. Simple shadows are easy to simulate in post production, but there are some that are more complex, that represent the true gradients from completely black to light gray. If at the same time objects have more complex forms, it will be quite tedious to digitally simulate these shadows. It is, after all unnecessary, especially when the original picture already has them all. So we need to extract them, somewhere before the final steps. In this article There are 3 Steps and (11) Processes which are part of the steps
The Steps of this Process Are:
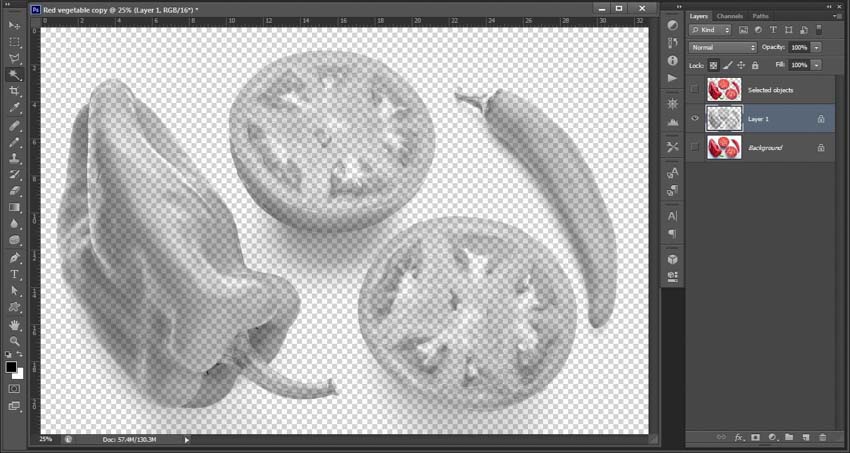
Step 1 – Extracting the Main Object(s) to a New Layer
Step 2 – Extract the Shadow(s) on a New Layer
Step 3 – Creating a New Absolutely White Layer and Make the Ultimate Combination of Three Key Layers – a “Separate Object”, Shadow, and White Background.
The Original Image without Post Production

How to Create a White Background: Step 1- Extracting the Main Objects
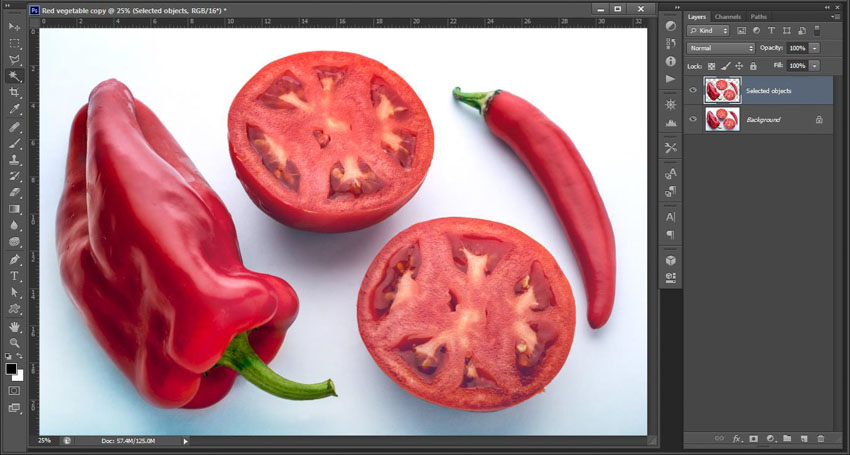
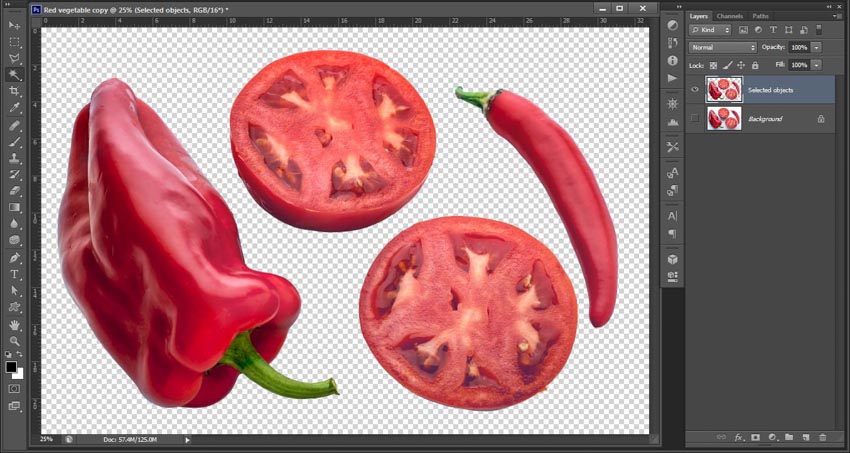
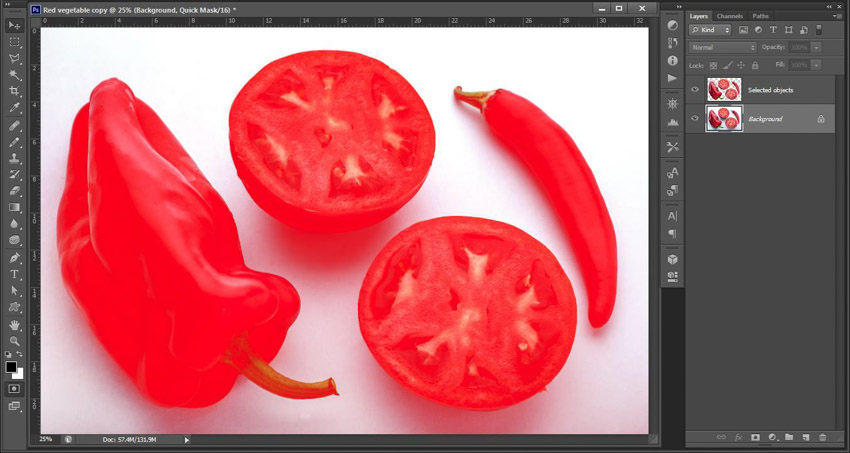
(1) The main object(s) must be previously isolated from the background by using some of the selection tools. We recommend the Pen Tool. Holding the CTRL key and clicking on the resulting Path gets the active selection. The Selection parameter Feather should be set to the value of the 0.3.
(2) The follow step is to right-click on the selected objects and choose the option Layer Via Copy (If this option is not visible make sure that there is any active selection tool on the Toolbox).

On a new layer (we named it “Selected objects”) there are now main object(s) separated from the original background.
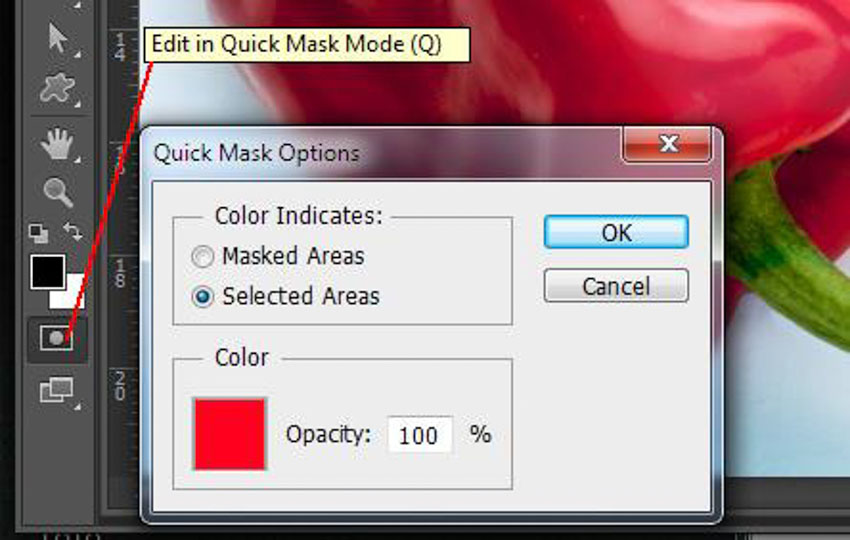
In order to match further descriptions along with the logic of this description, I draw your attention to the condition of my Quick Mask options. Double-clicking on the Quick Mask icon brings us to a form where you can see that my color indicates that Selected Areas will be highlighted in red.
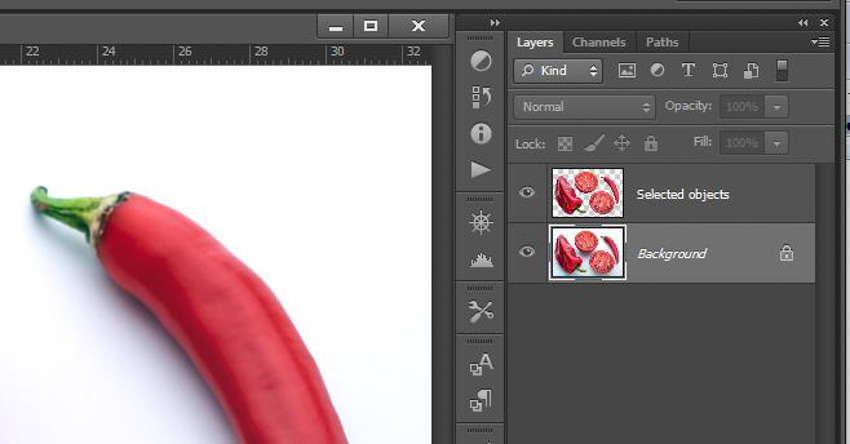
A very important note before continuing – return the focus to the Background layer
How to Create a White Background: Step 2 – Shadow Separation
(3) With the focus on the Background layer move on to the Channels palette. While holding down the CTRL key, click on the RGB layer. We get an interesting (proportional) selection. In fact, everything is selected (!) in degree of brightness. The more an area is brighter the more that it is selected, the darker it is the selection is smaller (more transparent).
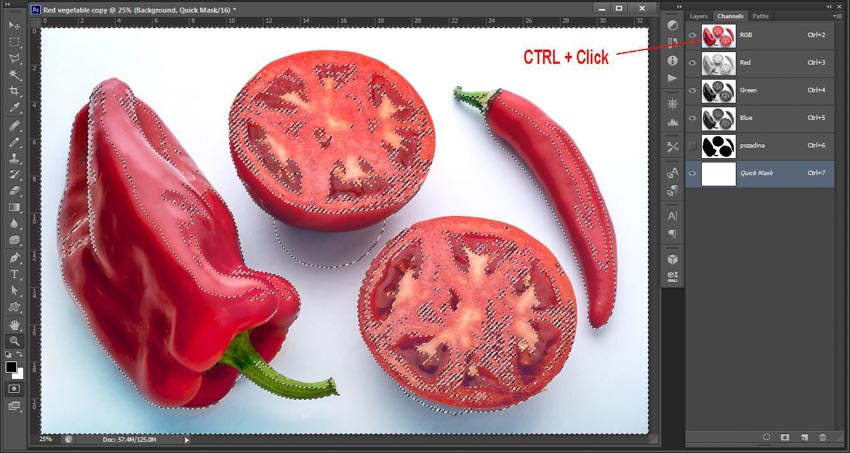
(4) In order to see that, we should activate the Quick Mask mode. It will seem to you that almost all of the picture is selected (colored in red).
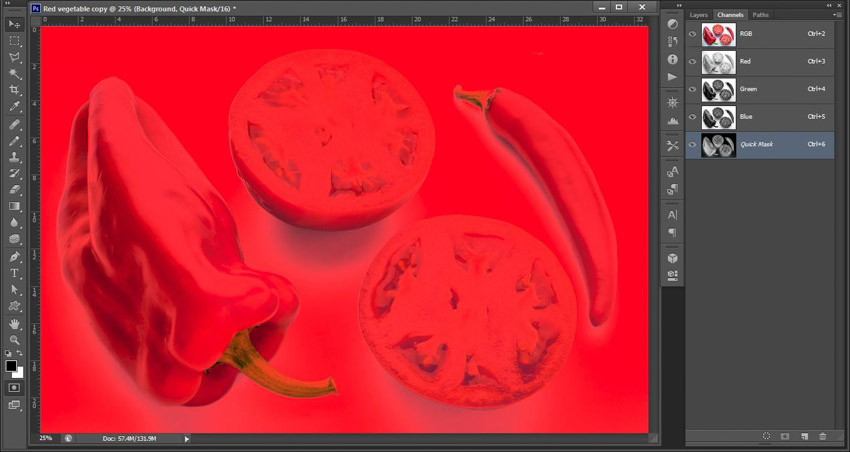
(5) Since we are interested in surfaces that are the least selected (shadows) we should invert the selection CTRL + I. In that way we come to the situation where darker areas are more selected.
(6) In order to reduce and limit the selection to the darkest parts (including our shadow), on the Levels form (Image / Adjustments / Levels) move the right slider slightly to the left. At this point you must experiment.

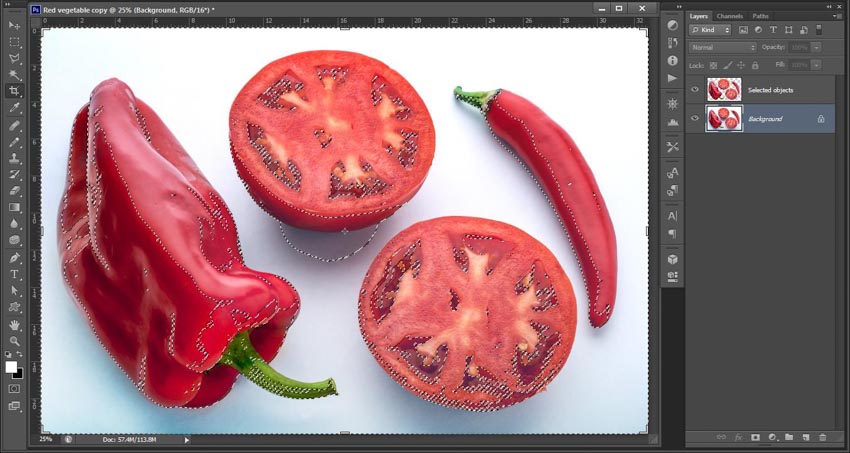
(7) Clicking on the Quick Mask icon again, we get a classic presented selection (marching ants). Don’t let the visual inconsistency in the selection layout confuse you. Although, somewhere where you may expect, if you don’t see the marching ants selection, don’t worry it still exists. Photoshop does not show the selection when the quantity of the selected pixels is below some extent.
(8) You now need to copy the selected shadow on the separate layer. Right-click on the selection and select Layer Via Copy to copy the shadow(s) on a separate layer (if this option is not visible, make sure that there is at least any selection tool active on the Toolbox palette).
(9) Then activate the option Lock transparent pixels (1) on the formed layer (preserve transparency in older Photoshop versions).
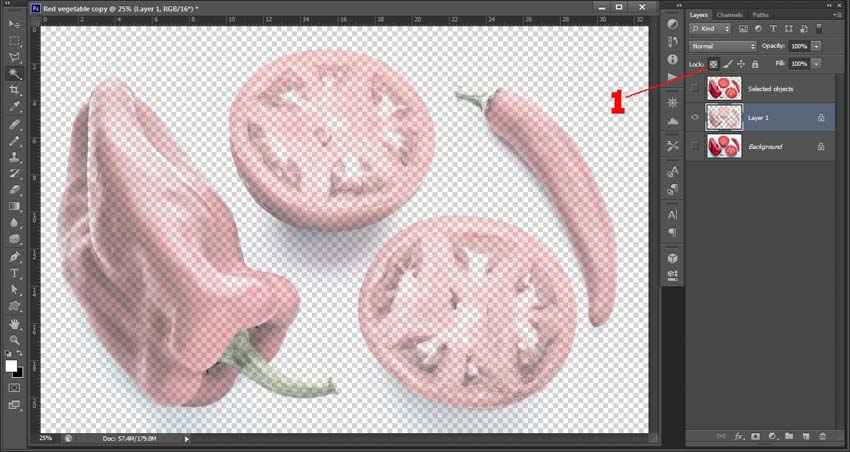
(10) Set the foreground color to black and paint over pixels of the previous layer with Edit / Fill… / Foreground Color. If you find that the formed shadow is brighter than you want, repeat part of the process from process number (6). If we feel that the shade is too dark, you can brighten it by using the Opacity.
How to Create a White Background: Step 3 – The Formation of New, Pure White Layer, and the Correct Combination of Three Key Layers
(11) Now you just need to create a pure white new layer. It will be a new Background layer. Above that Background there will be shadow(s) copied in section (8), (Shadows layer), and on the top of the layers palette will be a layer with the main objects selected in process number (2) (Selected objects layer).

Wish I had seen this tutorial sooner.
Glad you enjoyed it 😀