Behind The Scene of high-end commercial drink photoshoot.
Part One
 Mark Zawila is a digital artist, retoucher and photographer, specialising in high-end food, drink and product imagery for advertising. Mark’s images have been used commercially for print and web both in the UK and internationally and he is proud to have worked for clients such as Harrods, Sky, Lego, Sony and Miller. Mark is also passionate about working with small businesses and start-ups offering, exceptional imagery at a cost that won’t blow the budget.
Mark’s fully equipped studio space is ideally located between Basingstoke and Reading just off the M3, and less than one hour from Central London. Mark helps businesses by creating exciting and engaging images that blend design principles and creative ideas with technical expertise. He specialises in packshot photography, creative still life photography, food and drink photography and high-end retouching. Mark not only produces high quality imagery, he can also advise clients on concepts and visual strategies to communicate their brand more effectively.
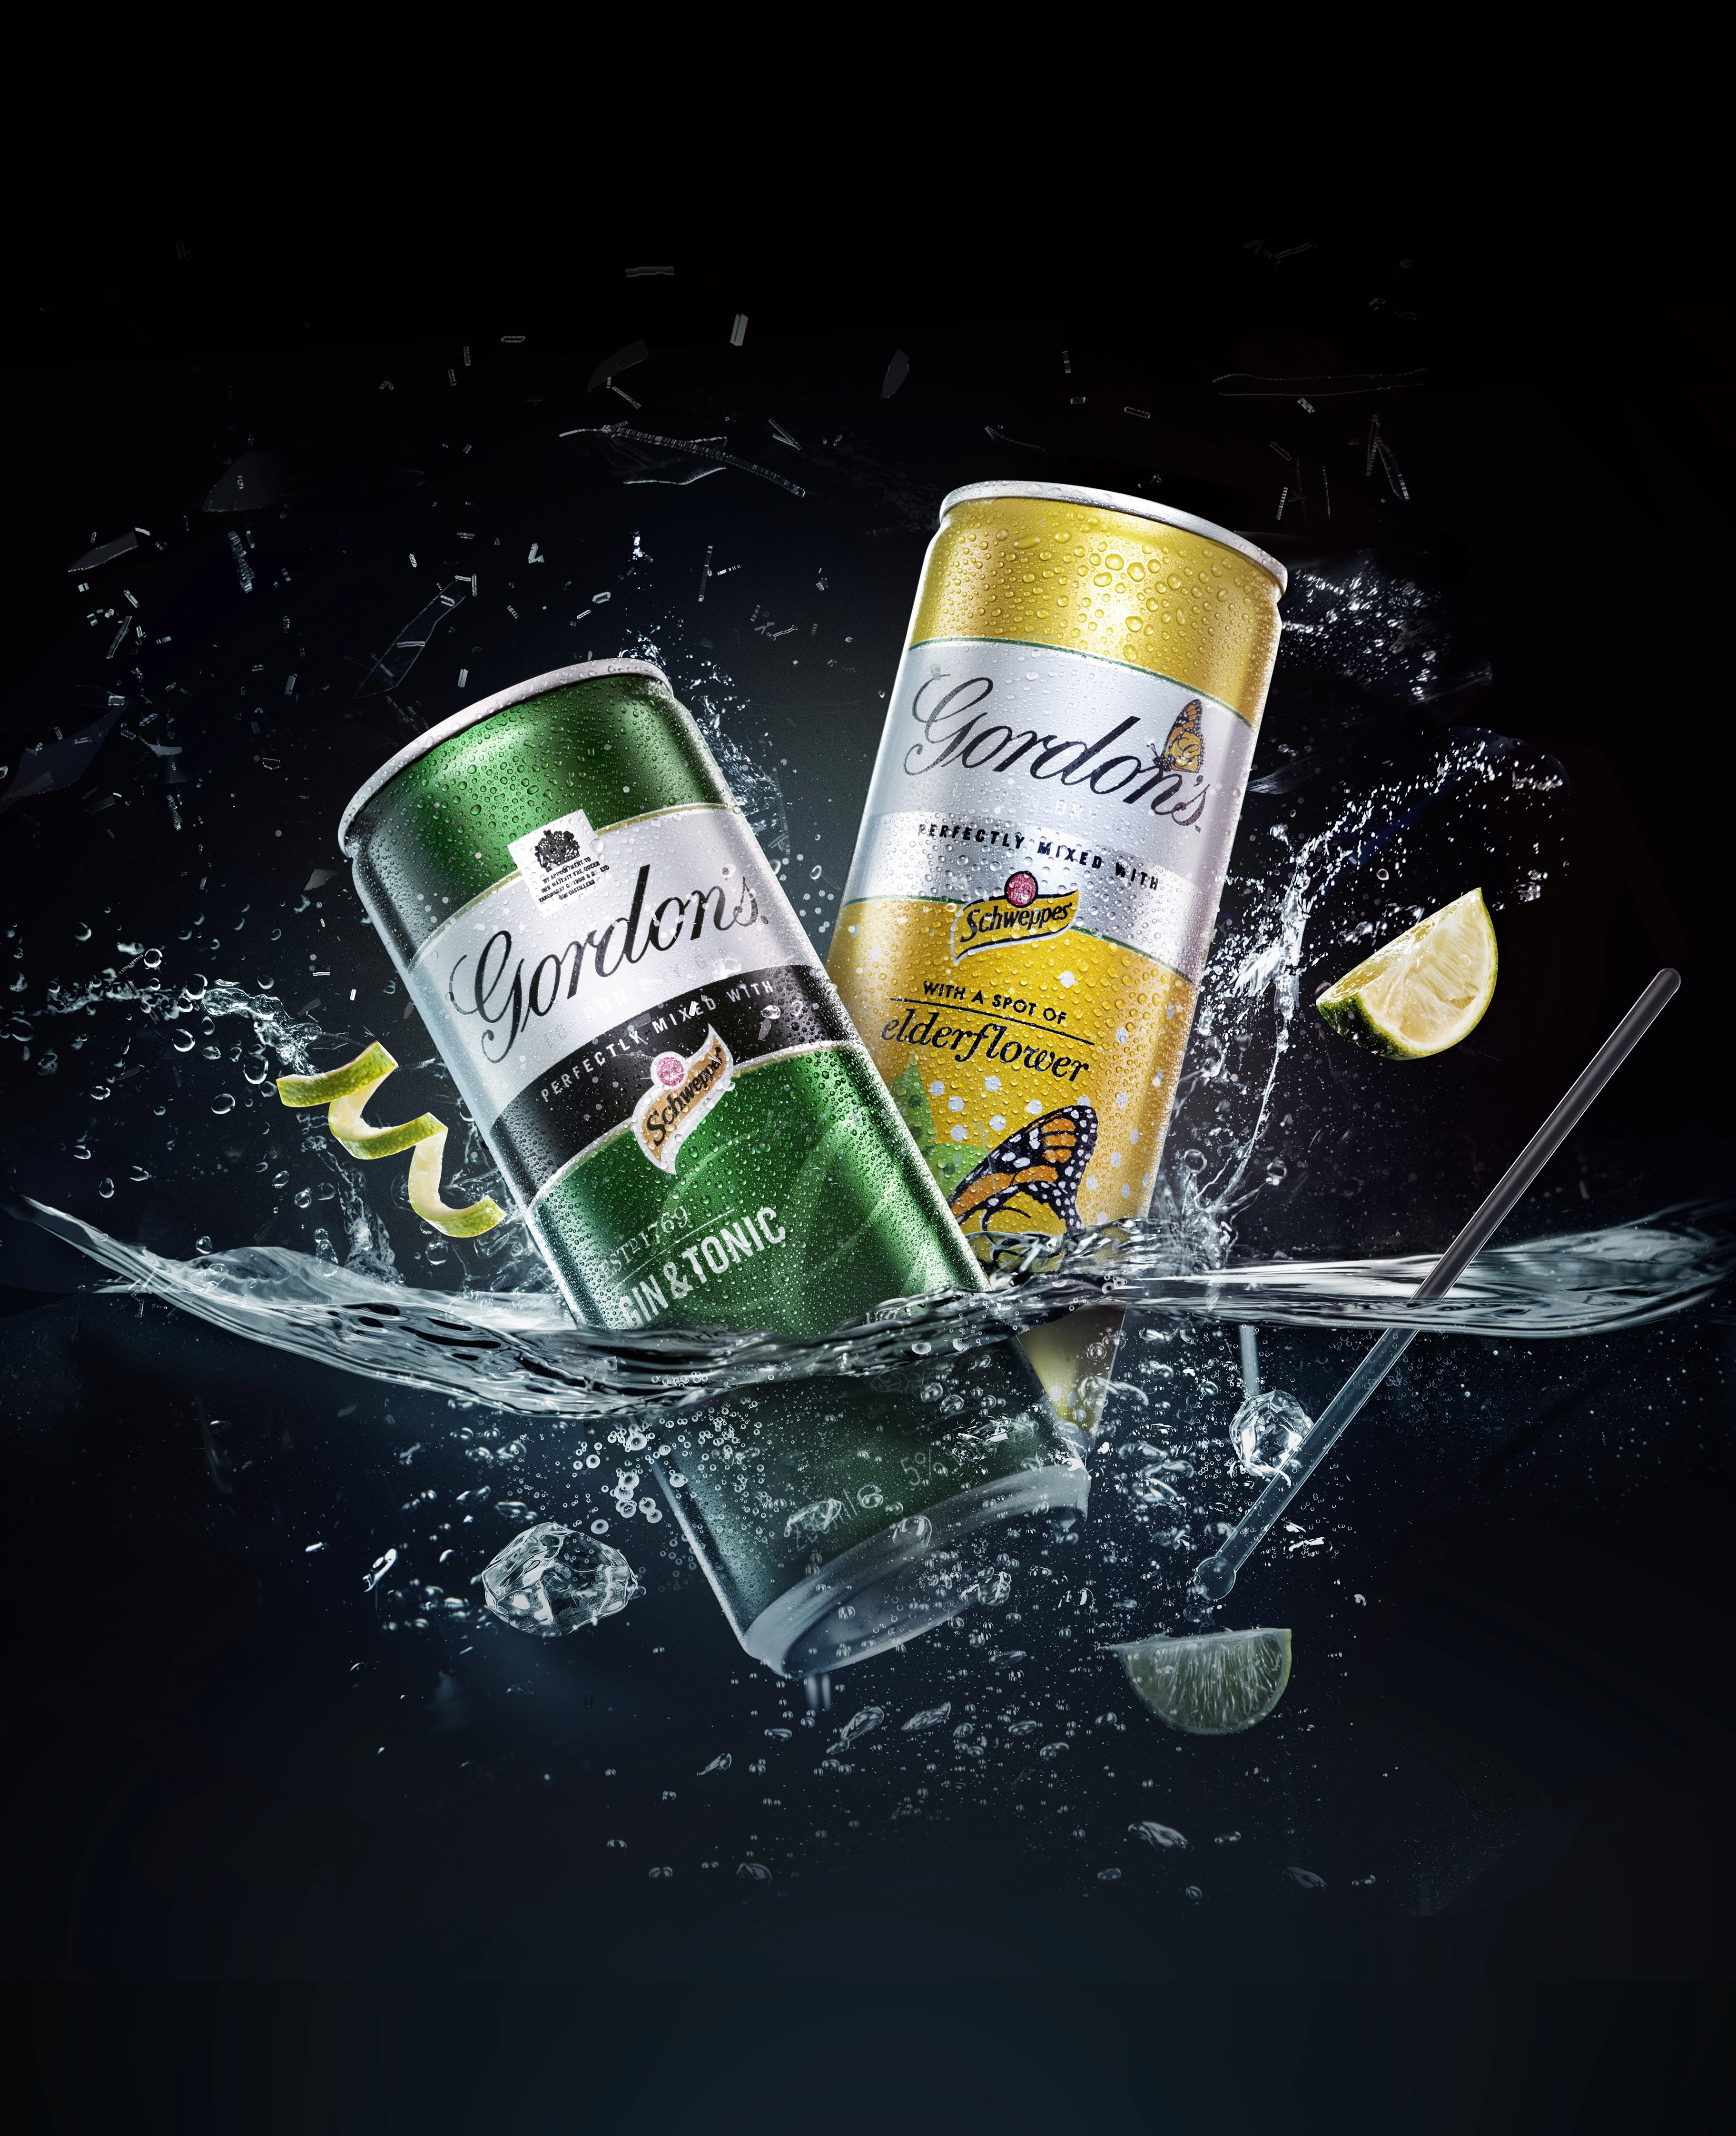
This image was created exclusively for Photigy and shows an example of my workflow for a high-end commercial drinks shoot. This BTS tutorial is broken down into two parts, Part
One describes pre-production and production and in part two I will share some of my post-production techniques and workflow.
Part One. Pre-production and production

Firstly the image was sketched out roughly in Photoshop in order to have a basis to build the image from. Usually an advertising agency would already have the concept finalised before approaching a photographer, but this depends on the size and type of job – smaller clients/assignments often give much more creative freedom to the photographer.
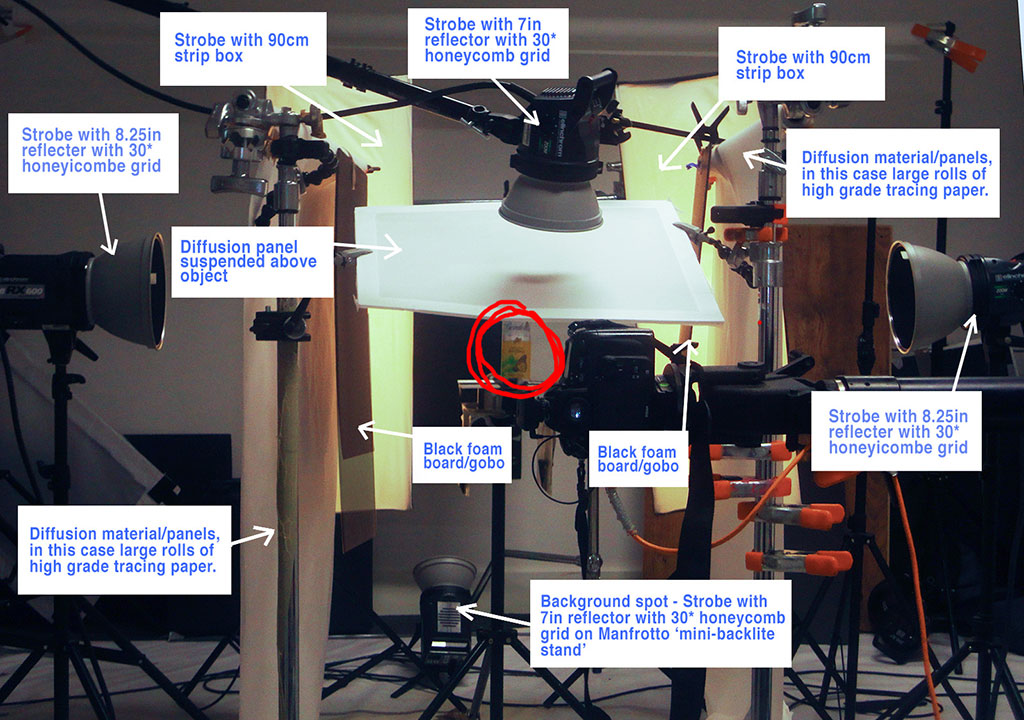
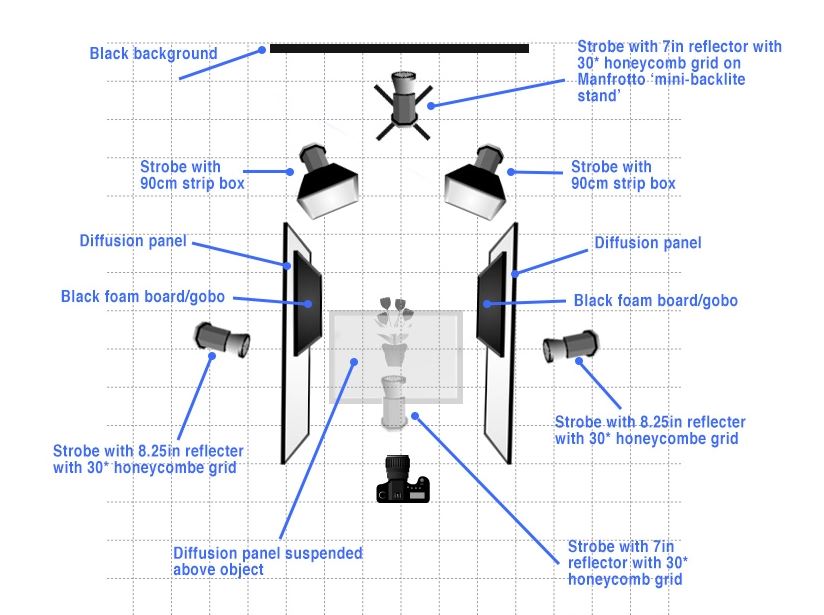
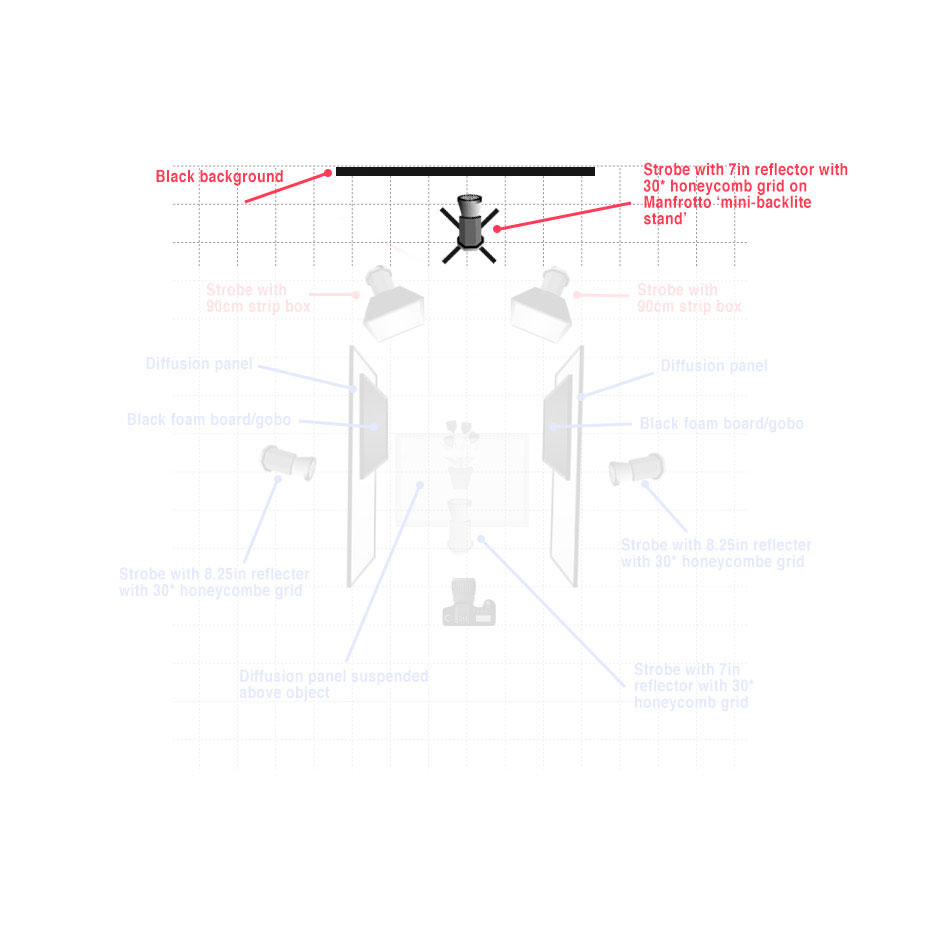
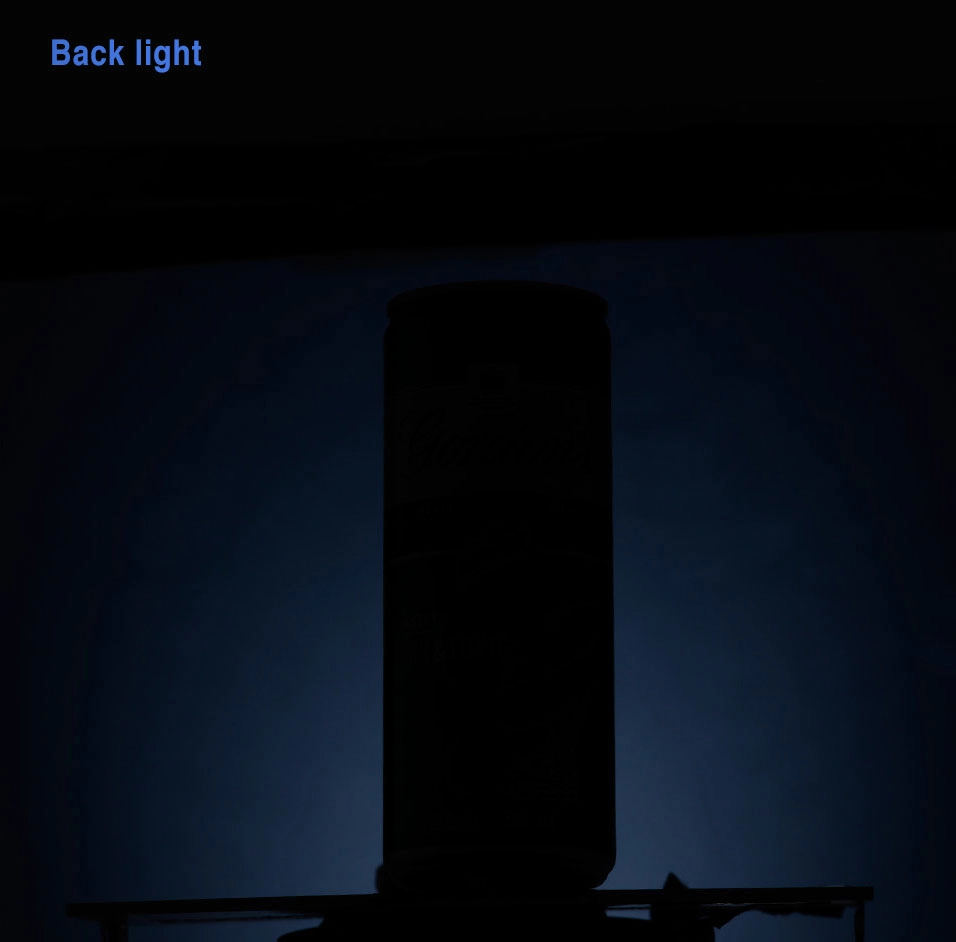
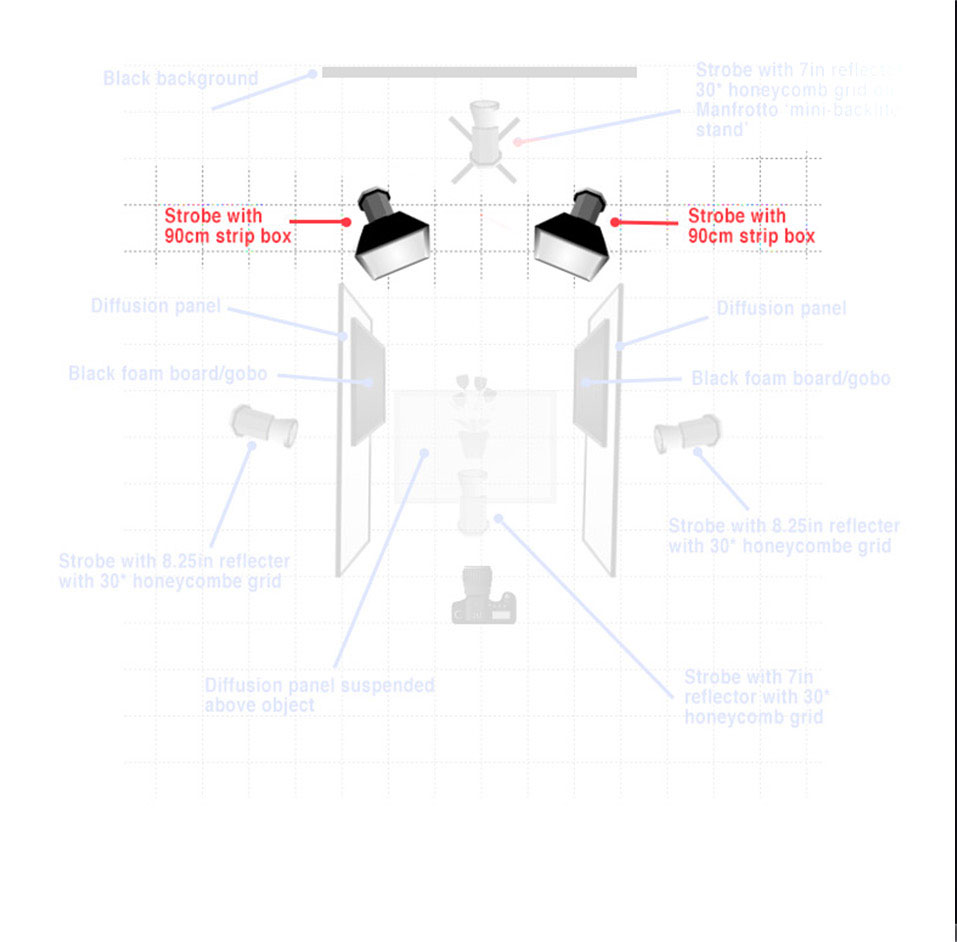
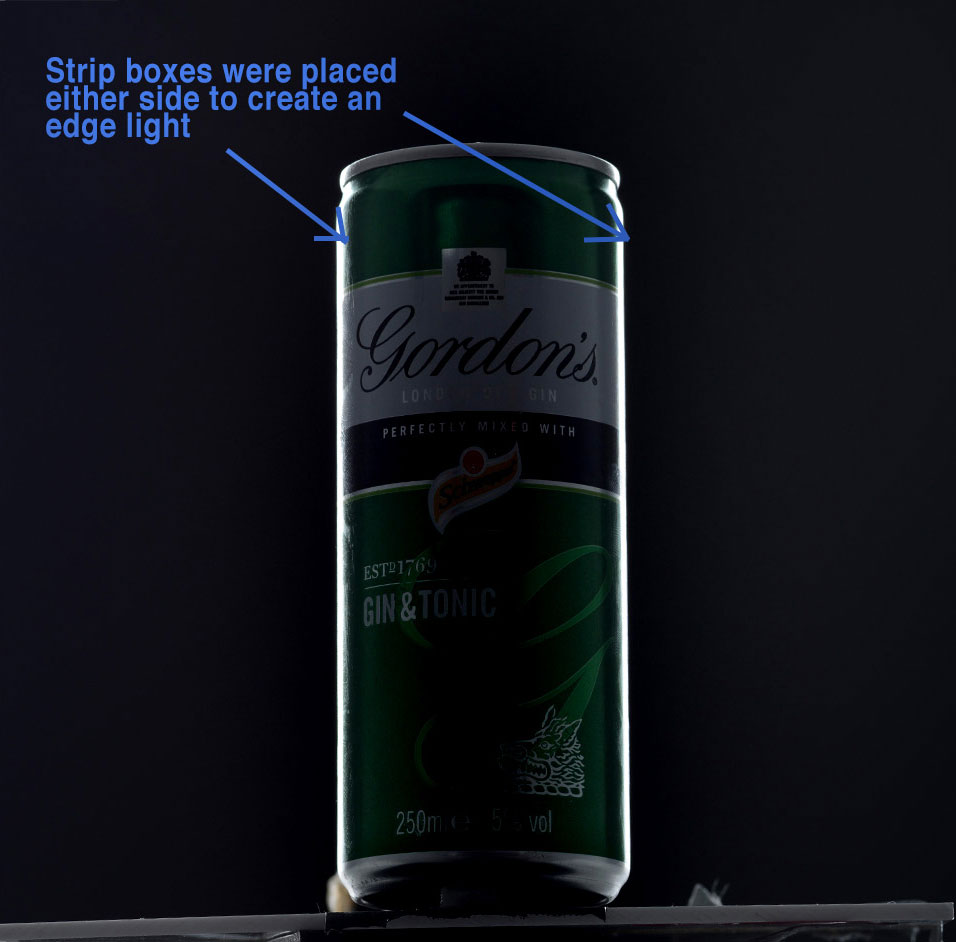
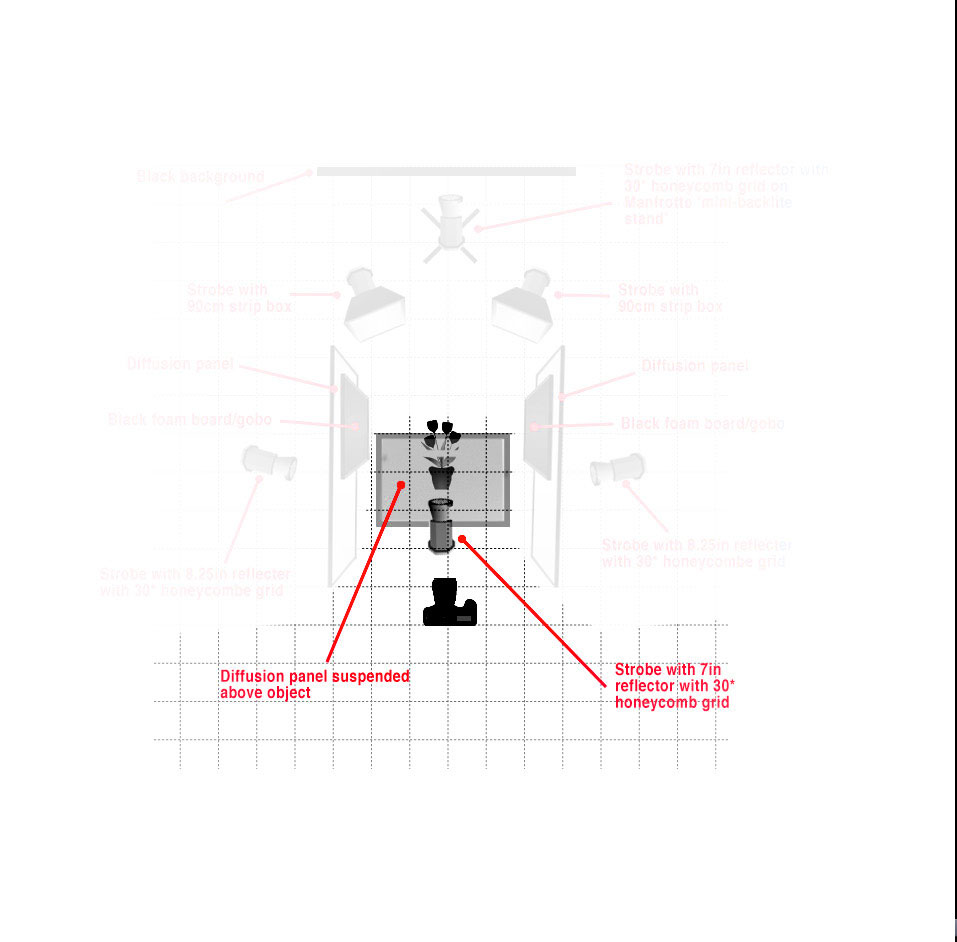
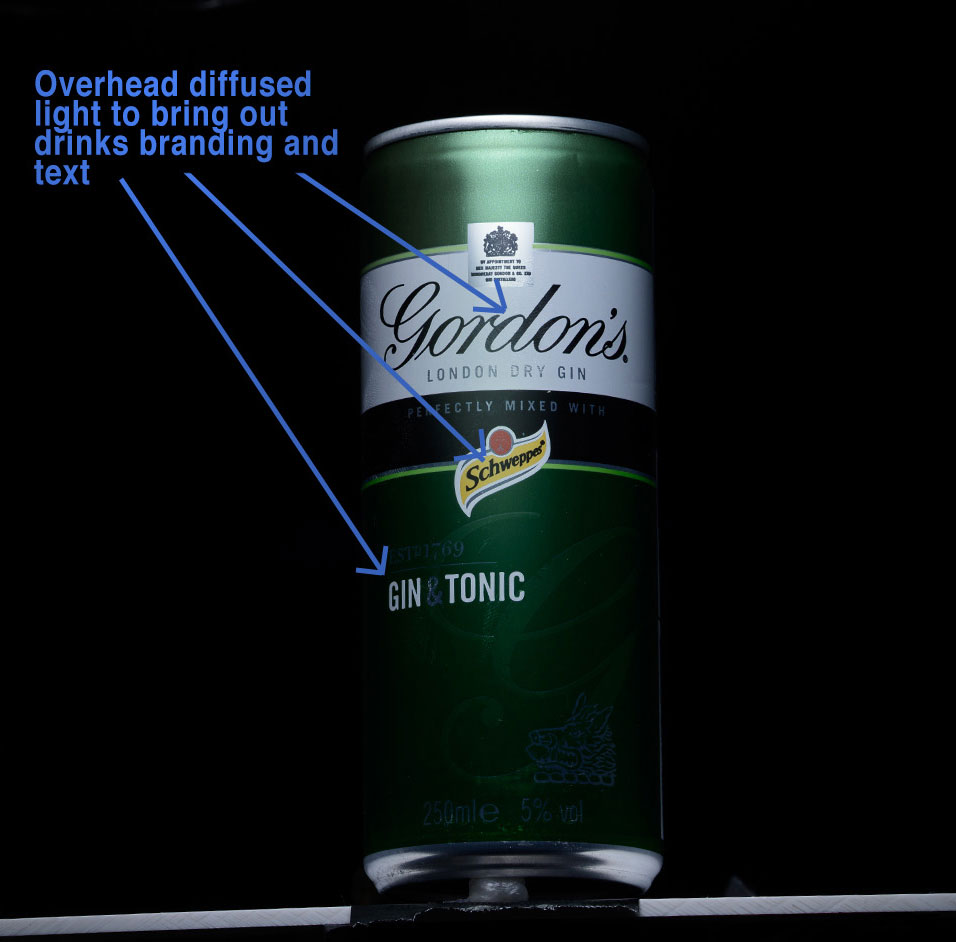
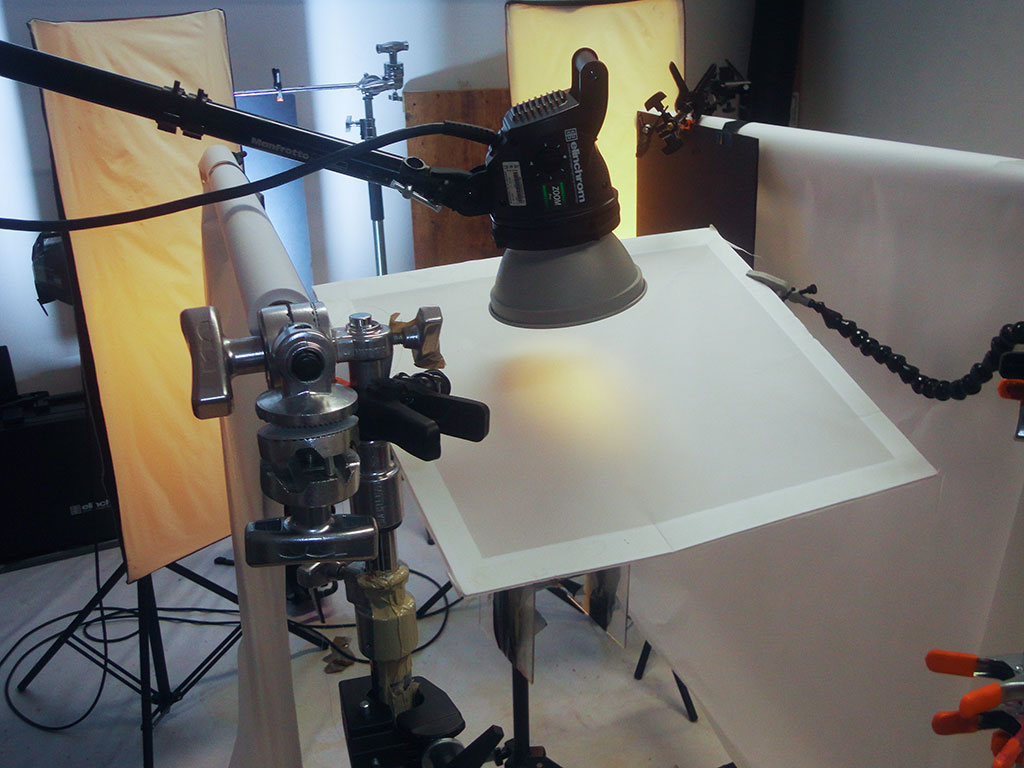
Next step is to set up the lighting in order to create the effect from the initial sketches. The following is my go to set-up for cans and bottles.
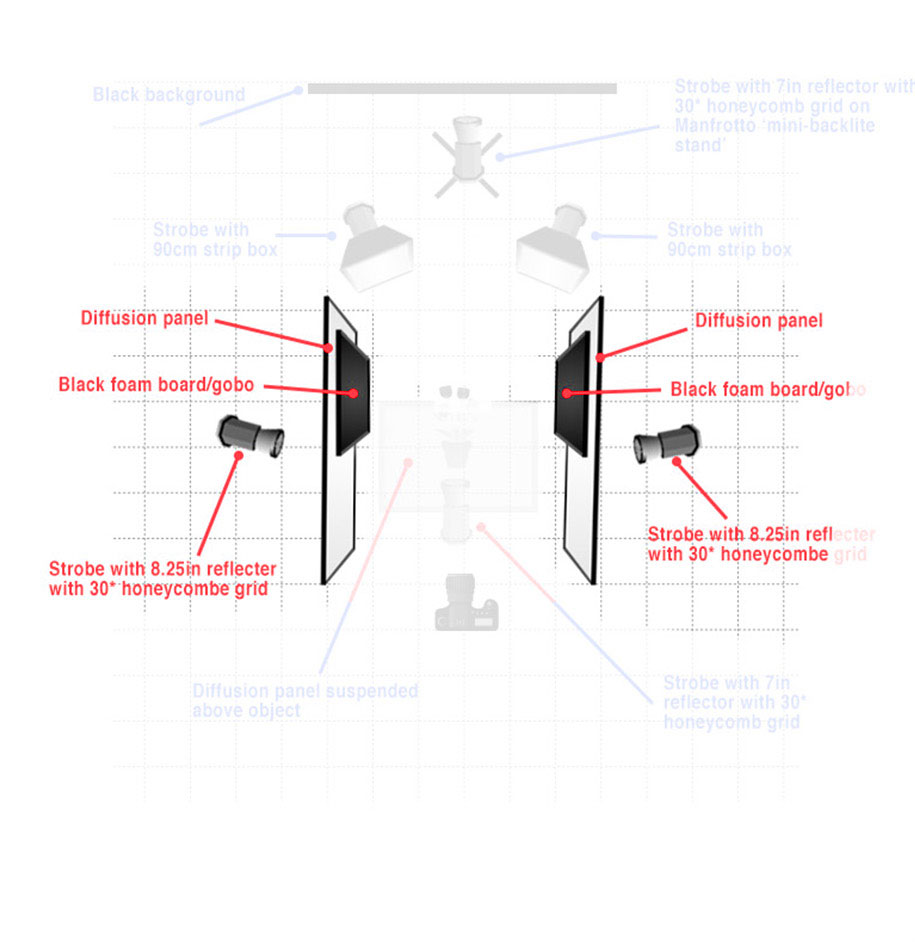
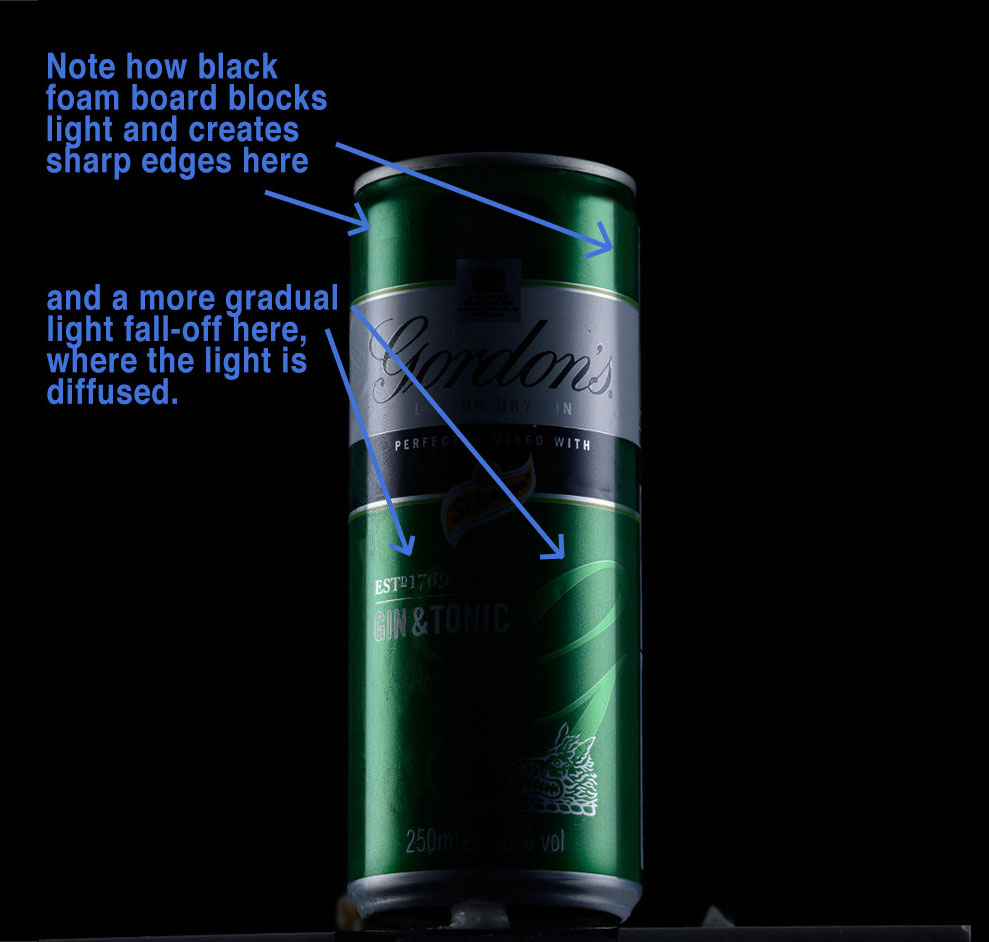
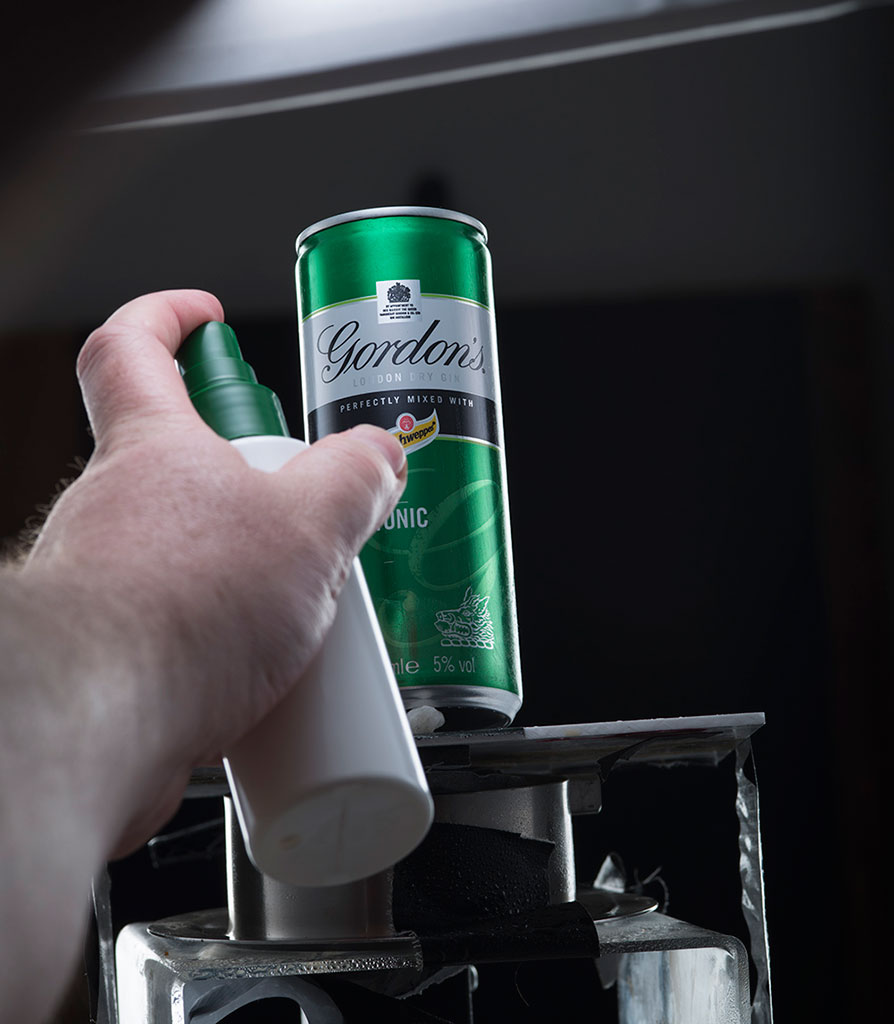
Before spritzing the can a smooth coating of Vaseline is applied to the surface as a base (make sure there aren’t fingerprints as these will show up under the lights), it has the effect of giving the can a “chilled” look and causes nice round water droplets to form. A 50/50 mix of glycerine and water is sprayed is stages onto the can, the glycerine keeps the droplets in place and stops them sliding down the can.
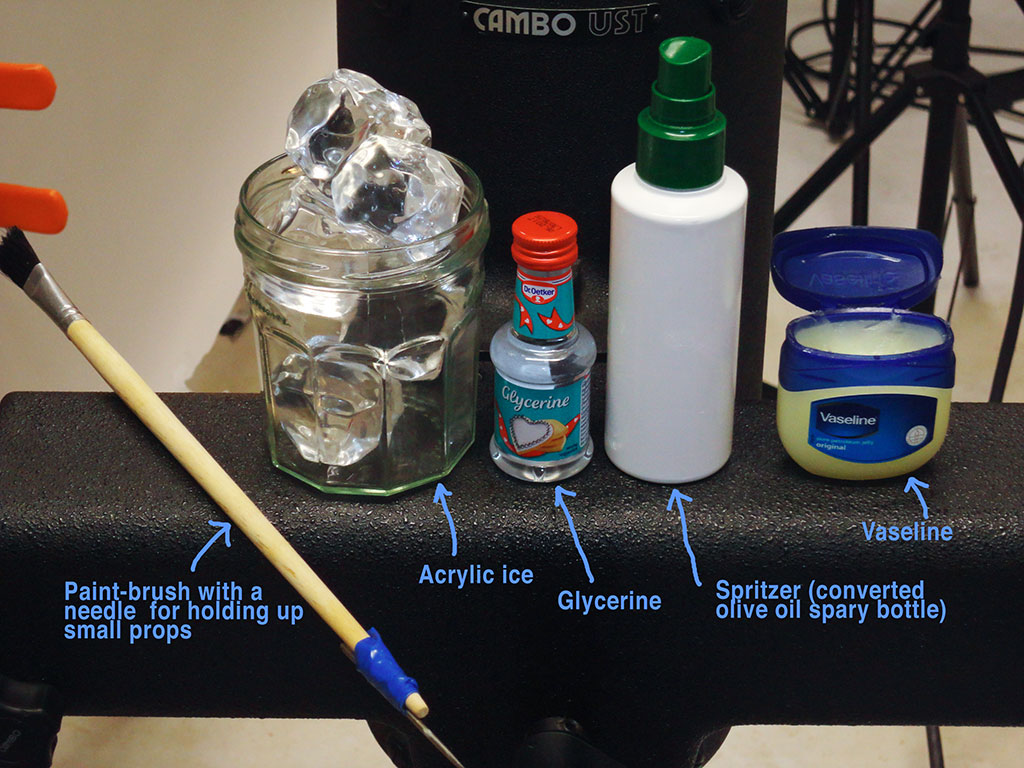
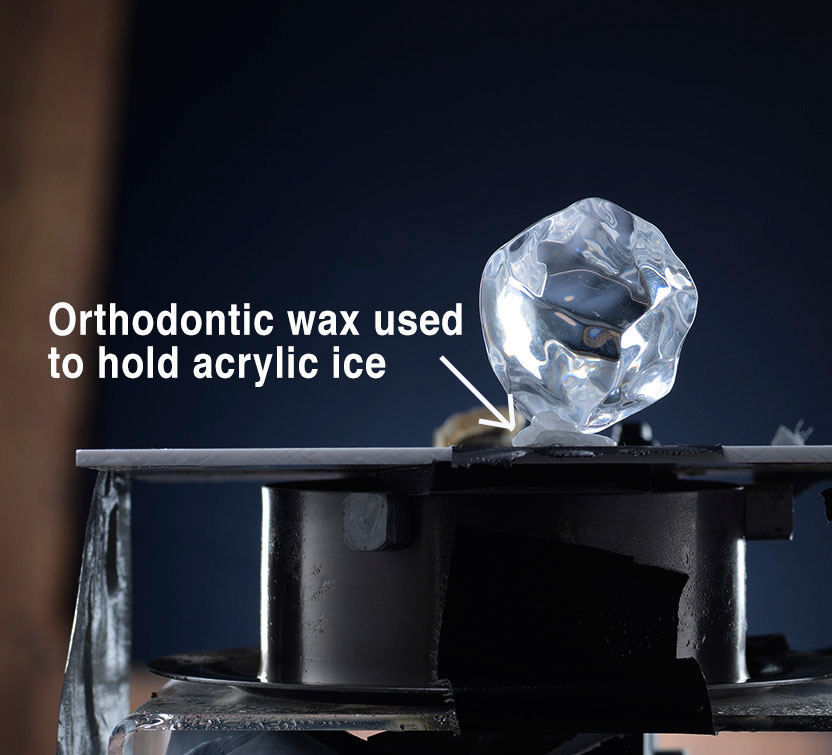
Some essential tools I use for drinks photography.

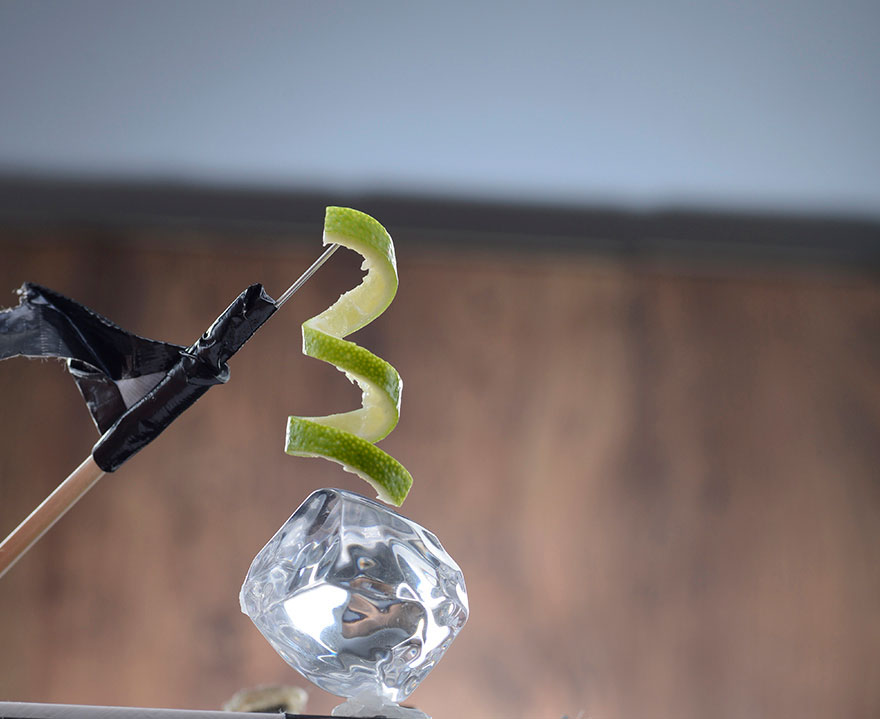
Additional elements were shot in the same lighting set-up and comped into image during post-production.
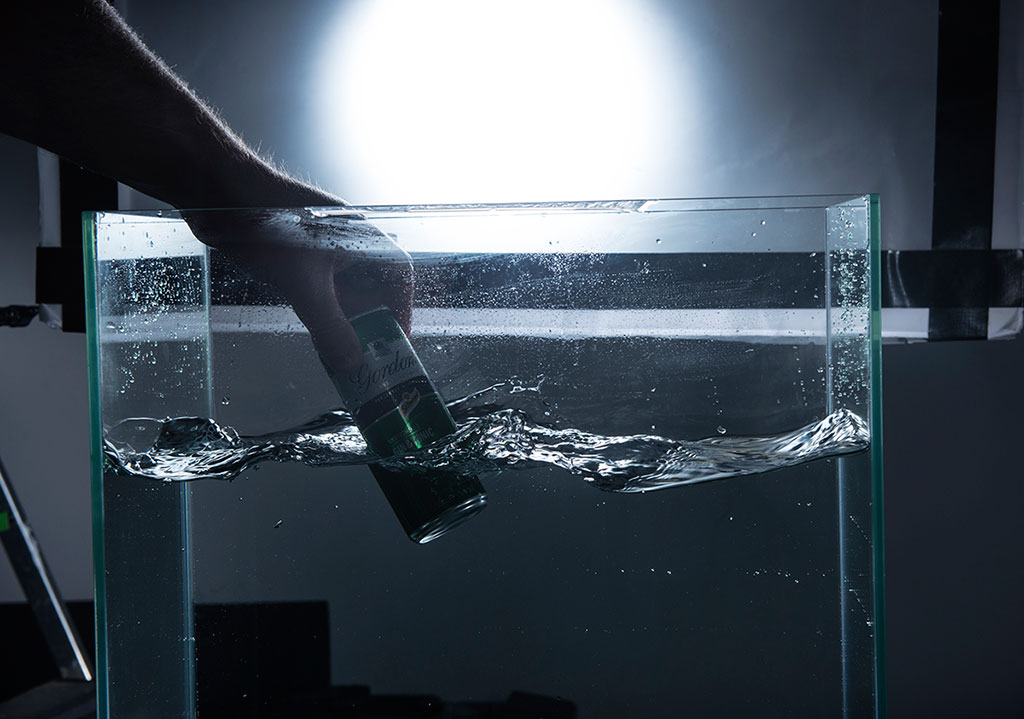
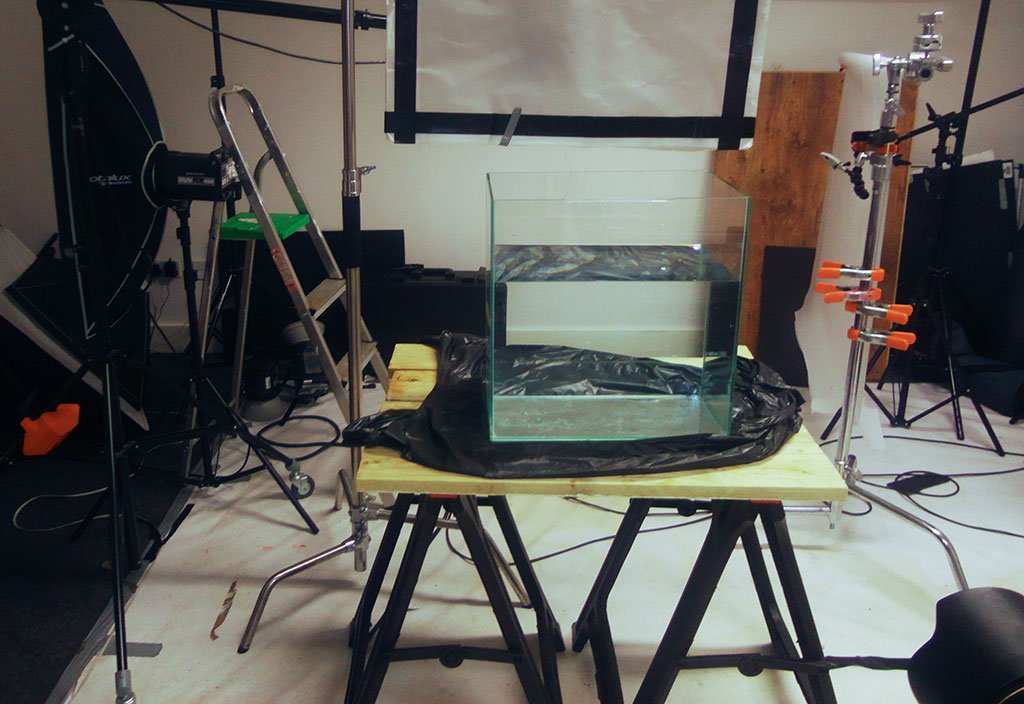
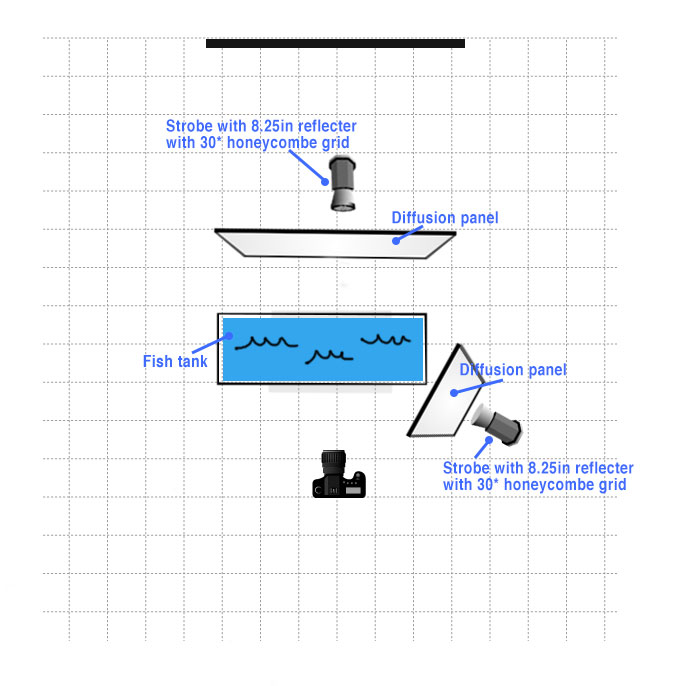
Water was lit very simply with one light placed behind the tank to catch the highlights on the surface and a light on the right as a fill. With splash/liquid photography its important that your flashes have a super-fast flash duration at least 1/10,000s to make sure captures are sharp. I’m based in the UK so I use Lencarta Superfast 300w flashes.
In part two I will discuss how I retouched this shot.
 |
In the Gearbox |
|
Equipment Zeiss 100mm f2 T* Makro-Planar ZE Lens Elinchrom Digital 1200 RX Pack Zoom Pro heads x 2 Einchrom Rotolux 90cm stripboxes x2 Reflectors and honeycomb grids
Studio accessories Cambo UST 7’ studio stand Matthews Hollywood 50cm C–stands Various clamps and clips Computer Equipment Macbook Pro 15” tethered to camera Wacom Intuos 4 tablet |
Connect with Mark

Where is part two?
Here it is: https://www.photigy.com/school/behind-scene-commercial-beverage-photoshoot-post-production/