Advertising Photography Behind-The-Scene:
UnCorked Sparkling Wine

Meet Eric Gordon –
Founder and CEO: The Product Photography Studio in Goleta, California
Originally from Virginia, I became interested in photography as both an art and science at a very early age.
This became a lifelong pursuit after interning with National Geographic magazine, then
assisting with photoshoots of Yucatan Mayan ruins in the 1970’s.
I graduated from Brooks Institute of Photography in 1986, then worked in New York City for some of the top names in the business.
I then pursued and graduated with masters degrees in Architecture and Structural Engineering at Virginia Tech.
I really missed the West Coast and good Mexican food, so I moved to Santa Barbara and launched ePrep Services, Inc. to provide technical and creative skills to the marketing and advertising professionals on the South Coast. This was during the digital revolution occurring throughout the imaging, printing, and graphics industries
I live with my wife, Valerie, and daughter, Wylder-Rose, in Goleta, California.
The STUDIO
My studio was originally born out of the pre-press industry supporting offset printing industry back in the 90’s as they made the transition from analog to digital methods for offset printing.
My original name was “ePrep Services” ; a play on my name, Eric, and the pre-press services I provided.
Everything from drum scanning, photography, and digital proofing, to color correction and consulting with graphic designers to achieve a result they wanted on press.
My company grew to be focused on product photography and art reproduction. More and more clients told me they had a hard time finding me and that I should change my company’s name and rebrand. So after much debate, we recently changed our name to “The Product Photography Studio” because everyone was just calling us “The Studio” now anyways and it was easy to remember who we are and exactly what we do.
Not a very creative name, I know, but should be easy to remember and our new logo accentuates “The Studio” part of the name.
Still in production, our new website can be found at www.theproductphotographystudio.com
Also, please like us on Facebook at www.facebook.com/theproductphotographystudio
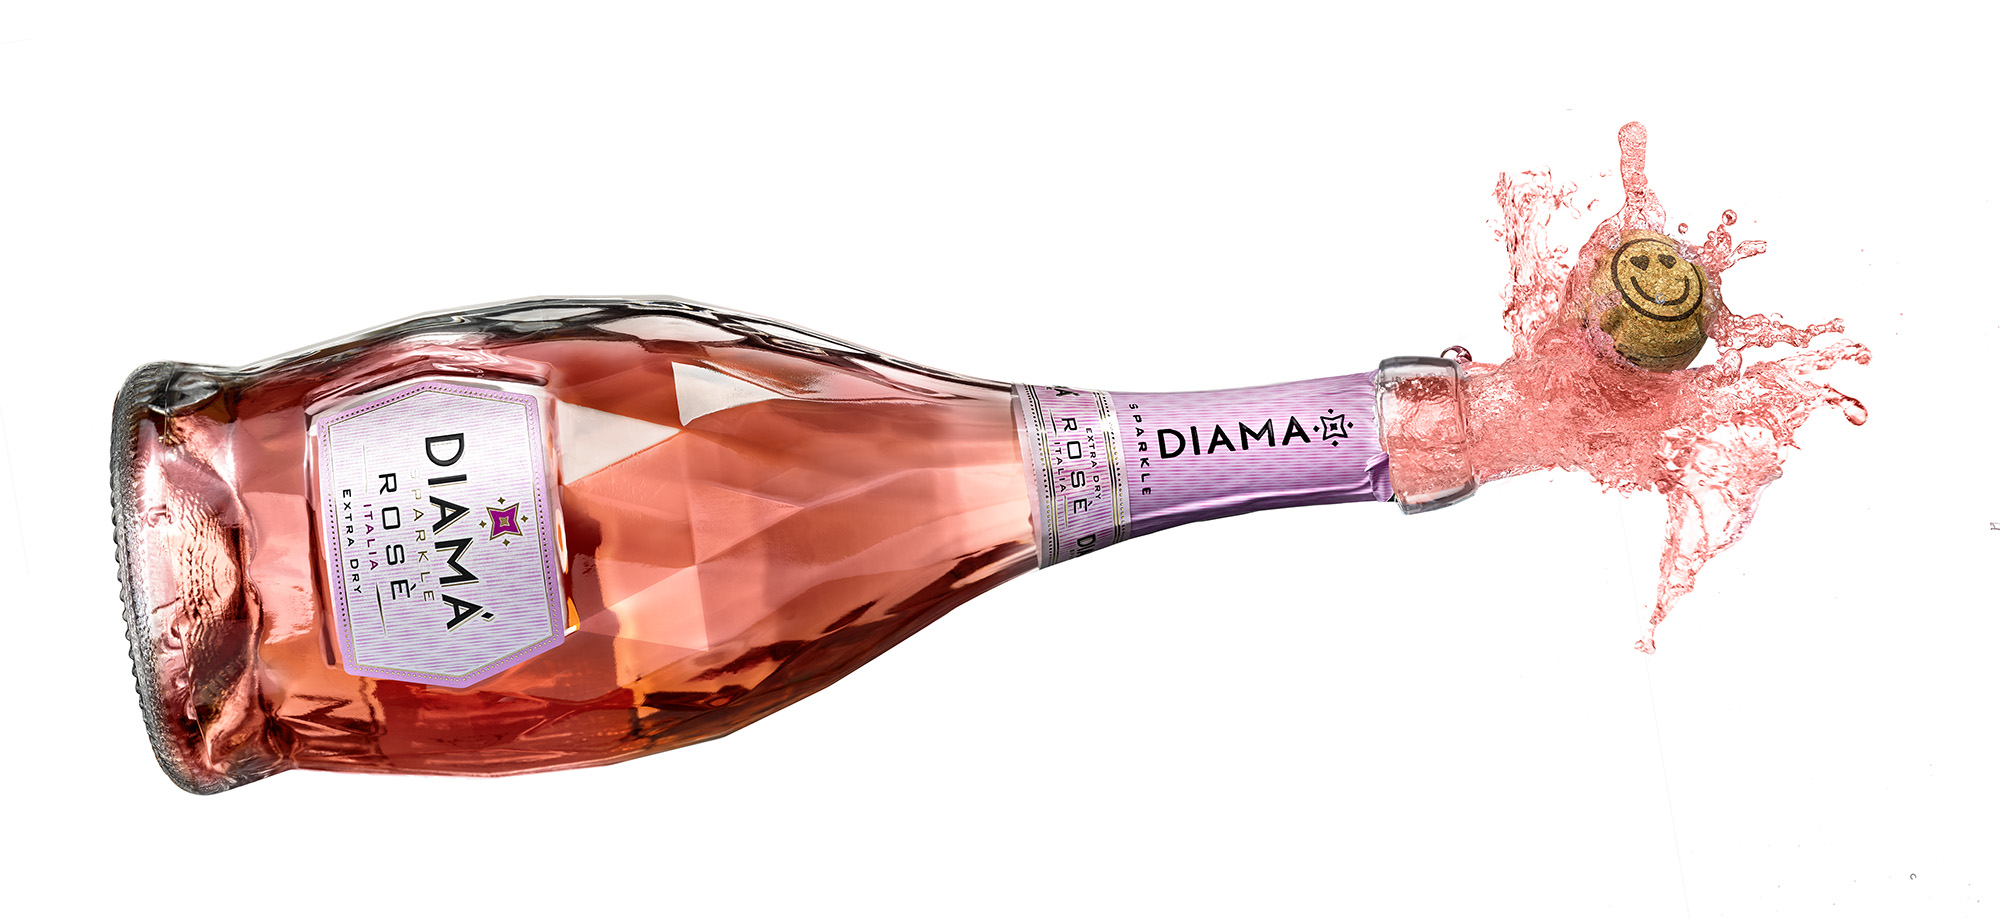
The Un-Corked Sparkling Wine Shot(s)
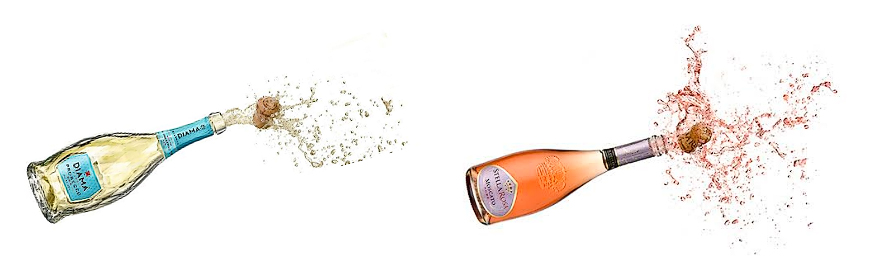
I was working for a client that was using a fantastic photographer to do liquid splash shots of their product line, I was impressed and jealous. We were doing all their eCommerce and standard profile images against white, as well as most of their social media imaging. I needed to add fun to our studio jobs.
I did some research and came across Alex Koloskov and the Photigy site to learn how to do liquid splash freeze motion shots. I dived in full blast and in a few months started testing the new techniques I was learning at Photigy. I applied the new freeze motion techniques to some cool new shots for a footwear client of ours and they were hooked immediately! We started doing more and more liquid splash images for different clients of ours who weren’t aware we did that type of work. Suddenly we were doing liquid splash images for all our eComm clients from footwear companies to cosmetics to beverages!
We were then contracted to do a series of high-resolution images by a wine distributor client to be used in an ad campaign of billboards 50feet long.
The images were to be “eye-catching” and show the playful motion of uncorking their many sparkling wine products.
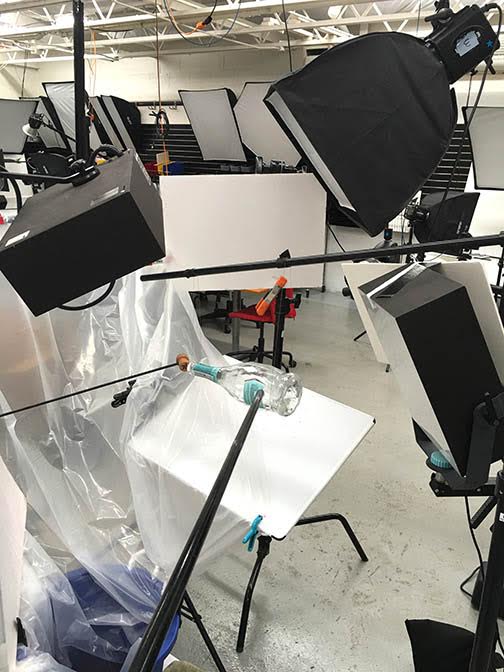
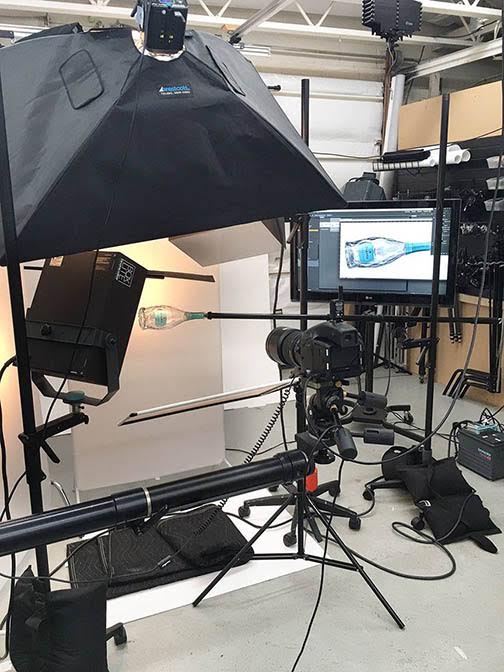
I will try and describe the gear I used for this shot, but I don’t like to talk about it much because I think creative vision and knowledge of lighting is more important than what gear you have or use. That having been said, over the years of doing this I have amassed some cool tools to get various jobs done efficiently. My favorte thing is when a particular piece of gear bought for one specific purpose, turns out very useful in a completely different usage.
For instance; to meet the extreme resolution demands of a billboard image that size I used our 80MP medium format digital back, a Leaf Credo-80.
We bought and normally only use this system for high resolution art reproduction work.
To further add punch I used my favorite medium format lens, a Schneider-Kreuznach 120mm Macro lens.
For lights I used a combination of PaulCBuff Einsteins and Broncolor Boxlight 40’s.
The Boxlight40’s were for lighting the bottle and label. They are my favorite product lighting lights and are absolutely even edge-2-edge illumination without any of the wrinkles or fabric details that a traditional softbox can impart.
The Einsteins were for the splashes, fill light and background glow. The Einsteins are 1/10th the cost of the broncolor’s, so we could afford to double them up everywhere we needed them for power and their T.1 speed at low power is simply unmatched for this type of work. So perfect for freeze motion work around and in front of the neck!.
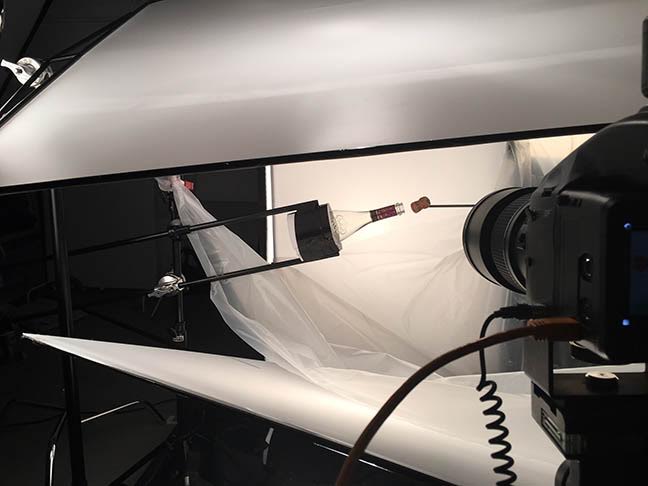
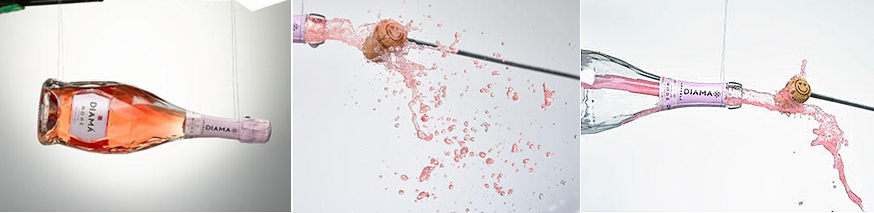
I decided to do this by compositing two images:
1. A well lit shot of the bottle and its label;
2. A freeze-motion liquid splash shot of the wine product exiting the bottle neck and pushing the cork out on the wave.
We would shoot them separately and I would composite later into a unified whole uncorked shot.
The DKR
The 1st step was to build a containment area for the liquid splashes. We call this a DKR (stands for “Dexter’s Kill Room” because it is eerily reminiscent of the plastic rooms in the popular TV show about a serial murderer named Dexter)
We built our standard “DKR” but soon tore it down because it was too restrictive for the straight bottle shot.
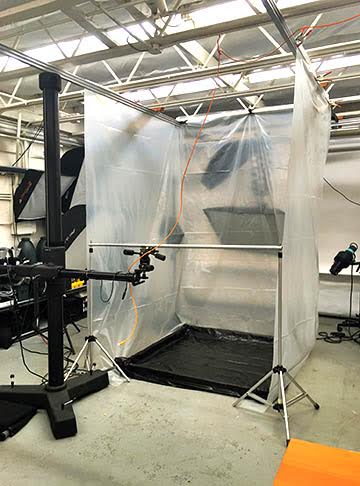
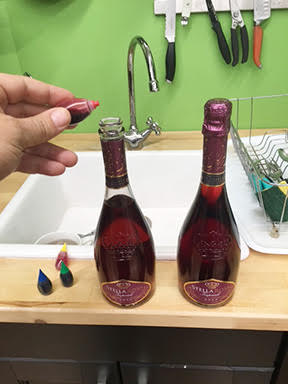
We learned fairly early on that using the actual sparkling wine created too “foamy” an image and we needed to use only colored water instead.
We tried lighting it on fire, plunging it intake water, car battery hooked to a copper wire, the old “oil floating in the bowl trick”, nothing seemed to crack the thick faceted glass of our bottles cleanly or with any predictability.
Finally, we just gave up and using a diamond bit, drilled a hole in the bottom that we could slip a tube into and all the way up to the neck.
We attached the tube to the business end of a cream siphon and Scott, my studio manager, slid the tube up thru the hole in the back of the bottle and did short controlled bursts while I would shutter release using a pocket wizard hooked to the PhaseOne camera. It was all about timing and getting into “the groove” : )
For each “keeper” shot there were at least 10-20 un-useable splashes for a variety of reasons from capture too soon, too late, too foamy, focus, “weak stream”…etc.
Eventually we got what we wanted and then moved on to the next bottle and the process started again.
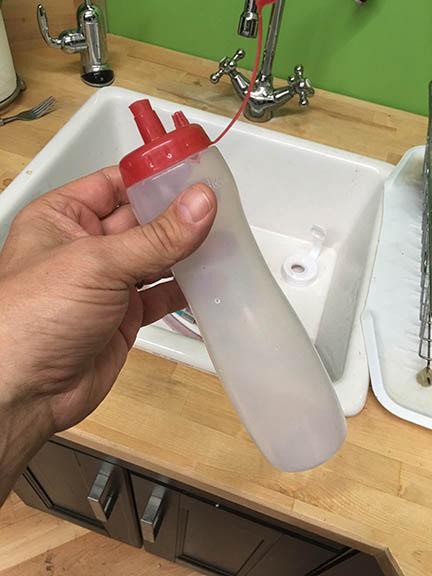
We have done many more of these with different bottles since; and have refined the techniques quite a bit. We have created a special foam harness to hold the bottles in place, we abandoned the cream siphon for a simple ketchup squeeze bottle, and have a drill press rig on site to drill the holes.
We added a third accomplice, photographer Natalie Thomson to man the computer and do quality control checks on each splash captured so we have a better idea if we “got it” or need to splash more.
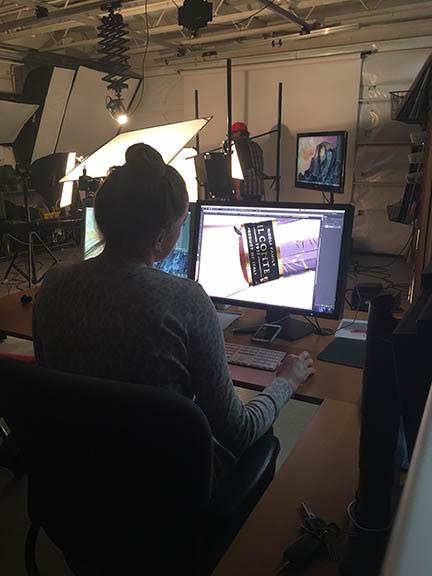
Compositing
Once we had the main bottle shot and a few select pours with cork processed, then it was up to me to composite the two images seamlessly.
All the shots were slightly different angles due to the nature of the motion action so it was difficult.
I first masked out the main bottle shot and then the neck/cork/splash shots and then composited into place.
The critical area was the where the foil was removed exposing the glass and mouth of each bottle.
I actually used over 10 different splash shots to create each uncorked splash around the cork and necks.
Masking out the bottle and drops from the splashes was next; then removing the harness, cork pole, and touch up work to the glass and voila!
(“voila” took many hours per bottle image actually 😉
 |
In the Gearbox |
EquipmentCambo UST 9Ft camera stand Studio accessories(4) Matthews Hollywood Century C Stand Grip Head Kit, Black – 10.5′ (3.2m) Computer EquipmentApple Macintosh MacPro 2.8Ghz quadcore (2010) |

Thank you for sharing this, it makes me feel much better after going into similar trial and error paths in my own splash photography!