How to Light Products with a Single Speedlite
 I call that technique «lighting-focus stacking». The main idea behind it is to shoot each part of your product separately with the lighting it and use each focus point for each part. Then on the retouching process, I just blend all parts of an image together in PS. You can shoot as many exposures as you need.
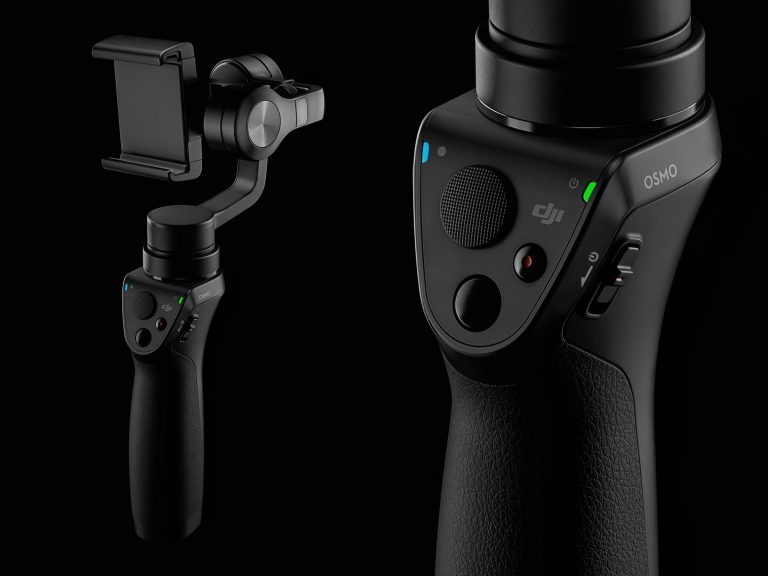
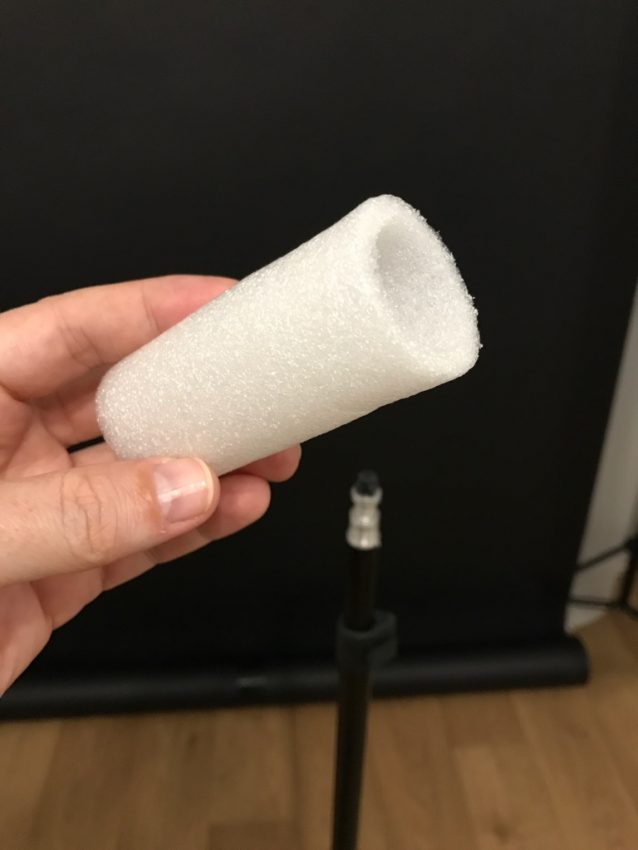
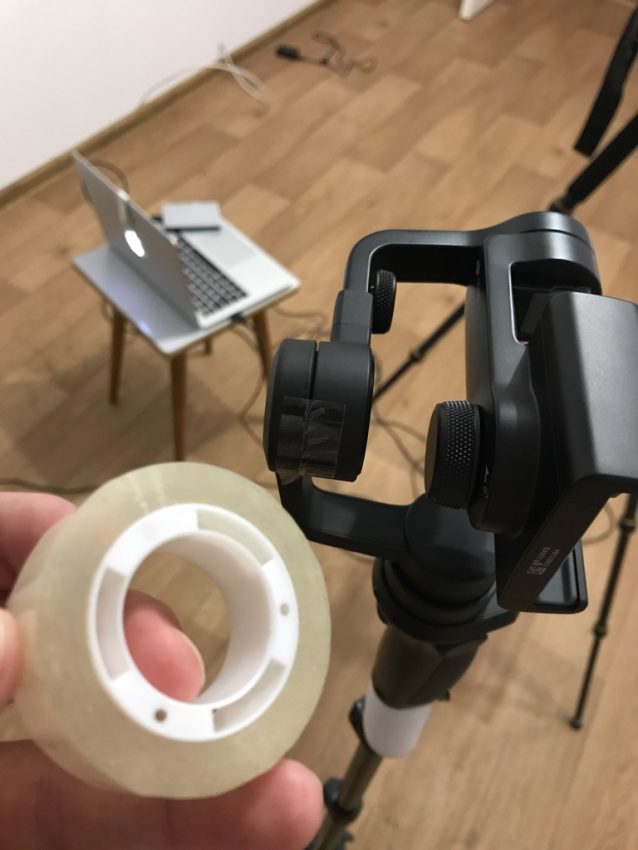
At the very beginning of actual photo shoot, I needed to mount the DJI gimbal on the light stand. I took some foam and removed the battery from the gimbal and put it together on the light stand.

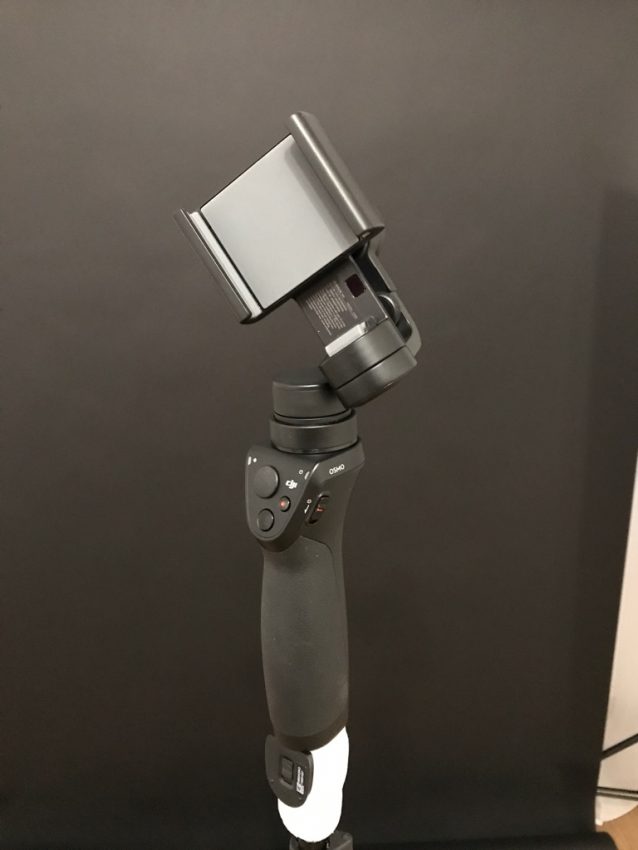
After that, I needed to fixate all moving parts of the gimbal. To do that, I used a regular tape.
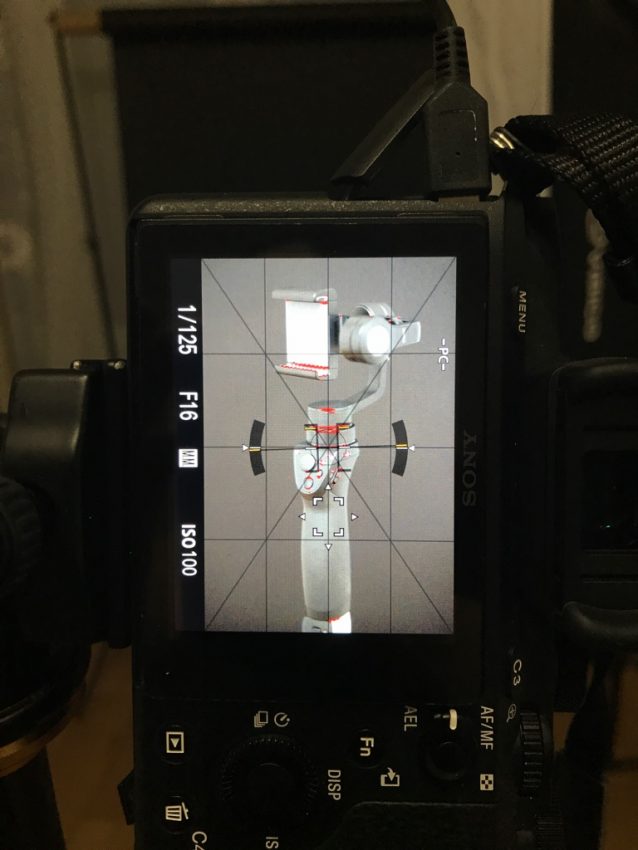
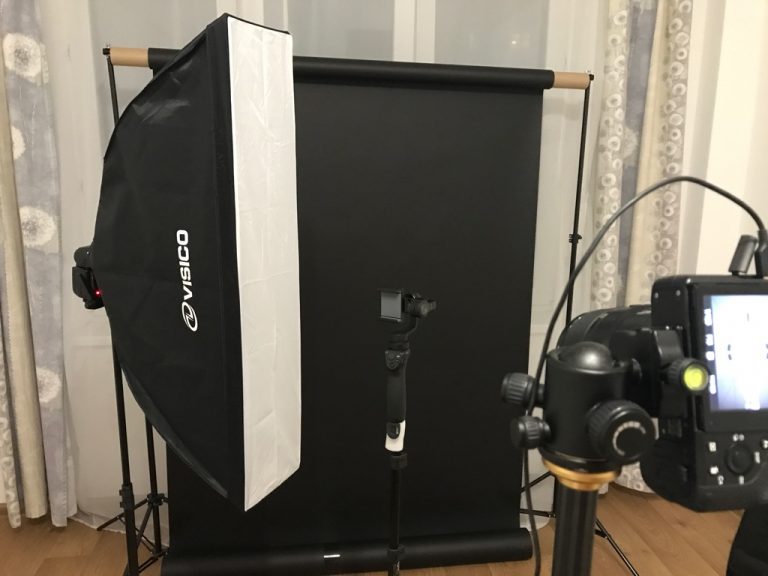
xSo, all parts are fixed in a right position and I’m ready to shoot. I used Sony Alpha a7 II camera with Sony 90 mm G f/2.8 Macro lens at f/16, ISO 100 and shutter speed 1/125th of a second. A light source is speed light Godox 685S with a strip box 90х22cm.

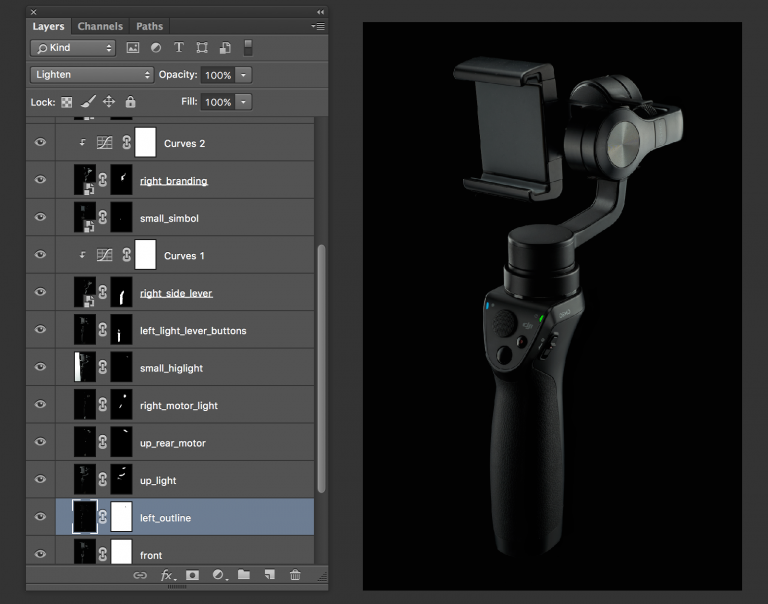
I was taking few shots for the each side with different focus points and positions of a light source. Changing focus plane allows me to precisely lit every single area of a product. Moreover, at the end, this will give me a wide depth of field overall and the whole product will be “in focus”. I did exactly the same thing for another side of the gimbal.
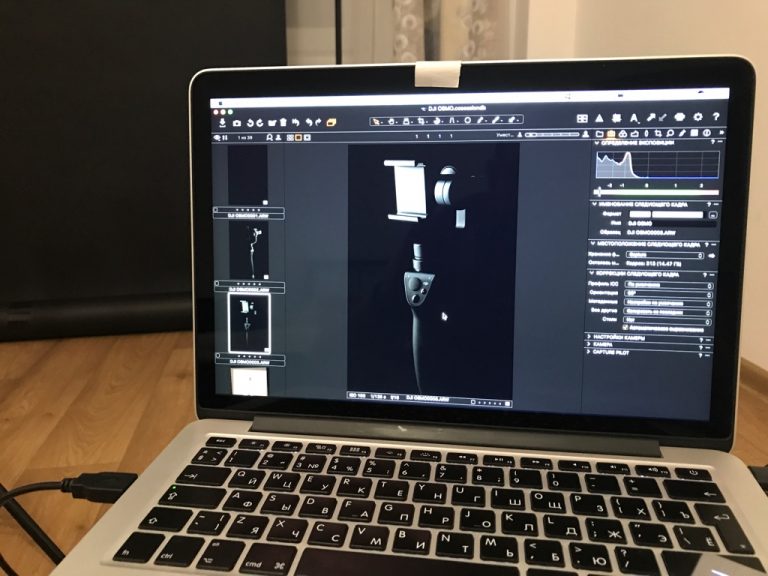
Post-prodction
First, I used command File > Scripts > Load files into Stack (choose all open files) then choose necessary layers and Edit > Auto Align Layers for the right position of all the layers. For each shot, I changed Blending Mode from Normal to Lighten and add a layer mask to hide particular areas. Also, I added Curves adjustment layer to make some additional corrections.
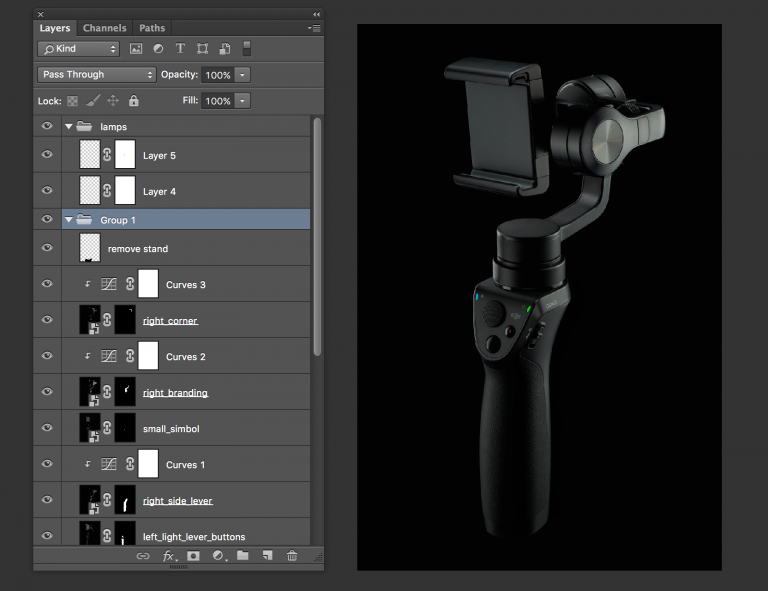
To colorize the small indicators, I used the Pen Tool for selection and paint them with provided colors: #19c012 (the green one), #0ca7d6 (the blue one) using Linear Light blending mode.


Next step – cleaning up. I used a Frequency Separation technique with a different radius from 2 px to 9 px. On the lower layer, I used a Mixer Brush tool and for the upper layer, I used Clone Stamp tool. When basic cleaning was done, I finely tuned some parts of the image with Curves layers.
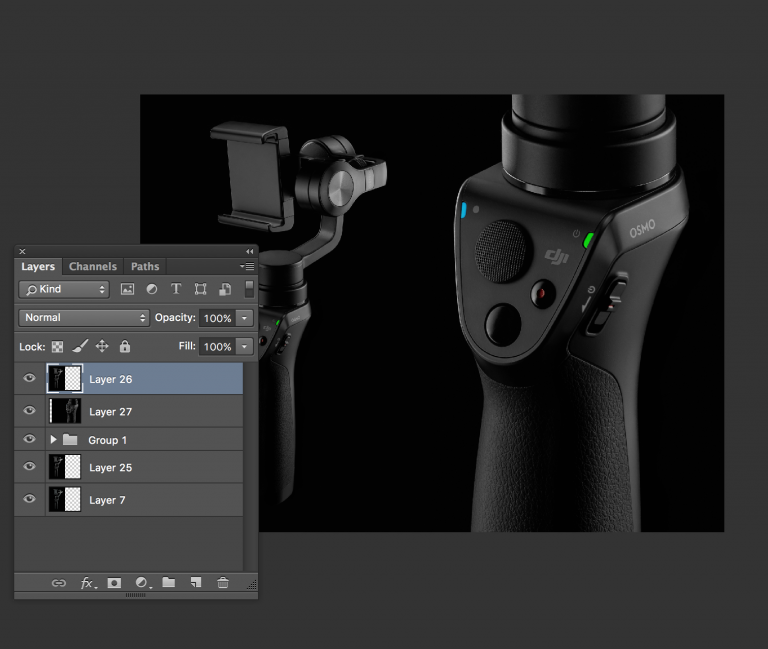
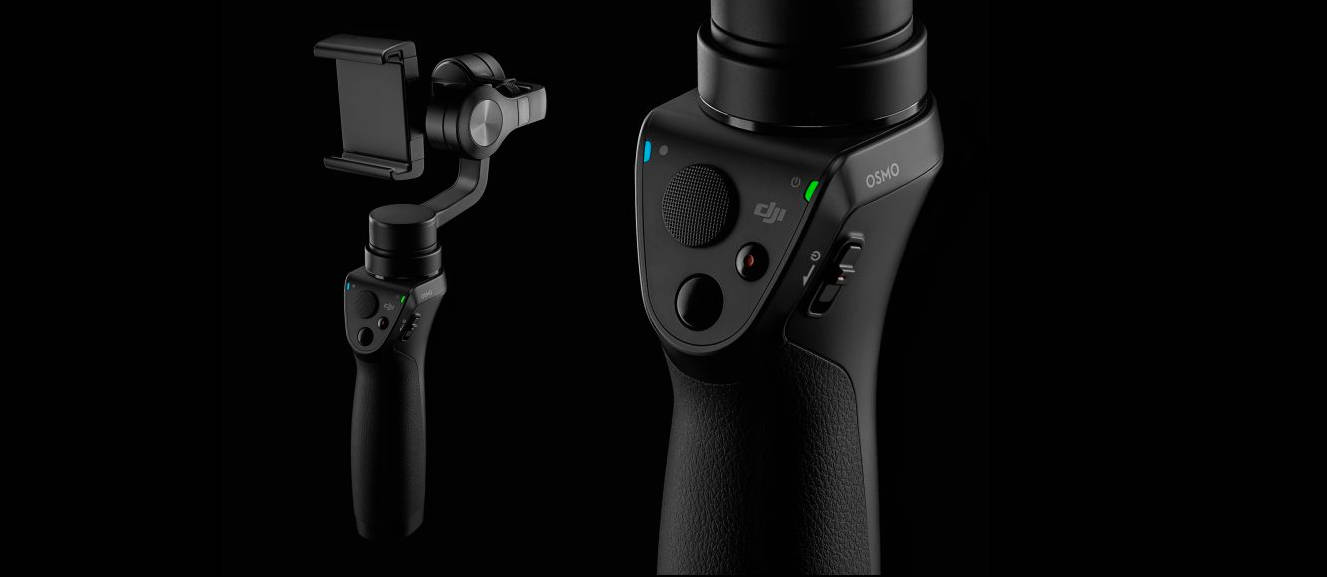
For the final composition, I copied the original image and paste at the right side. An unsharp mask was used to bring more sharpness to the image.
Connect with Alex
