Jewelry photography:
3 lighting setups for your inspiration.
A while ago we had a very extensive jewelry photoshoot for new hi-end jeweler in Atlanta, Elizabeth Dupree Lynch. Descendant of one of the oldest and best known families in America, she recently launched jewelry business. Her Fine Jewelry collection, hand crafted by Italian master jewelers, represents love, specifically – “all the love in a world one can have for another ” as she say. (To know more about Elizabeth’s jewelry please visit website: edlcollection.com).
Our studio was selected to photograph the full collection, and I’ll show you some of the photographs we got along with the lighting setups. We worked on an extremely tight schedule: I was shooting 10-12 hours every day for 3 days, with day and night post-production for 5 more days. Obviously, there was no time to do any behind the scene video or to shoot intermediate lighting setup builds. However, I’ve got some of the actual lighting setups photographed and will be glad to share them with you.
All the pieces were photographed on a white background, that was the requirement from the client, and this is how all the retouched photography was delivered. However, for the portfolio we have created more creative backgrounds for each of the selected shots.
Must say that there were all kinds of different jewelry items in Elizabeth’s collection: rings, earrings, necklaces, bracelets, broaches and pedants. I was dealing with huge 4 karat diamonds, glossy platinum, matte gold, all the variety of different types and finishes. It would be a heaven for a jewelry photographer, if not the toughest schedule I ever had :-).
I had to build so many completely different lighting setups that I’ve never had build for a single photo session.
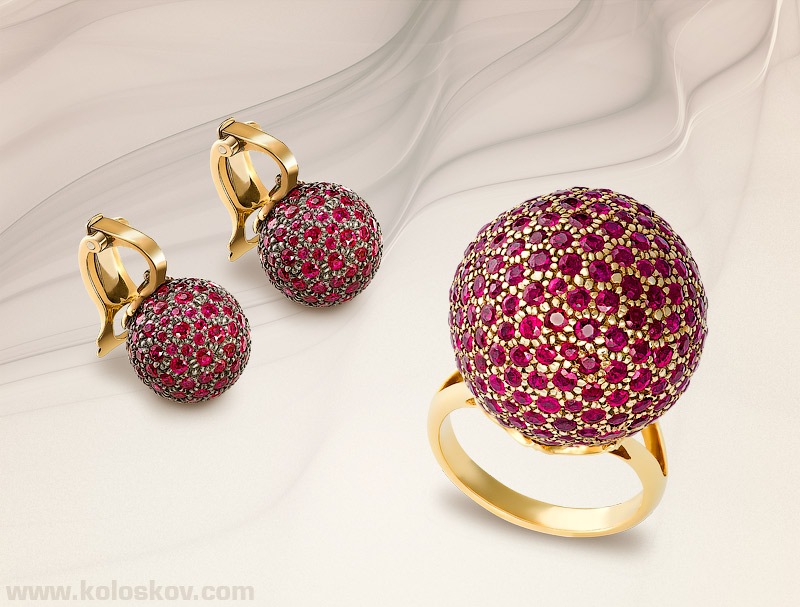
Few more masterpieces, before we’ll go technical:
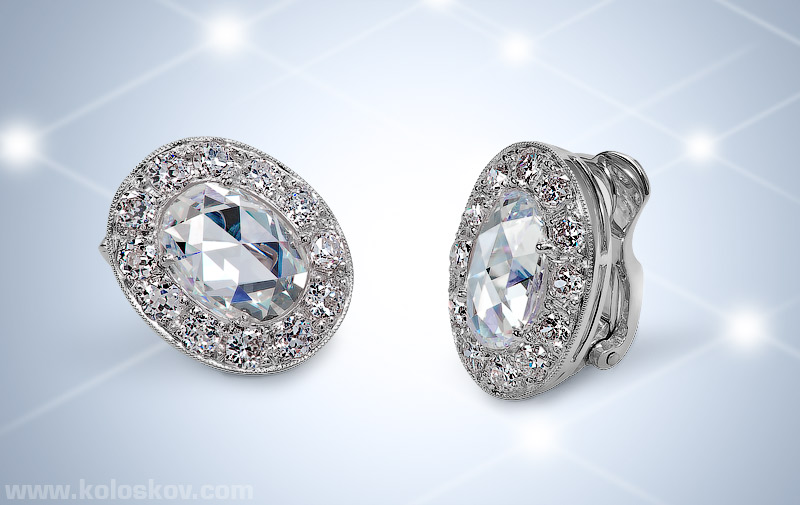
Atlanta photographer jewelry diamond earrings
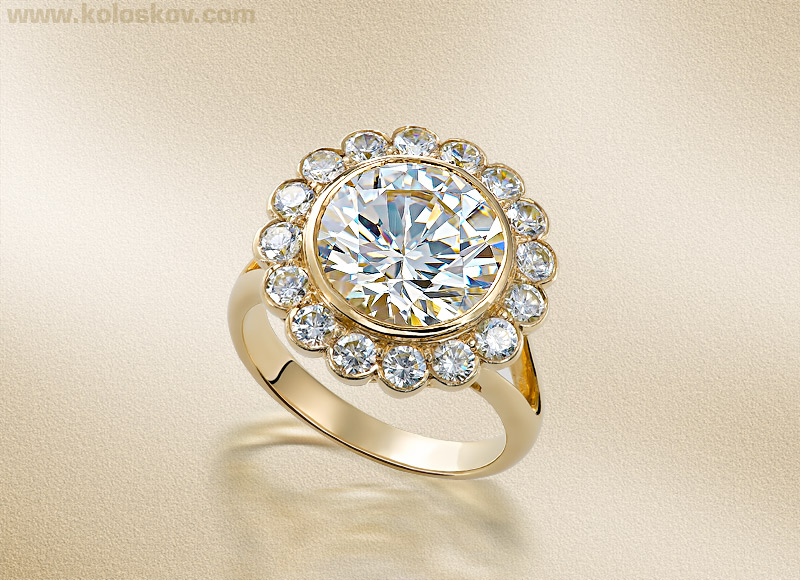
jewelry photography example: golden ring
Now I am not sure what lighting setup was exactly used for each particular shot, but at least you’ll get some of the ideas of how Plexiglas, foam-board core, paper and other materials can be used to build the lighting.
We have posted a post-production before and after images, I know you’d love to check it out:
Jewelry photography retouching: Before and After.
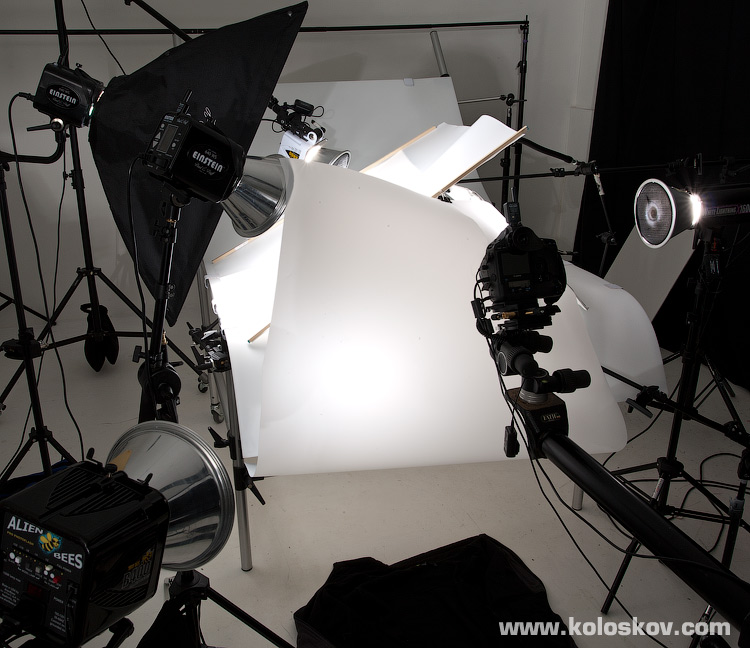
First example of the lighting for jewelry:
“A” shaped cover for the white shooting table, made from the framed thin white plastic. Below is right side of the setup:
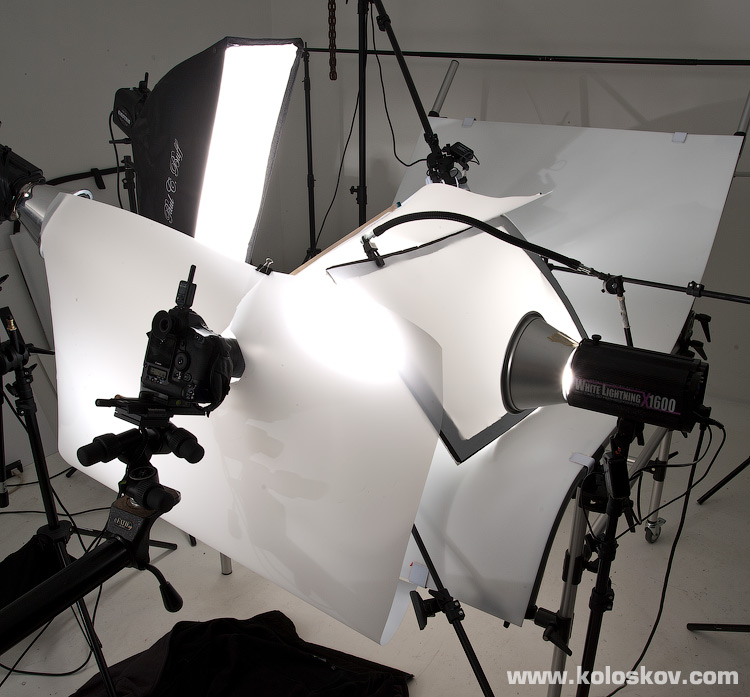
Atlanta photographer jewelry lighting setup, right view
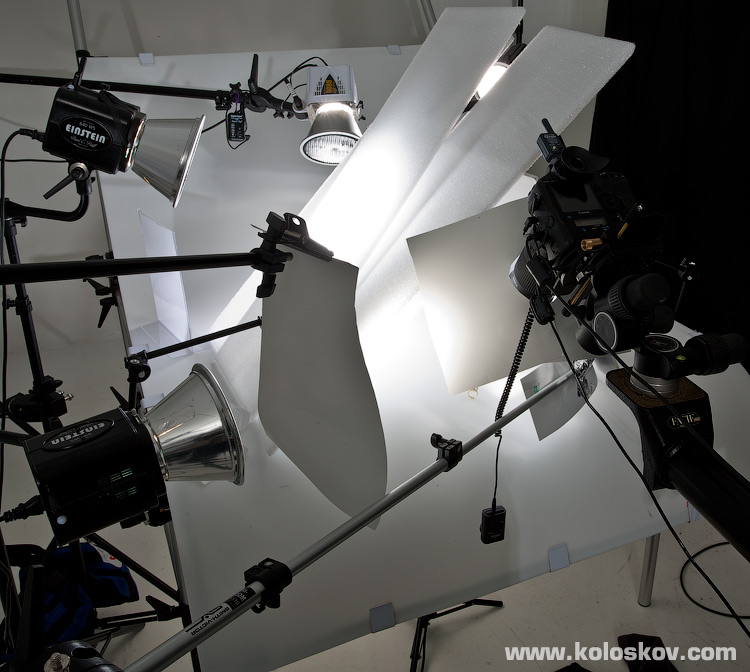
Left side of the same lighting setup:
Ideas for jewelry lighting setup: left side
As you see, I was using 4 snooted (10º-20º honeycomb grids) lights to make bright spots on the diffusers where they were needed. It was necessary for a gradient reflection on a glossy subject’s surface.
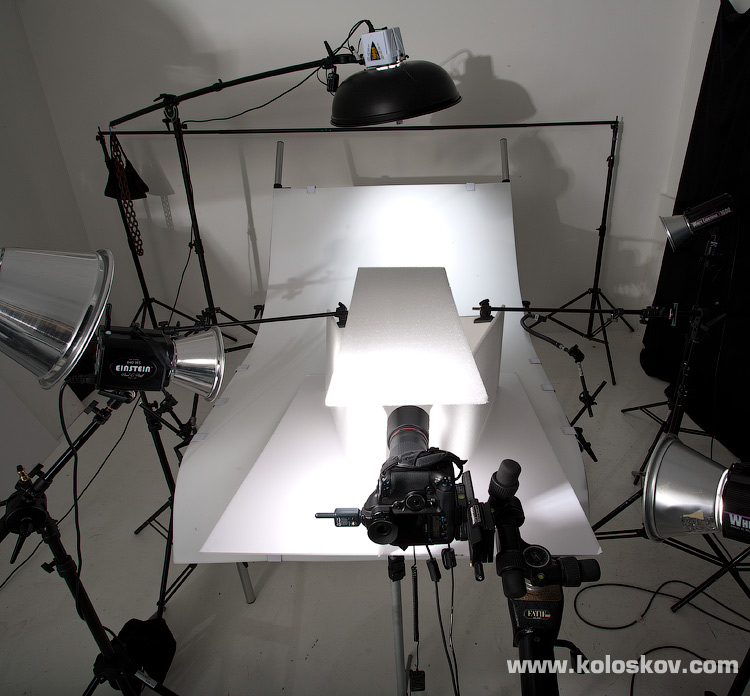
Similar idea of the jewelry lighting setup below:
Lighting for jewelry using flags and foil reflectors
Similar idea, but I’ve used foam board core to build a “roof” on top of the table. Also, note the little silver reflectors “injected” into a shooting area: silver foil was needed to ignite a sparks on the diamonds.
The lighting setup below was used for the earrings:
Yes, this is I remember for sure:-)
Jewelry photography lighting: earrings
Earrings were hanged vertically right in front of the white cardboard, placed at the end of that “tunnel”. The camera was placed directly from the front, and it was easy to create isolated spots on a long diffusers on all three sides of the “shooting box”. To make it more understandable, here is the back view:
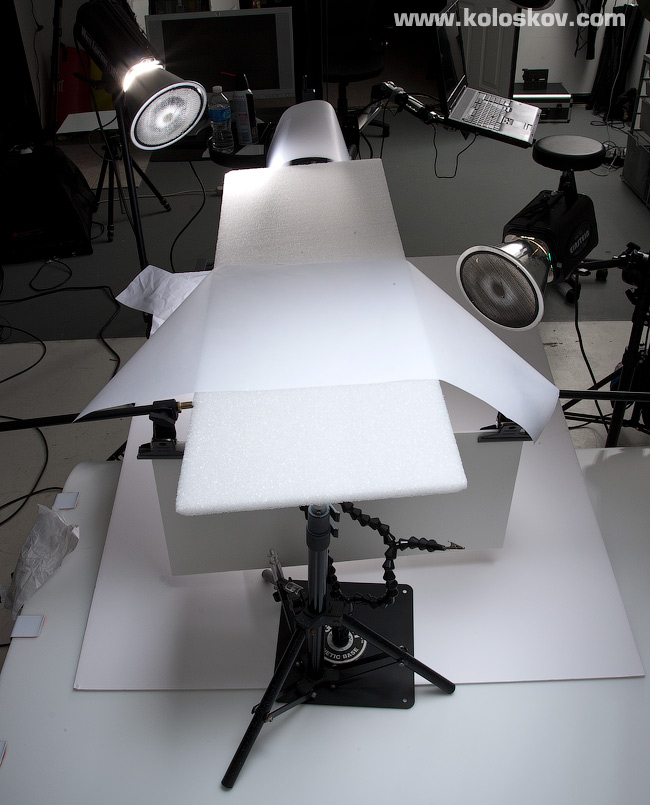
Jewelry photography how to lighting setup rear view
Piece of vertical cardboard and Delta Dual Arm was used to hold the earrings in place.
OK, hope it was inspiring enough:-) Now stop complaining that you do not have money for “pro-grade” (BTW, what is that?) light modifiers, get up and go to a nearest craft store like Hobby-Lobby or Joan’s and buy whatever you want.
One more tip I’d like to mention: From now, we would never work with non-cleaned jewelry (unless it is brand-new). If jewelry was worn, always ask client to do a professional jewelry cleaning first. You’ll save a good amount of your nerve cells and money during retouching 🙂 Also, even cleaned worn jewelry will require 3-5 times longer in post production than a brand new. Next time I’ll keep it in mind when providing the quote for a jewelry photography.
Hope it was interesting. If you like what I do, if you think that things I share can be useful for other photographers, please help me spread the word. Thank you!
 |
In the Gearbox |
|
Canon EOS 1Ds Mark III DSLR Lighting, light modifiers and accessories: Paul C. Buff Lighting: 5×640WS Delta Dual Arm Adobe Lightroom 3 and Canon EOS Utility as a remote capture solution for tethered shooting Exposure specification: shutter speed 1/250 sec, F16, ISO 100 |
