Professional photography without professional equipment:
myth and reality
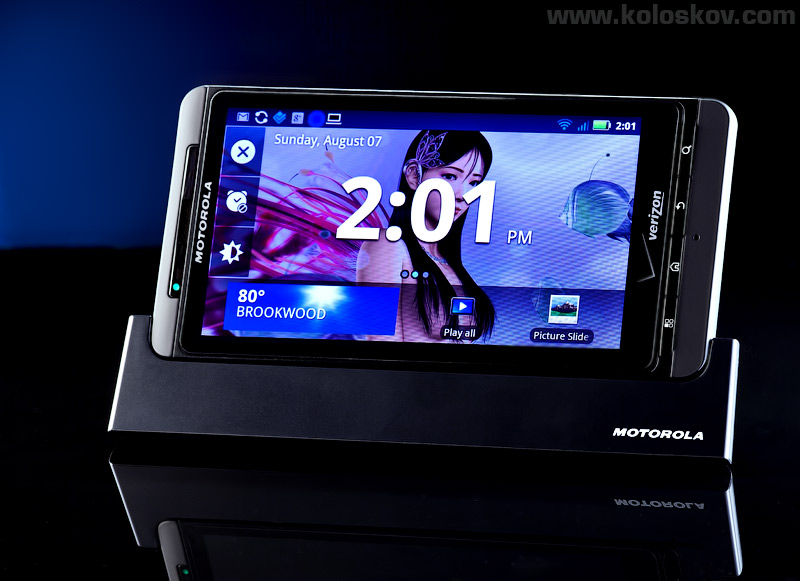
Do you remember my guest post for digital-photography-school.com? If not, here it is: How to Create an Eye-Catching Product Shot, I promised to get the same or similar photo without using any professional equipment. This weekend I spent less then hour getting it done. The result is below.
$55 lighting set result


Professional photography without professional equipment
Not bad, is it? Instead of five light sources I used only four, which is why we are missing the spot under the phone.
Here is what I paid $55 in HomeDepot and this was my studio setup for this shot.
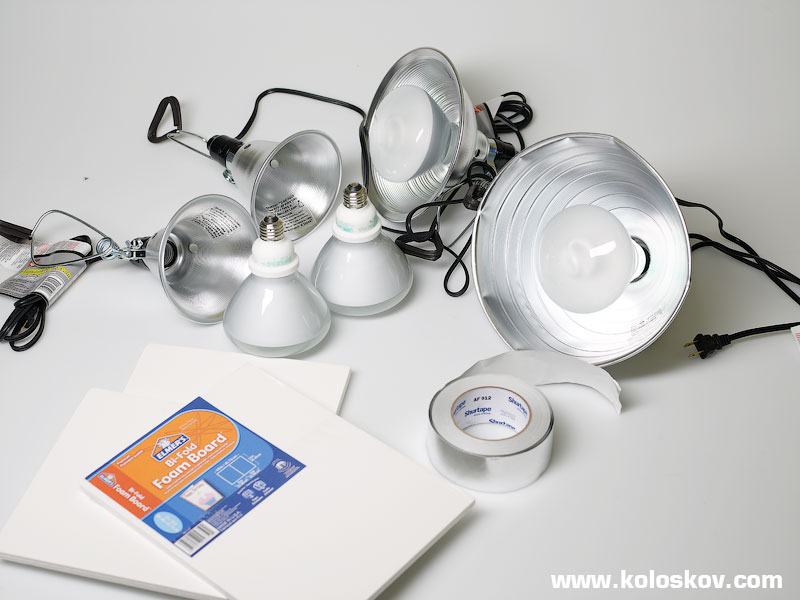
$55 lighting set
I didn’t include a few things, like a paper, office frames and the electricity bill, but you get an idea. This or similar items is what everyone already has at home.
I’ve selected fluorescent reflector bulbs, as they are much easier to work with (they are cold), but it can be any other bulbs. The only requirement for the lighting is to have the same color temperature, otherwise you won’t be able to balance them (talking about white balance of the image).
Now what is really needed to be good in tabletop photography?
The light modifiers. You may not need to use softboxes or diffusers, It can be virtually anything. I’ve used foam core board panels ($3 a piece) and transparent office picture frames, like this one:
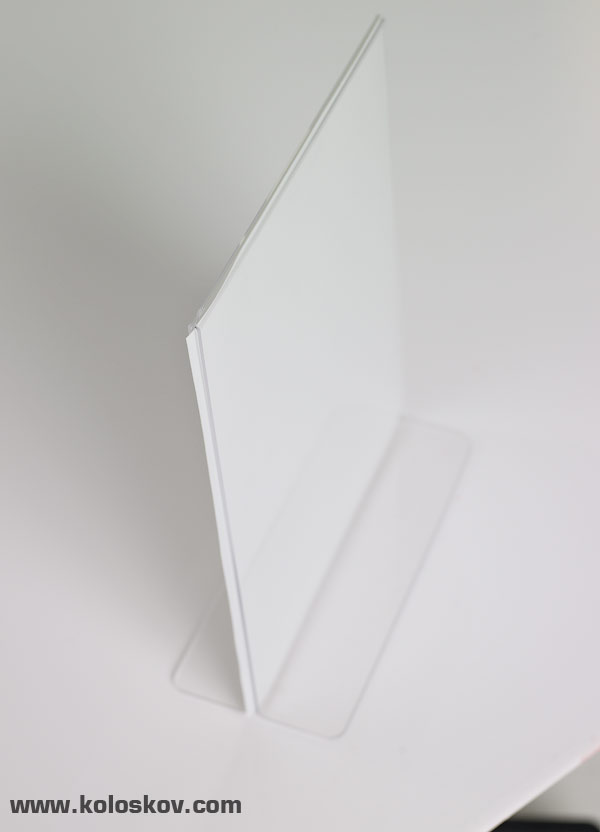
Diy mini softbox by koloskov
I’ve stuck a piece of plastic in it, but it can be white paper or gel or whatever you have a fancy for:-) For my particular set, white semi-transparent plastic is what I needed -> (Savage diffusion roll).
The lighting setup
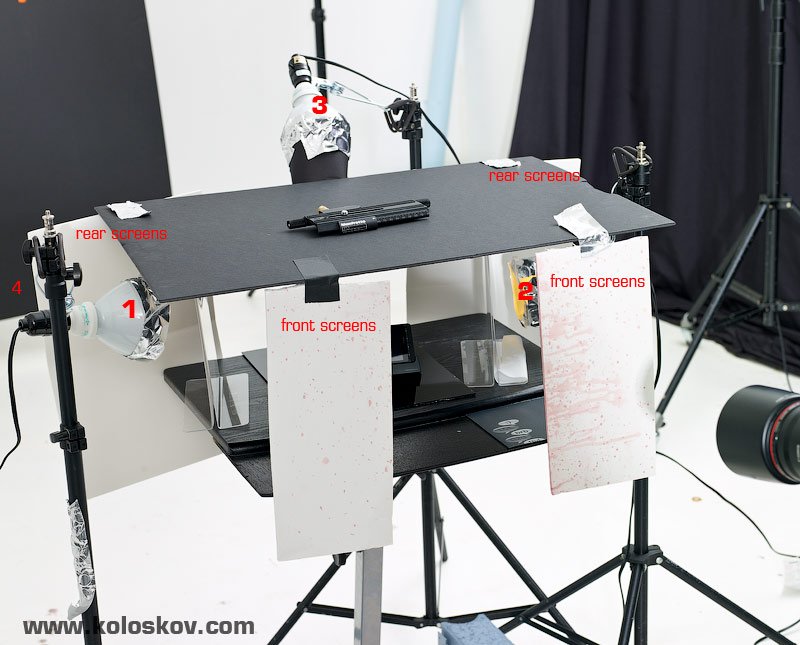
$55 dirty lighting setup for pro photographer:-)
As you see, the only real photographer’s thing was PCB light stands. I was too lazy to bring our dining chairs to the studio, but they will work with those lighting clamps maybe even better then the pro light stands. So, please don’t point at them saying that it wasn’t fair to use a piece of “real” equipment 🙂
I’ve used 4 lights:
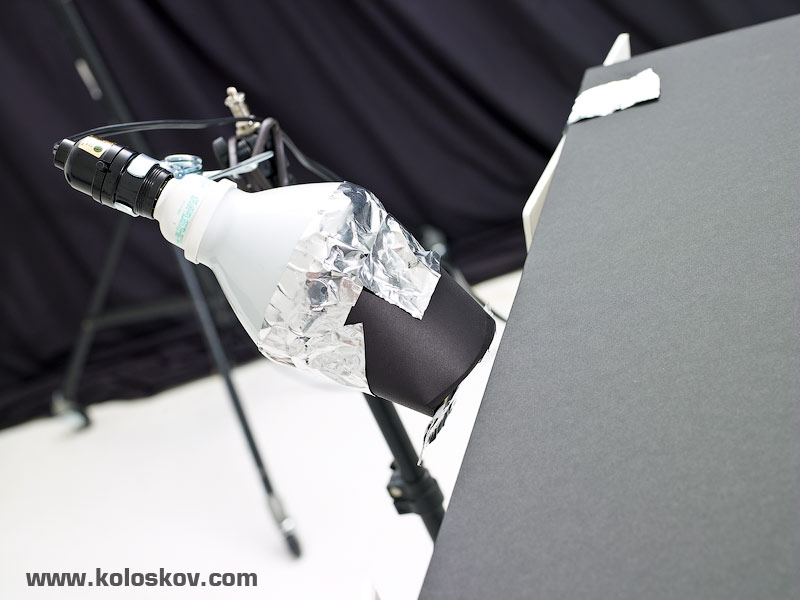
#1 and #2 from both sides, same as softboxes were placed on the original, “pro” setup (you can take a look here). Because I’ve placed my “ghetto” softboxes much closer to the subject, the effective size was the same as from much larger Elinchroms I used earlier. To limit light spill, I’ve added an edge cover around my lamps, this helped to direct light to a front.
The screens on the front was needed to prevent light from hitting the camera lens directly. Ideally I would have preferred to do a barndoor-like screens (from the same aluminum foil tape and foam core board for each of the bulbs), but my solution was the most time effective. Plus, these front screens were reflecting the light back to the subject, highlighting the front of it.
The same with the rear screens: there were preventing light spill to dark background.
The light #3 was used to highlight top edge of the phone, same as softbox#3 on the “pro” shot. I’ve made a snoot-like modifier for it from a tape and black paper.
The light #3
The light #4 was a snoot pointed to a background to create a spot on it. Two reflectors taped together and some color gel from screw-in strobe:
DIY snoot
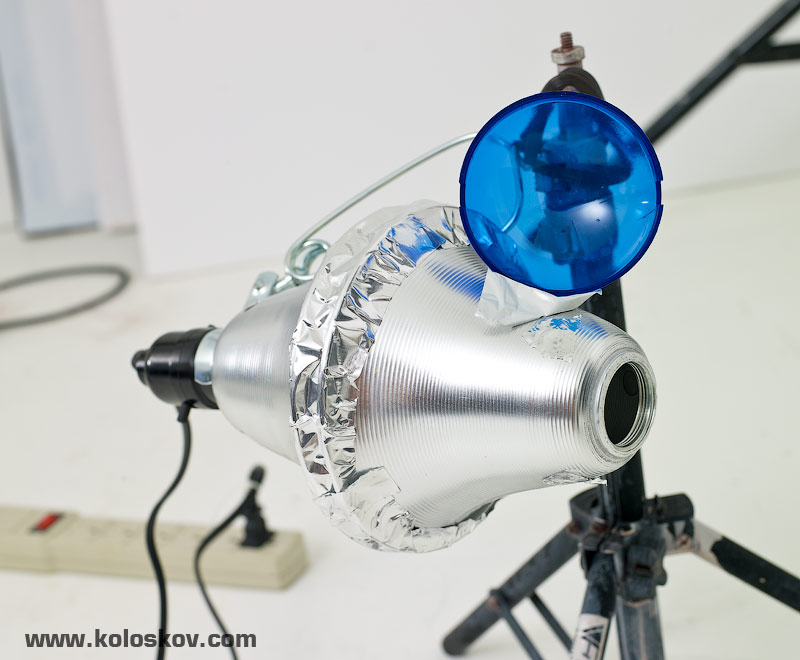
If I needed to modify a light spread from this DIY snoot, I would easily do this by adding a tube inserted in the snoot nose, made from black paper.
Side view of the lighting setup:

How I was modifying the power of each light to get the ratio needed? Easy:-) I’ve covered the front of the bulb with that aluminum foil tape. Less opening – less light, and the opposite.
I purposely used the dirtiest pieces of cardboard I have. I used the cheapest $20 computer table as a shooting table solution. I only spent about 40 minutes to build the modifiers and the lighting setup. It was probably the most unprofessional approach to the tabletop photography I could squeeze out from myself. I did it so that i could show aspiring photographer’s that
It’s not the thousands dollar equipment which makes the image. It is a photographer behind the shot.
Nothing new, we hear it all the time, right? But when I read, under almost every post “I wish I could have that gear, and I would be able to shoot like this.”
It’s not the gear, it’s you. You’re not thinking out of the box and you who’s not wanting to spend time playing with the lights and stuff you already have. It’s fine if you spend every evening watching TV or playing your favorite computer games, but at least don’t lie to yourself saying that you can’t get the shot because you don’t have money or time to invest in your photography.
You do not need time. You need to decide.(C)~Seth Godin
Please don’t get offended. I am not trying to offend you, my friend. I write this in hope to “ignite” those of you who were waiting for this… Sometimes a small “push” is what you need:-)
If you’re wondering how much post-production was involved? Little bit more than the one done with $2000 lighting, but not by much. Below is as-is image of the phone. The second exposure one was used to capture phone’s screen: it was too bright for the exposure/lighting I had.
AS-is from camera RAW:
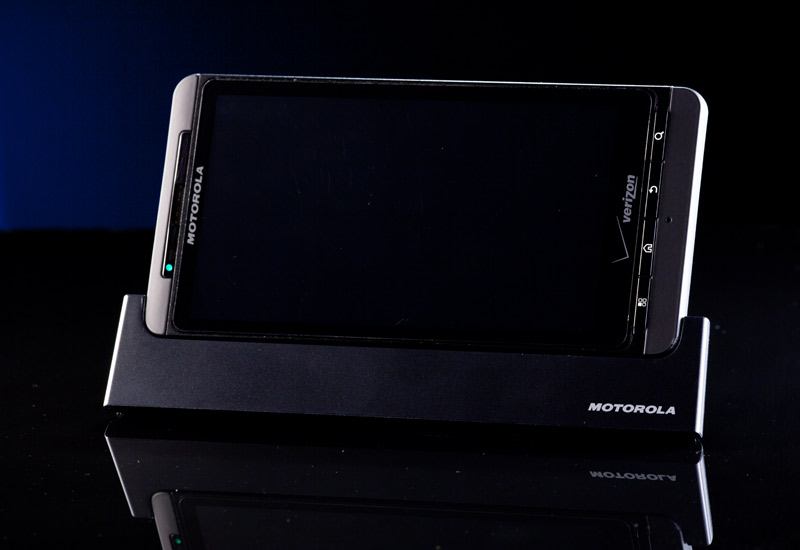
As-is phone, done with $55 lighting and no pro gear
And again, this is the final one:

Professional photography without professional equipment
A few words about disadvantages of working with these lights: You need a very long exposure (2-5 seconds), meaning only still life can be captured. Mirror lockup and a steady tripod are good things for these shots as well.
I used a grey card to get correct white balance, as it’s hard to guess the color temperature of fluorescent lights. It will never match the bulb specification.