Sigma sd Quattro Camera Review
The SD returns.
With all the buzz over at Photokina and many new photography items coming out I wanted to take a little time to write about something a little different, something a lot of people might have missed but something I feel could be good for many photographers and is currently unmatched for price to IQ ratio if you can use the camera where it shines.
What is it?
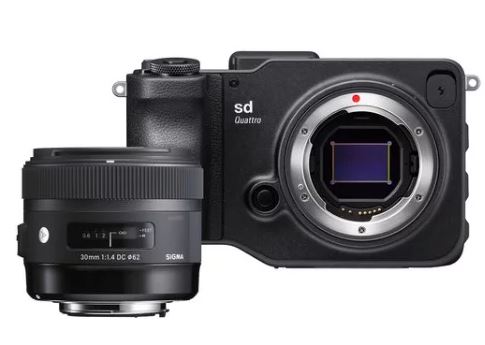
Sigma’s sdQ is the latest update to their interchangeable lens camera and while their SD1 was a typical DSLR design they released around five years ago they have changed to a mirror-less body with electronic viewfinder for this version.
Unlike other mirror-less cameras (except the Pentax k-01) this camera is designed around using Sigmas DSLR global vision lens and as such keeps the original SA mount and a similar size overall to the older SD1.
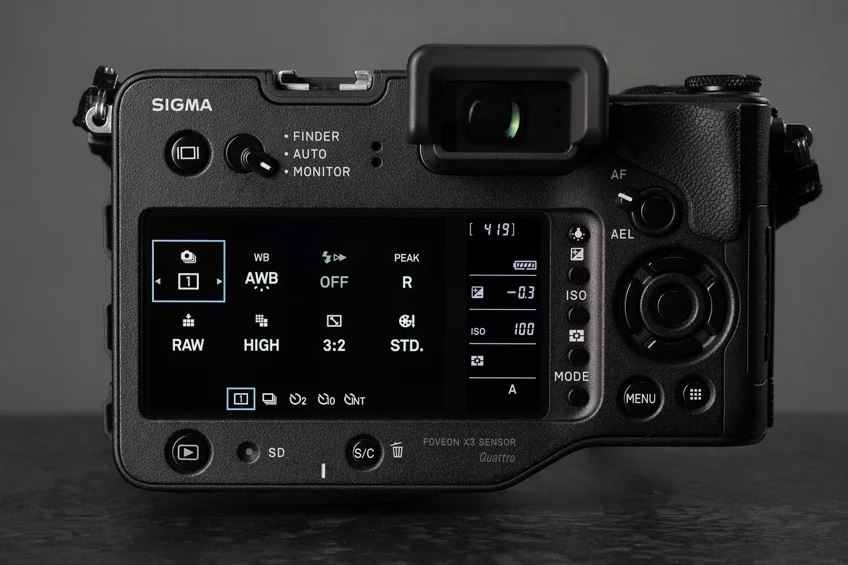
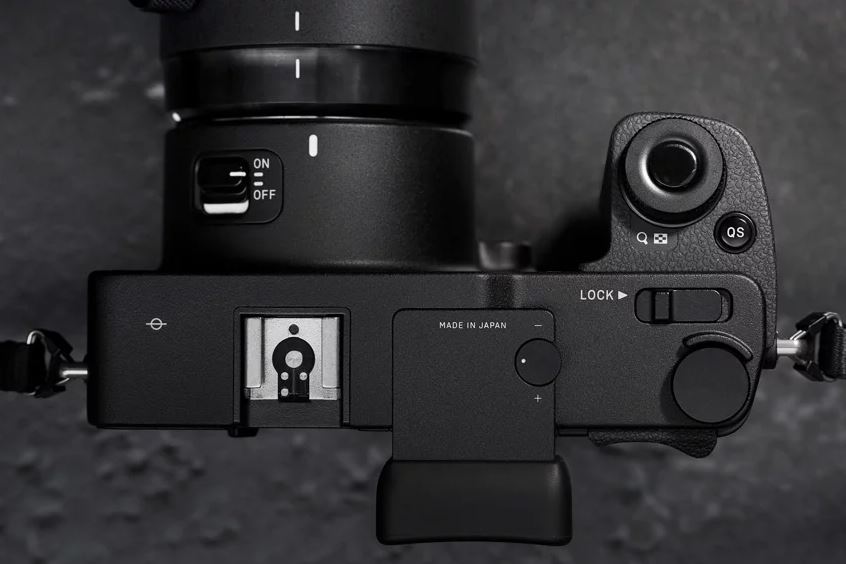
The sd Quattro has a dust/splash proof magnesium alloy body with two control wheels, dual LCD screen on the rear with a row of buttons which corresponds to the settings on the second LCD and user removable IR filter (as on other Sigma DSLRS).
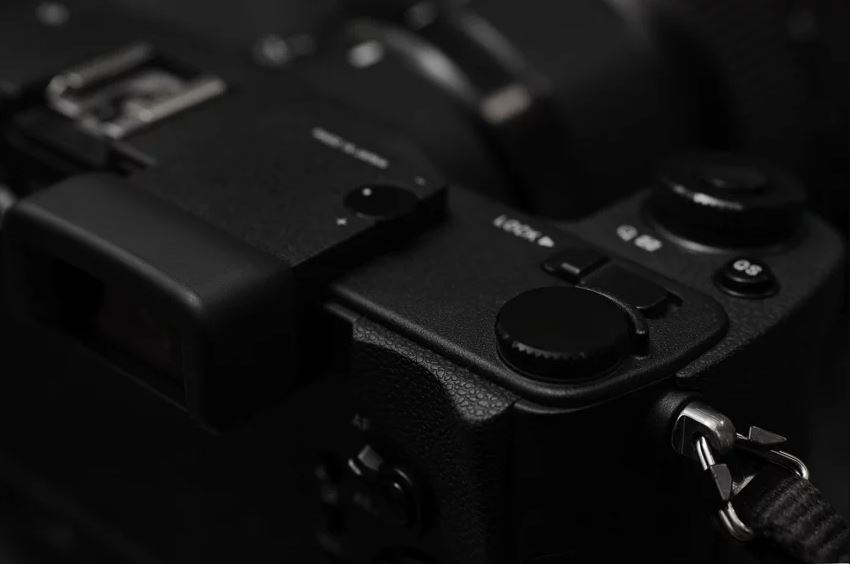
The camera feels like what you would expect from a high end product and much better than the price suggests, the unique hand-grip add’s a lot of comfort for many hand sizes and the button layout is well thought out, it even has a dedicated switch for the EVF/LCD control and a locking switch which can be customized but it does take a little getting used to the power switch being on the lens mount.
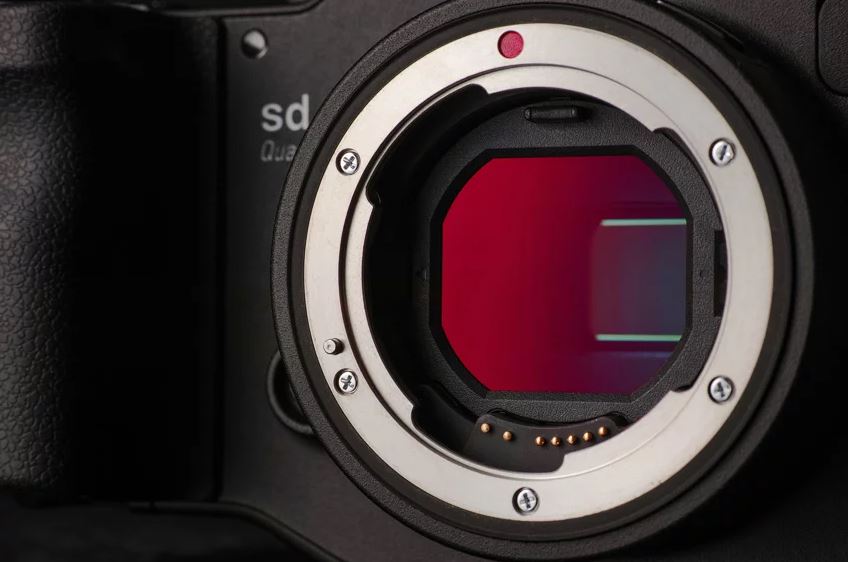
But enough about the body, the main thing and the reason you will be buying this camera is the sensor.
Foveon?
I have already written about both the Merrill (here) and Quattro (here) but for a quick recap the Foveon chips unlike Bayer chips capture color in three layers using the silicone itself to filter the light and while the new Quattro chip does away with the true X3 design (in which each layer has the same amount of pixels) found in the older Foveon sensors, it still offers the ability to capture far more color detail than a Bayer/X-Trans which uses a single layer (monochrome) sensor with a color filter.
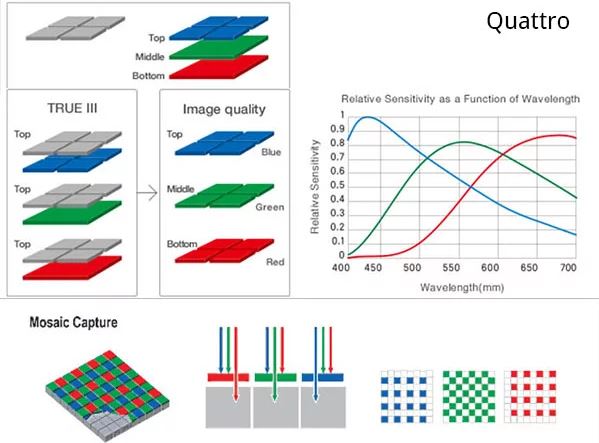
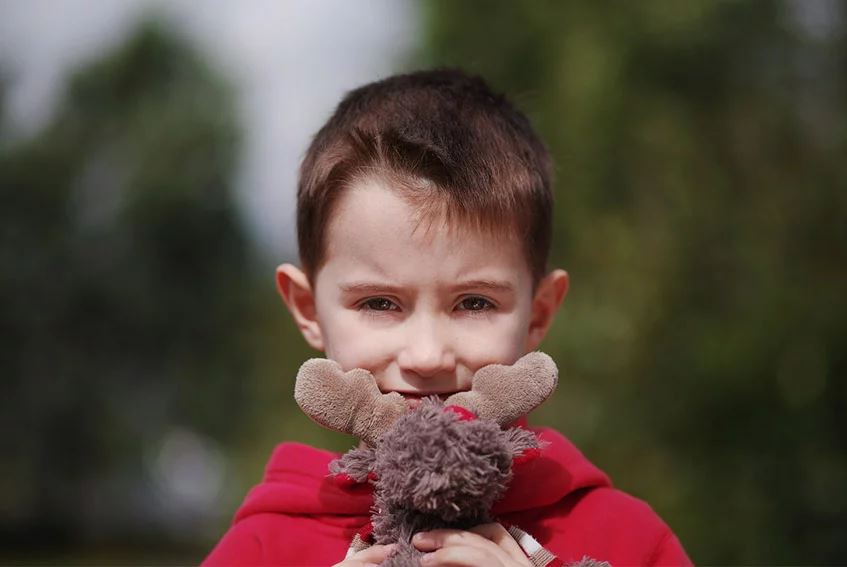
I personally feel this leads to a more realistic rendering especially in color as the sensor is able to change luminescence and color values of pixels much faster than a Bayer sensor and there is no mosaic algorithm guessing lots of missing color info, skin for example has more hues/tones throughout and the sensor is able to resolve fine details such as hairs down to the pixel level.
Take this quick shot of my son with 100% crop as an example.
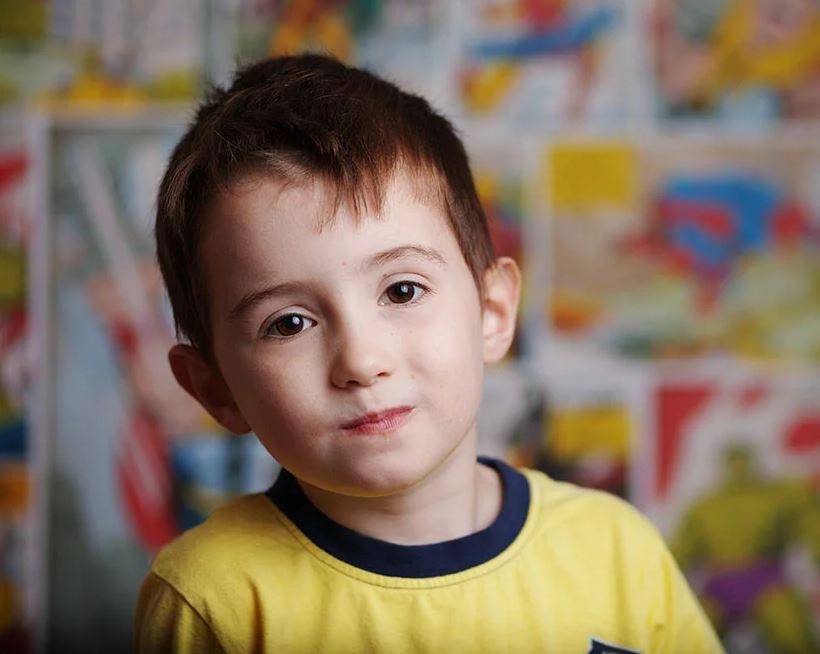
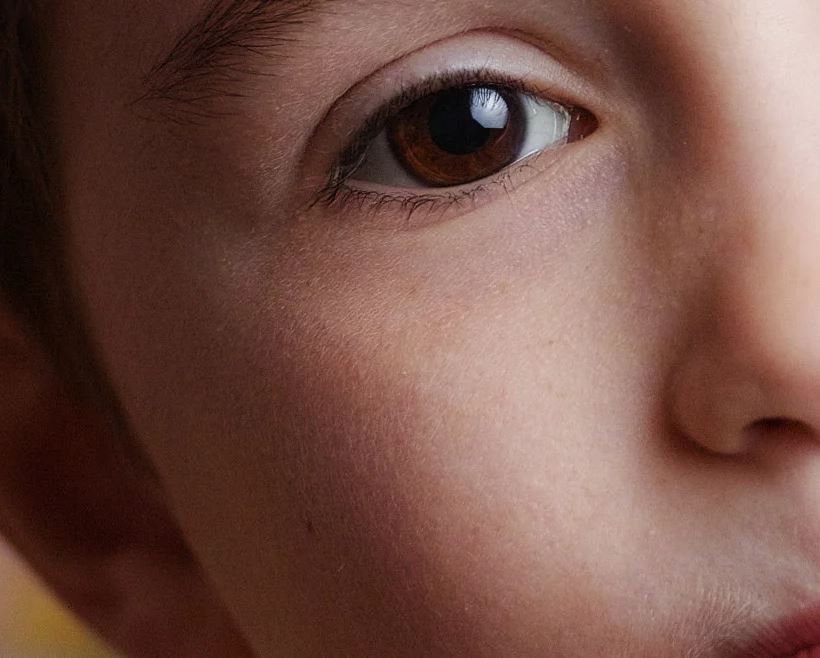
Taken with the sd Quattro with Sigma 50-100mm f1.8 Art at 88mm f2.0.
Here is a quick 100% crop demonstration of the Foveon and Bayer captures from the previous article, notice how the Foven chips have more hue/color changes throughout the image? *note the Bayer image was sharpened a lot here.
All of this extra detail and color info comes at a cost though, as the light has to pass through the silicone the lower layers get less light which in return means less dynamic range compared to modern Sony sensors and more noise. While this camera is amazing at ISO 100-200 as you go above ISO 400 especially in poor lighting the benefit of the Foveon sensor starts to fade quickly (except possibly in Monochrome) as images start to lose saturation and noise/color blotching starts to appear.
But as a studio photographer or when on location with strobes I’m mostly always at my base ISO and this is where this camera truly shines and what I will be focusing on for the rest of this article but first let’s talk about another great studio feature.
Tethering
Although cameras have had this ability for many years (like my Sony a7ii) for me this is a relatively new feature and one I am finding invaluable when shooting in the studio.
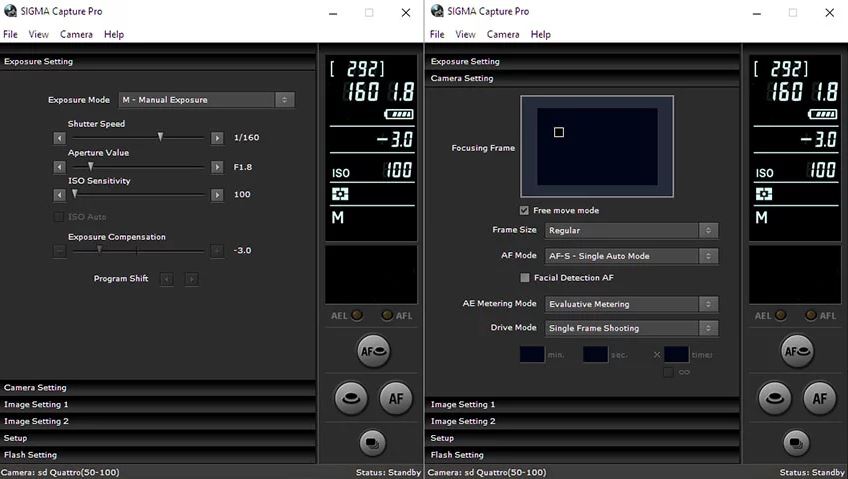
With the addition to USB3 and HDMI connections to the sd Quattro along with free Sigma’s Capture Pro software it is possible to setup and control the camera using a PC/Mac with a second screen to display the live-view in real time as this BTS image taken with my phone shows.
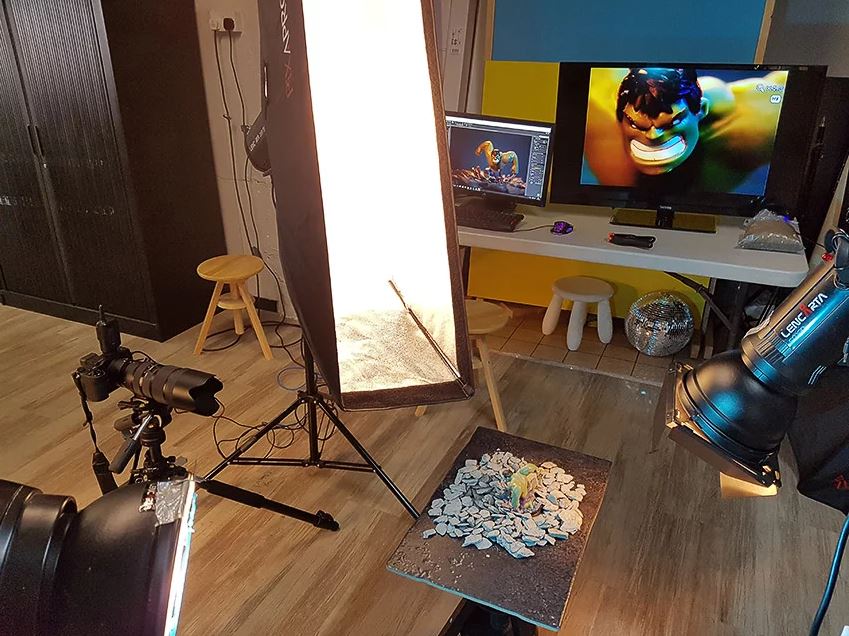
Sigma Capture Pro allows control of almost all settings of the camera, even the ability to adjust the focus in free-move mode by dragging the square focus point around with the mouse and while you do need a second display via HDMI to see the live-view feed the system works really well.
You can also save the raw files directly to the PC/Mac (and/or SD card) and automatically open them in Sigma Photo Pro with around an 8-10 second delay giving you the ability to view your images on larger, higher detailed screen than that on the camera itself which is handy when doing detail work to make sure everything is fine before moving on.
The main draw back I can see so far with shooting tethered is that the camera is a little power hungry so extra battery or the optional AC adapter (SAC-7) would be good, that and the ability to shoot in the camera’s new SFD (Super Fine Detail) mode isn’t available while tethered but I suspect that will come with future updates.
Image Quality
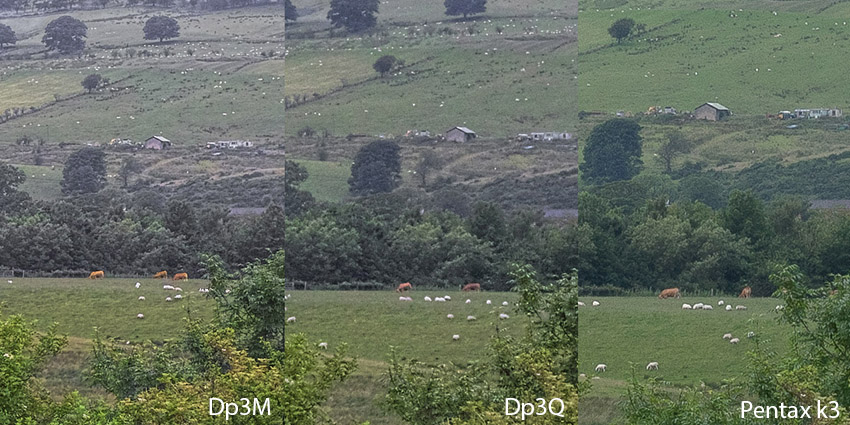
To try and demonstrate the image quality of the Foveon chip and how it renders compared to Bayer cameras I set up a little test scene and took the same shot with the Sigma sdQ, Pentax k3 and Sony A7ii but since the Pentax and Sony images where almost identical in color/detail I’ve used the Sony body in the examples and can only apologize for them not being aligned perfectly.
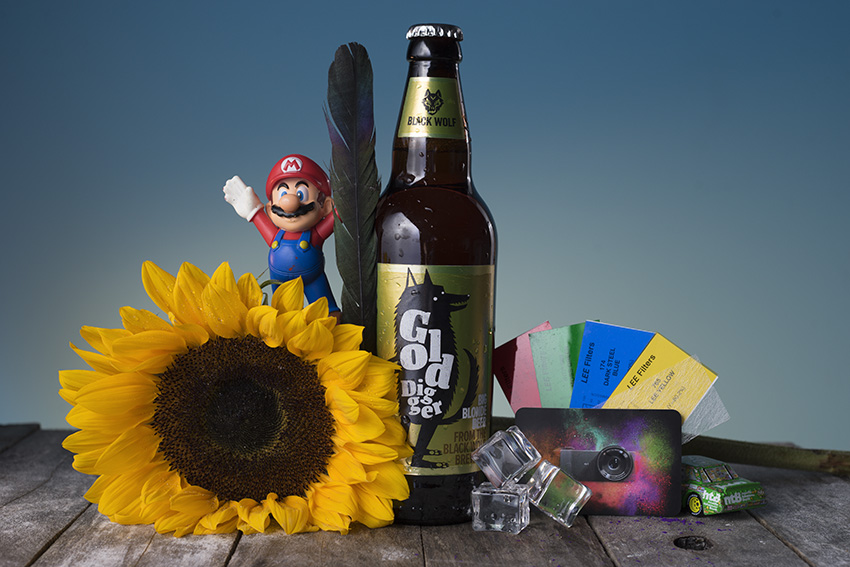
It’s quite a difference in rendering between both shots and you would think I had used different settings or lighting setups but both shots where light by the same strobes at the same power, both camera’s where set to the same settings (iso100, f8, 1/160, Daylight WB) and the Sony shot looked almost identical to the Pentax (through Adobe camera raw) shot so its all down to how the different chips render and raw developers.
The Sigma shot has much more color/life I feel over the Sony, the sunflower instead of being almost one shade of yellow has lovely tones of orange going through the darker area’s which is closer to how it appeared in real life. Over all I find the Foveon rendering the more pleasing of the two but lets get on to some crops/details.
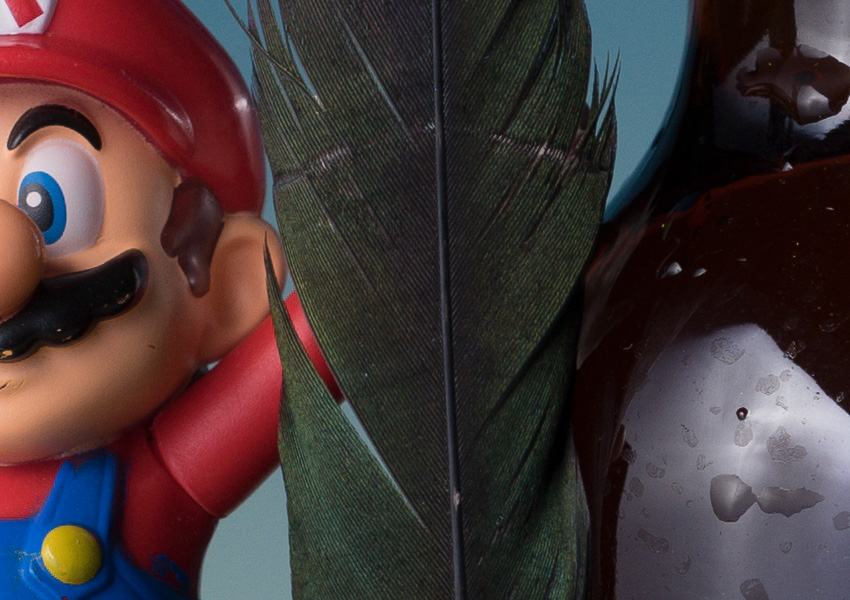
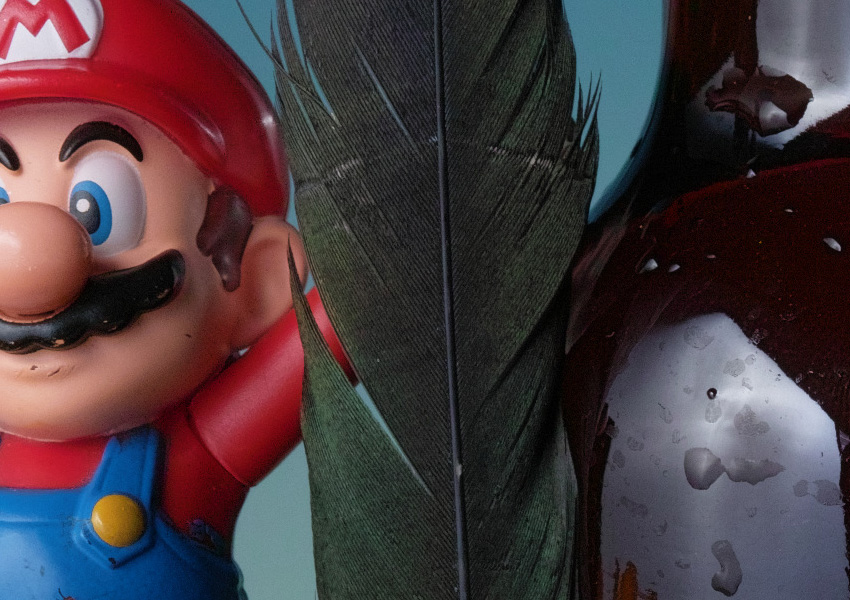
Considering the sdQ is an APS-C chip with close to 5 less MP than the Sony its doing pretty well here, looking closely at some parts of the feather I can see it pulling out more detail, a better test would have been some detailed fabric so I’ll have to work on a better test in the future.
Let’s check out another part of the image.
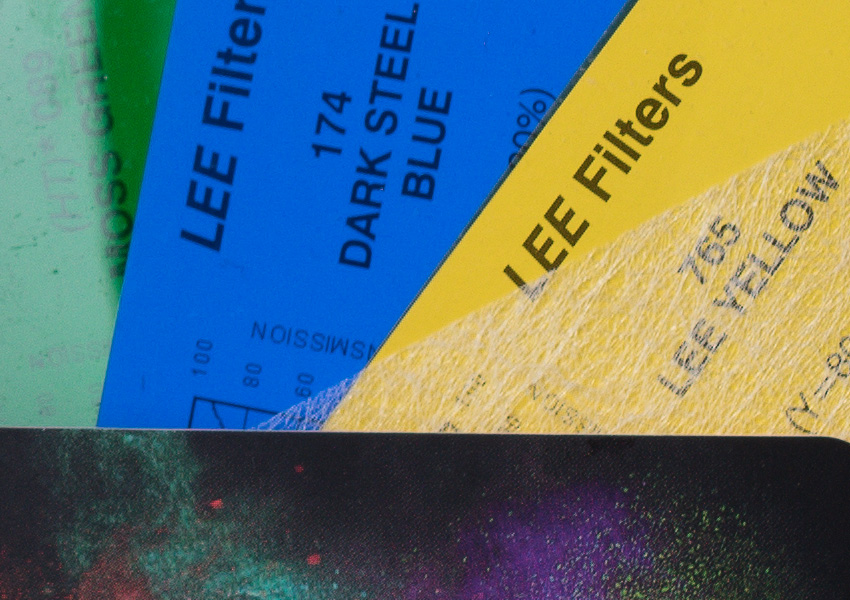
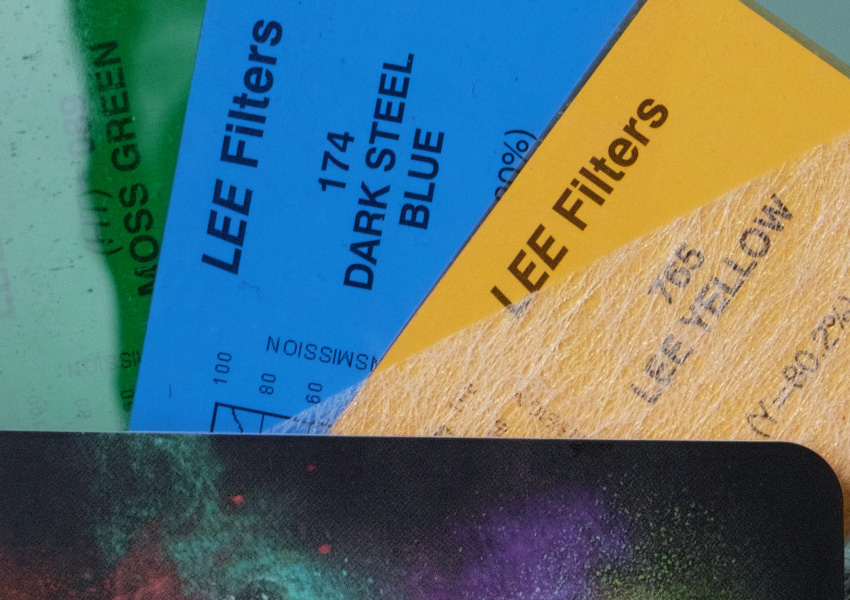
This is an odd part to look at, at first I felt the Sony crop didn’t have enough depth of field as parts where falling out of focus but if you look at the text in the yellow part and the dots on the business card print you can see that it is in focus but the white material which is between them looks soft as well as the text in the blue green gels.
I can only contribute this to the Bayer sensor and the demosaicing process, since the 24mp Sony chip has 12mp green 6mp red/blue and looks like its unable to render all things with the same sort of detail/accuracy while the Foveon chip shows a uniform sharpness across all the gels and textures in this crop.
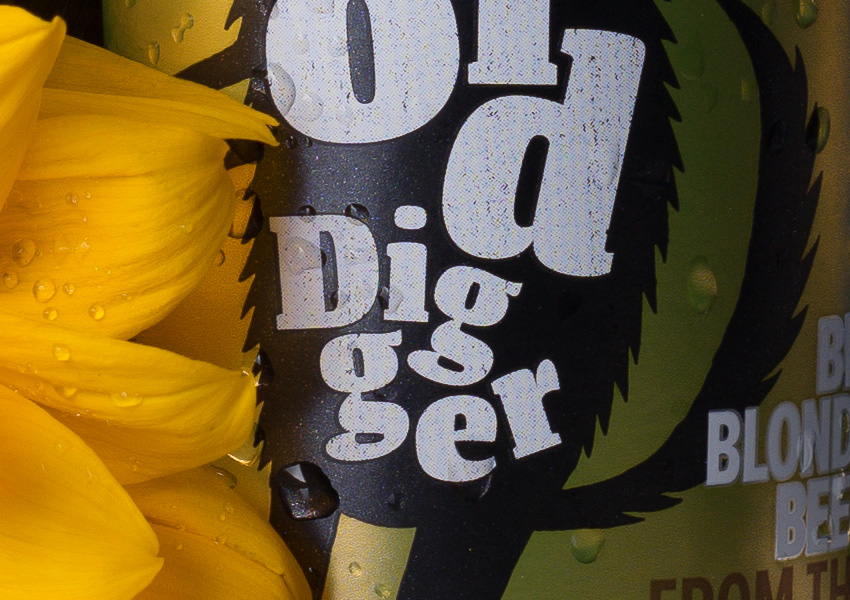
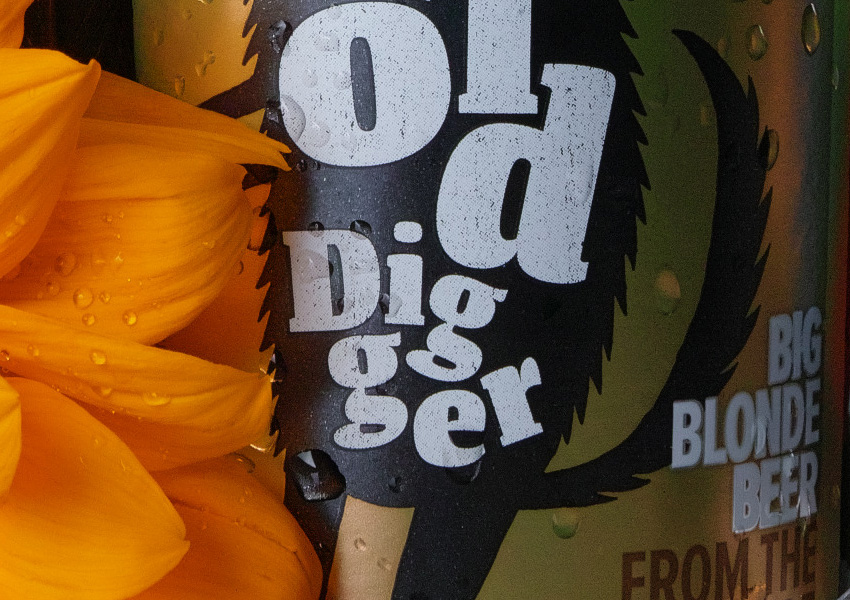
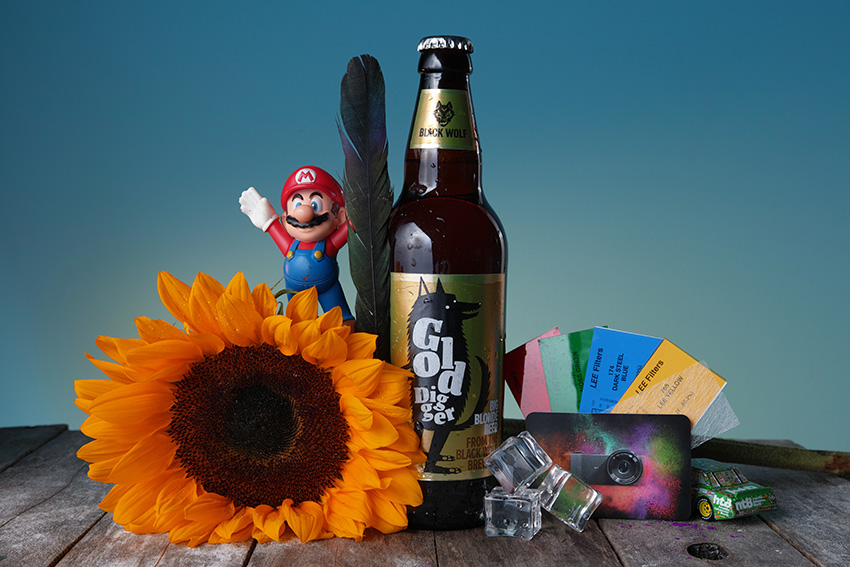
The last crop that I feel is worth looking at and one in which you can really see the difference in color rendering between both systems again mostly with the sunflower but it also shows up another issue we have to deal with at this which is moire.
All sensors can be affected by this as it happens when detail in a scene is higher than the chip can make out, but the Foveon chip doesn’t suffer from false colors moire like Bayer sensors do and you can see this in the beer label when looking at the Sony image even though the a7ii has an anti aliasing filter designed to reduced this effect.
Update: it is possible to change how colors are rendered with the Sigma using different color modes, the images above where shot with “standard” but this one has been set to natural and the sun flower is now similar in color the Bayer shots but with still more hues/shades through out and could be a better place to start for studio work.

Super Fine Detail.
This is a new mode introduced by Sigma into the sd Quattro in which the camera will take seven exposures to create a 350meg (or there about) XFI raw image with much higher dynamic range and lower noise to reveal all the detail the sensor is capable of producing. Shooting in this mode gives you a very flat raw file to work with similar to an S-Log profile for video grading.
Being that its stacking multiple exposures this doesn’t work with strobes as the camera uses the shutter to change exposure and movement will cause artifacts but in the right situations the rendering from this mode is stunning.
Here’s what the SFD raw looks like next to a standard raw file.
And here is a crop of both.
Dynamic Range
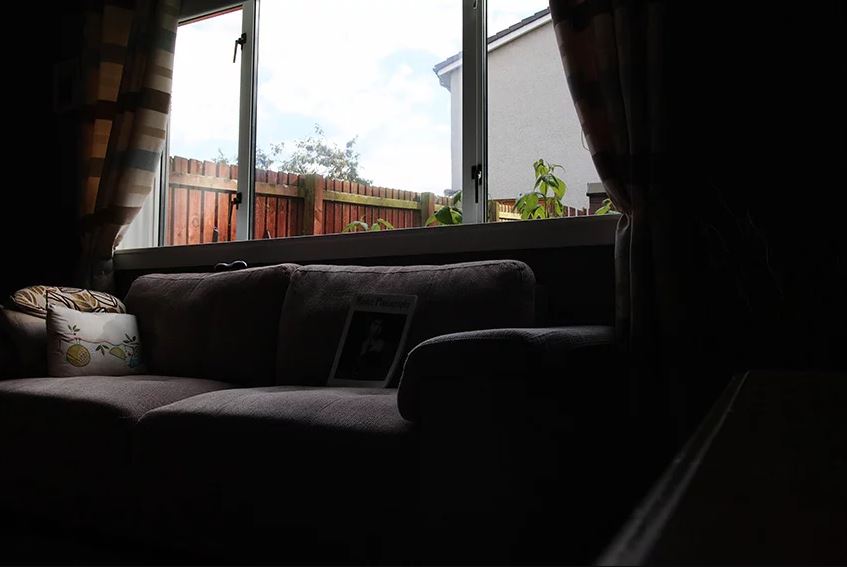
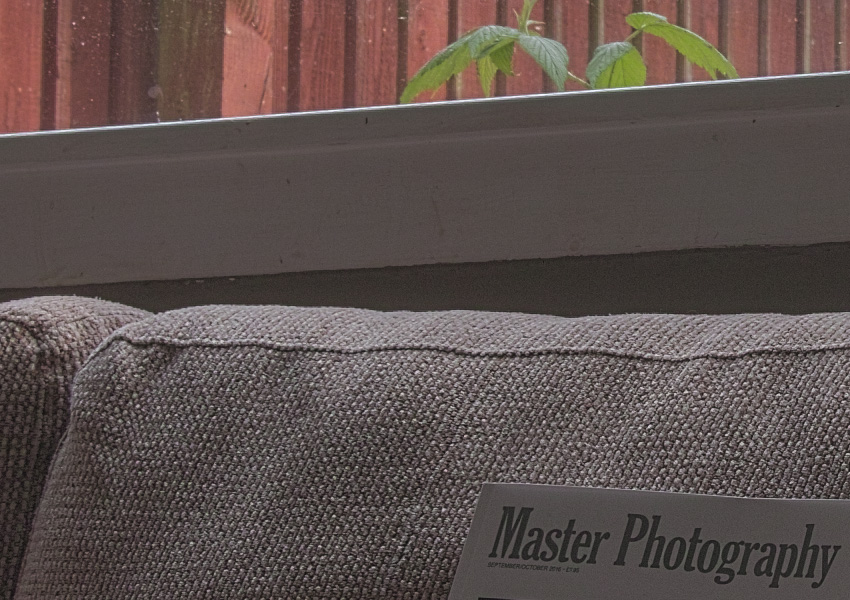
To really test the dynamic range benefit of the SFD mode I decided to try a shot in my living room shooting out the window but also keeping in the sofa and dark walls that were not getting much light at all.
Here’s what it looks like direct from raw to jpg using the Sigma 18-35mm f1.8 at 18mm f10 without any tweaks and as you can see its quite a testing scene.
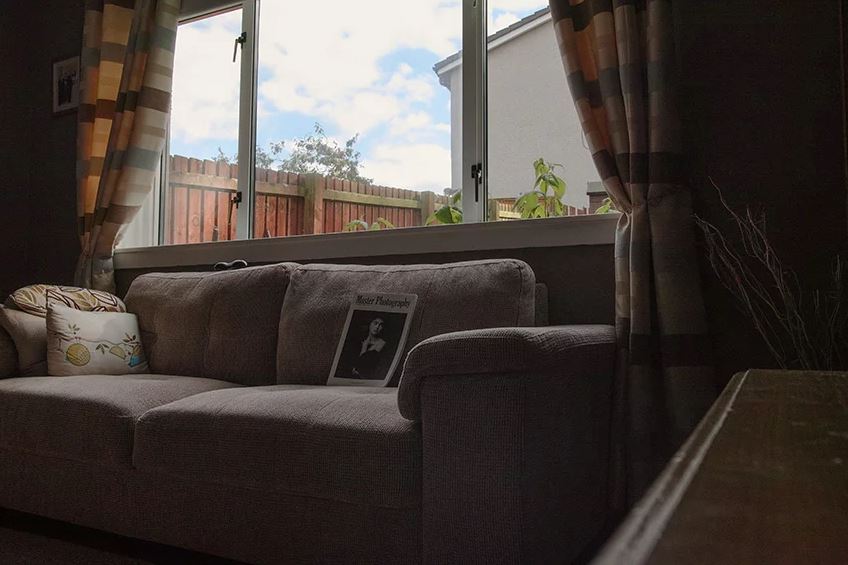
Next up I tried to push the dynamic range of the camera but I had lost some highlights and pushing the shadows so hard was giving me some noise and color blotching.
Next up use the SFD mode and the camera took its seven frames, I tweaked this in Sigma Photo Pro and then saved into a 16bit tiff to edit in Photoshop to push the file even more.
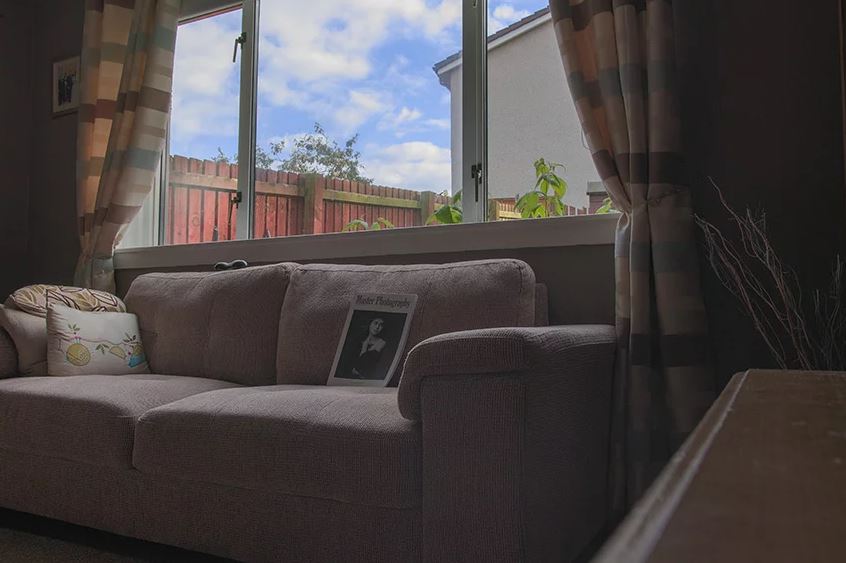
I was rather impressed with the amount of play I had in the SFD image and I could have pushed the highlights and shadows more than this, To me the rendering is looks natural and not like HDR and with the right lens this could be a great tool for interior design photographers and landscape photographers alike although movement can introduce artifacts into the image.
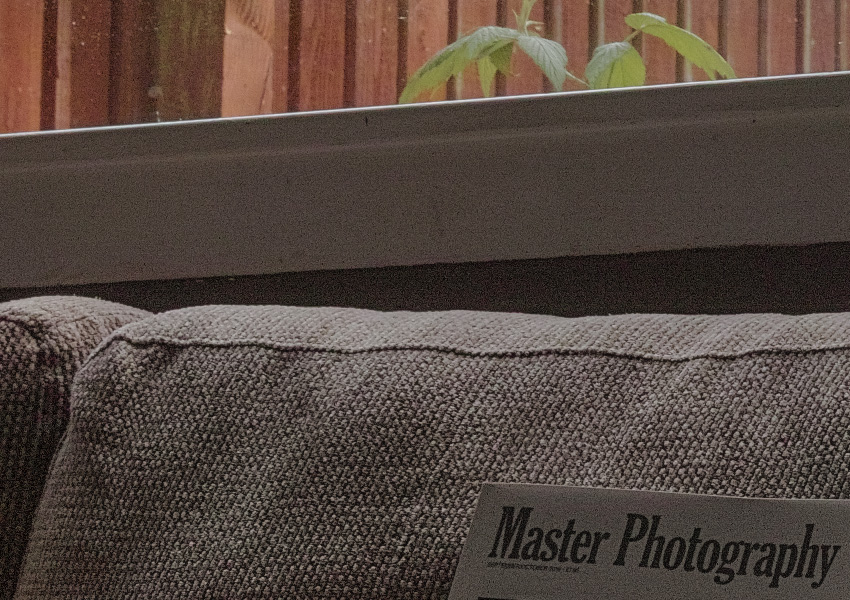
Here’s a crop from both the pushed single shot raw and pushed SFD raw to see the noise/detail from each mode.
Hands-on with Sigma SD Quattro camera.
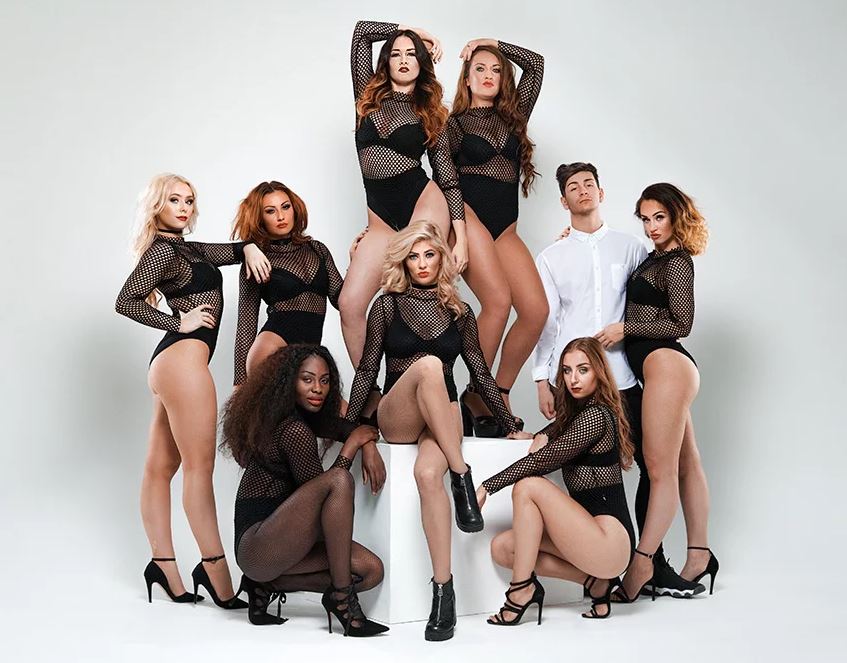
I’ve had the pleasure of using the sdQ for several shoots now, my first working with a new company called Pink Acid based in Glasgow who needed some promo shots and although I had barely used the camera at this point I was pretty comfortable bringing it along.
Here is one of the group shots, taken with the sdQ and 18-35mm Art.
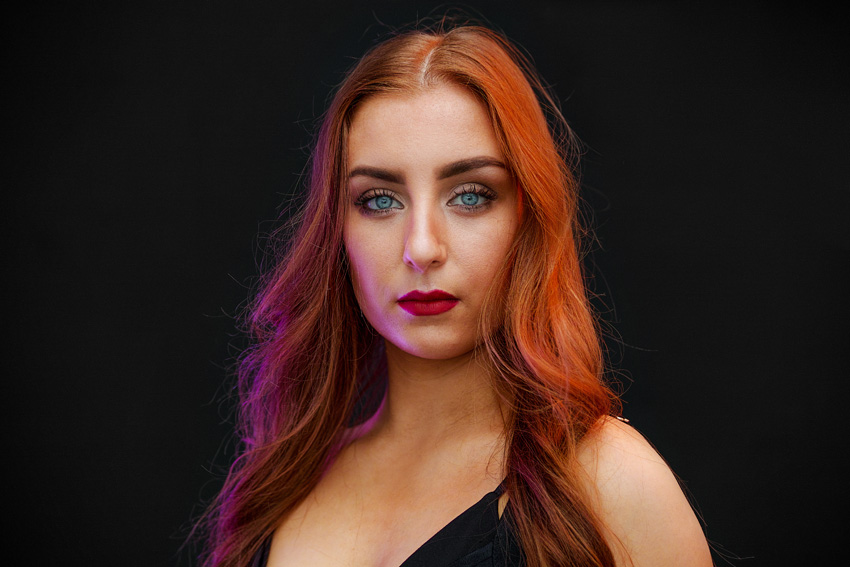
Next up a portrait taken with the 50-100mm f1.8 Art lens
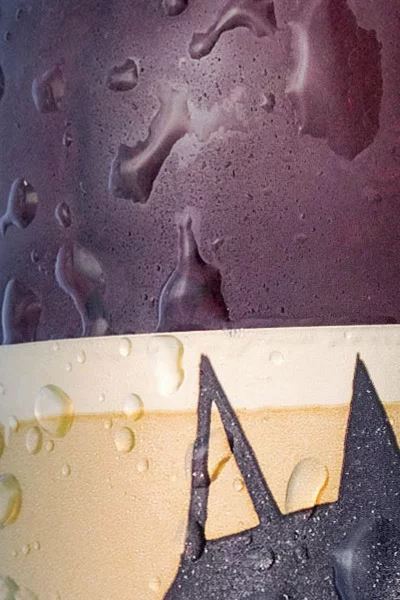
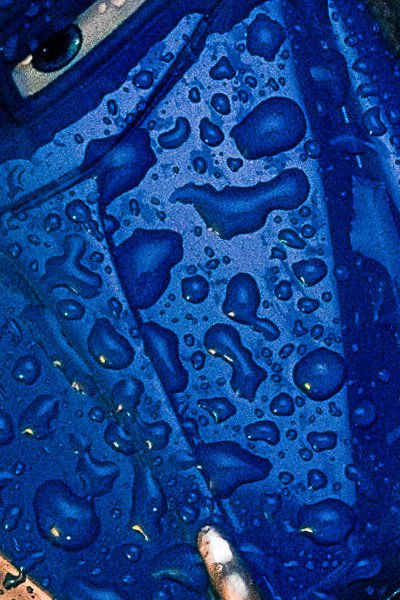
For this next shoot I wanted to do something more inline with what Photigy.com is all about so I grabbed a plastic tub, some ice, a beer and my smoke machine with a few lights and created this. *note this is made from two frames, as I turned the top lights off to get the dark ice.

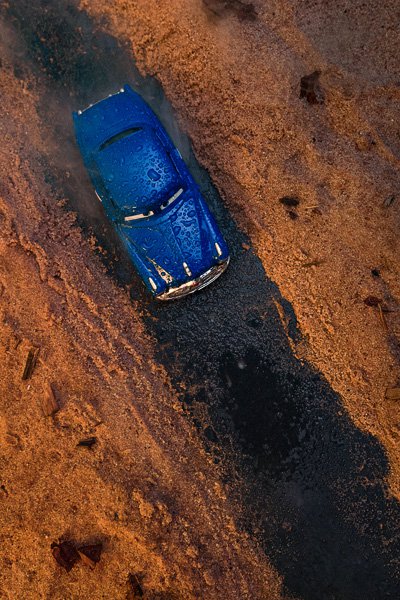
Another shot in style of Photigy but this I “borrowed” one of my son’s toys to create something more fun.
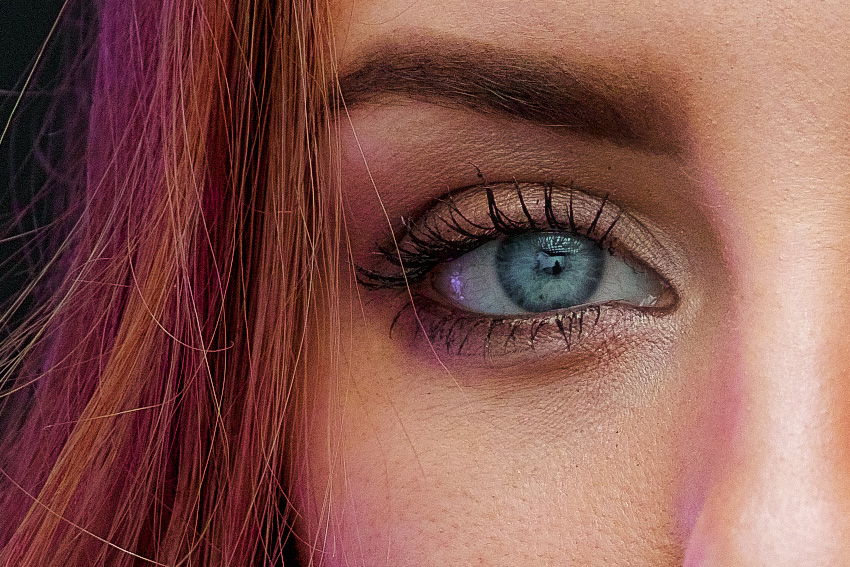
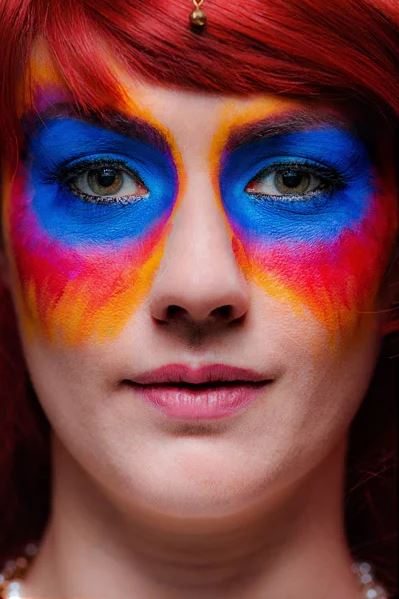
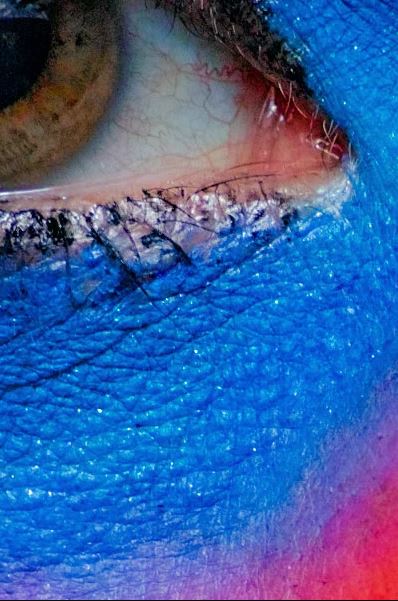
For this shot I wanted to try something close up with lots of color, my friend Aranel Cosplay modeled for me and Beth King did the make up,.
Lastly an outdoor shot of my son with natural light with the 50-100 f1.8 Art wide open to see how the camera works in the real world.
Conclusion
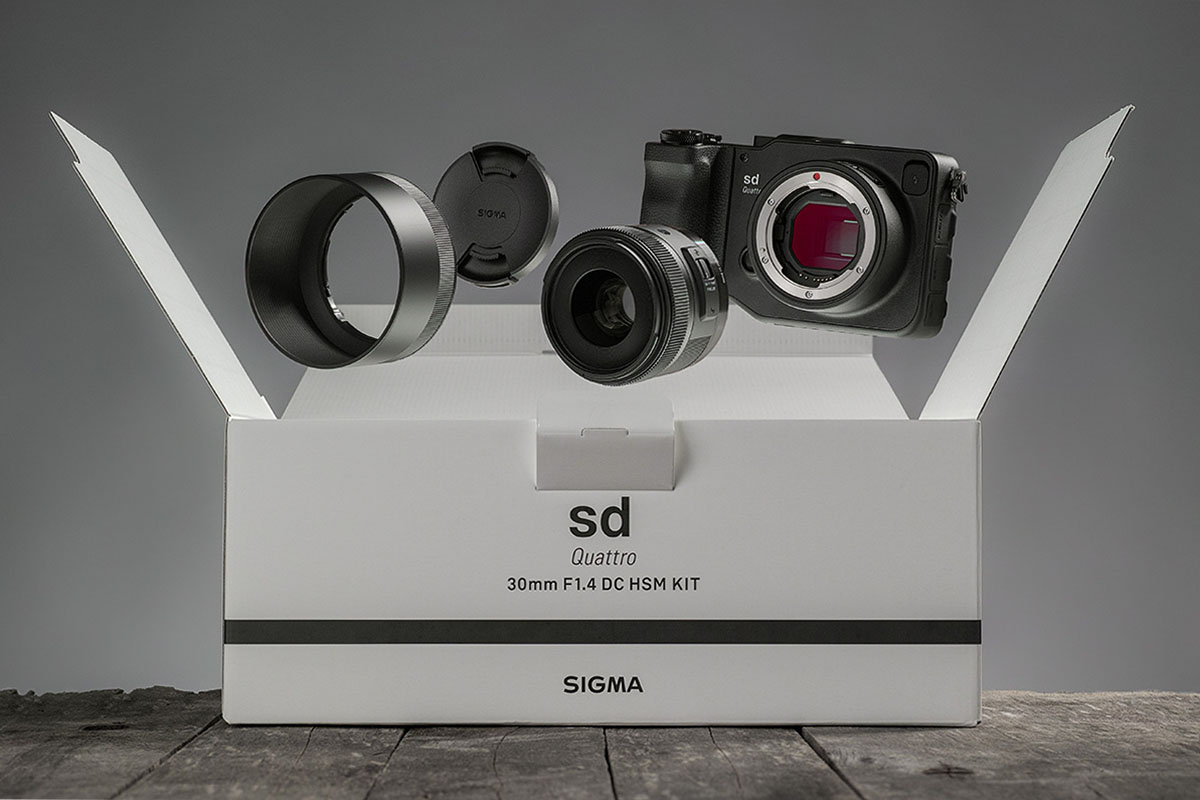
Sigma have once again created something unique that wont be for everyone but for the right people its a wonderful tool with great build and image quality, considering the price of £799 body only or £999 with a 30mm f1.4 Art lens you are getting a lot of camera and image fidelity for the money.
Sure it has its down sides as its slower than your typical Bayer camera in just about everyway from focusing, shot to shot time and even editing with Sigma Photo Pro, the camera doesn’t like higher ISO especially in low CRI lighting and there is zero video ability but all of that is worth it I feel for the image quality the unit delivers in the right conditions.
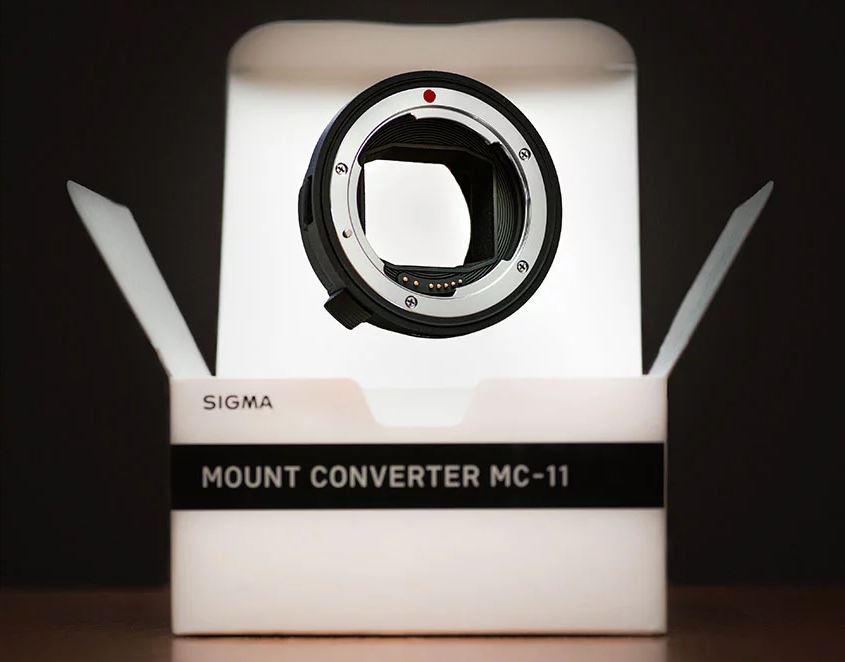
Sigma know that their camera is more of a specialized tool and some people will be worried about investing money into a system that can’t do everything but with the Sigma MC-11 adapter I can use all the Sigma SA lens (designed for the SdQ) on a Sony body so in reality with one set of lens I can get the best of both Foveon and Bayer worlds.
I’m a better photographer than writer but I hope this article has been helpful to people out there looking into high resolution systems for product/studio type photography, I felt it was only fair to shine some light into a camera that lots of people would never take a second look at yet has possibility the best price to image quality ratio out there and when printing can compete or surpass systems costing many times more.
If you would like to see more of my work or the odd behind the scene videos feel free to check out my Instagram.
Sigma SD Quattro Specification.
Sensor type: Foveon Quattro – apsc 19.8 megapixels (5,424×3,616 pixels) – apsh 25.5megapixels (6,192×4,152 pixels)
Sensor dimensions: apsc – 23.4×15.5mm or apsh – 26.7×17.9mm
File format: x3f 14bit raw, jpg
ISO speed range: ISO 100 – 6400
Storage options: SD Card, SDHC Card, SDXC Card, Eye-Fi Card
Capture rate: 3.8– 5.1 (in low) frames per second
Display: 3.0 inch 1,620,000 dots TFT LCD
Electronic viewfinder 2,360,000 dots color LCD monitor
IR filter: User removable mounted in front of sensor close to the lens mount opening.
Software: Sigma Photo Pro, Sigma Capture Pro
Platform support: Macintosh: OSX version 10.10; PC: Windows 7 / 8 / 10 (64 bit only)
Connection type: USB 3.0, HDMI type C, PC port, Remote Shutter.
Operating temperature: 0 ̊C to + 45 ̊C
Dimensions: Camera Body only: 147mm(W) × 95.1mm(H) × 90.8mm(D)
Weight: 625g (Camera Body Only)
Note*
All photographs in this article where created by the author Paul Monaghan and shot on Foveon Quattro sensors unless otherwise stated.