Cosmetic Photography Tutorial: Viktor & Rolf Spicebomb photoshoot
Product photography behind the scene
Approaching the Spicebomb – Product Photography Tutorial
Approaching this product photography tutorial, I knew that I wanted to create a perfectly clean white background. I knew how I wanted the highlights to appear on either side of the atomizer. I also knew that I wanted a billowing cloud of ink rising out of the bottle. I had a pretty clear vision of what I wanted before even getting the product in the mail. Planning is an essential part of my work flow that allows me to test my understanding of photo lighting, to sharpen my skills in reading subjects before putting them in front of a camera, and to save a whole lot of time once I actually get into the studio. I will admit, this part of the process literally keeps me up at night, but sometimes I think it’s worth it.
Before I shoot a subject, I do a lot of research to see how other professional photographers have done similar products. I look for things that specifically have similar materials, shapes and colors to make sure that I’m not going in with some ridiculous idea that isn’t going to work in the end. Even if its a portfolio building shoot, I try to be conscious of the branding of the product. In this way, I try to keep in tune with the needs that a client might have.
When the product came in the mail, I took a good hard look at it to make sure that everything I had planned would work. I didn’t see anything that would create any issues, so I moved ahead with putting my equipment together the way I had planned. Out of this planning process came…
The Lighting Setup
Let’s take a look at some setup images, and I’ll describe what’s going on.
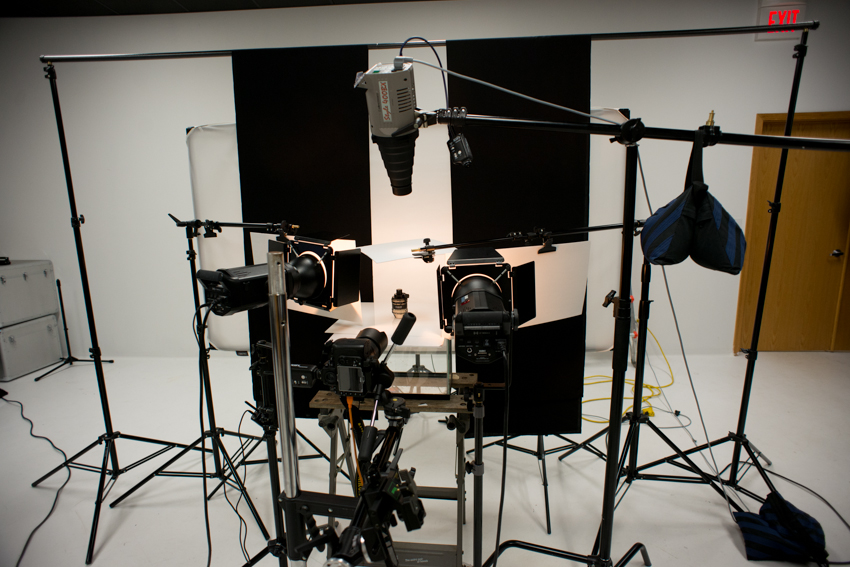


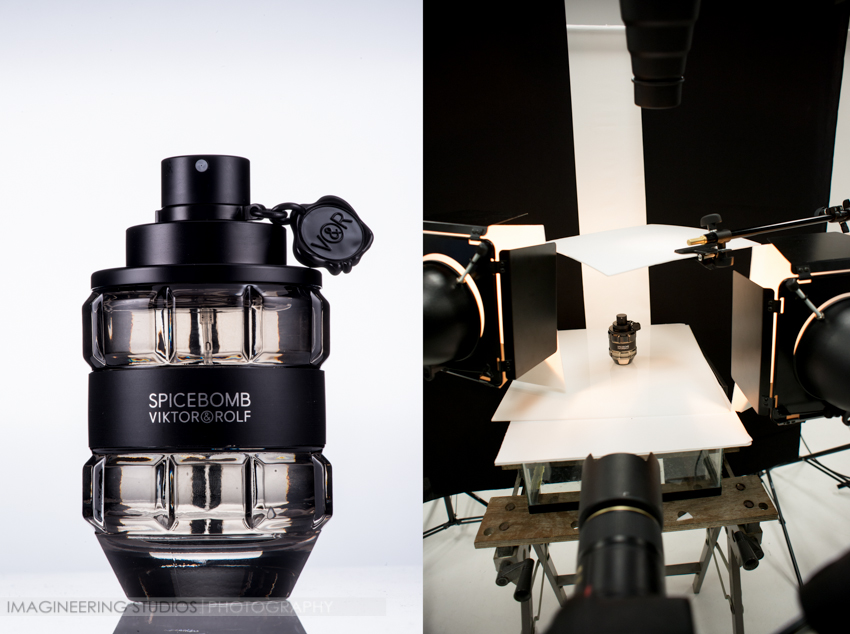
Here’s a front shot of the setup. You can see that I’d set the product in the middle of the plexiglass surface. The aquarium here is just for elevation.
I had my two Travelites as my primaries with barn doors on either side of the subject. Both of these were shooting through cellfoam panels to create the diffused highlights on the top and label.
There’s a cellfoam panel above the product, which was being hit with the snoot to create highlights on the reflective tag/pin of the product.
Behind the product setup, I’ve hung two sheets of black fabric. The thing doesn’t have to be this massive, but I felt that doing it this way kept my workspace more open for me to maneuver in. You could hang sheets of black construction paper to get the same effect in a smaller area. More on this in a sec.
What you don’t see here is the white foam core board that I used to bounce light onto the label. I’ll get to that later.
Behind the black curtains…
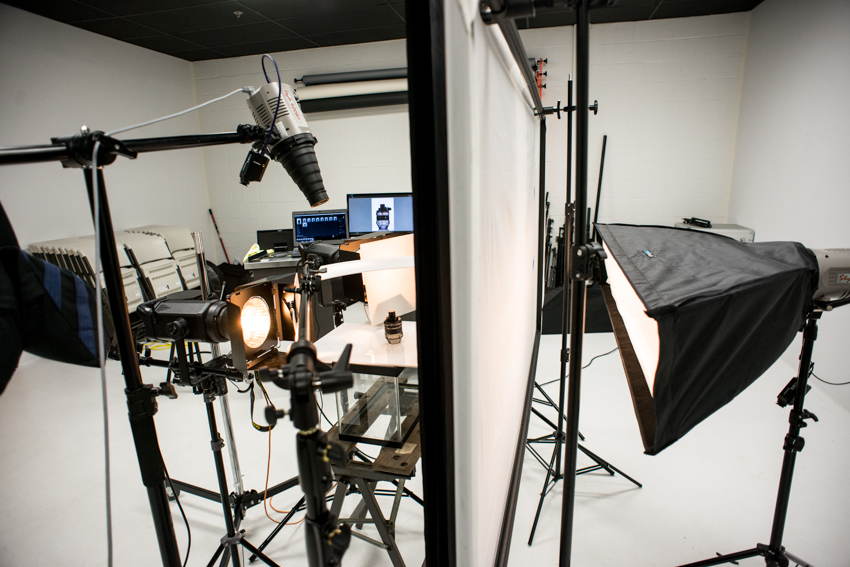
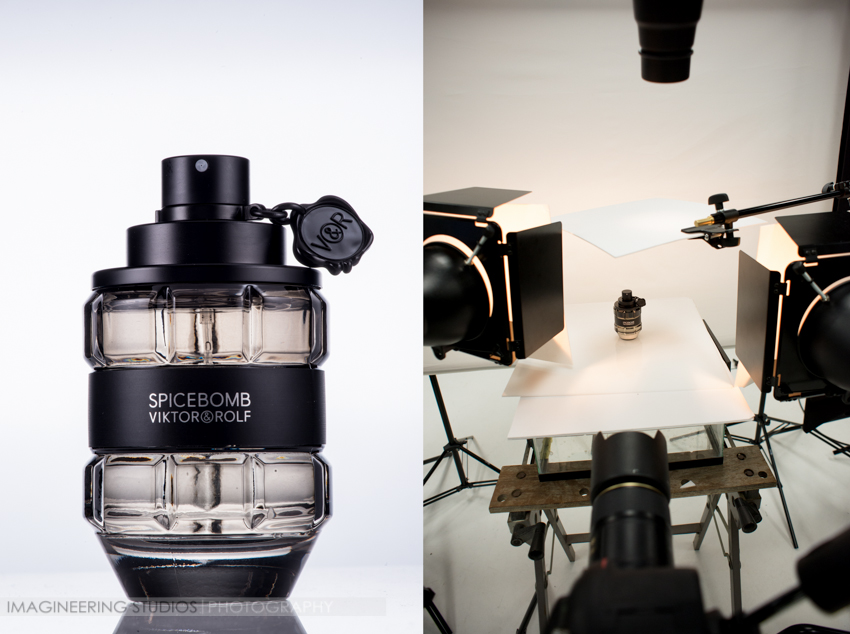
I placed the large diffusion panel with a light behind it to blow out the background.
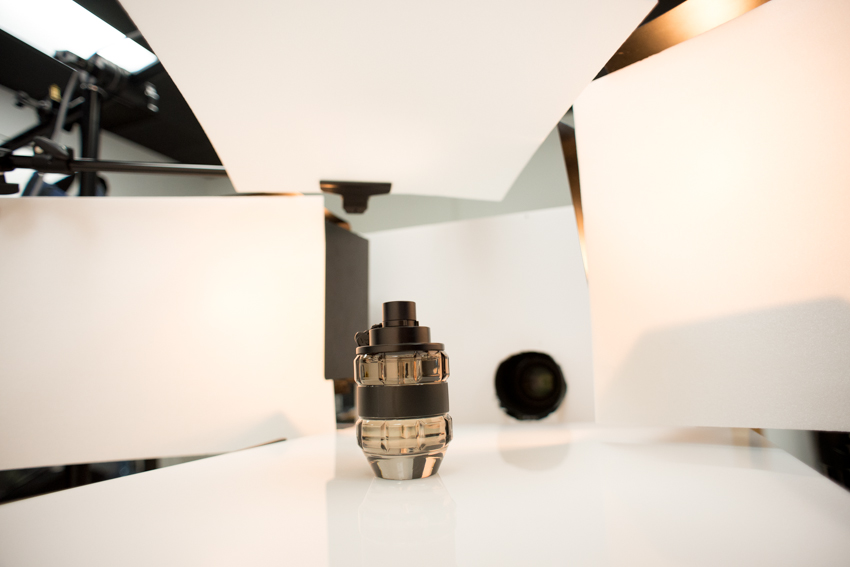
Here’s a shot from the product perspective. You can see that I’ve cut a hole through my white foam core board and mounted it onto the camera lens. This is simply bouncing light back into the label. Without this board, the highlights would contrast too much with the middle of the label, making it difficult to read.
On either side of the product, I’d put the cellfoam panels. I made sure that these were long enough to go at least past the sides of the bottle. Since the product is round, it will reflect light pretty narrowly, so I needed horizontal coverage to create wider highlights.
Establishing Shots
The first images that came into the camera were for position refining and exposure balancing between the lights. At 1/160s, f/22 Iso100, and with the lights at this distance from the subject, I know that I’m going to get pretty close to the exposure that I need. It should only take a few test shots to have everything balanced properly.
Remember that with studio strobes, the shutter speed is pretty insignificant. Your primary exposure changers are your aperture, ISO speed, and the intensity of the strobes. I keep my ISO at 100 in studio to reduce the graininess of the image, and I keep my aperture between f/13 and f/22 to keep the depth of field deep.
Once my lighting was balanced, and I was satisfied with the positioning of the bottle, lights and camera, I took two primary exposures. The first…
When shooting at reflective surfaces, I pay close attention to what is behind and to the sides of the subject and the angle of reflection. Since the “fragmentation segments” (for those of you who know how frag grenades work) of this bottle have a little bit if a roundness to them, I needed to get the black sheets fairly close to the product in order to cover the edges of it with black. This created the contrast between the edges of the bottle and the white background.
But this image also has the black sheets in the refraction of the bottle. We didn’t want that in the shot, so I took a second exposure.
Now the sheets have been drawn out of the way. You can see that the bottle is now clear, but the edges are reflecting the white background and I’m losing the definition in the shape of the product. For this reason, I used this second shot as my primary exposure and comped in the edges from the first shot to recover that definition.
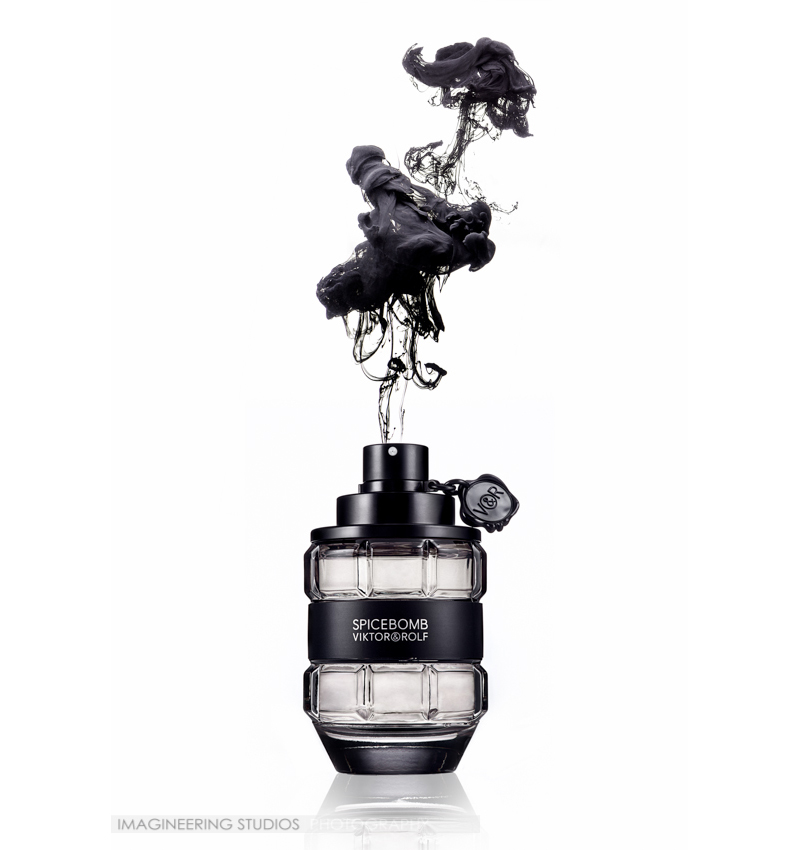
The final concept was to have black ink coming out of the bottle like smoke. Since the product is called “Spicebomb” and shaped like a hand grenade, I thought something like that would be fitting. So, I filled up my aquarium and started prepping for the ink segment of the shoot.
This being the first time I had shot ink, I was working on theory. I wanted something that looked like a mushroom cloud and lit from the top. So, I set my aquarium on the work table, which can open up in the middle to allow space to shoot a light through. The aquarium was set onto a cellfoam panel to create diffusion.
In hind sight, I didn’t need the diffusion panel. I lost too much light shooting at black ink and ended up pushing the exposure in post which caused some grain issues. More on that later.
Here’s a shot of the lighting setup:
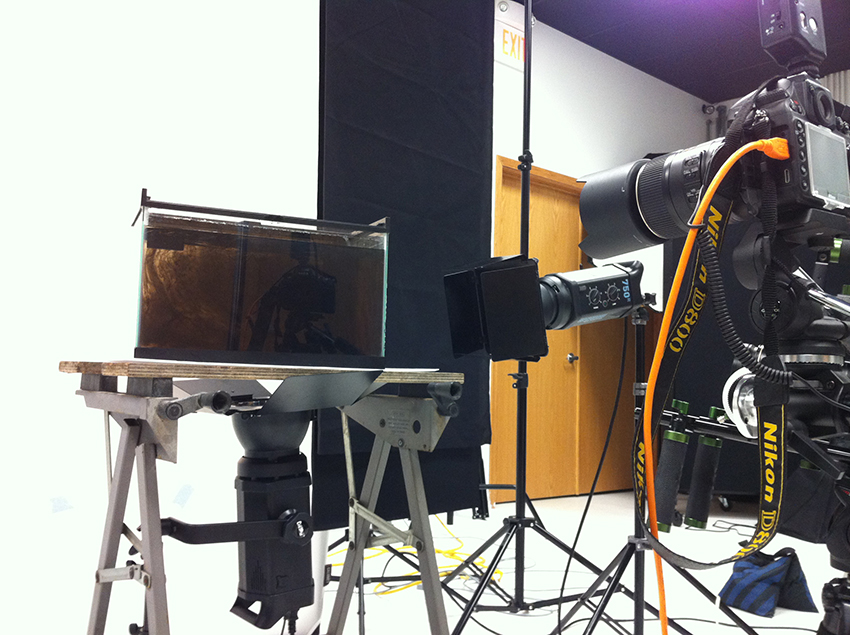
I also had the back light still on, and I threw in a side photo light as well. With that setup, I began shooting into the aquarium.

I won’t bore you with too many shots of ink, but you’ll notice a couple of things. I used a screwdriver to reference my focus point, and I flipped the images upside-down so that the billow was moving up. Between each drip, I had to empty the tank, refill it and clean it inside and out. Midway through the shoot, I was pushing my exposures and I noticed this nasty little thing.
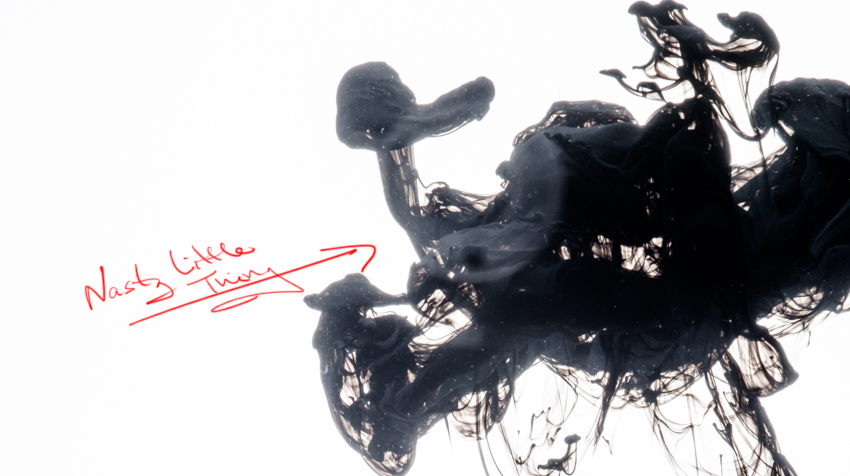
That is the lens reflecting in the glass of the aquarium. That’s there because I was shooting directly into the glass. So, I fixed that by rotating the aquarium about 15 degrees, which changed the reflection angle to point somewhere else.
But, there were also these nasty little things when you get up to 100%!
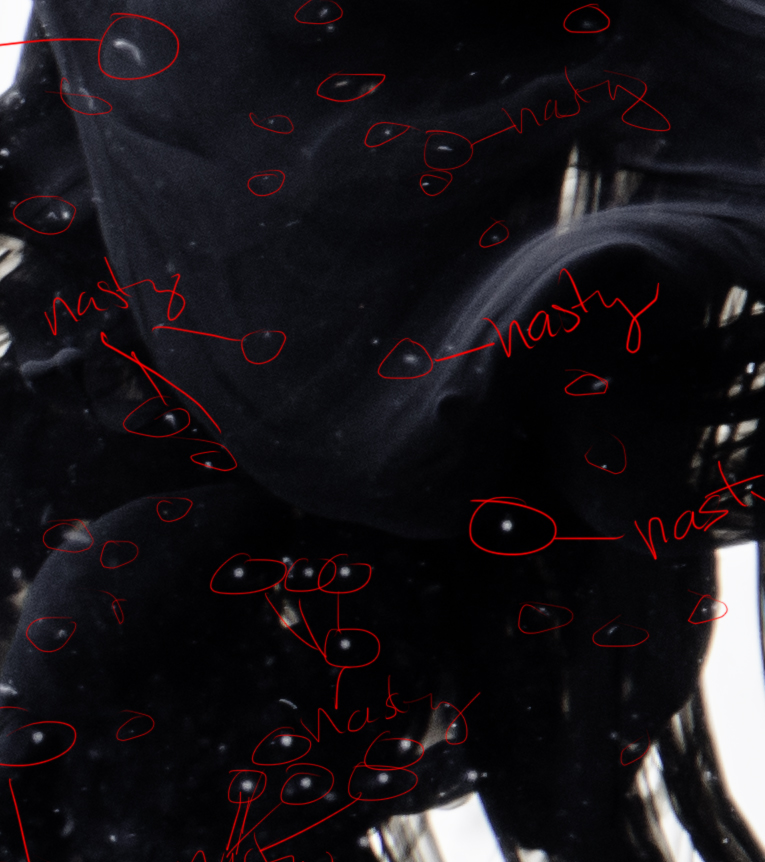
These are tiny little debris that are floating around in the water. Well, I didn’t have the patience to go back and reshoot everything from scratch, so I opted to remove them in post. Don’t ask me how that made sense.
But, moving forward with that decision, I selected two shots and started …
Post Production
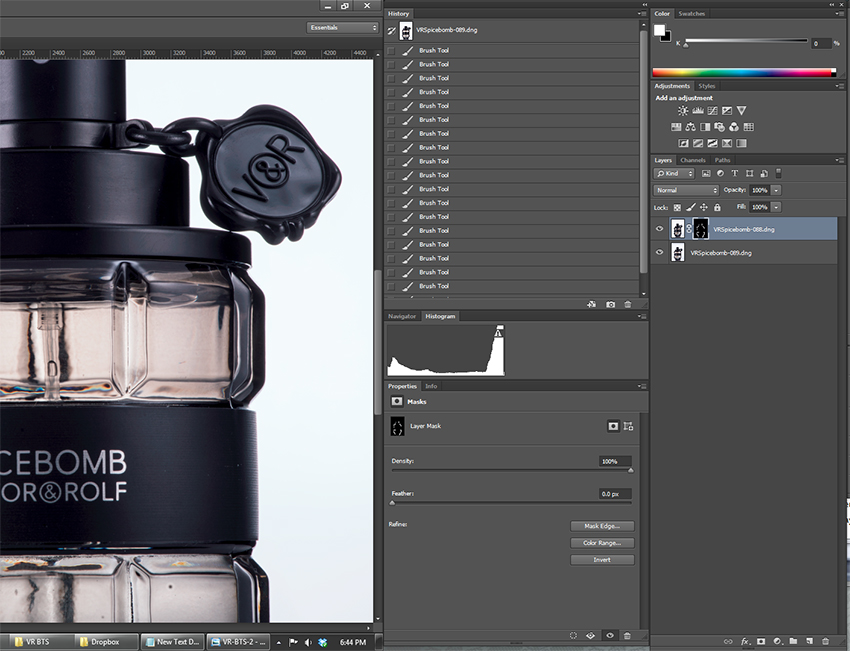
The first thing I did was to composite my two bottle images together using layer masks and such. I selected the two images in Lightroom, right clicked, and selected “Edit In > Merge to Panorama in Photoshop.” This aligns the two images according to content. If your images are taken from the exact same angle like these, you could also select “Open as Layers in Photoshop.”
That done, I put my image with dark edges on top, created a black layer mask and painted back the edges that I wanted in the final image. It looks something like this.
Next, I attacked the little dust particles and lens spots using the healing brush and rubber stamp tools. One trick with this part of the process is to use very small brushes. I keep my brush size between 5 and 12 pixels for the most part. When you get close to high-contrast edges, it’s better to use the rubber stamp.
I went ahead and removed the straw to make the bottle completely clear using the same methods of healing and rubber stamping.
I adjusted the levels and color of the image using adjustment layers and sharpened it using a high-pass layer and unsharp mask.
I removed the background completely, leaving a pure white background, by masking the entire bottle. Here are a couple of final before and after images of the processing on the bottle.
Lastly, I had to tackle the ink. I used a Dust and Scratches filter to start out, and finished off the image using the healing brush and clone stamp tools. As I mentioned above, since I was shooting black ink, I had to push my exposure to get the brightness I needed, which created more graininess in the image. The Dust and Scratches filter took enough of that out that I was satisfied.
Once that was finished, all I had to do was comp the ink in with the bottle shot and…
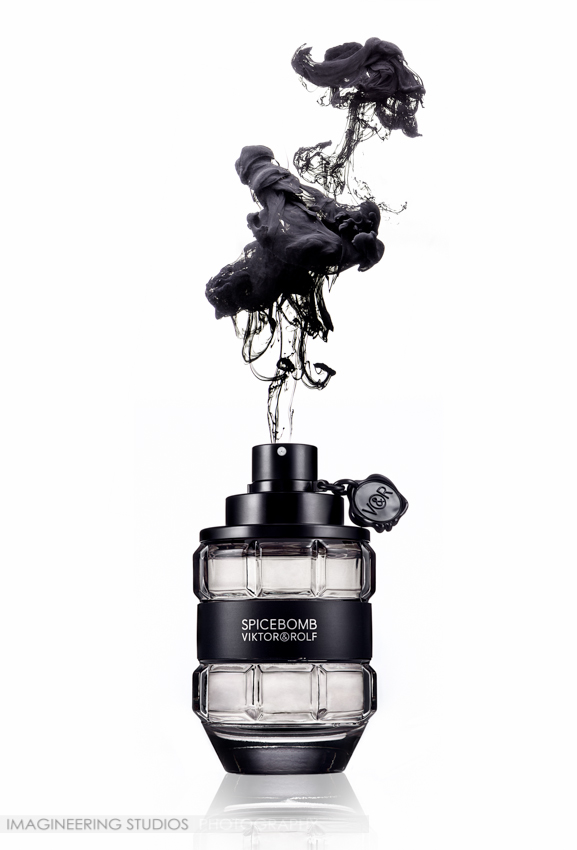
A final image.
I know I made the ink editing sound simple. Believe me it was tedious, but it was pretty much more of the same clone stamping and healing brush. Which leads me to…
Closing Thoughts
Every shoot is a learning experience for me. I try to find ways to push myself, either creatively or technically. This one, I definitely learned a lot on the technical side of things.
If you want to save yourself a headache and sleep, clean EVERYTHING before you start shooting. Clean your lens, your sensor, your product, your table… everything. It’ll save a lot of time in post-processing.
I learned that black ink is extremely challenging to shoot. Black wants to absorb all light, and being in water actually helps it do that, which makes it necessary to push the exposure somehow (either by increasing ISO or doing it in post; either way, you’ll run into grain). The next time I shoot ink, I’ll probably shoot a different color. Brown or blue would probably be easier, even if I were to make it black in post.
Lastly, I learned that the water in my studio is extremely dirty. With that amount of debris floating around it gets very difficult to shoot a clean underwater image. I’ll be exploring ways of dealing with this issue, so I have a feeling I’ll be talking about it again.
For now, I’m afraid that is all I have. If you managed to read this article from beginning to end in one sitting, I think you deserve a medal. Sorry, you don’t get one. But, thanks for taking the time to read. I hope it was helpful and I’ll be looking forward to sharing more in the future.
 |
In the Gearbox |
|
Camera: Nikon D800 Photo Lighting: Elinchrom 400 BX (x2) Light Modifiers: Calumet 42×78 Diffusion Panel Other Shot Essentials: White Plexiglass Panel |