Photigy Course
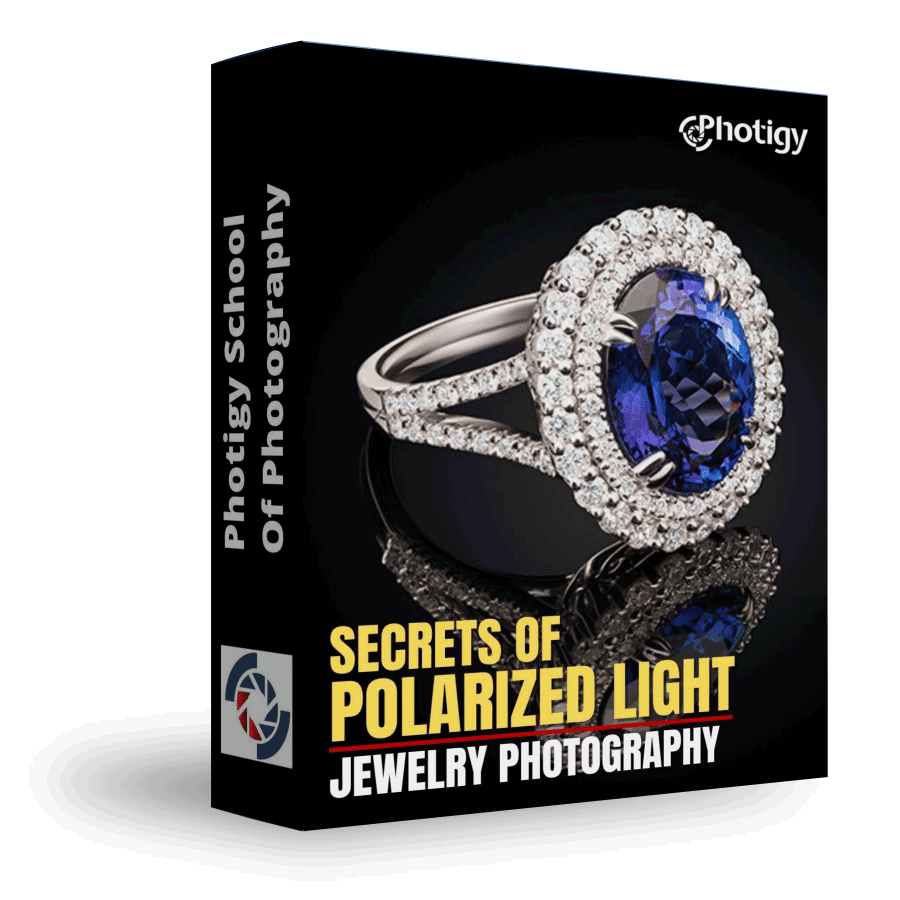
Secrets Of Polarized Light in Jewelry Photography
Professional, step-by-step online course — watch every lesson at your own pace, forever.
$145one-time · lifetime access
Professional, step-by-step online course — watch every lesson at your own pace, forever.
ONLINE COURSE
In this unique course, Alex Koloskov reveals the secrets to working with polarized light and applies the technique to photographing a variety of challenging jewelry pieces. Product photography is all about managing reflections to ensure a product’s particular attributes like colors, textures, and shapes are captured accurately, and jewelry is often among the most challenging subjects to work with. Applying these polarized lighting techniques can help overcome some of challenges posed by a jewelry item’s numerous reflective surfaces, but it can also introduce additional problems if used indiscriminately. Alex guides you through why and how to use polarized light and explains when to avoid it. Once the shooting is done, professional retoucher Genia Larionova takes over and demonstrates the post-production techniques to use to create truly stunning final images.
This course is for you if...
Lighting for jewelry has left you completely frustrated
Unwanted reflections in your jewelry photos have forced you to spend far too much time retouching your images
You have struggled getting high-quality focus-stacked images
Imagine you could...
Extend your skills technically and creatively
Conquer reflections like a pro
Capture super-sharp gorgeous jewelry images that look absolutely perfect
Where to buy, cons/pros of each material, camera, lens and more
Advantages of using polarized light for a jewelry photographe
You will see where polarized light will give you the most advantage over a “regular”, non-polarized studio light, and where it is not effective and make things worse.
We’ll show you simple yet effective DIY light modifiers that can be used in jewelry photography for an outstanding results.
Focus stacking in jewelry photography
Course covers focus stacking technique without a focusing rail – simple and effective
Focus stacking in Adobe Photoshop, cleaning jewelry image from dust and scratches, how to making diamonds and other gemstones to shine, metal to look polished and other essential techniques is covered in a post-production part of this course
Using polarized lighting is a technique not all photographers are familiar with. In this course, I will teach you when and how to use it to achieve the best results and explain when using it will actually create more problems than it will solve. Master the secrets of polarized light and take your jewelry photography to the next level.
Alex Koloskov
Founder of Photigy


Sample photos from the program’s video lessons that you will learn.
Before-After Post-Production
Left – SOOC (straight out of the camera),
Right– after Adobe Photoshop
SOOC - BEFORE
AFTER
Course Curriculum
INTRODUCTION
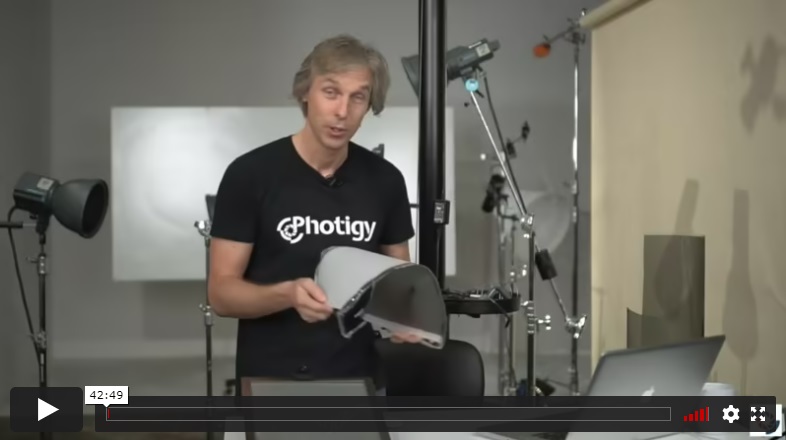
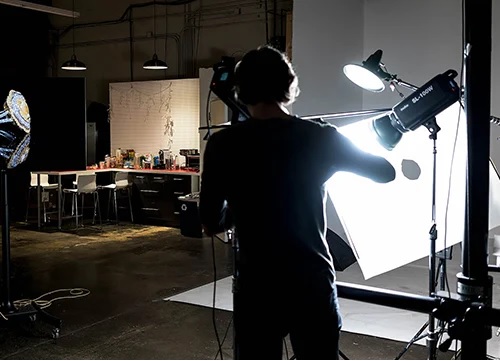
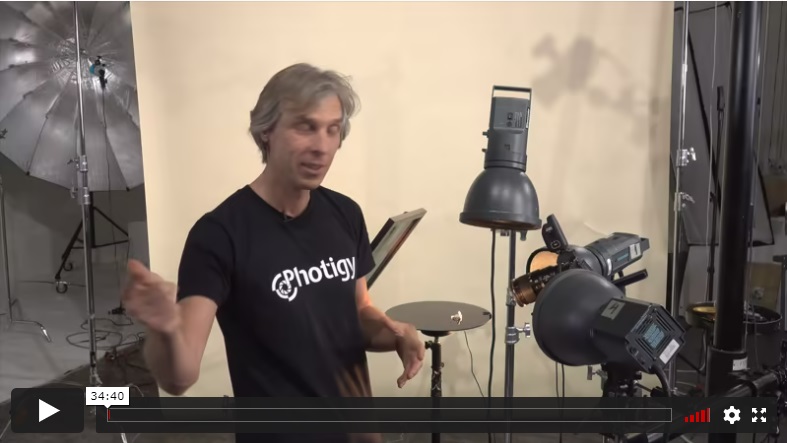
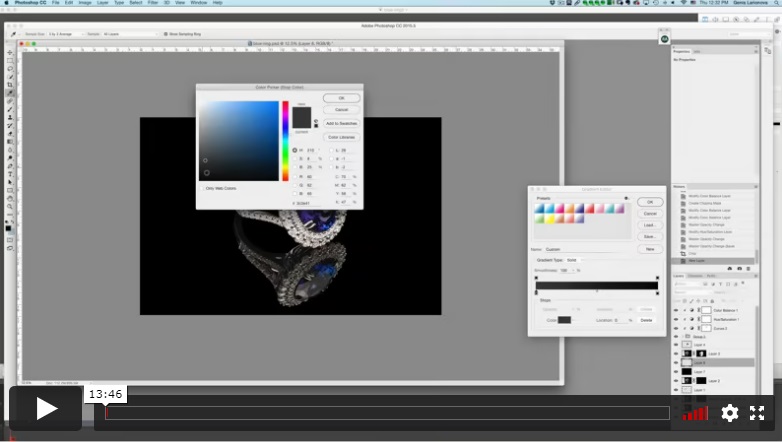
In this first introductory lesson, Alex shows examples of polarizing filters and sheets. He explains how polarization works and why it is useful. Alex shares some sources for where to obtain the materials and discusses the quality.
WORKSHOP
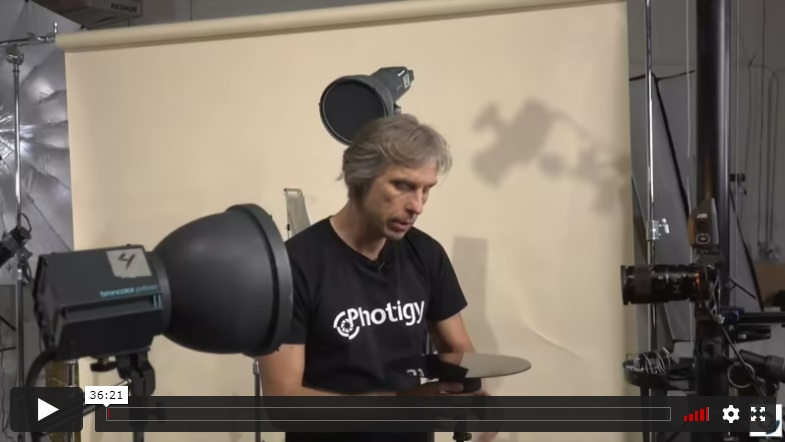
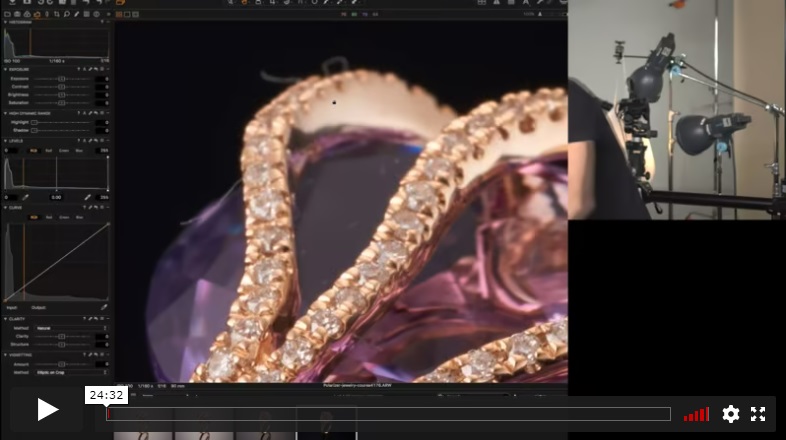
Alex first demonstrates the effects of using only a circular polarizing lens filter on costume jewelry stone with non-polarized lighting source. Then he shows the effects with a polarizing filter added to the light. Next, he shows the use of three light sources through a DIY style polarizing film tent to demonstrate the effects obtained on ring stones and table reflection. He also explores the effects on non-transparent surfaces.
In this lesson, Alex demonstrates the effect of adding another polarized light source and discusses the ability of using the different light angles that polarization provides to achieve quick image lighting changes without actually moving light sources. He also briefly discusses focus stacking, gels and a few other topics.
Alex again explores shooting with polarization, but this time on a white base. He addresses more questions from online viewers.
SHOOTING
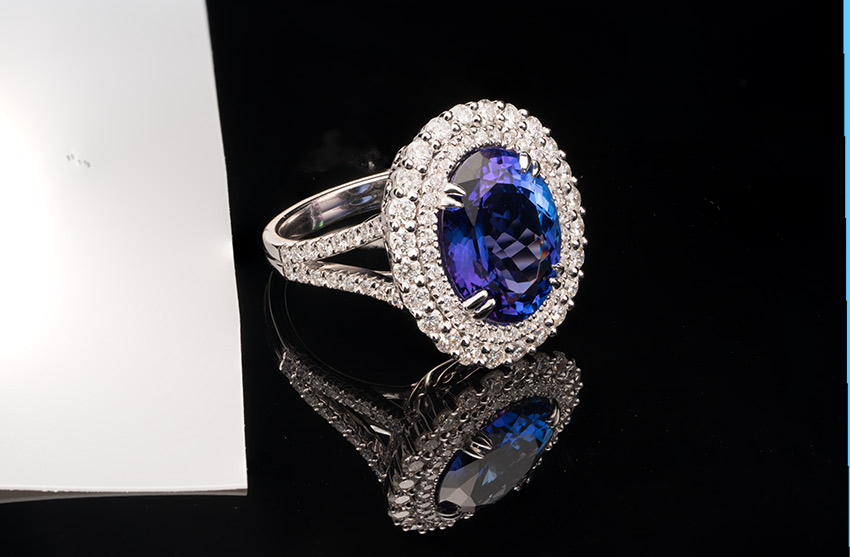
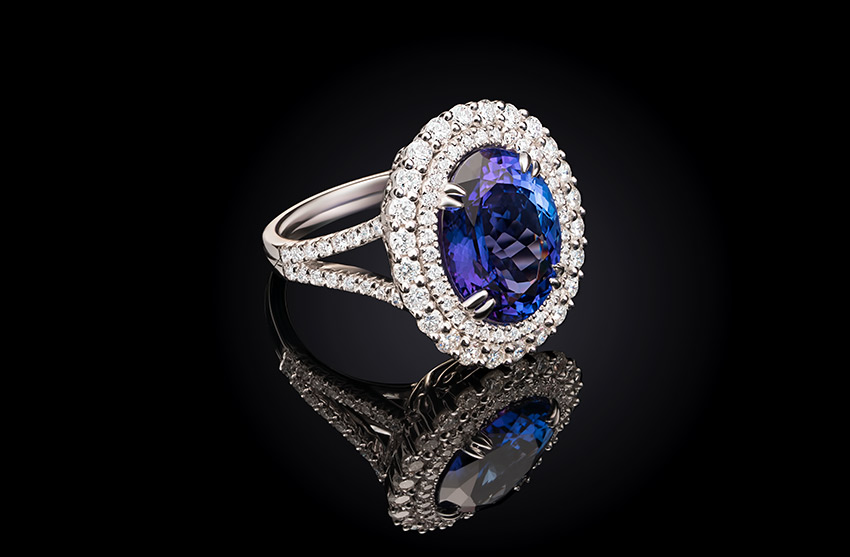
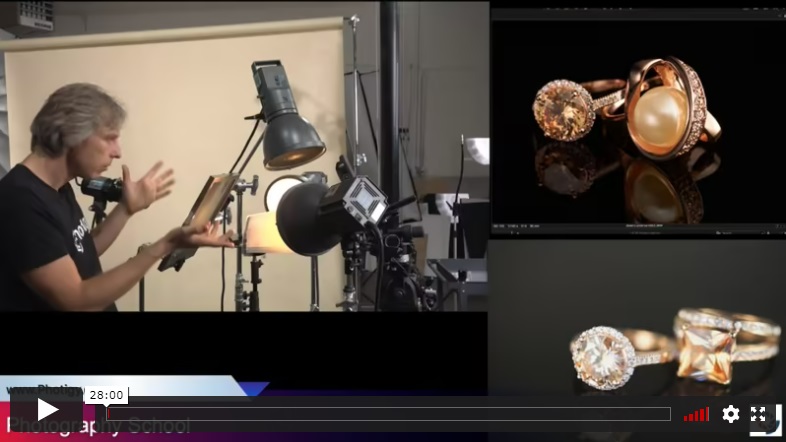
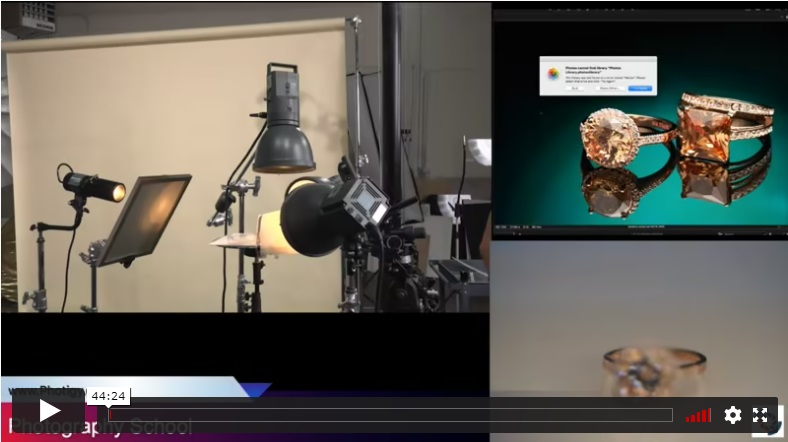
Alex shoots a Tanzanite stone ring which exhibits a blue with purple color and tries to show both colors in the final image. Three gridded lights are placed over a non-polarizing cover. Alex demonstrates unwanted reflections first and then polarizes the light by reversing the cover. He demonstrates how a sequential set of shots taken while rotating the lens filter can be used to remove some unwanted reflections in each image and then composite them together for the final image.

As he continues to work with the blue ring, Alex discovers a dark area inside it and adjusts the tent to eliminate it. He then shows how to load and align the images into Photoshop for the post work.
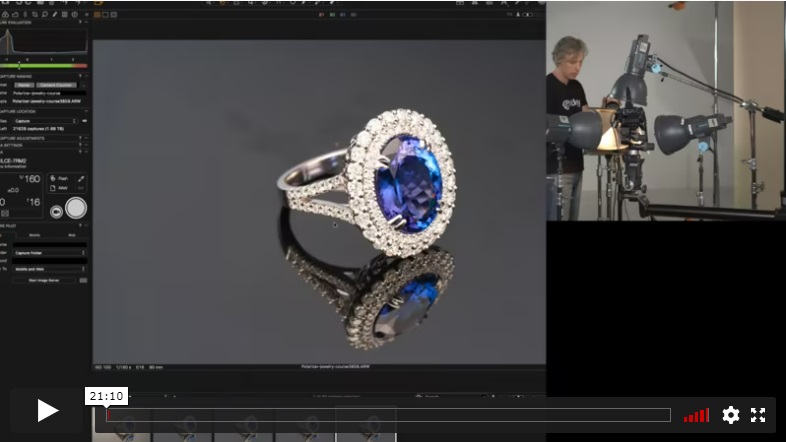
In the final part of this lesson, Alex repositions the ring and the lighting to acquire a different view. He demonstrates the effects of polarized light without moving the light source to obtain a desired result and uses a reflecting strip to eliminate a dark table reflection. Finally, Alex shows how to focus stack with lens focus changes as opposed to using the rail method. He demonstrates what to do when Photoshop’s auto-blend gives a bad result with focus-stacked images.
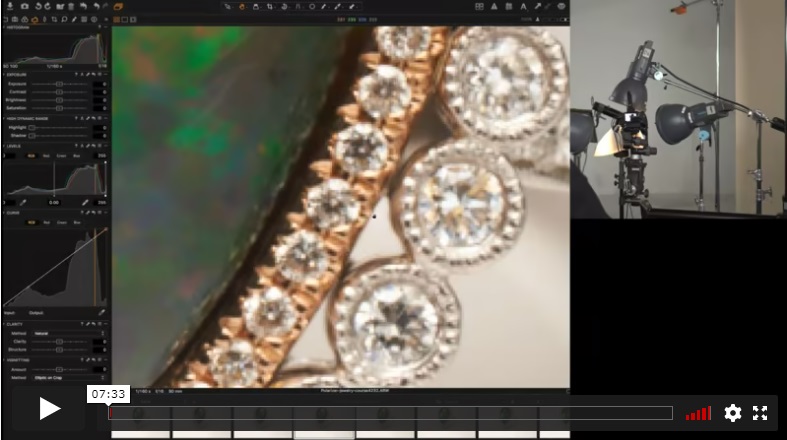
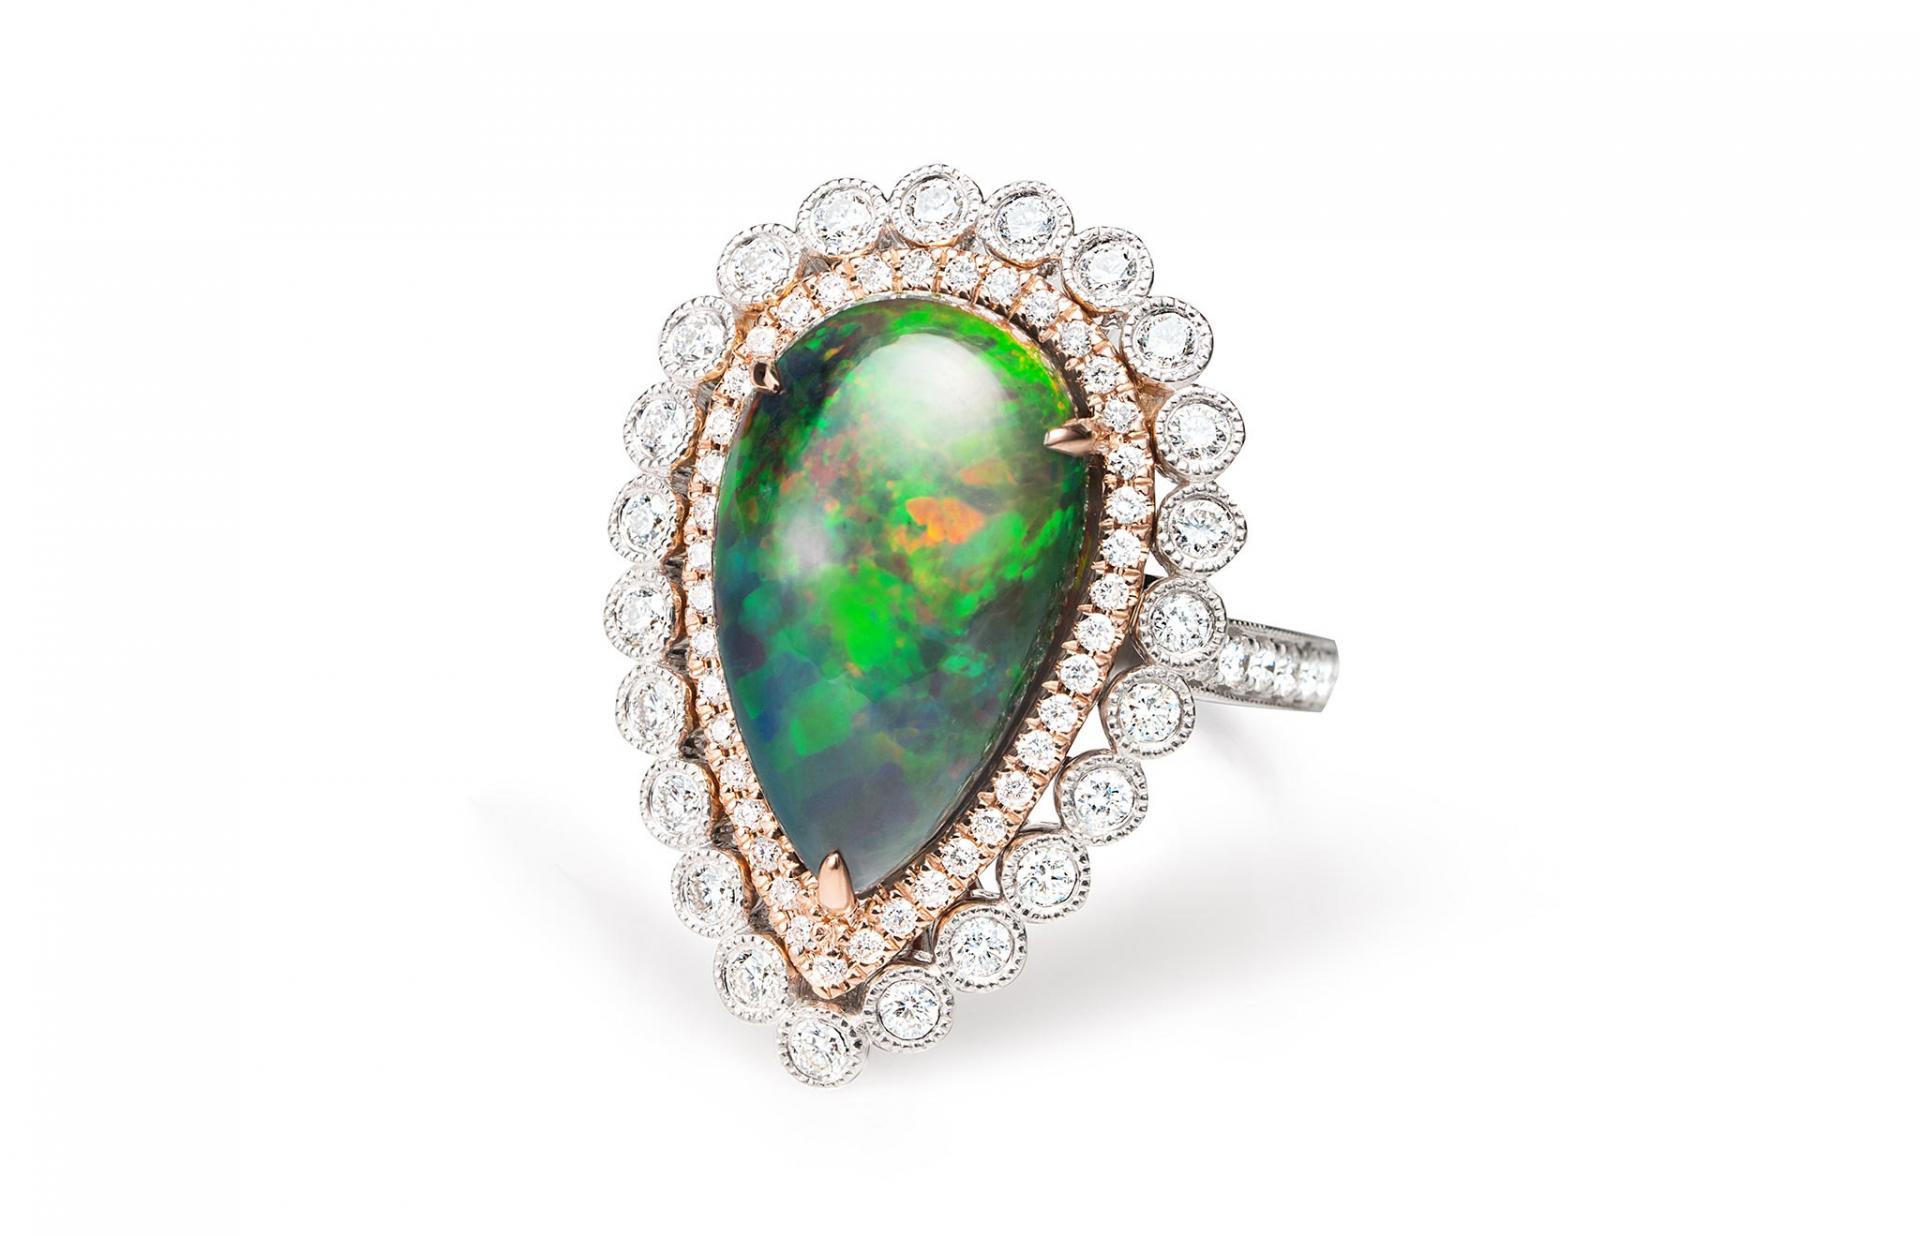
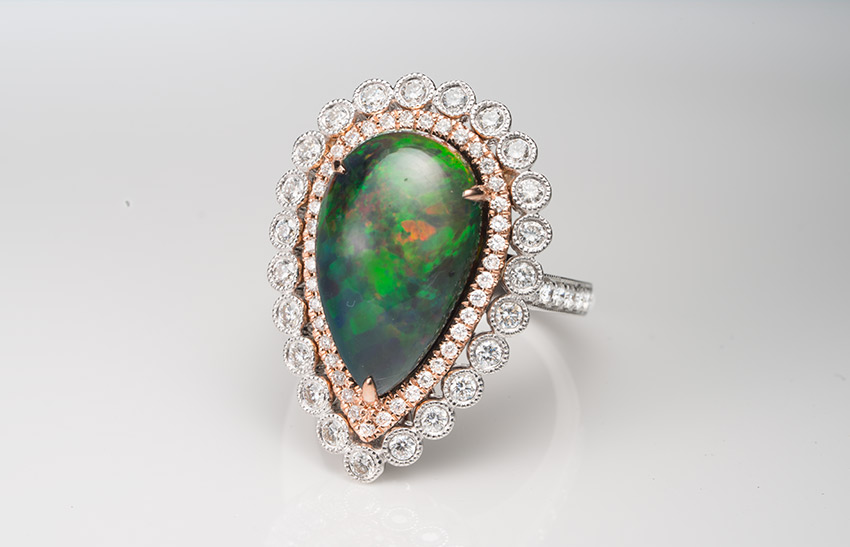
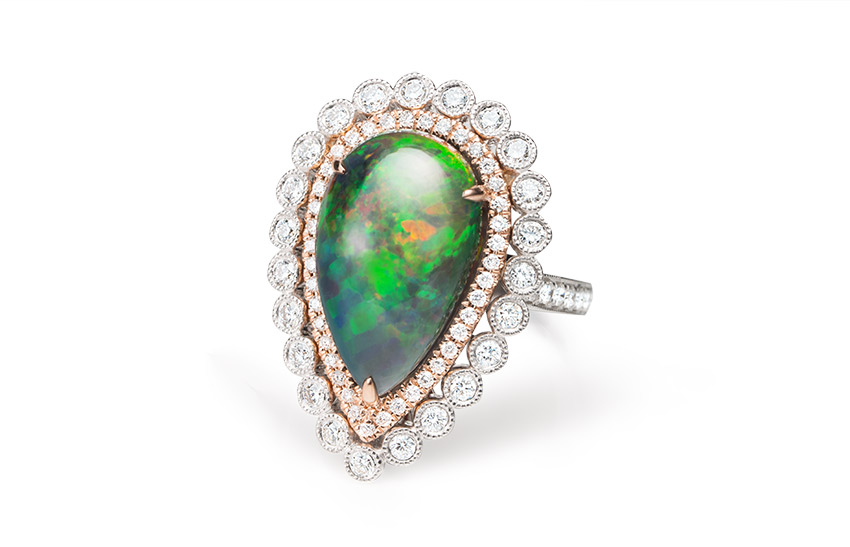
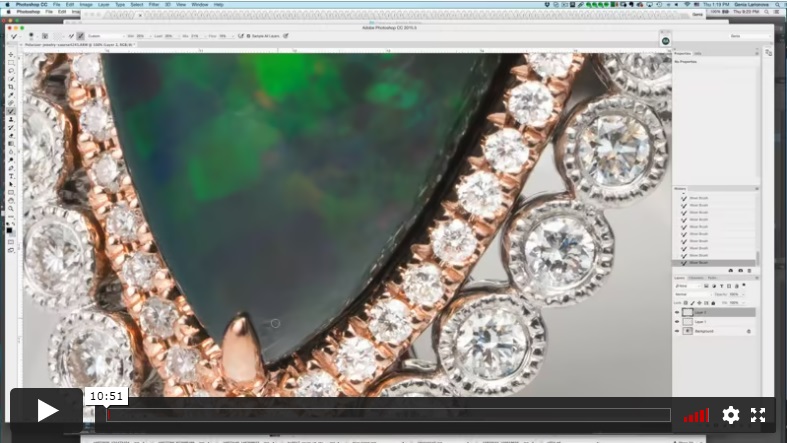
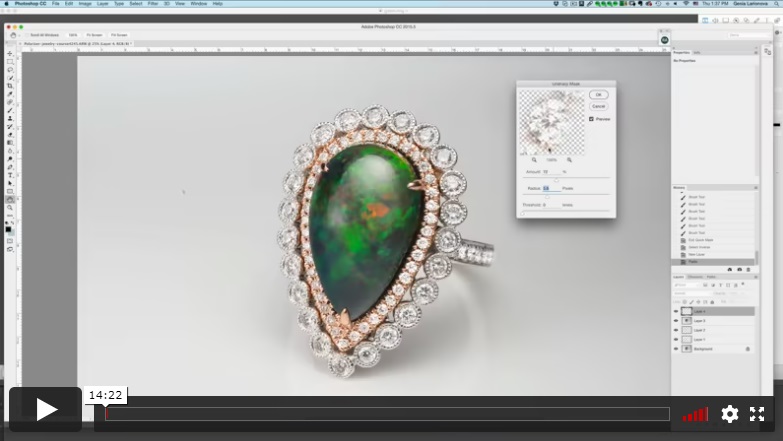
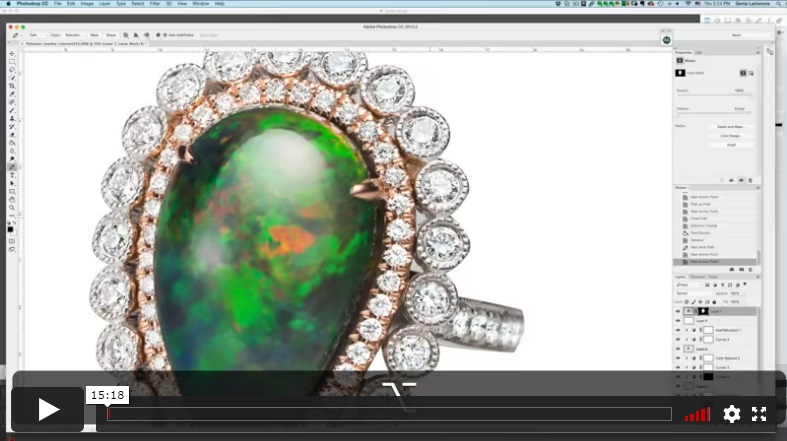
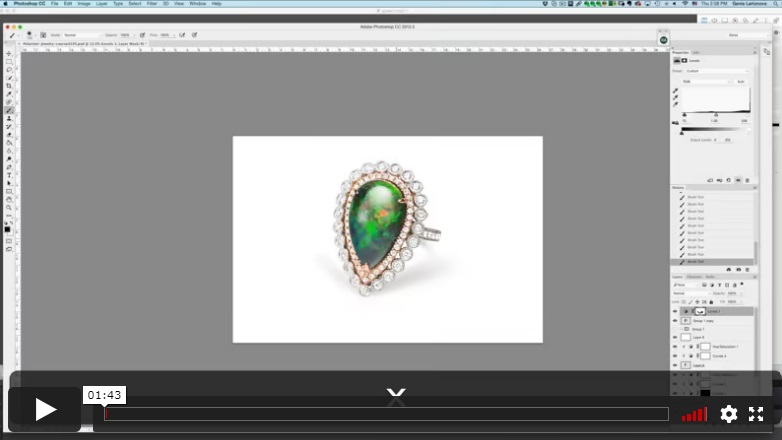
Alex uses the polarizing tent to shoot a black opal cabochon ring surrounded by diamonds. The non-transparent nature of the opal does not benefit from the polarized lighting, but the diamonds do. Alex uses focus stacking to get everything in focus.

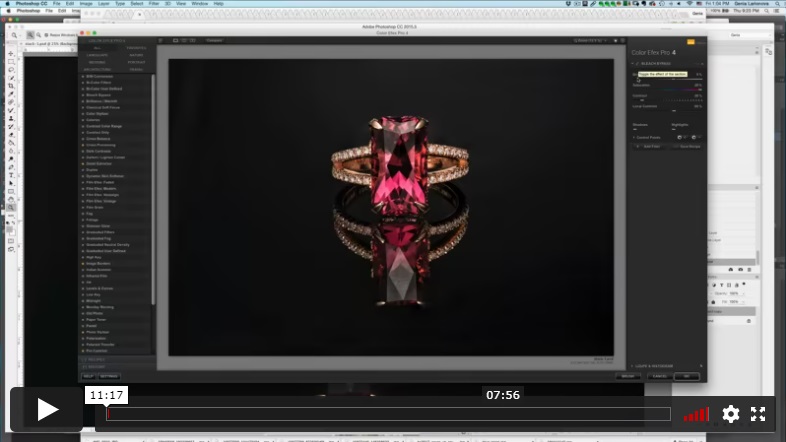
Alex uses the polarizing tent and rear panel to shoot a pink faceted tourmaline main stone ring with diamond accent stones. He shoots straight on to show how symmetry creates challenges. Small changes in light positions and adjusting the lens polarizer result in good and bad changes in the image, so Alex shows you how you must always strive for positive benefits.
In this lesson, Alex reshoots the Tanzanite ring to remove black internal “eye-like” reflections, making adjustments to the tent around the lens and slight light position changes to achieve the desired result.
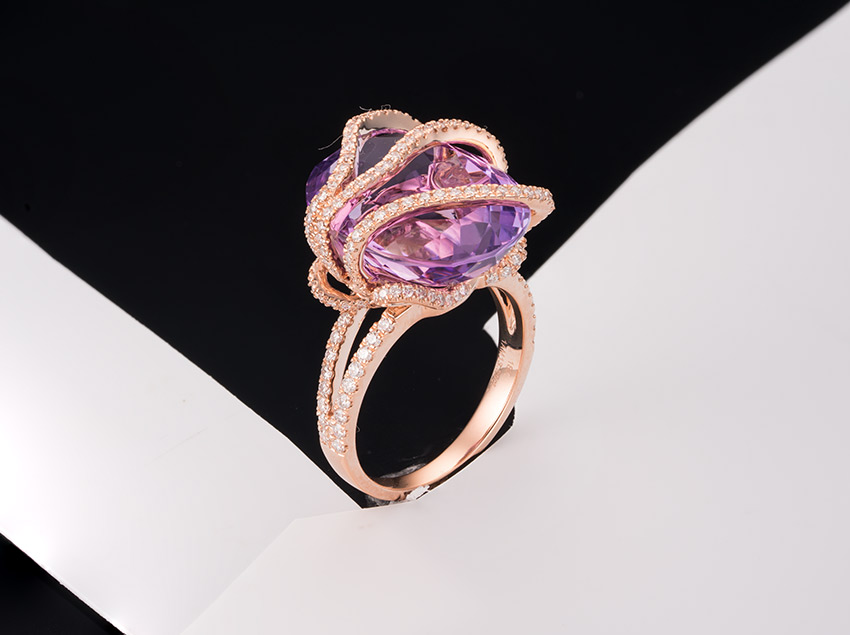
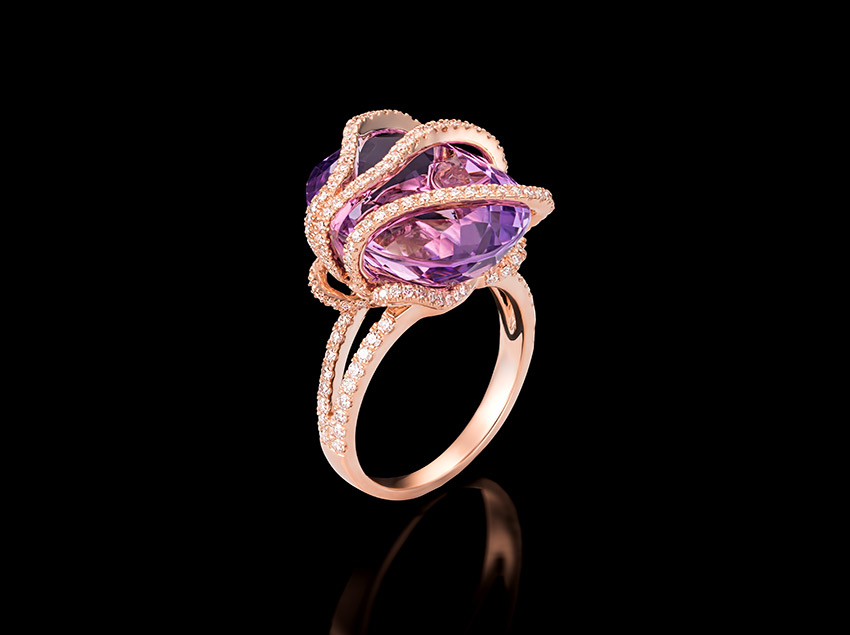
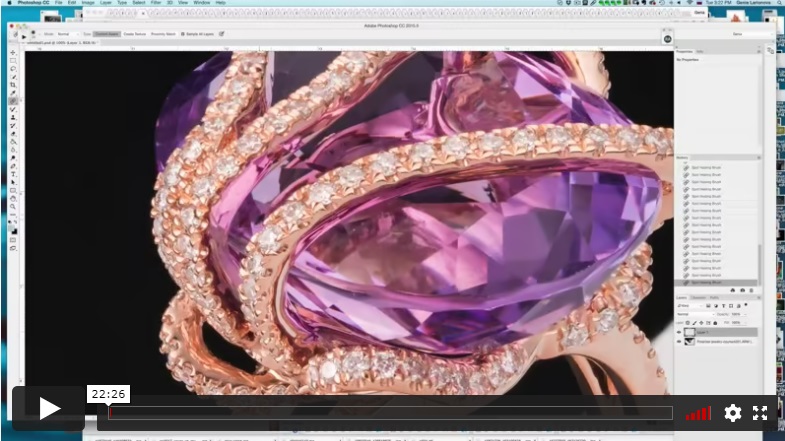
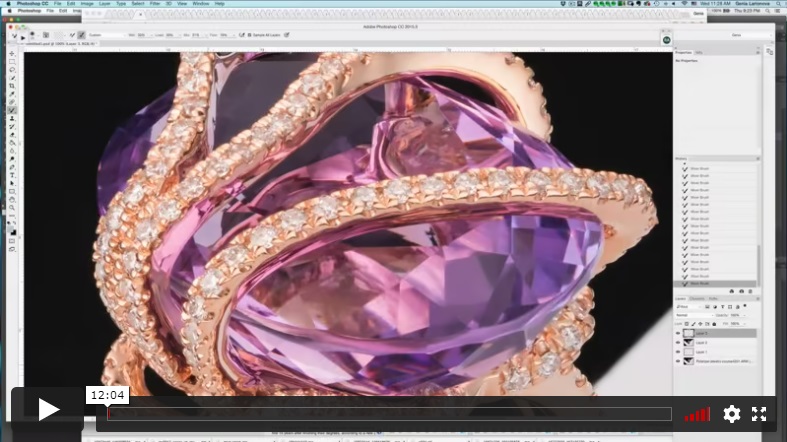
Alex shoots an amethyst ring with diamonds inside a cone. He demonstrates how the polarizer isn’t necessary for the stone but shows how it assists with background and metal lighting. He fixes a see-through area of stone by using a reflector and uses another reflector to add highlight to the metal. Again, Alex uses focus stacking to get all parts in focus.
POST-PRODUCTION
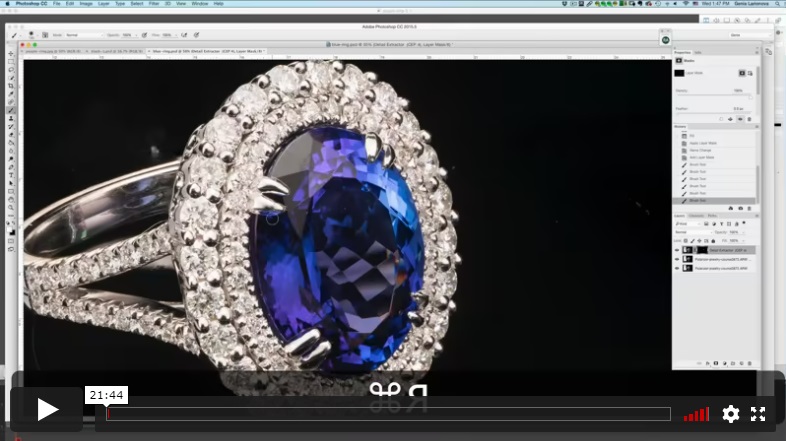
In this multi-part post-production lesson, retoucher Genia starts her post work on the tanzanite ring. She extracts details from inside the stone and uses the Mixer Brush in Photoshop to adjust the metal highlights and shadows to clean up the metal.
Genia further touches up the metal band and then sharpens and prepares to add more contrast to the selected stone. She adds contrast with a Curves adjustment and sharpens the diamonds before brightening them.
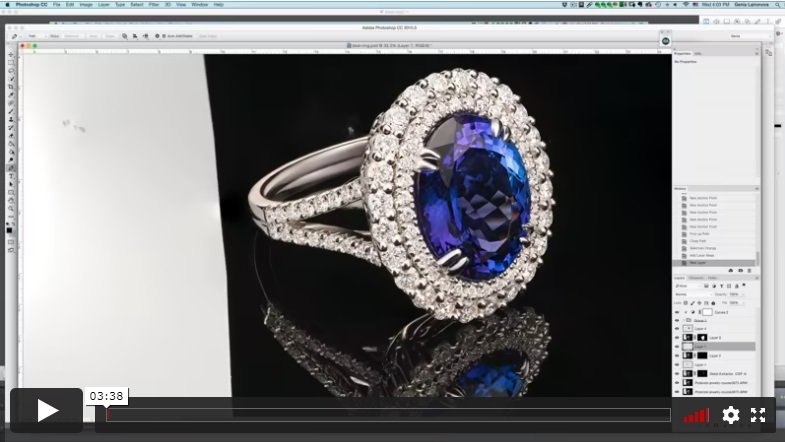
In this lesson, Genia shows how to extract the ring using the Pen tool and places it on a black background.
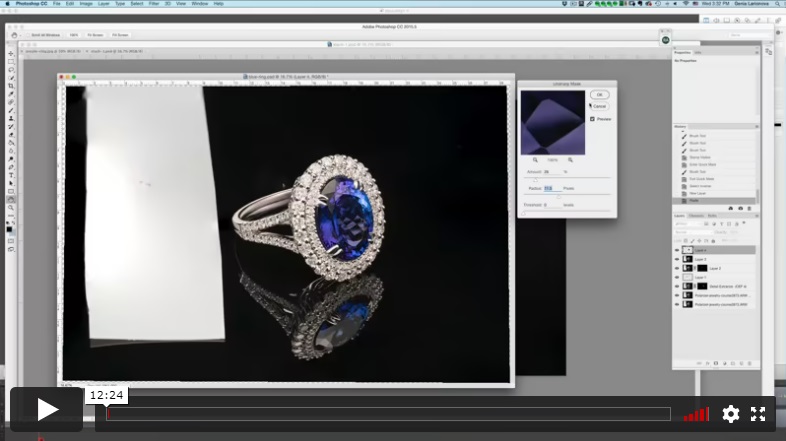
Genia wraps up the post-production of the blue ring by adjusting the colors in the diamonds and adding a radial gradient to the background. She further tweaks the highlights before making final adjustments in the Topaz Denoise plug-in.
Genia opens the image in Camera Raw to adjust the white balance and brighten the diamonds, then opens the image in Photoshop to clean the stone and metal.
Genia continues the retouch by adding contrast to the diamonds and adjusting the brightness for some of them, before making color adjustments. She then adjusts the contrast and saturation of the large stone.
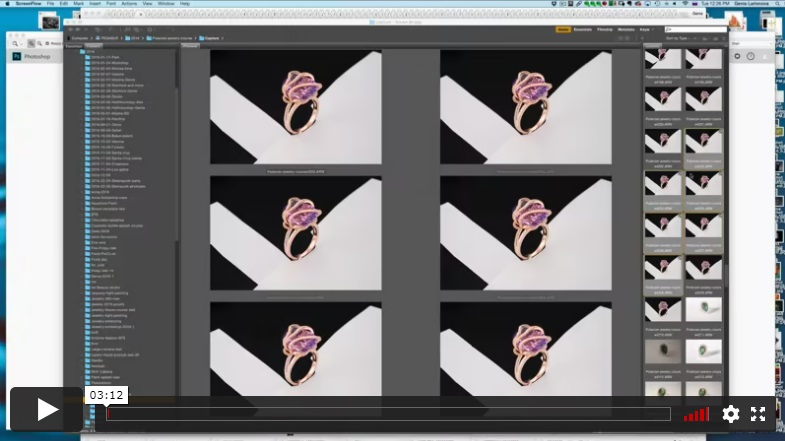
Genia uses the Pen tool again to cut out the ring and place it on a white background. She then paints in a shadow on the base and refines it with masking and a Curves adjustment.
Genia adds contrast with a Levels adjustment and paints back shadows with a mask.
Genia works on post-production of the focus-stacked red tourmaline ring. She starts with the Nix Collection plug-in for Photoshop and adds contrast to the stone. She shows how to use guides to assist using the Warp transform tool and adjusts metal areas to improve symmetry.
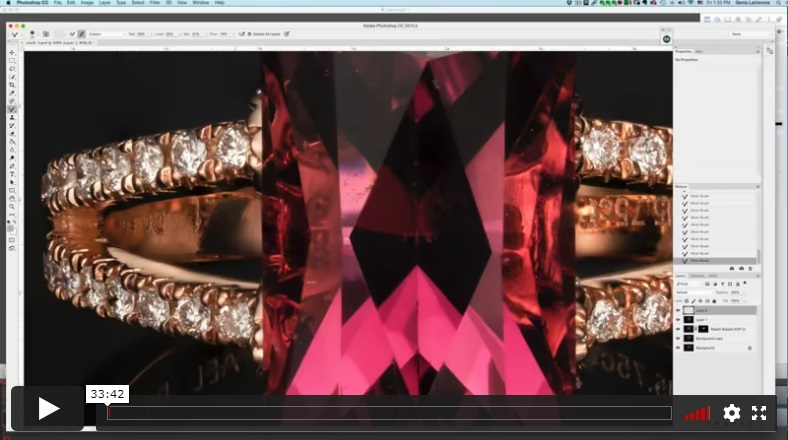
Genia shows how to use the Mixer Brush tool to clean and adjust metal appearance and then adjusts the stone.

In this next part of the lesson, Genia adjusts the shadow of the back inside of the ring using Curves. She sharpens and brightens the diamonds, then adjusts their color balance before cleaning up the background and determining the final crop.
Genia opens six files in Camera Raw to adjusts them before opening them in a Photoshop stack where she combines them using auto-align and auto-blend.
Genia starts cleaning with the Spot Healing brush and fixes reflections using Liquify. She then uses the Mixer Brush to clean the metal and stone.
In this next part of the lesson, Genia continues cleaning with the Mixer Brush. She selects the diamonds to sharpen them and adjust their brightness.
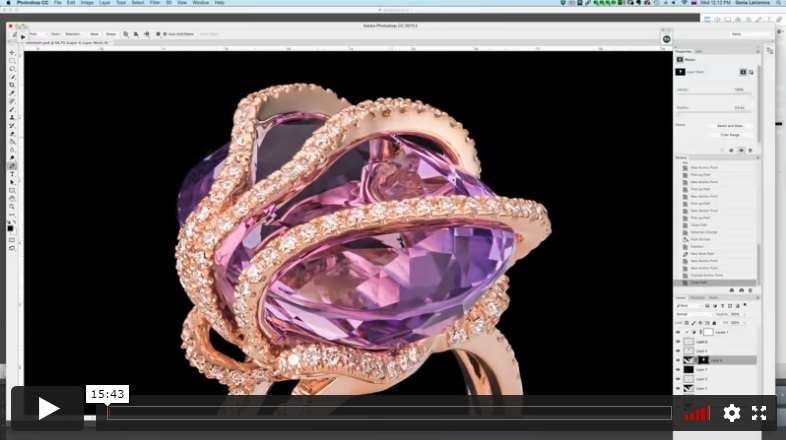
Genia uses the Pen tool to cut out the ring and place it on a black background. She chooses a reflection to cut out and composite into the image.
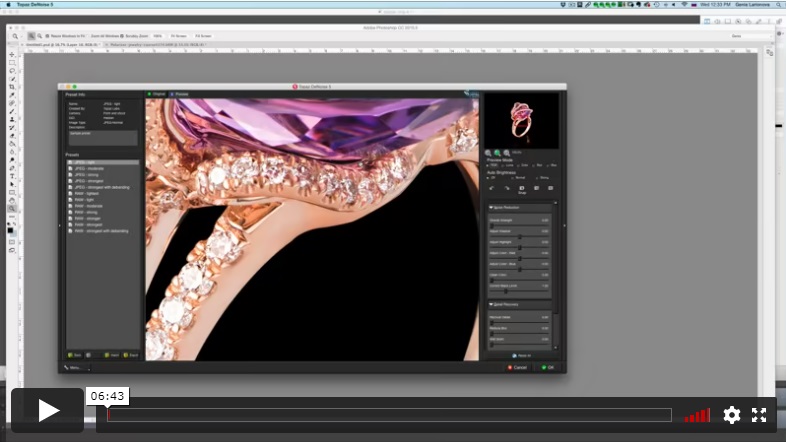
In the final post-production lesson for the purple ring, Genia works to refine the reflection mask before doing her final clean and polish using the Topaz Denoise plug-in.
⭐⭐⭐ SIGNATURE SERIES
Best for long-term access, more DIY approach
Lifetime access
Weekly Q&A
24/7 Email Support
VIP Membership
Best for ongoing learning
Unlimited access to all courses
Priority support
Yes, you can ask an instructor, as well as get a feedback on your work. We have a support forum for this course where you can ask questions, get answers, and feedback from your instructor.
You will have 24/7 access to course videos, forums, and reviews on the Photigy.com website. It is optimized for mobile as well, and we stream from the worldwide cloud to ensure a worry-free learning experience.
You’ll have lifelong access to the course. There is no limitation on this.
All course students have access to a private forum dedicated to support. This is the place where Photigy instructors answer students’ questions, and students can share their own experiences and solutions.
Photigy School Of Photography 2020

Most frequent questions and answers
Is there a way to ask an instructor a question/to show work and get a feedback?
How do I access the course materials?
You will have 24/7 access to course videos, forums, and reviews on the Photigy.com website. It is optimized for mobile as well, and we stream from the worldwide cloud to ensure a worry-free learning experience.
How long will I have access to this course?
You’ll have lifelong access to the course. There is no limitation on this.
How I can ask questions of the instructor?
All course students have access to a private forum dedicated to support. This is the place where Photigy instructors answer students’ questions, and students can share their own experiences and solutions.
Own this course for $145, or unlock it plus every Photigy course and workshop with a VIP membership.
Try the course. If it is not helping you make better images, email us within 30 days for a full refund.