How to Photograph Watches with One Light:
Product Photography Tutorial
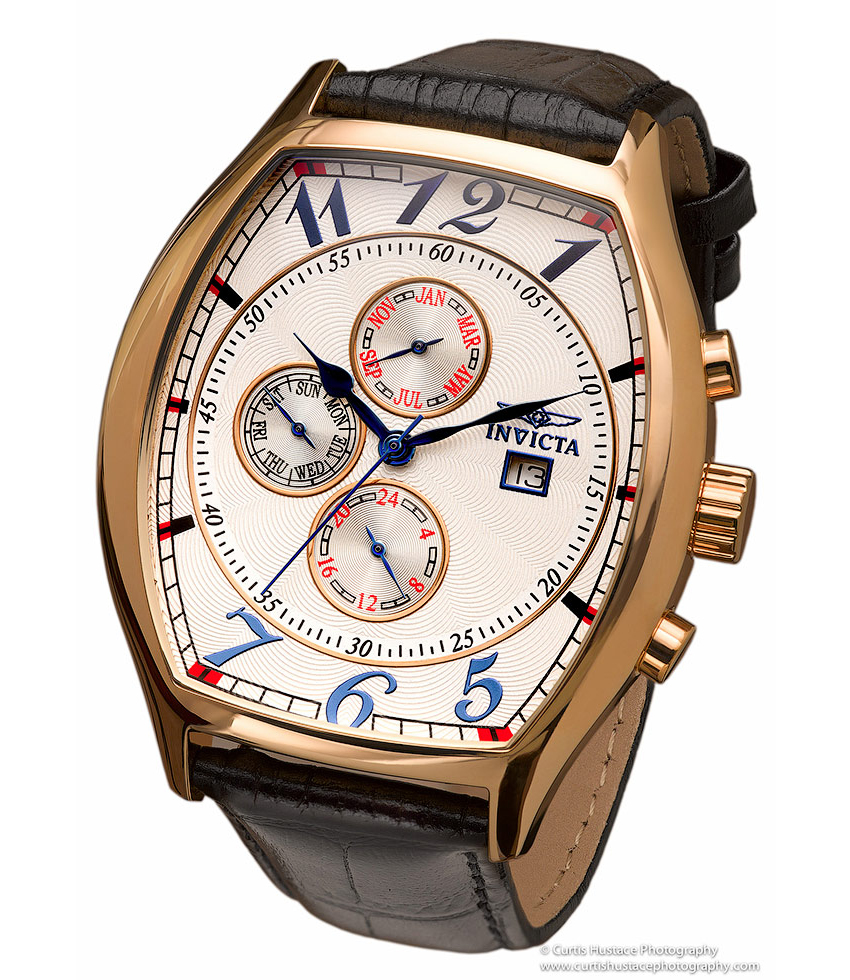
Invicta Watch Shot: How to Photograph Watches with One Light
First off, let me beg for some forgiveness here! haha 🙂 I shot this in my living room. My studio is full of projects right now that can’t be disassembled so I took this at home. I had to re-arrange the living room which apparently my wife was not too happy about! 🙂 Anyway, on to the shot . . . .
The inspiration for this shot was a double page ad in the WSJ (The Wall Street Journal Magazine) July/August 2013 issue. The magazine had Woody Allen on the front cover and when you open the magazine you will see a two page ad for Brequet Watches. Of course this isn’t an exquisite Breguet Watch, but it is a very nice inexpensive watch. If Brequet ever wants me to shoot their watches, I would be more than happy to do so, they are works of art! 🙂
On to this watch!
The first watch I ever shot was done with a similar set up to this. First time around I constructed a 4×6′ wooden frame from wood 2×2’s that I bought at the local lumber store and covered with paper Vellum. Vellum works just fine, but there are two problems with vellum. One, Vellum is very fragile, you hit it and you will punch a hole in it. Two, apparently if you get Vellum to close to a hot light, it catches fire!!! So, for safety purposes, I only use the Savage Roll diffusion material.
This time around, I made my life a little easier on myself and bought a cloths rack and covered it with Savage diffusion material. This you can find on this site (click HERE ), Alex Came up with the idea and I thought I would just capitalize on that idea and use it. I bought two of these frames from Amazon.com for $12 Each. I only used one however for this shoot.
Before I get into the details of the shoot, I would like to make a comment on equipment. I shot this with a Medium Format camera, however, you do not need a medium format camera to take great photographs. I have one, so I use it. But you can just as easily use your Canon, Nikon, Sony . . . whatever you have. Is there a difference between a DSLR and a Medium format camera?” Yes, there is in my opinion. Can you tell the difference if you hold them up side by side? Yes you can in my opinion.
Will anyone ever take the exact same photograph with a DSLR and Medium format camera and hold them side by side? Probably not. So shoot away with whatever you have. If someday you have the extra $$’s and you want to play with medium format equipment, go for it. But don’t ever feel you have to have it to take great photographs! 😉
The Shot: How I Photographed Watch
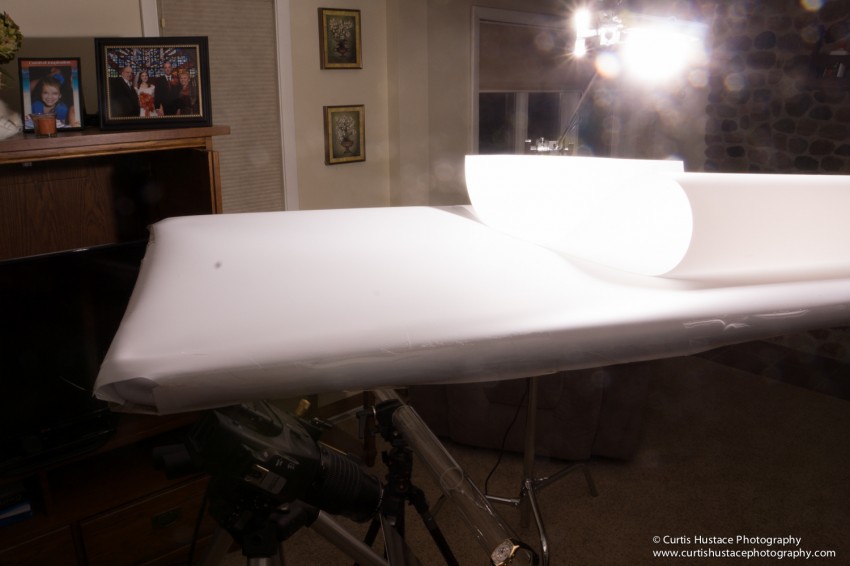
OK, Now on to this shot. This was, as I said taken with ONE strobe. See below for the general setup.
I used one frame with diffusion material on it clamped to a C Stand. Ironically I didn’t take a photograph of how I clamped it, but it was very basic and I used the clamp that comes on a stand and just clamped to the tubing at the base of the metal frame.

 Only for Pro Club Members
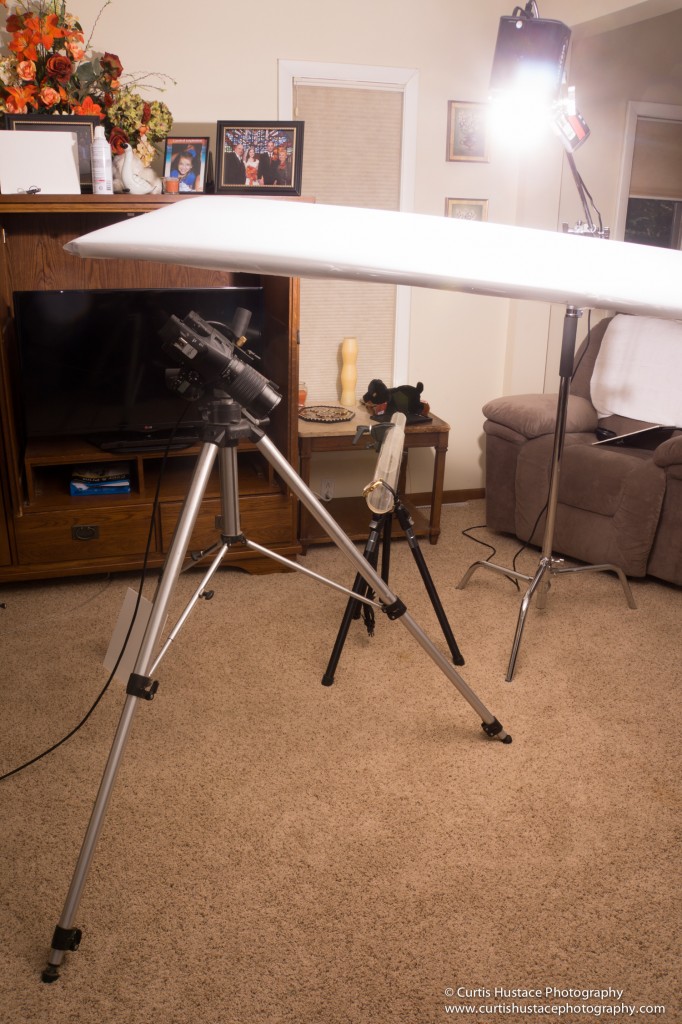
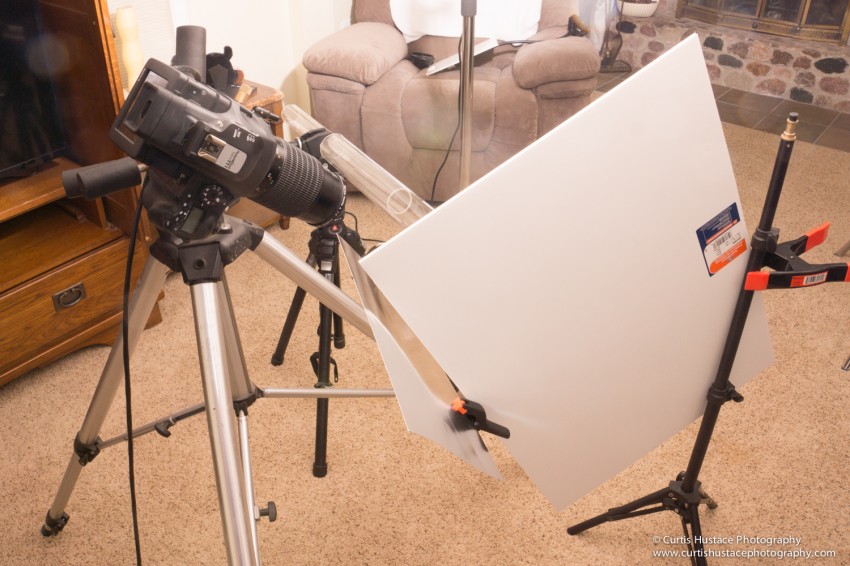
Basic Setup. One Light Modifier With One Einstein Bare Bulb Strobe
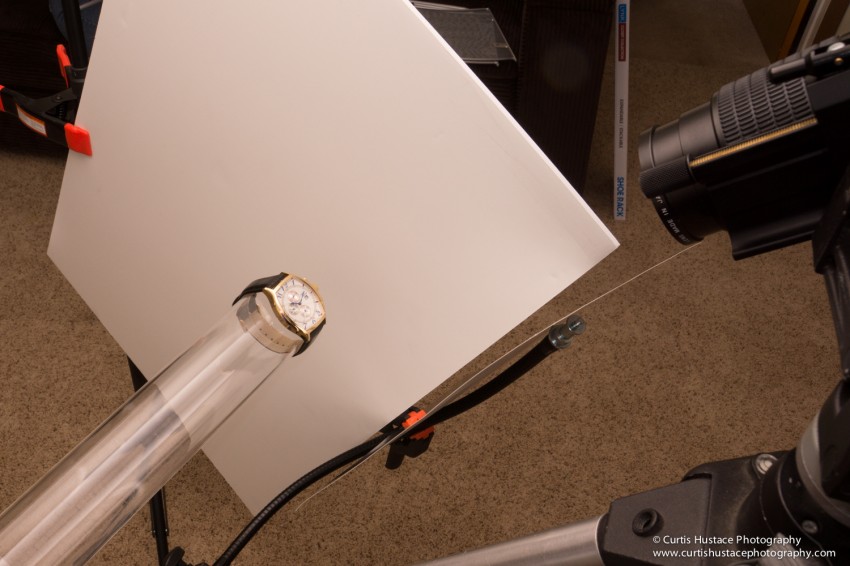
The camera is on the Bogen tripod and the Manfrotto tripod is holding the acrylic tubing. There are two tubes of Acrylic, one 2.5″ in diameter and one 1.5″ in diameter. The 1.5″ tube is clamped to the tripod and the 2.5″ tube was slid over the 1.5″ tube. I did this only because my clamp would not hold the 2.5″ tube directly.
I used tubing because I wanted the watch band to be more or less round. I didn’t want the watch to “FLOP” around I wanted it more or less still. In this configuration I took my first shot to see where I was with regards to exposure etc.
The Buff Einstein is bare bulb for a reason. I wanted the light to not be channeled by a modifier like a reflector or soft box, I wanted to try and get some fall off and gradients on the tiny watch surface. By adding a reflector I would be directing the light to a spot on the diffusion panel thus restricting its ability to fall off and create a gradient, so it remained a bare bulb.
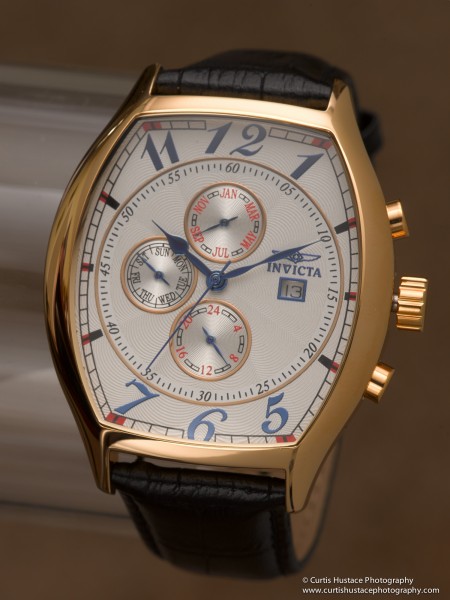
First Shot Out Of The Camera – Too Hot On Top.
Bezel On Top Reading 255 (Pure White) With
No Gold Tone Or Texture.
OK . . . SO this is a SOC Image (Straight Out of Camera) The face is fairly well lit, but as expected the sides and bottom are dark. Also, the very top of the bezel is blown out as that is where the light is coming from. Now If I turn down the light, it just makes everything darker, I told myself I can’t add a second strobe, so what do you do.
Well, you have to reduce the amount of light hitting the top of the watch. How do you do that you may ask, well, you simply diffuse the light further. I had some left over material from making my panel, so I put that across the top. AT first I just put a single strip, but it was still to hot, then I just double it over, so I then had three layers of diffusion across the top.
In Capture One, I could see the light had gone down from 255 (pure white) to where I had some detail and it was no longer “BLOWN” out and I could see some gold (see below)
Added Diffusion Material To Lessen Light Across Top Of Watch
Now Top Of Watch Isn’t “BLOWN” Out
Next on the list was giving some light to the bottom of the watch. Since I am only using one strobe, I got a silver card (actually on heavy paper). I got this from a local craft store. I clamped it to my tripod on an flexible arm to give it some curve to the silver.
I was hoping it would put some light on the lower band, but it really didn’t. So I would fix that later.
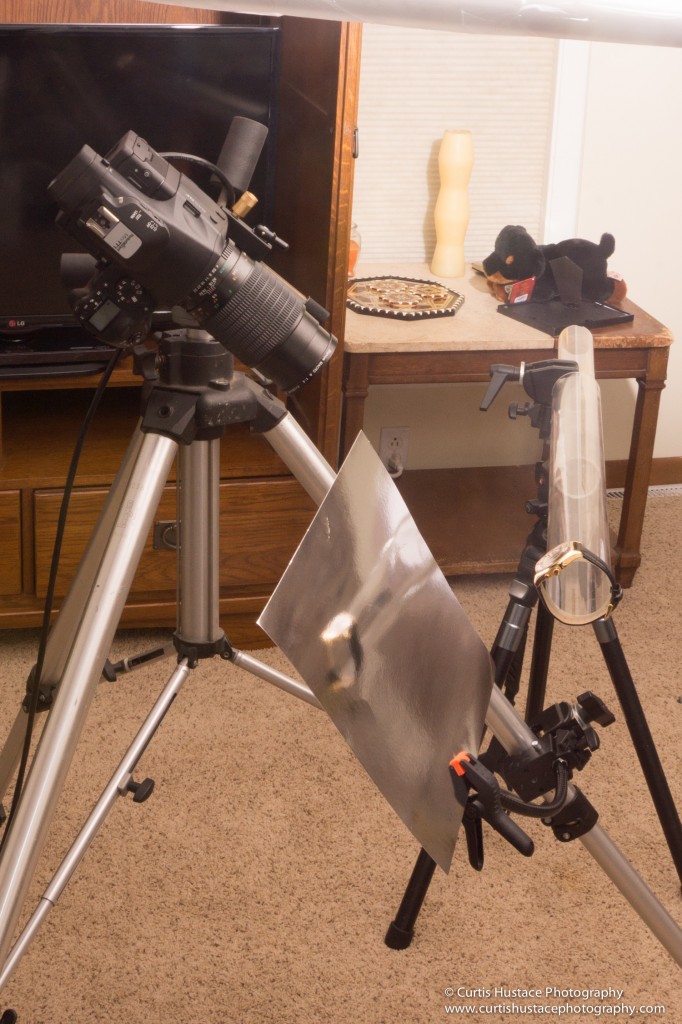
Silver Card Added To Lighten Up Bottom Of Watch
This was the resulting shot using the silver reflector:
Bottom Of Watch Now Has More Light
Now came the left side of the watch, I need to lighten that up.
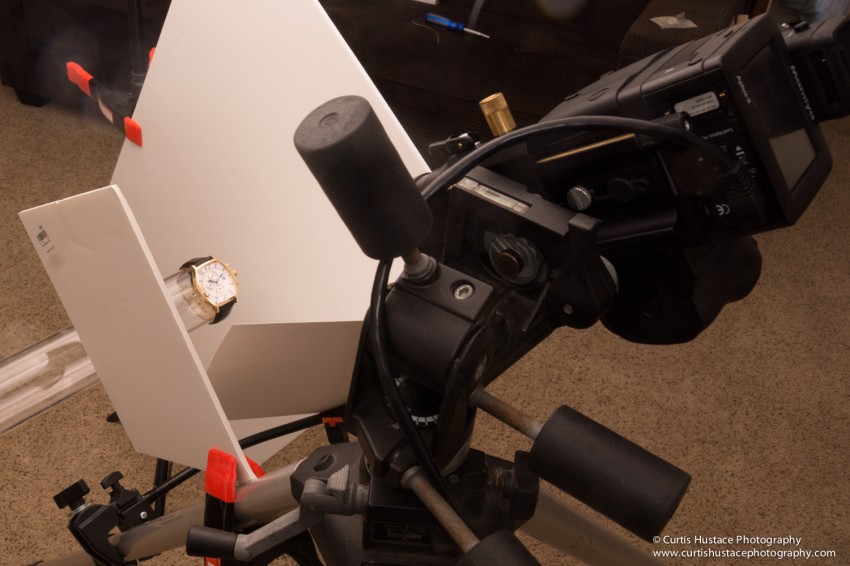
So I got a simple light stand and a large white foam core board and clamped it to the light stand.
Foam Core To Add Light To Right Side Of Watch
The Right Side White Card From A Different Angle
The Result of Adding a White Card:
The Result Of Adding A White Card TO RIght Of Watch.
Ok, so we are getting there. Now we need the left side of the watch! Another White Card you ask?? Why yes of course!
Card To Add Light To Left Side Of Watch
The Resulting Shot:
Result Of Adding Card To Left Side Of Watch
Ok, now how about the bands? Well, I don’t have shots of how I shot this because After I shot the watch, I then took yet another white card and held it by hand on the top and bottom to give light to the band to composite in later.
Now that I have my shot, I need to stack focus this image. So I took a series of photographs starting from the back to the front adjusting focus as I went until I got the whole watch in focus across multiple frames. I then took those images and put them into Helicon. If you have never used Helicon for stack focusing, you are missing out.
It is, in my opinion FAR better than Photoshop in this regard. It seems to be far faster, and more accurate and it is easier to fix if there is a mistake than PS, download a free trial and give it a whirl.
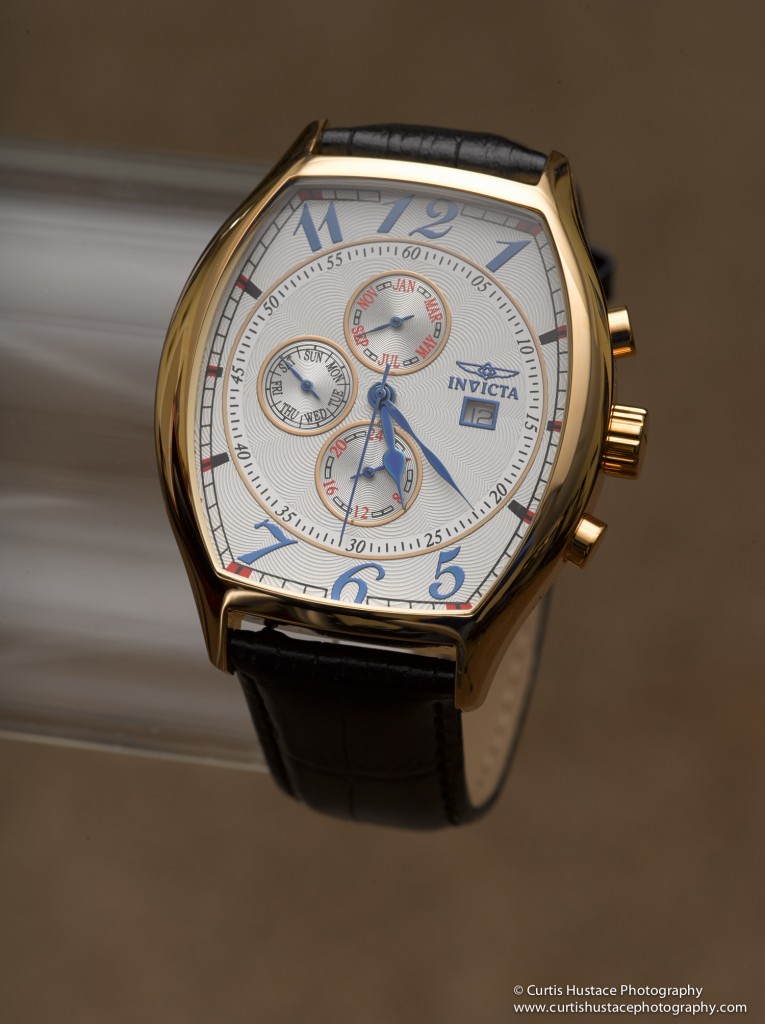
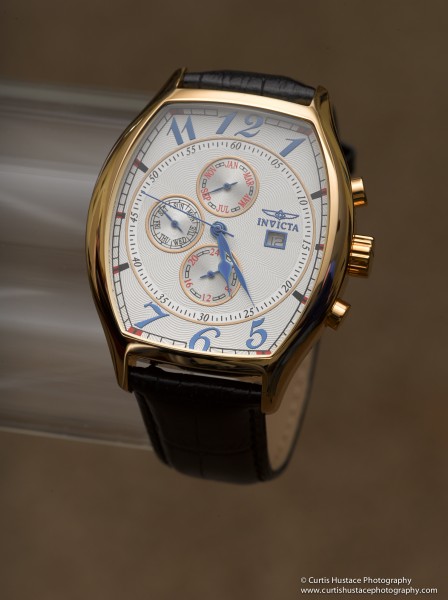
After all that, I spent a LONG time retouching and the final image of this angle was this:
The Final Images
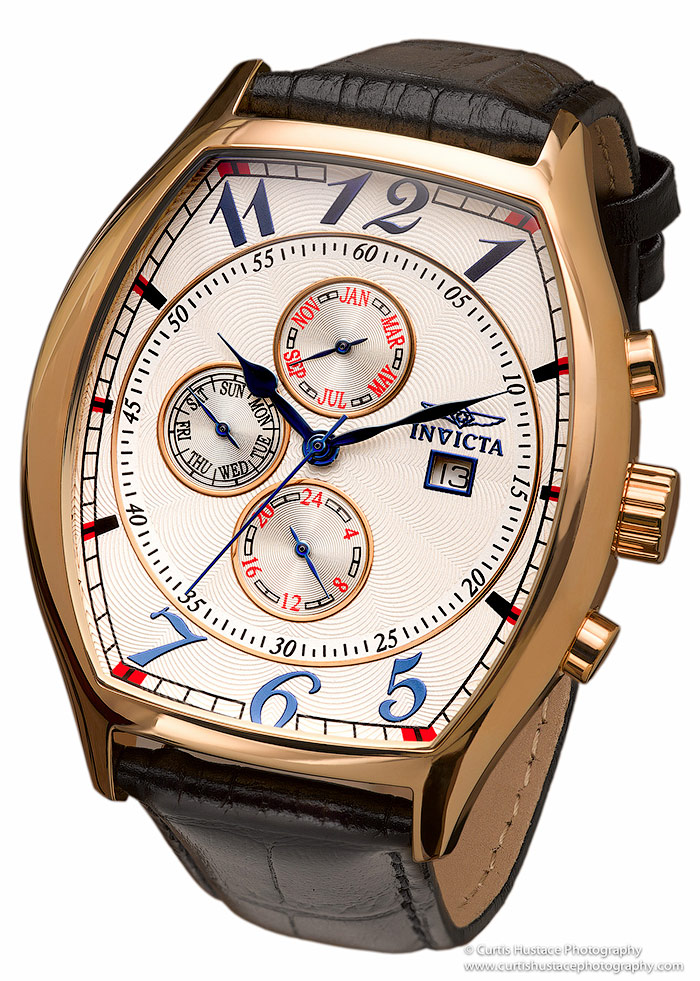
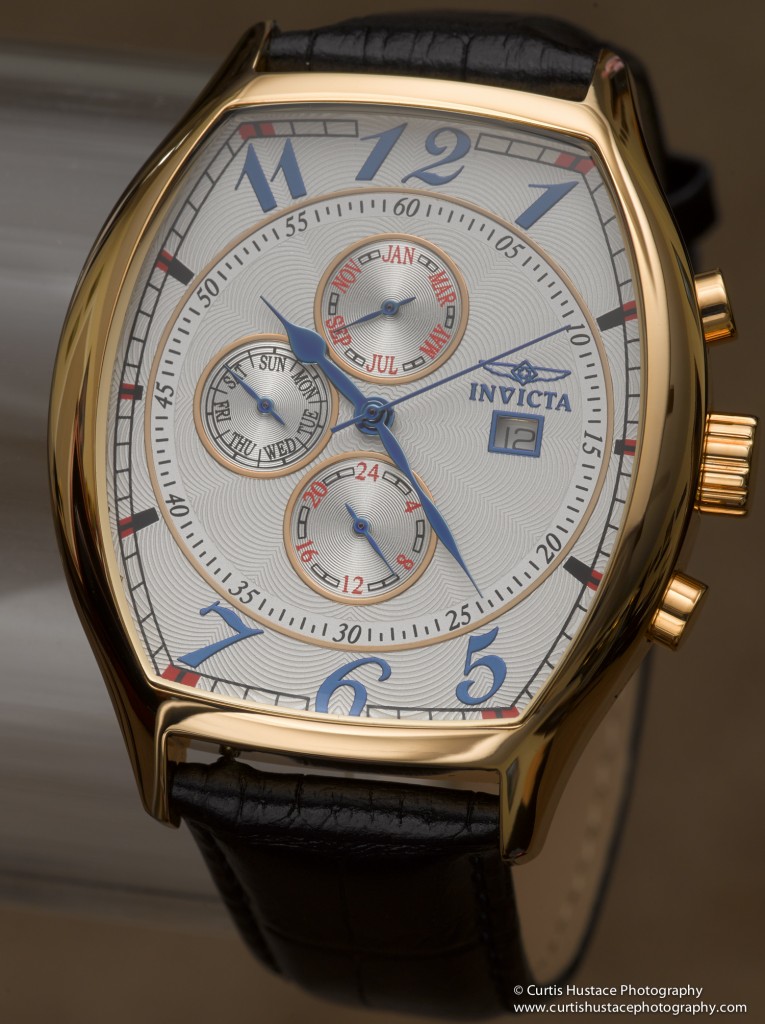
This is a TWO shot image though. So I had to get a close up of the face, I just re-positioned the watch slightly and got this when it was all said and done!
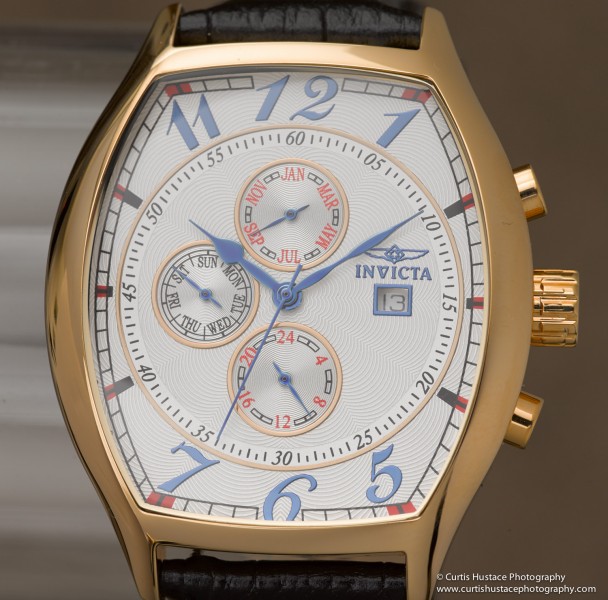
SOC Image of Straight On Variation To Be Used For Background
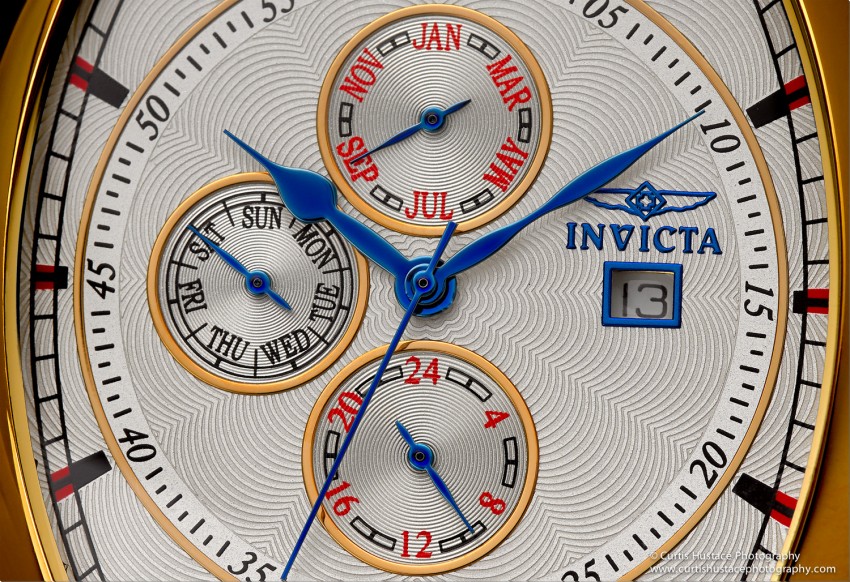
Straight On Shot After Retouching
Then I composited the two and you have your final image!
I hope this was helpful, if you have any questions, feel free to contact me via email or Google+ or post your comments right here, under this post.
 |
In the Gearbox |
|
Camera: Mamiya DF Medium format body |