How to Photograph a Chrome Faced Watch with a Reflective Body and Strap
How to Photograph a Chrome Faced Watch:
This shot was produced merely as an exercise, and not for a client or the watch manufacturer. Honestly – had it been for a client It would of been a re-shoot due to some of the issues I came across. More about those later..
I’ll apologize right now for the video quality, what appeared to look ok on a small lcd screen didn’t translate to the final file. Seems the camera I used will require MUCH brighter lighting levels than a few fluorescents will provide, hence a rather grainy video (I’ve a couple of thousand Watt work lights on order already).
I’ll list the rest of my ‘should have done’s’ after the video, except to say- maybe having a shave and a change of clothes before recording this would of been a good idea ;- )
How to Photograph a Chrome Faced Watch: Issues and mistakes
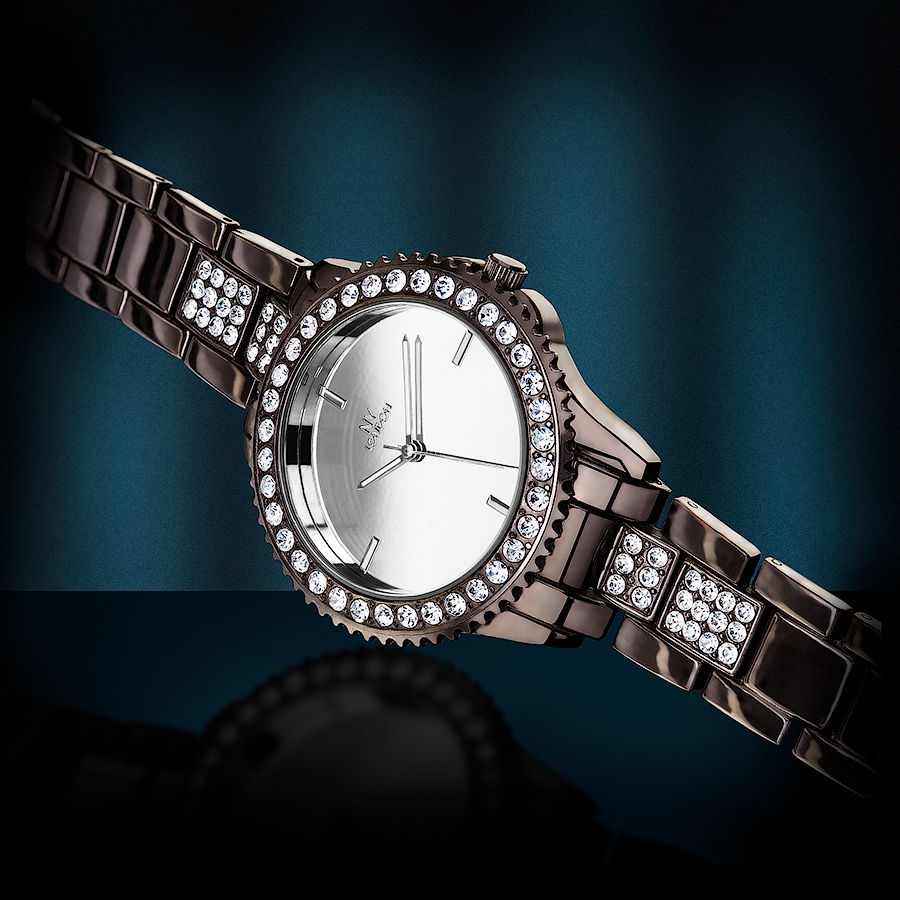
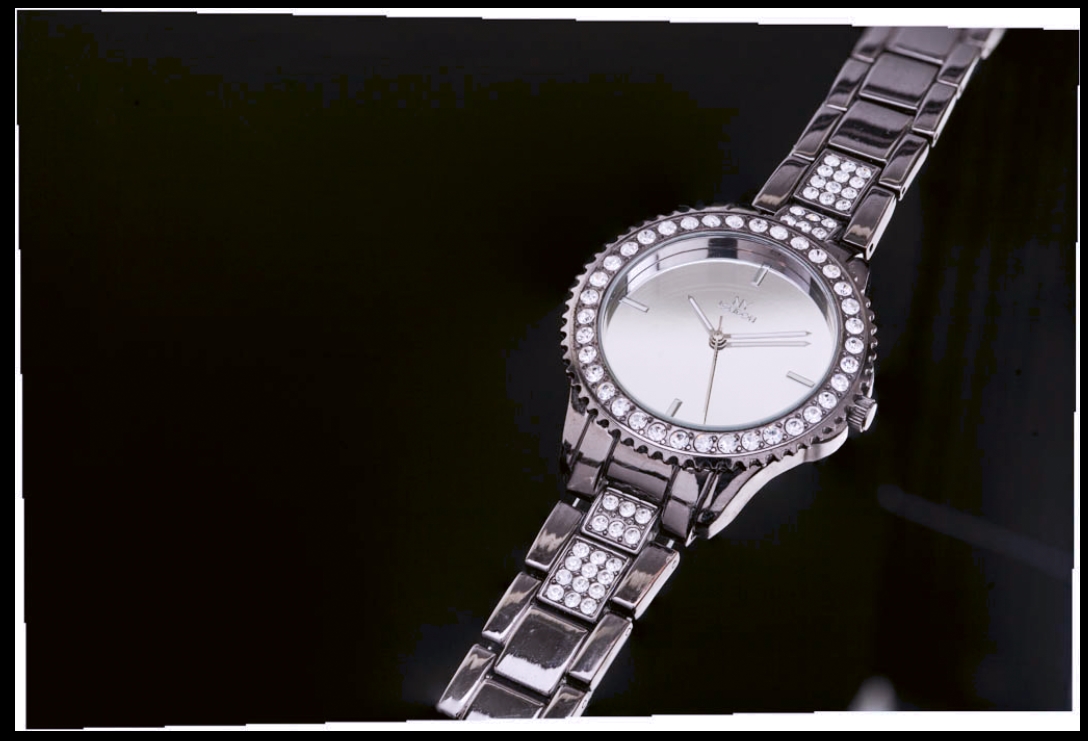
It’s only the 2nd watch I’ve ever shot, but wouldn’t you know it – I made the same mistakes as I did the first time around. The watch had already been worn, so all the normal wear and tear was already prevalent across the surfaces; and in particular all the sharp edges of the body and strap were already starting to get rounded off. Additionally, I didn’t clean it anywhere near as meticulously as I should of, so this all added to the amount of post production needed.
Deciding how to light the chrome face proved a challenge. I initially had a few ideas along the lines of placing some thin black reflections across the face to show it was reflective. But I felt this would break up the shape of the face and probably just look distracting. After consulting with a few of the guys I went with a gentle gradient, and have pretty much relied on the internal reflections from the inside wall to show the viewer its reflective nature. Btw the actual face is (I suspect) just reflective plastic or cardboard…you can see texture across it; which I should perhaps of smoothed out for the final shot in post.
The biggest mistake was not ensuring all the strap links were perfectly aligned on the perspex strip, you can see from the final shot that the left side of the strap isn’t straight – and the links are stretched out too far on the right side thus leaving odd looking gaps between the links themselves. It doesn’t help when having to check everything is ok whist looking at a cameras LCD screen. The view through the viewfinder was impacted by the polarizing filter, so it wasn’t obvious to me that the watch had shifted slightly – a pitfall of not shooting tethered.
Using a polarizing filter will dictate your working aperture. In this case I was forced to shoot at f8, the filter will soak up nearly a whole stop on its weakest setting. The diffuser additionally soaks up around 2 stops – so with the rear light at nearly full power I ended up with f8. This in turn forced me to take more shots using the macro rail just to get the watch sharp from front to back…a total of 25 shots were taken.
Shooting used jewellery watches. If you like to lose hours of your life in Photoshop then this is a great idea – otherwise stay away from them if you can. Failing to clean them item meticulously (woops) adds to the woes.
Not having a clear idea of the final image, or not having everything you might need to hand. The rotated view and fake reflection and background were very much an afterthought whilst doing the post work. I initially tried bunching up nylon (fishing) line and arranging it behind the watch to provide some background/bokeh interest but it just didn’t seem to work well. Of Christmas lights didn’t really appeal to me during the shot either, so I left the background black in view to adding a complimentary graphic design of some sorts later. Had I decided to create a surface reflection during the shot, I could of probably inserted a piece of clear perspex up against the bezel (taking care not to get other reflections on it). Again, this would of saved some time in post.
 |
In the Gearbox |
|
Camera – Canon 5D Lens – Canon 100m (non IS) f2.8 Maro Lights – Paul C Buff Einstein E-640 x2 (+stripbox +7″ reflector) ‘Little Table on a Tripod’ Closed cell foam diffusers (see links at end of article) Black card/foam core sheet |
How to Photograph a Chrome Faced Watch: Post production part
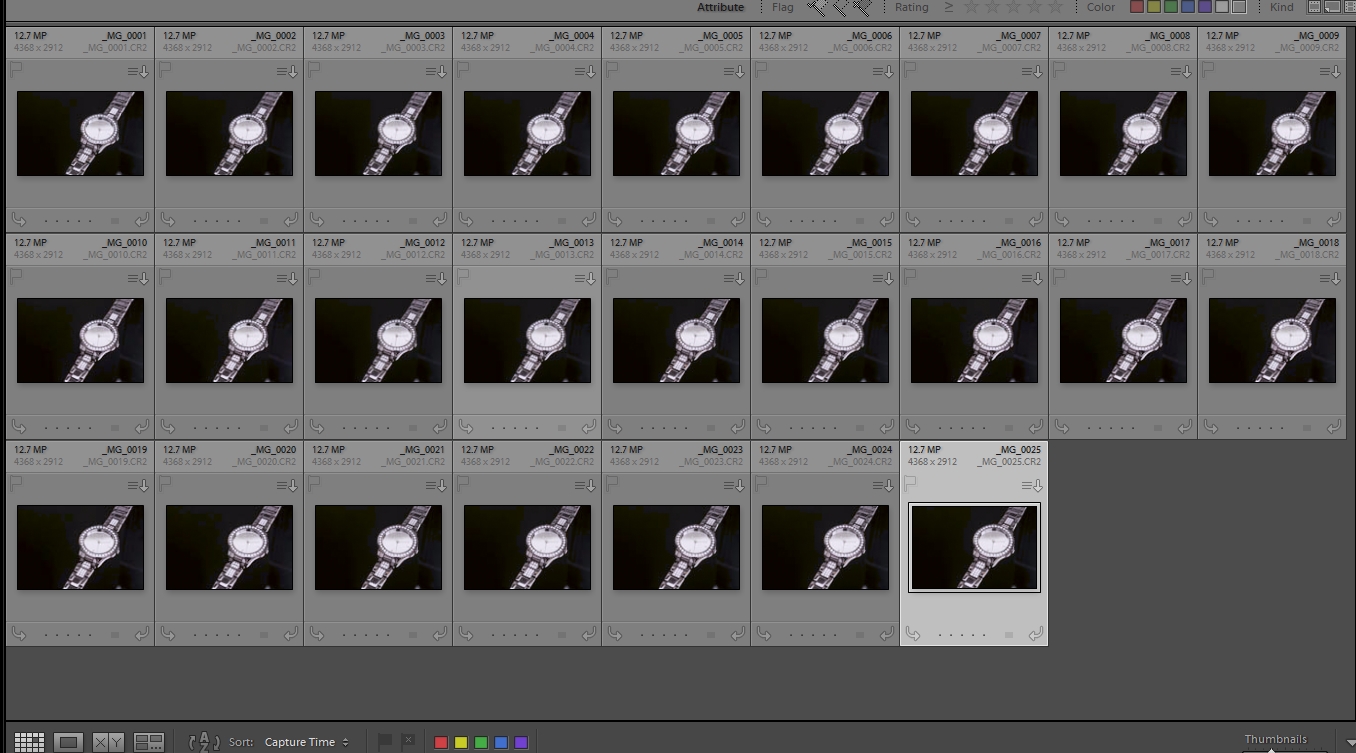
Above: All 25 RAW files used to stack into Photoshops photomerge facility.
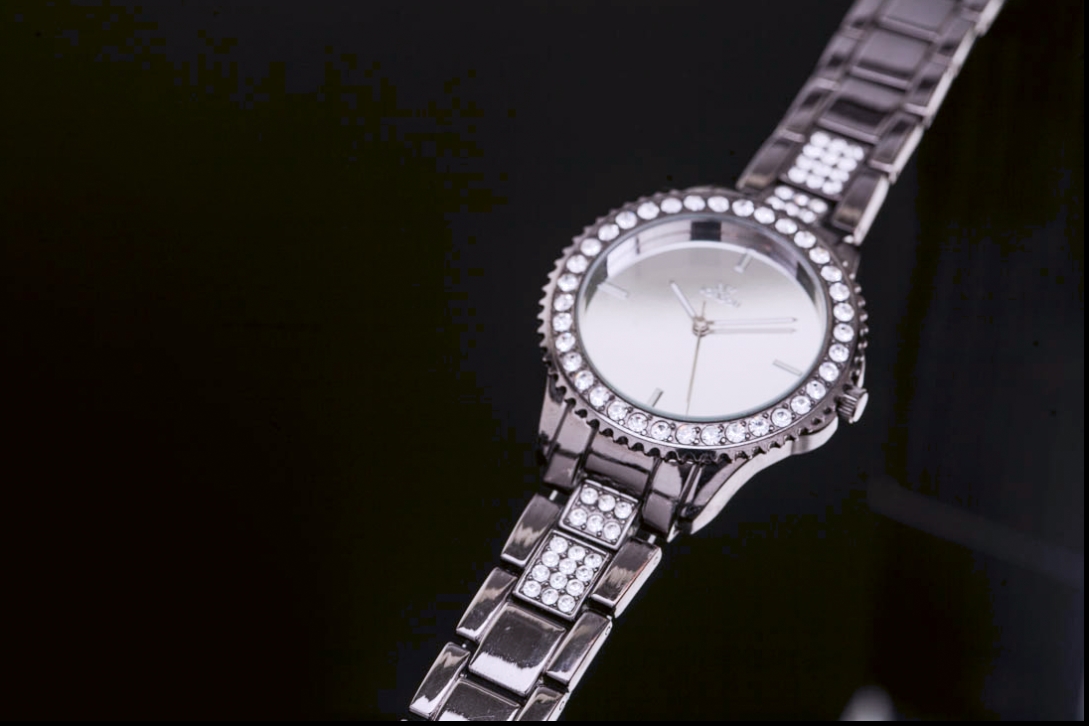
Above: The first RAW shot of 25 taken. Notice the level of scratches and tarnishing of surfaces. Interestingly, at f8 there already seems to be a good portion of the strap and body in focus. I would of probably gotten away with taking only 12 shots to cover the entire watch in this case.
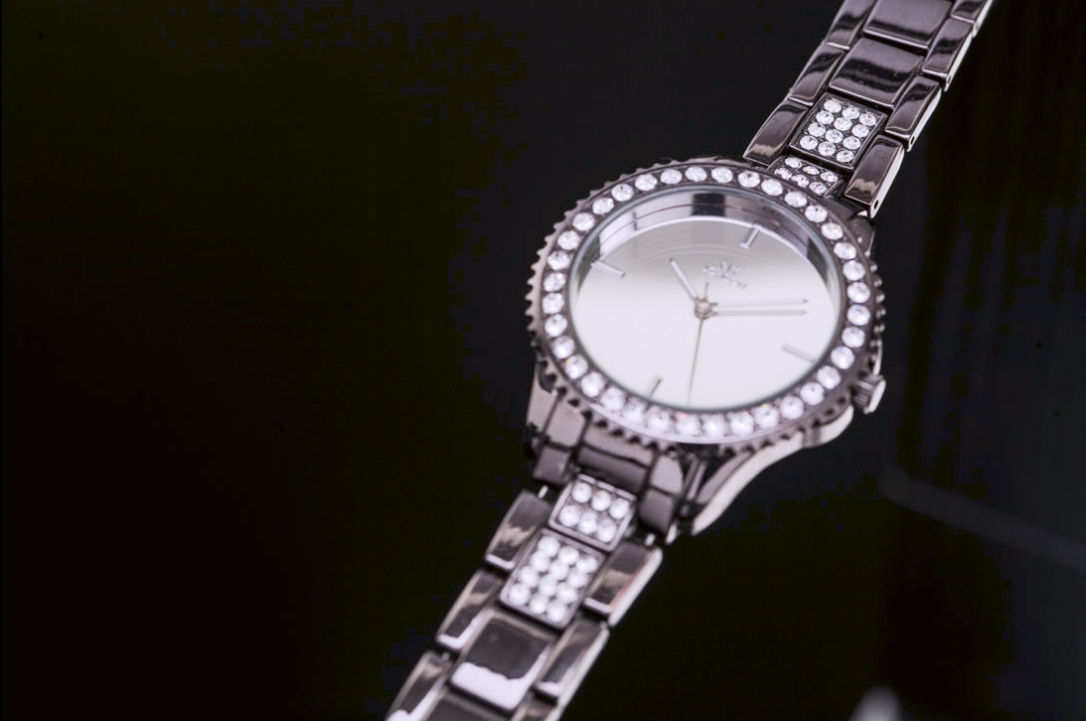
Above: The last of the 25 Raw shots taken.
Above: The result straight out of photomerge. Note how the far part of the strap has become blurred, it’s possibly the result from having used too many images in photomerge. I wasn’t too concerned as I’d already planned to conceal the extreme ends of the strap.
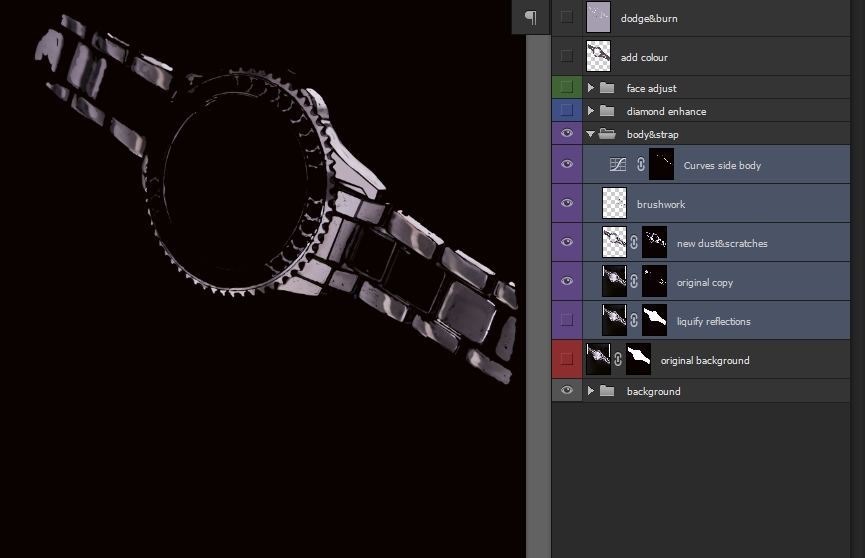
Above: After making a cutout and a resulting mask of the watch – alterations to just the body & strap consisted of using three copies of the original layer. The highlighted layers show (from bottom) one for cleaning up the shape of the surfaces with the liquify tool. The two above are both blurred copies of this layer that were cleaned using Genia’s dust removal method. The brushwork layer above this is a merged result from over 20 separate layers. A combination of using the healing/clone stamp brushes all on separate layers so mistakes can be easily rectified if necessary. Only once I’m satisfied do I merge the layers down to a single layer.
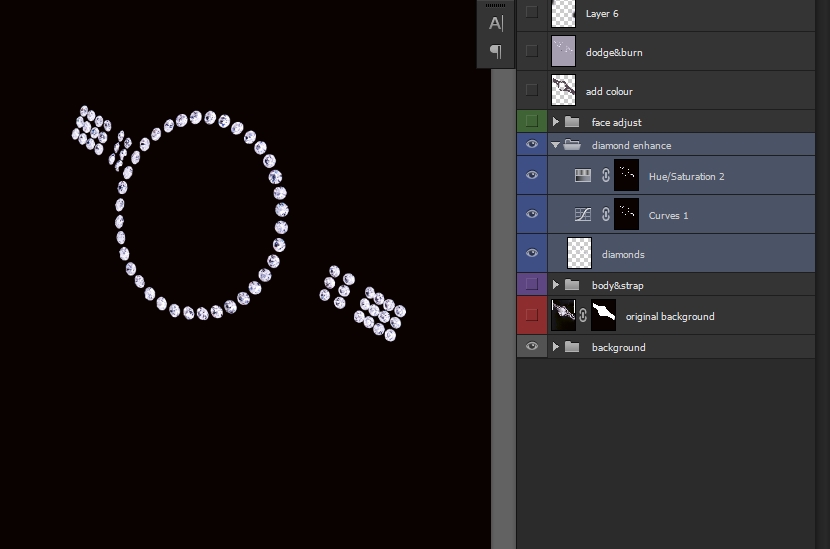
Above: Retouching the fake diamonds consisted of using a small hard edged brush in Quick Mask mode to make the selection, then copying and pasting to a new layer. The diamonds needed contrast, and were tonally too bright.
I ran the Unsharp Mask Filter using a large radius of around 200, and strength at 30% to provide mid tone contrast – then ran it again with a radius of 1 and strength of 60% for added detailing. The Curves layer above lowers the mid tone values, and the Hue/Saturation layer removes most of the yellow highlights that were noticeable.
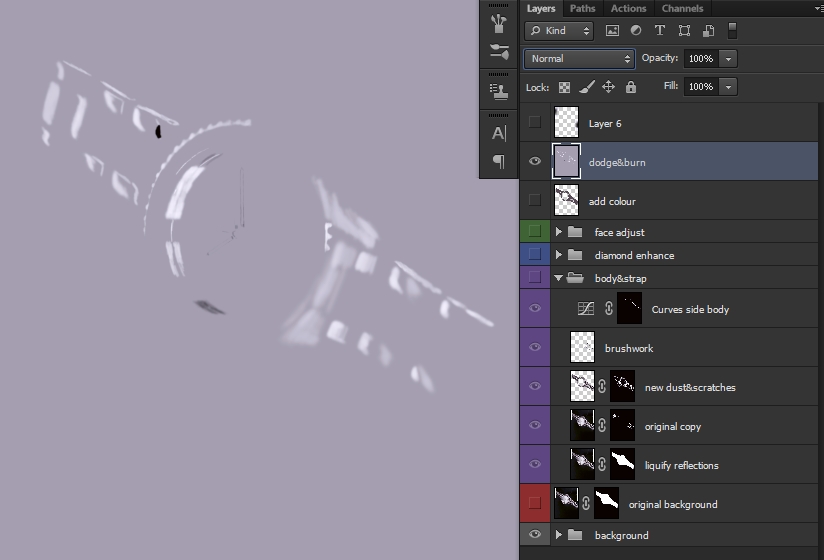
Above: Dodging and burning performed by creating a new layer, setting the blend mode to Overlay and filling with a neutral grey. The Dodge and Burn brushes were used at varying opacities and hardness.
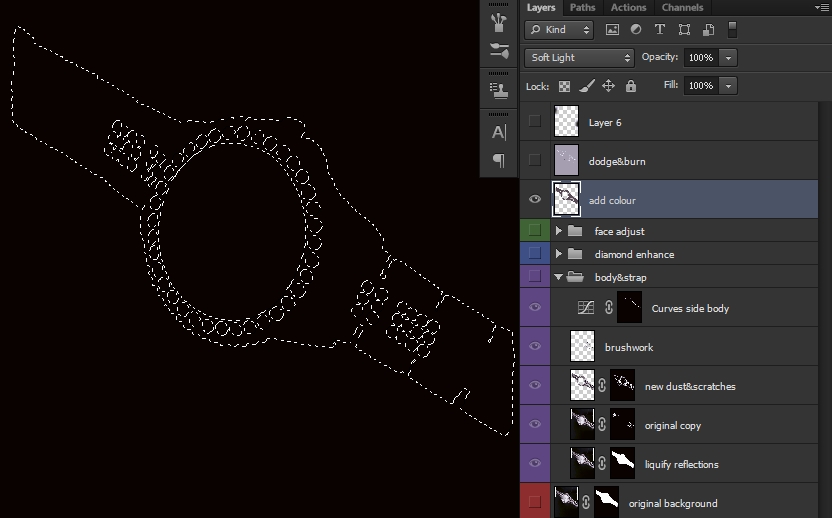
The layer below this is to boost the body and strap colors. The original watch selection was loaded up, the mask for the watch face was then used to subtract it from this selection. With the resulting selection still active (see image below), a color sample was made from a darker region of the watch with the eyedropper tool and the layer filled with the color and its blend mode set to Color. Layer opacity was reduced for taste.
The uppermost layer is simply some brush work to conceal the extreme edges of the strap.

Above: A fake background was created by some large vertical soft brush strokes on a new layer, blur and noise were added along with a mask to give a surface edge. A Hue/Saturation adjustment layer with a blue tone selected was clipped to this to add colour.
The entire watch was then selected and copied to another layer, flipped and rotated – then blur applied and finally masked to taste so to provide a reflection. The next layer above shows some blue brush work across the faux surface with the contents of the layer below used as a mask.
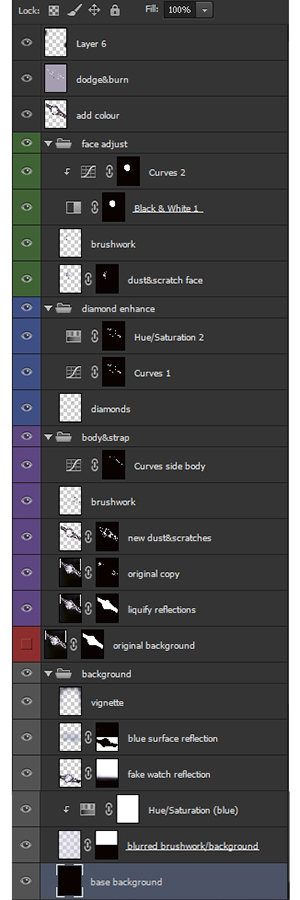
Below: The entire layer stack in Photoshop
How to Photograph a Chrome Faced Watch:
That’s it guys. Again, a few mistakes made – but also a few lessons learned 🙂
Oh I nearly forgot..
If your in the U.K, finding closed cell (Styrofoam) foam can be a challenge, I purchased Depron foam sheets and glued two of them together using “3m 77 Scotch” adhesive spray.
