Behind The Shot:
Dynamic Rockport Shoe Shot – Sand as an Alternative to Fluids?
Product photography tutorial: Behind the Scene of the Rockport Shoe Shot
a behind the scenes look and product photography tutorial by Photigy contributor Paul Whittingham
Before the Photo-shot: Pre Planning Stage
I’d owned this particular pair of Rockport shoes for a while, and had purposefully not worn them in view to using them for a shot I had in mind. Any wear and tear on the soles would of probably taken them beyond a condition that could be corrected in post production. Just like any product (especially jewellery), its best to shoot something that’s brand new so as to avoid a lot of extra work later on in the process.
I’d already decided on using sand within the image to provide a sense of motion, and I liked the concept of combining it with rugged footwear. Having never shot with sand before, I was intrigued to see how it would react when thrown and frozen in flight with short duration strobe.
I initially thought about getting a bag of cheap building sand, then I recalled my time working on building sites and quickly changed my mind. You see – cats just love sand… they like nothing more to leave little presents behind for you to find later on.
Enough said. Instead I purchased a bag of kids playing sand which turned out to be a good move, it’s very finely filtered and washed; so the individual grains are regular in size and very small.
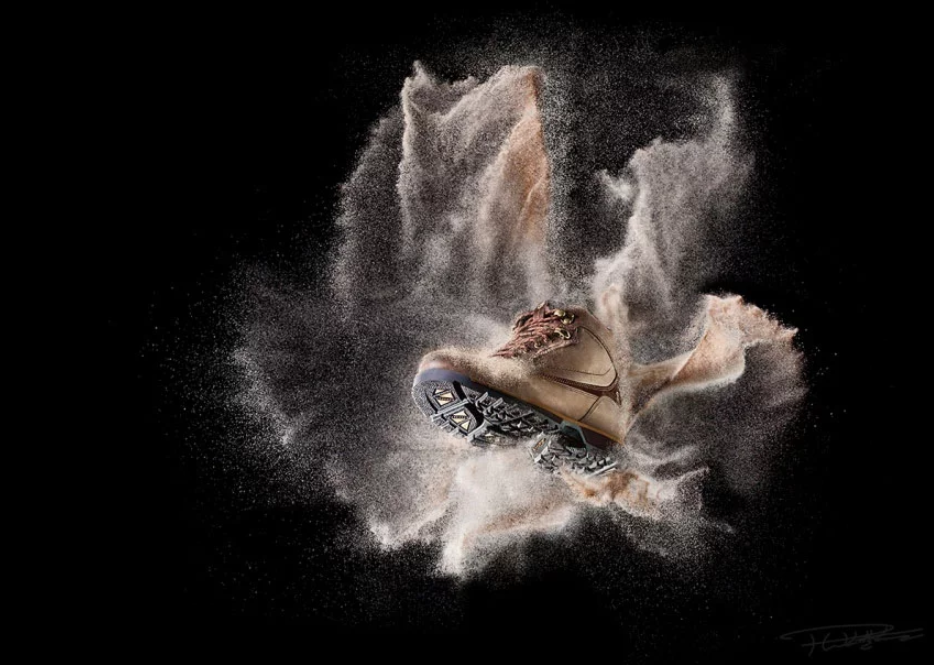
Toying with the idea of combining sand explosions around the shoe, and also capturing separate pour shots; I knew that a good deal of compositing was going to be required. This more or less forced my decision to go with a pure black background. I had no exact idea what form the sand would take, or how easily it would be extracted from its background for processing later. Not so much a bad thing as I was hoping the sand would provide enough interest in the image alone, and really ‘pop’ against the black.
Manfrotto super clamp
The Lighting Set up

 Only for Pro Club Members
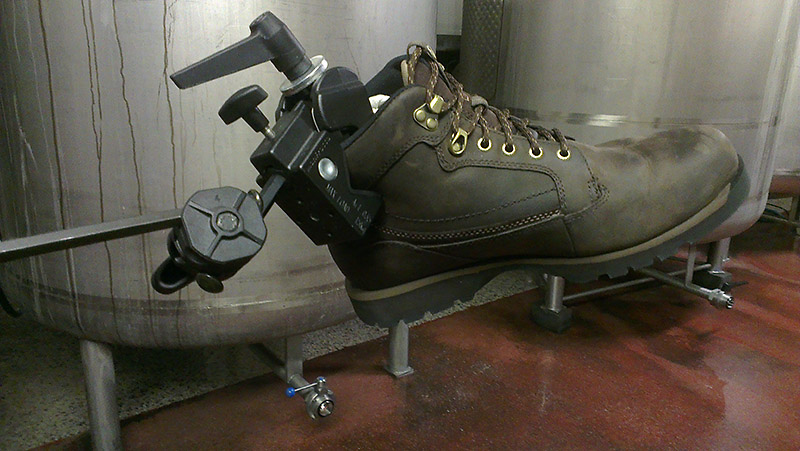
This is how the shoe was fixed. This clam is a great to hold anything for a product photographer: from light modifiers to the subjects.
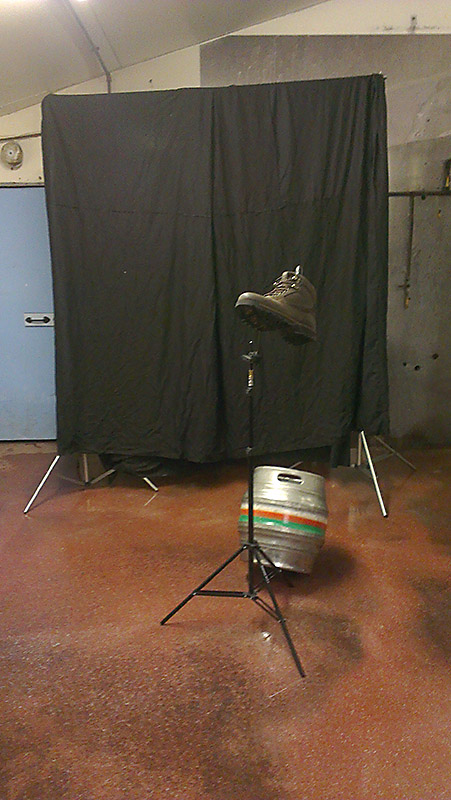
As you can see, I’ve covered a background stand with the black fabric, and the shoe was clamped to a light stand via an adjustable arm. Great care was taken to make sure the least amount of the clamp was visible in frame above the shoe as this would require editing out later.
Getting the shoe angled correctly so the sole was visible to the camera, and trying to ensure both the clamp and arm were as concealed as possible took quite some time. I knew I needed space around the heel to throw sand at the shoe without it being obstructed too much, particularly from the viewpoint you see in the shot above.
The lighting setup of this product shot
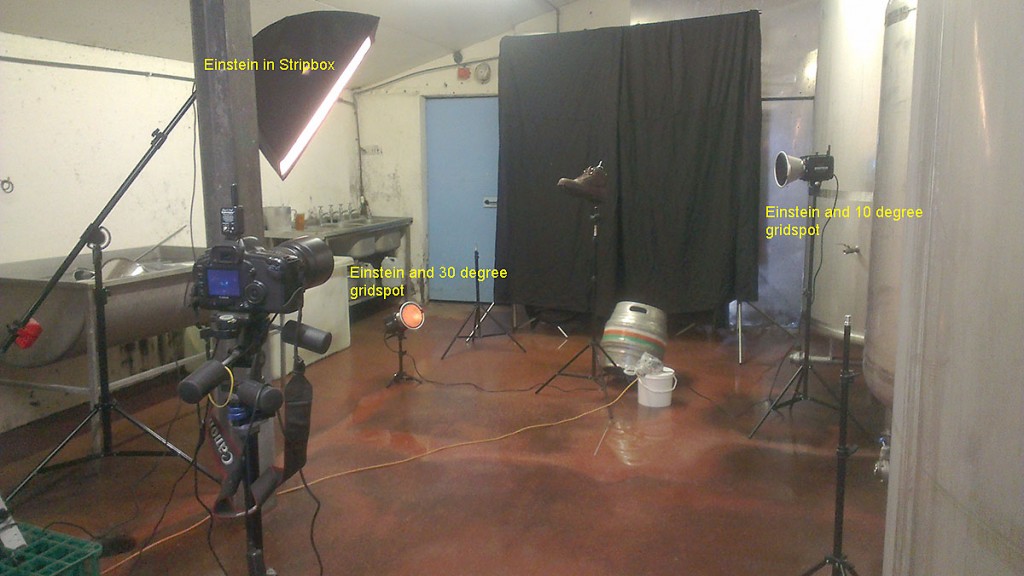
Lighting is a simple 3 point set up.
The stripbox was used to hit just the toe and the lacing portion of the shoe. The light on the floor was behind and angled up towards the sole, hard directional light was required here to pick up all the details on the underside. The third light, placed very slightly behind was raking across the heel and front facing section of the shoe. Care was taken to ensure that this light was also reflecting on the faux brass finish buckles on the upper parts.
The shots
Camera settings were:
Shutter – 1/200 sec, the maximum sync speed for this camera.
Iso 100
Aperture f.11
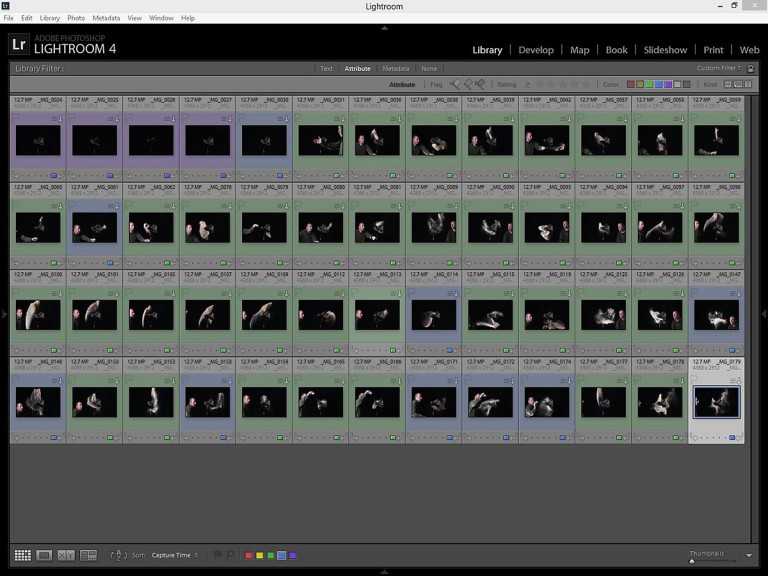
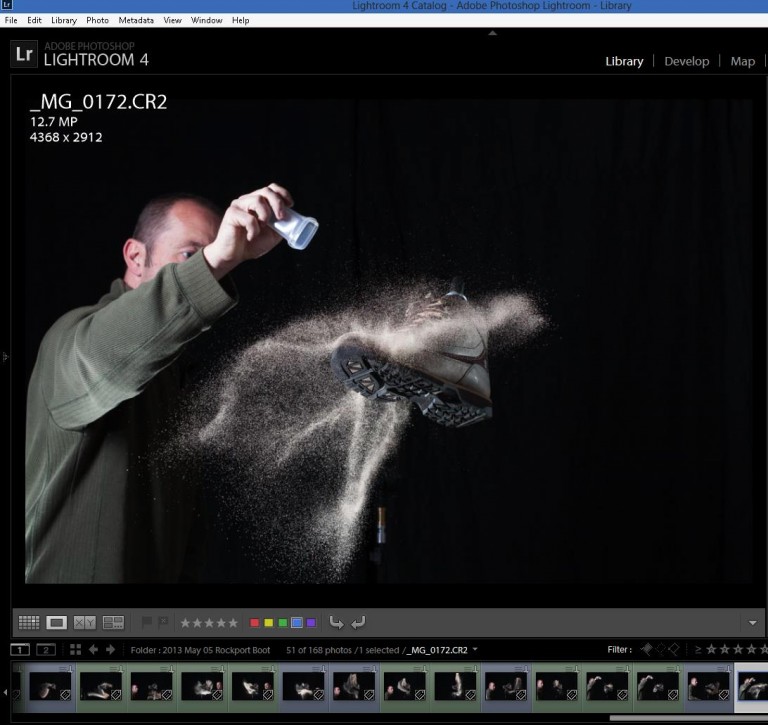
Altogether, 168 shots were taken. All of the shots involving the shoe are shown above, the one’s labelled blue are the shots that were eventually used for the image. When throwing fluids/objects etc you can expect a large amount of wasted shots.
Without setting up extra stands or markers to show you where the edge of the frame is in relation to where you are throwing, it becomes a bit of a guessing game. You have to keep a mental check of how far from your subject you can allow the fluid/sand etc to travel before triggering the camera.
Add to this , your working in a confined area of sharpness from front to back according to the aperture you’ve selected and the distance of your camera to subject. Luckily f11 gave me a relatively good area to work with as the camera was placed several feet away from the shoe (more on why this distance, and that particular aperture was selected to follow).
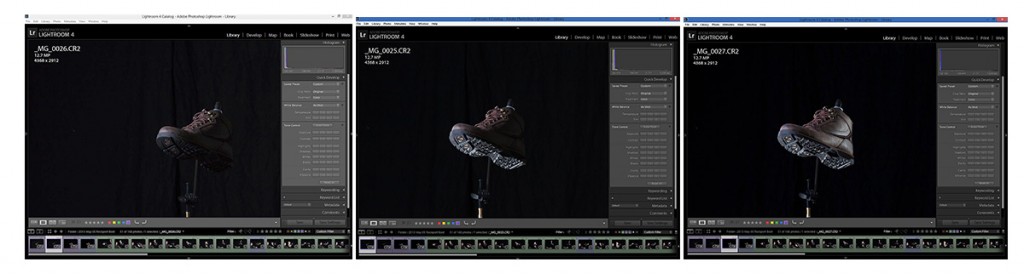
The shots for the boot. From left to right: Starting with just the stripbox, next up I added the gridded light for the sole; and the third is the combination of all three.
Shooting The Sand
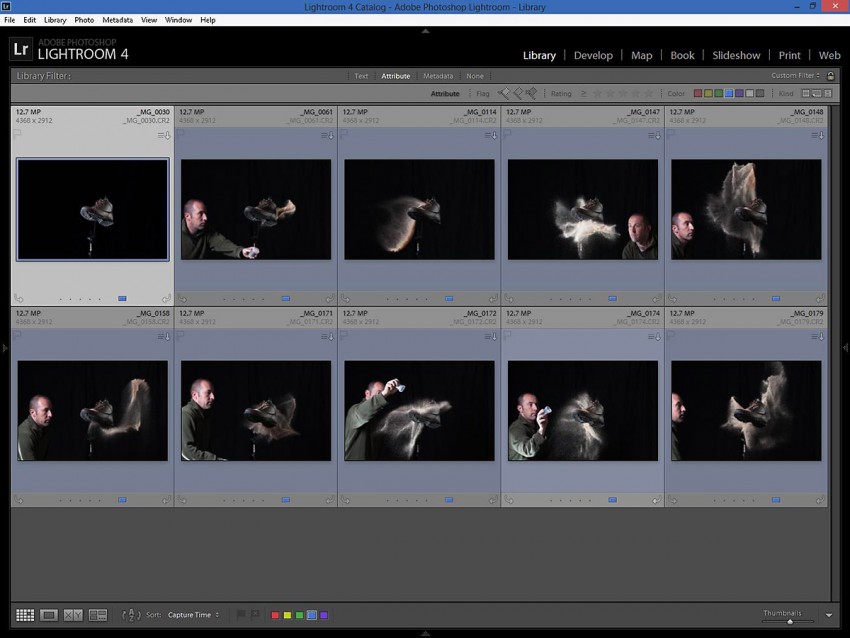
A closer view of the ‘clean shot’ for the boot, and the separate images of the sand splashes.
Before I took this series of images, I spent 20 minutes or so checking power and flash durations just for the sand. Kids play sand is incredibly fine, but I was still surprised at just how fast a flash duration is required to ‘freeze’ its motion. I took a few dozen shots with and without the stripbox, and each reflector just to see how they were lighting the sand, I also found out that my minimum flash duration would be T.1 =1/4500sec. Even at this speed I could see that many of the individual grains were still slightly blurry, but possibly this was adding to the effect.
The stripbox light was set to 1/4500sec which gave a total of 160Ws output. The two other lights were altered to taste once I had the shoe clamped in place. Interestingly I think because they were gridded, the light from those wasn’t playing a huge part in freezing the sand in a number of shots, in particular where the shoe was blocking the flash from the faster light; or where the sand flew outside the area they were lighting. The flash durations for these ended up around 1/6000sec at 80Ws power output, all lights were set to ‘Action Mode’ on the Einsteins in order to reach those kind of flash duration speeds btw.
At those settings my Aperture was dictated as being f11 which gave me enough Dof to play with. Even at f11, and the camera a good 6 feet from the subject you can see how quickly sharpness falls off by looking at the shot below. I was stood about 3 foot behind the shoe.
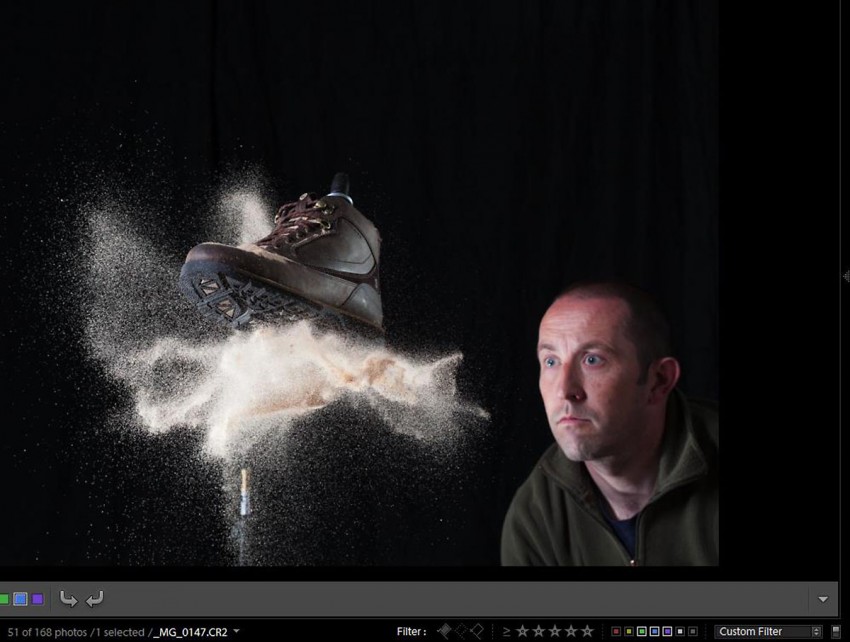
Guys, when your trying to concentrate on getting the right splashes in the right place and capture them at the right time…well your likely to start pulling some seriously weird faces. Nuff said.
(Above) Using a small plastic container, and varying the amounts of sand along with the speed it was being thrown. Incidentally, even just the sand hitting the shoe was enough to make the adjustable arm sway back and forth during the shots. If I were to shoot this again, I would use a boom or a grip arm. Or anything sturdy enough for the shoe not to move.
This would of cut down on post work because the shoe would of remained perfectly aligned in each shot.
Btw guys, I’m about 10 feet from the camera so I’m triggering it with a 15 foot remote shutter release in my left hand. I’ve tried doing this with RF triggers, but I found them quite unresponsive and half the time the camera would fire a fraction of a second too late. RF propagation delay maybe? Who knows, but the long shutter release works every time ( it was only about 8$ too) ; and is probably the best method if like me – you don’t have an assistant to hand.
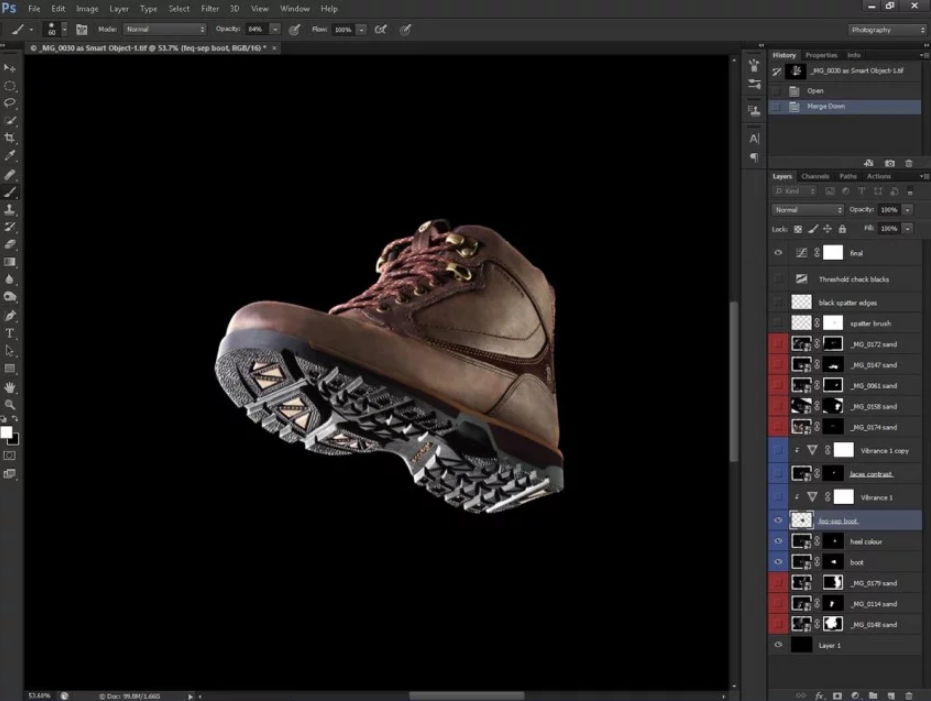
Product Photography Editing: Post Production in Photoshop
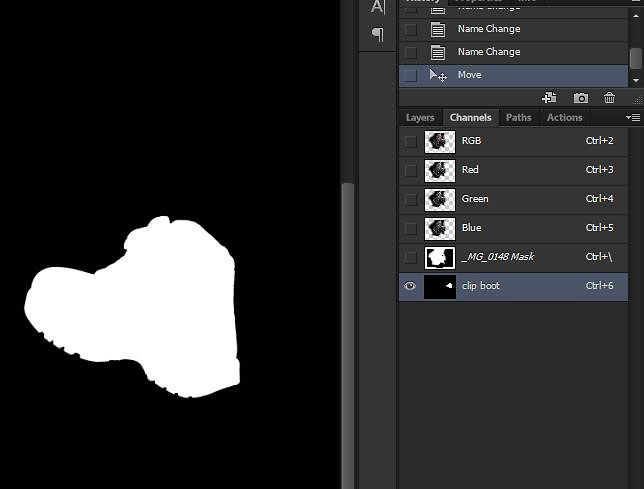
Ok, after opening the ‘clean’ shoe shot as a smart object in Photoshop CS6, the first job was to clip it from its background. Using the quick selection tool, followed with the refine edge dialogue in Photoshop CS6 it only took about a minute. The resulting selection was saved and renamed, which produced a separate alpha channel in the channels pallette. I would be using this selection constantly when starting to mask the other layers.
Following that, I went about fixing the issue I noticed of the differing color temperatures on the shoe. (see images below).
The problem here is that on ‘Action Mode’ the Einsteins act very much like a speedight. The color temperature of the lights varies depending on the power levels set. The shot on the left shows a slightly hotter color temperature from the light placed to the right of the shoe. This actually results in more blue-ish light being emitted (think of a gas hob, the hotter the flame is – the more blue it gets). Its noticeable compared to the color from the light on the left, although its possible the stripbox itself played a part in this.
To remedy this I made a copy of the smart object (Layer>Smart Objects>New Smart Object via Copy). This opened the copied layer in the Adobe Camera Raw dialogue where I simply shifted the white balance to warm up the colors for the heel area of the shoe. Clicking OK to those changes, it was an easy job to mask just the required area back into the scene. (Before and after above).
Frequency Separation
Taking a closer look at the shoe, I noticed a lot of wrinkles in the leather. The hard light raking across the shoe has added some drama, but its also shown up every imperfection as well. The obvious choice here is to the use clone stamp/healing brush tools to remove blotches and wrinkles, problem is they can be quite destructive and remove all details from an area. I’ve thought about using the Frequency Separation technique for a while now, and some of the guys here on the forum have also mentioned it.
Generally it has been used for high end skin retouching, the idea is to take all the fine details in an image and separate them from the tonal values. The two can then be edited separately. In skin retouching the facial tones are usually evened out by a combination of blurring and/or dodging and burning. This would normally destroy fine details such as pores/hairs/eye lashes and any other defined edge..lips/eyes and so on. However, all the fine details have been separated and so are left untouched – they can then be edited without causing any unwanted tonal shifts within the image.
I won’t go into this any further as I’m no afficianado on the subject, I’ve only scratched the surface of it myself and I spent a very short amount of time evening out the tones on the shot below. Additionally I’m sure some of the better retouchers here on the forum will kill themselves laughing if I try to do a tutorial on it!
(Above) An attempt at evening out the tonal values of the shoe without losing too much detail.
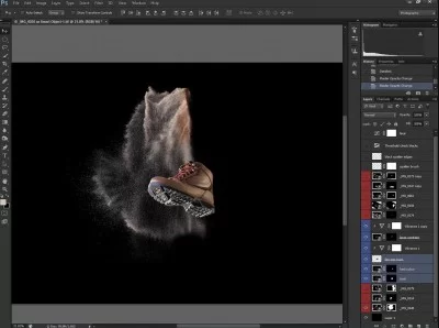
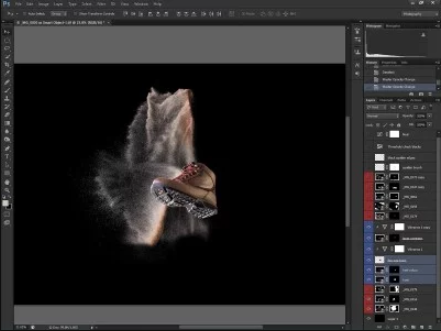
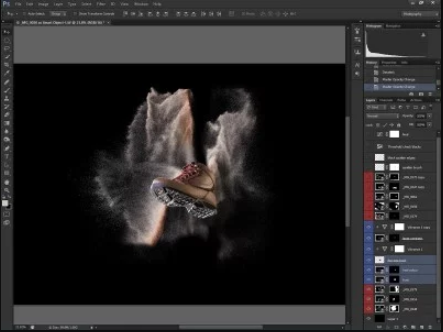
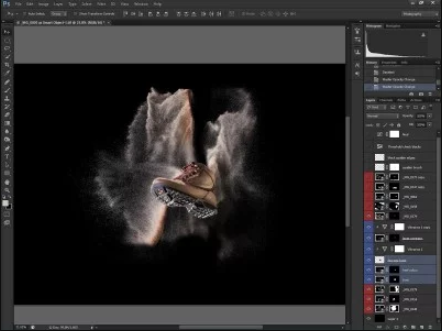


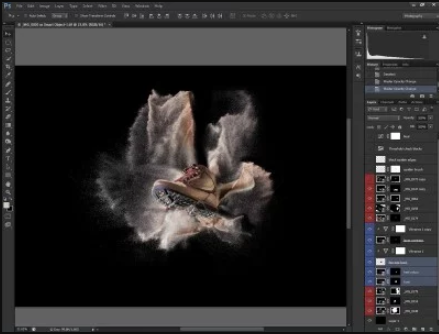
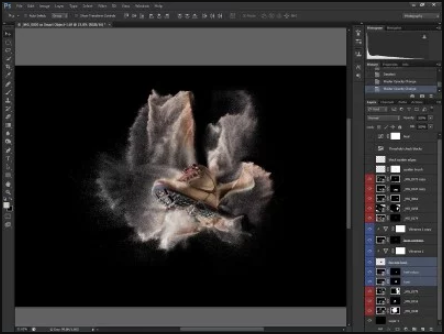
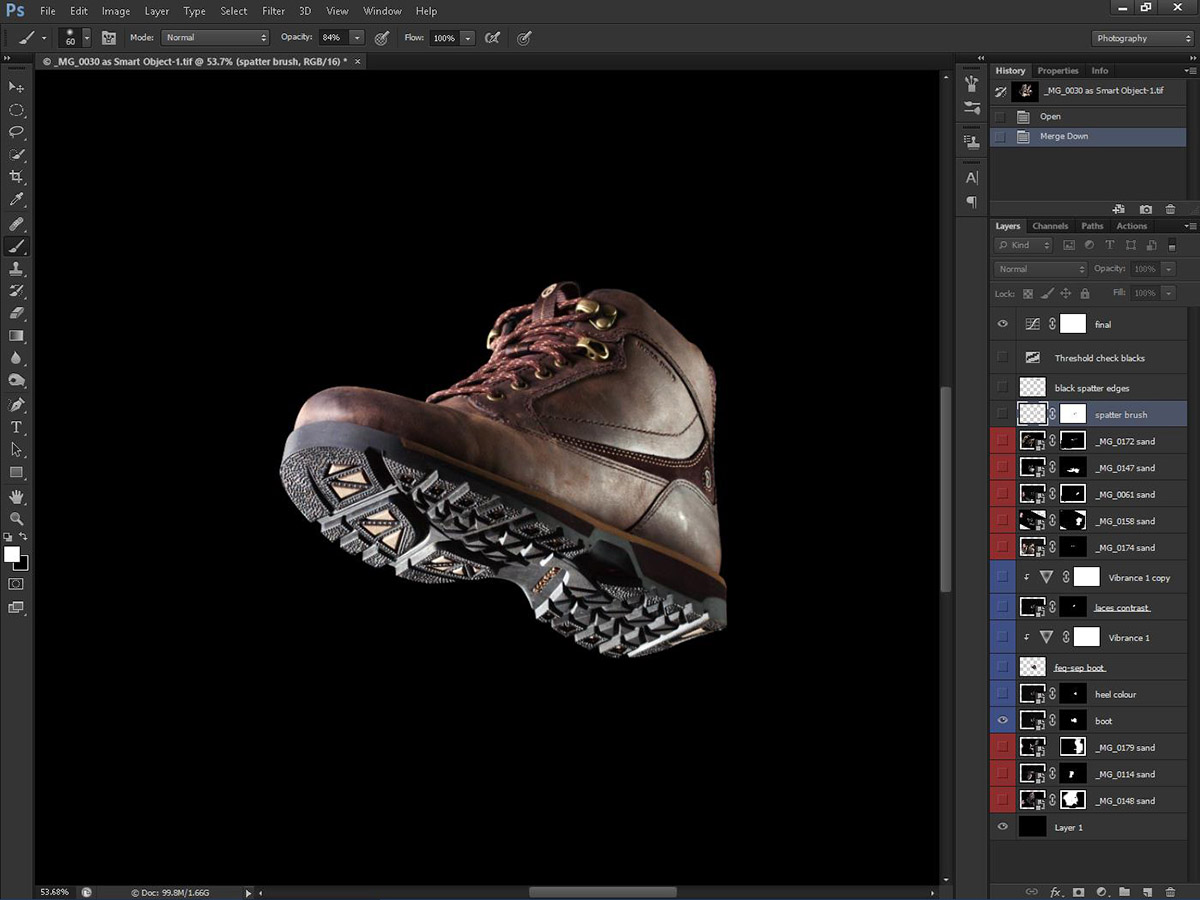
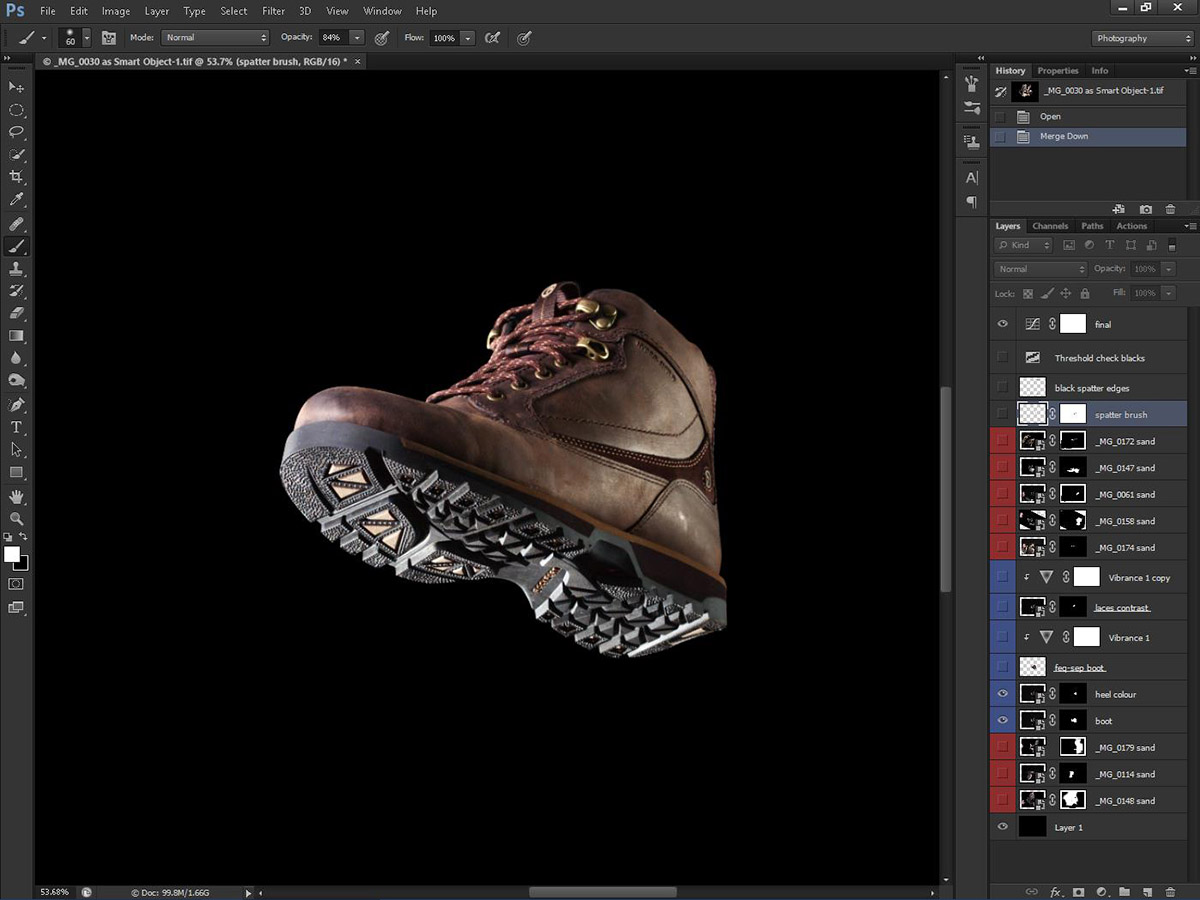
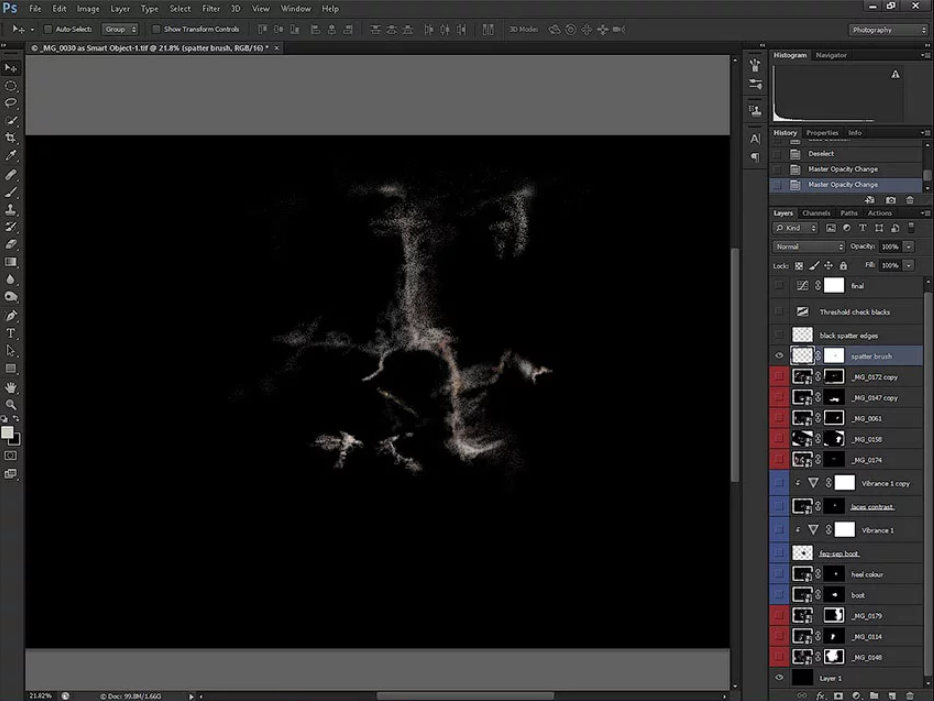
The various stages of compositing. All layers were imported into the document as fully editable Smart Objects. Access to the original RAW data is invaluable. I initially tried masking out the sand from its background, but using the the color select tool didn’t provide a good selection and the refine edge dialogue just laughed at me…
No amount of channel masking/blending or trying the ‘Apply’ function helped me either. I even gave Luminance masks a quick look -in.
Too much tonal variance across the sand was causing me pain. So, it was down to manually masking with a soft edged brush at varying opacities. The layers pallet in the images shows the entire layer stack. The sand composites were colored red, and shoe layers blue for easy reference. Normally I’d group layers for more convenience.
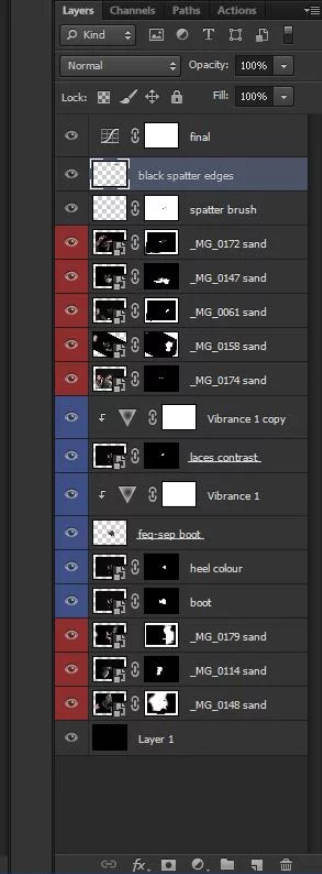
I usually rename layers, but make sure the original file name remains in the description for reference. This saves me time in trying to keep track of what has and hasn’t been used.
I used a stock grainy airbrush to key in areas of the composite. Controls such as spacing/spatter/jitter were all altered to mimic the effect of sand. Painting on a separate layer, I continuously sampled colours from various parts of the sand shots whilst altering brush size and opacity so as to not produce any repeating patterns. I also used the same brush on some of the sand layer masks in order to hide/reveal certain areas according to taste.
Well, thats it. I hope this was straightforward, it turned into more of a Photoshop tutorial than a lighting walk through I guess. But, that’s all in the nature of shooting fluids and doing composites etc. A lot of post production will ensue unless everything you want to achieve can be done in one shot.
 |
In the Gearbox |
|
Camera: Canon 100mm f2.8 macro (Non IS version) 15′ remote shutter release cable Lighting: Einstein E640 (x3) 7″ reflectors (x2) with 10 and 30 degree grids 10″ x 36″ stripbox Other: Various light stands 12′ x 9′ black fabric sheet Tre-D 3 – way adjustable arm |