Select Page

Behind The Scenes of Advertising

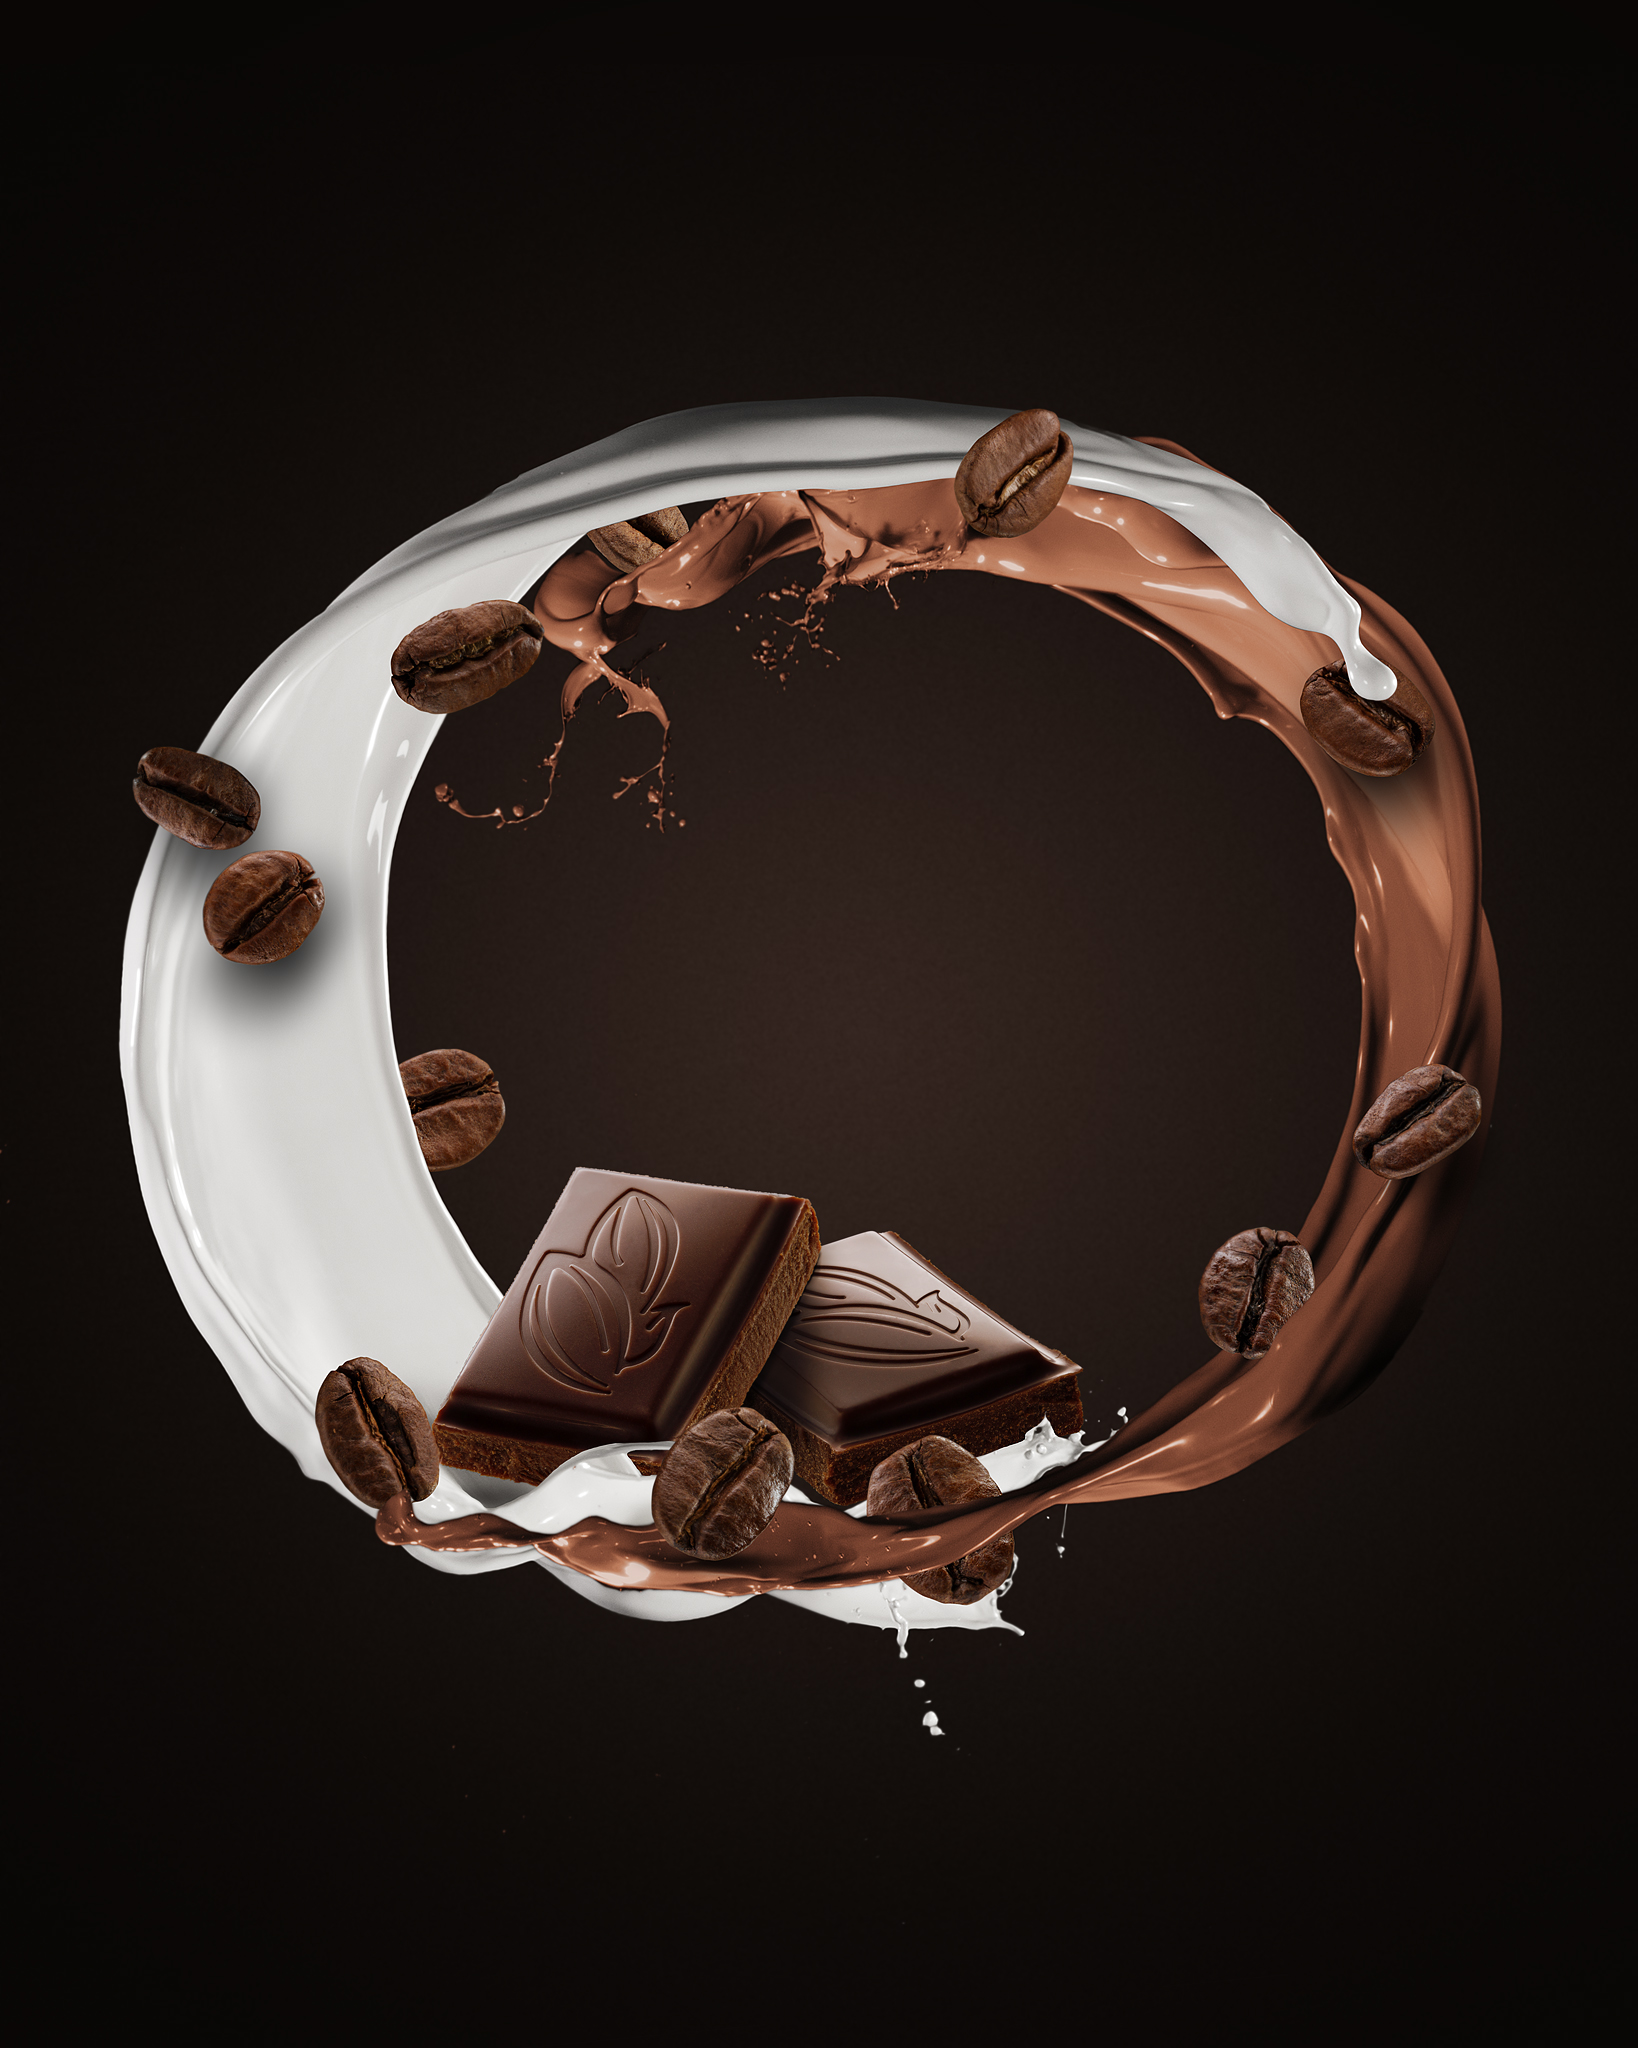
Still Life Image with Splashes

From this article you’ll know how to combine different images to create something unique. Moreover lighting setup doesn’t require a lot of equipment and everyone can do that. You’ll learn how to properly light small objects to give them a sense of volume, combine different part of single a image to get realistic result, retouch difficult parts and many more things.

There were involved different techniques to create this image. I faced a lot of difficulties during shooting and post production which I want to share with readers to help you avoid such mistakes.

Behind The Scenes of Advertising


— Lighting setup. Chocolate —

Ingredients_Lighting_Diagrams
1
2
Lighing setup isn’t fancy yet effective and do the job. I used couple of Canon’s speedlites. To lit small pieces of chocolates (about 3 cm on long side) you have to use such light modifiers which gives you total control over light spilling. I put DIY snoot on the Canon 580 EX II being created in 2 min. Basically it’s just a black cardboard wrapped around the speedlite. The main idea is to create small light spot on diffusion panel and put the gradient exactly where you want. Avoid large light modifiers like softboxes or stripboxes if you want to create appealing result for small objects.
3
Small reflector from A4 sheet and speedlite behind it to lit the side of the chocolate bar. I also put tin foil to bounce some light back to the bottom part. Shifting light modifiers by few inches gives you completely different look, so you have to act very accurately. Fingerprints easily destroy smooth surface of chocolate, it’s good idea to wear gloves to avoid them. Chocolate itself has very gentle substance which easy to damage, I tried probably 20 different pieces before I found the right one for the shot.
4
5
6
I put piece of chocolate on a needle clamped by small ‘crocodile’ (by the way you can find example of using such things in more creative way here). If you pierce chocolate too much there you see a needle on the top of that, which probably not what you want. If you pierce chocolate not enough, it rotates around a needle, deliver difficulties with accurate positioning. So the golden middle is what you need.
7
Since I set lighing, chocolate and camera in right positins, I started to do focus stacking. Helicon Remote is greate software, probably the best solution on the market to do focus stacking. It works fast and smooth, I’ve never had any issues with that. I was using Canon 7D and Canon EF 100mm f/2.8L Macro IS USM Lens. As I wanted to get the sharpest image (for that particular lens and camera), I set aperture to f 8. Every lens has such aperture value when it gives as sharpest image as possible. You have to test it by yourself with camera you have, but probably for the most common lenses this range will be around f 8 – f 11. You can see the DOF on two very first pictures under the final result. Obviously f 8 is not enough to cover the whole are. I also put camera as close as possible to the object because I wanted to get a lot of information for post production. Of course it’s possible to increase DOF by moving camera further away from an object, but as I already said I needed very detailed shot. Here important to say that I didn’t have very strict brief for myself as it was personal project. I only knew it should be captured well, so that’s why go with focus stacking.
IMG_9492
They didn’t pass the exam. Or are they just retired models?


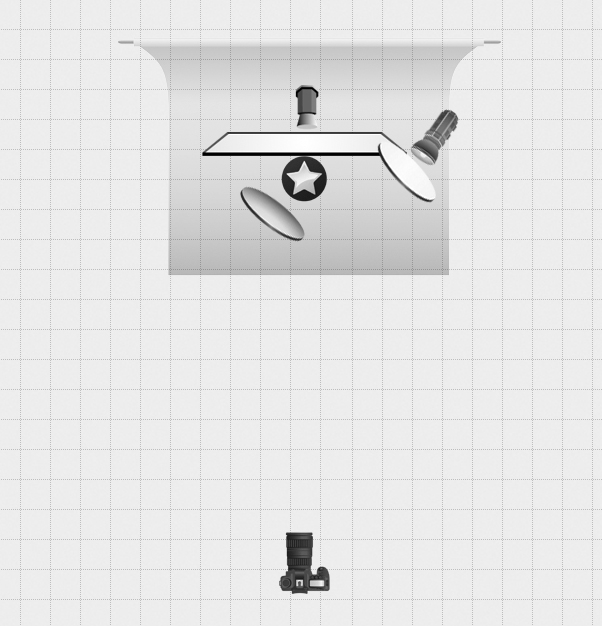
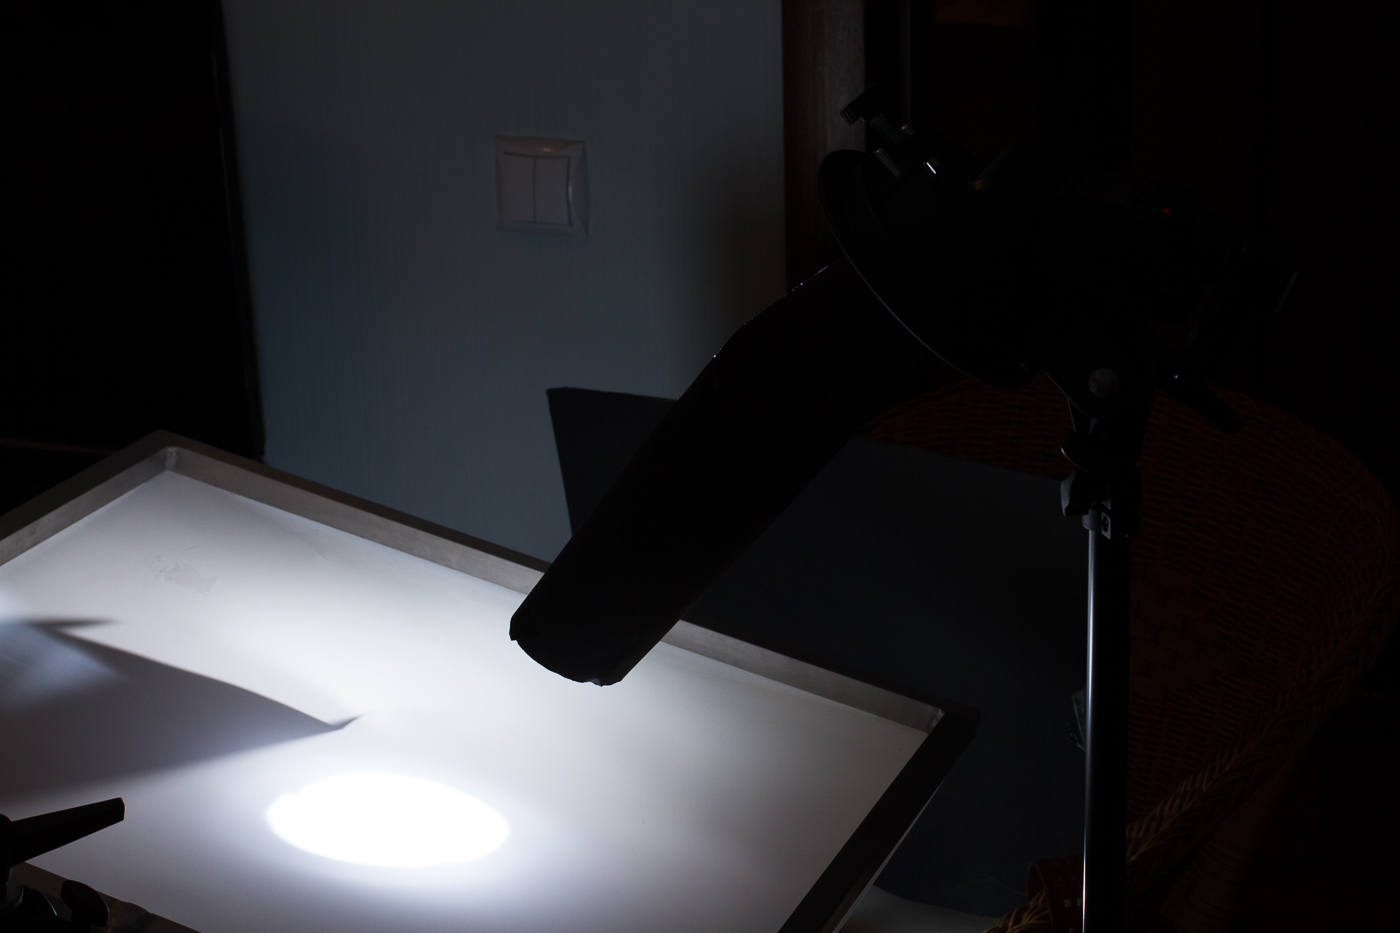
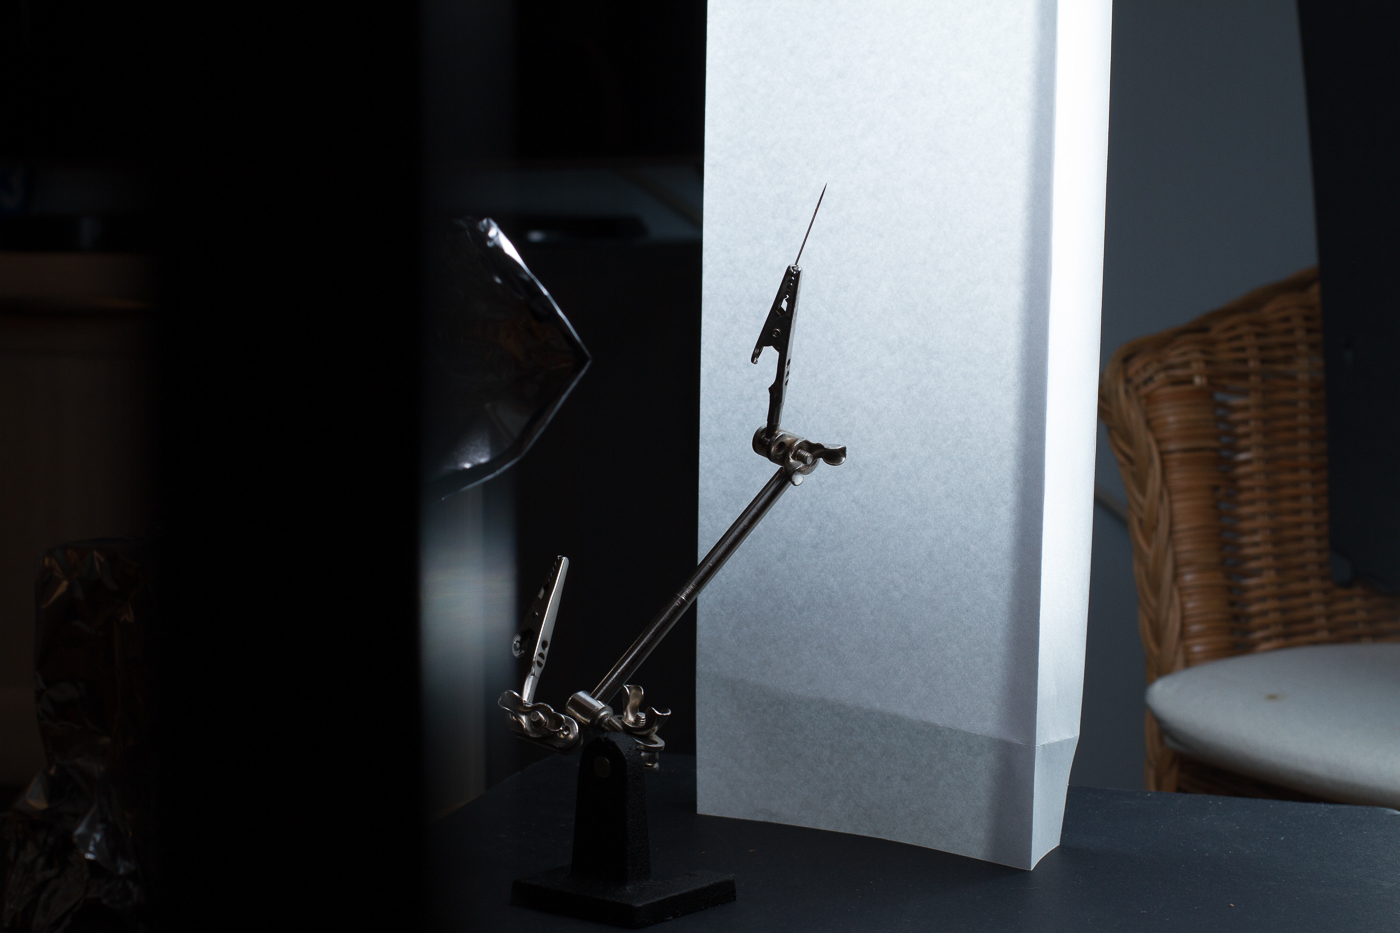
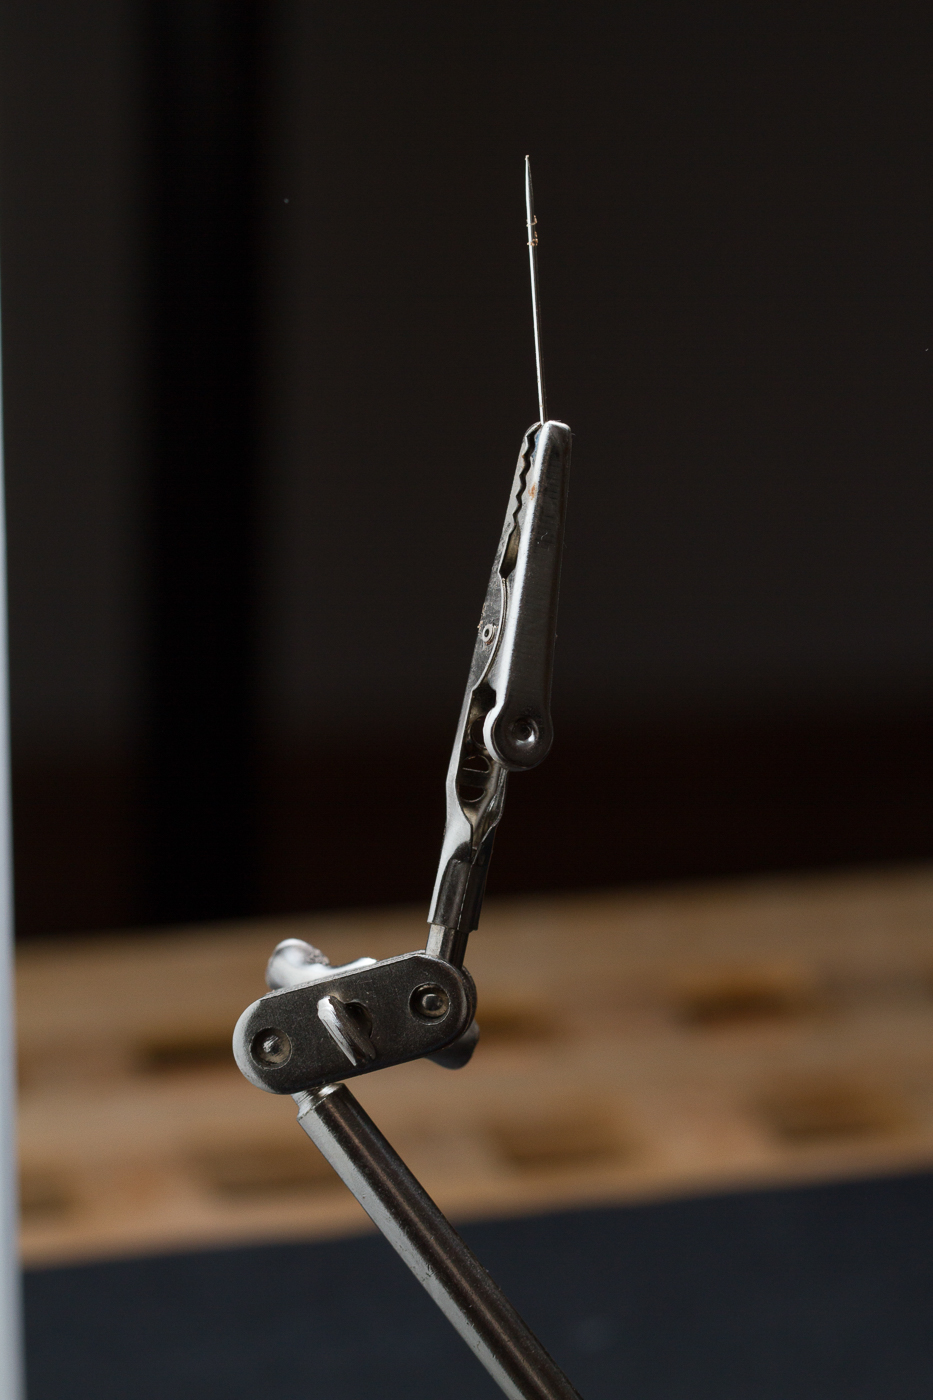
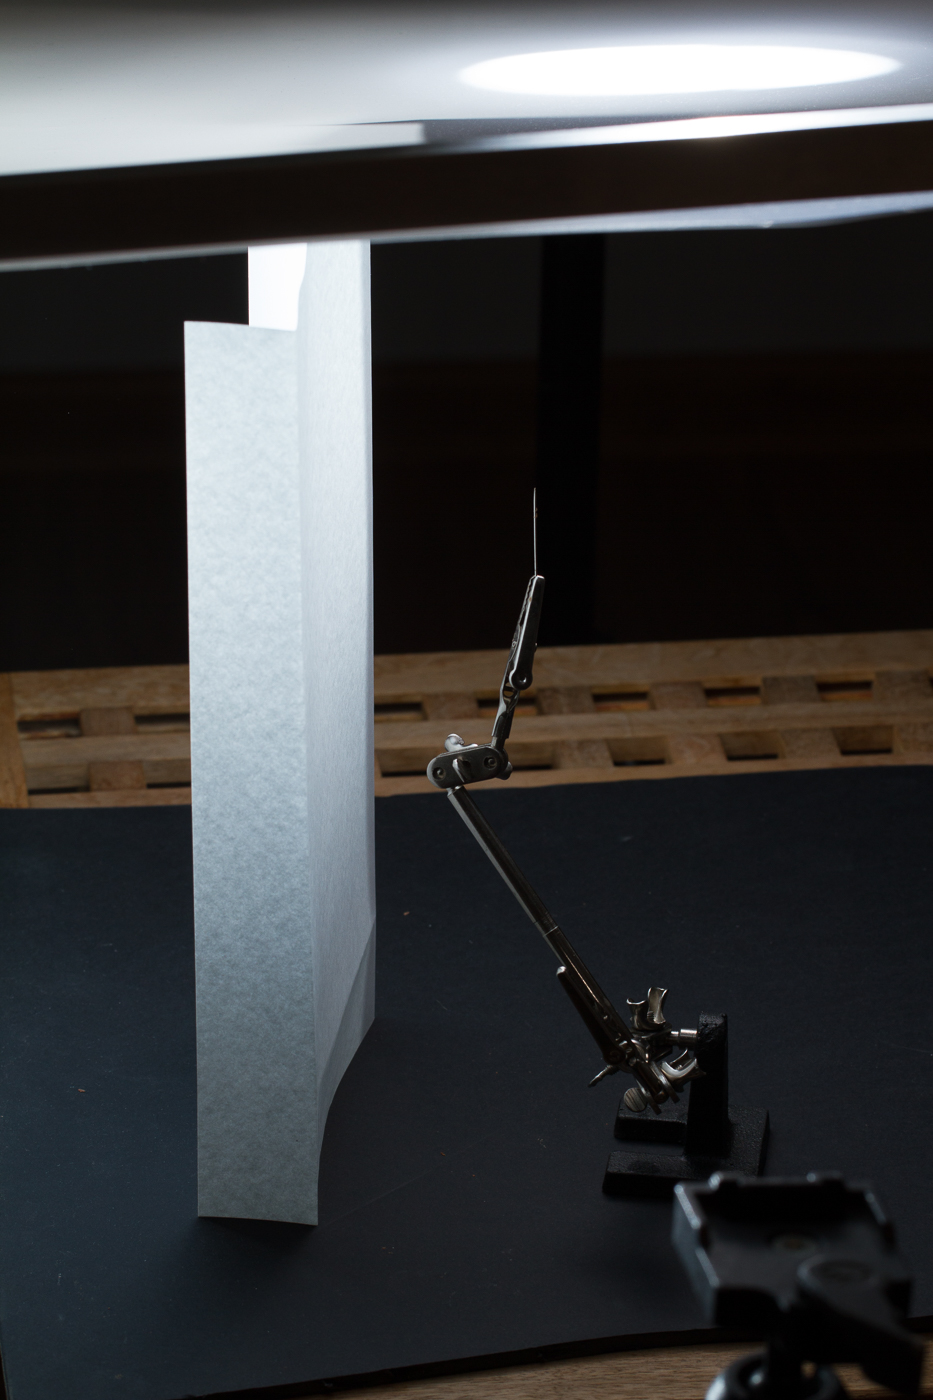
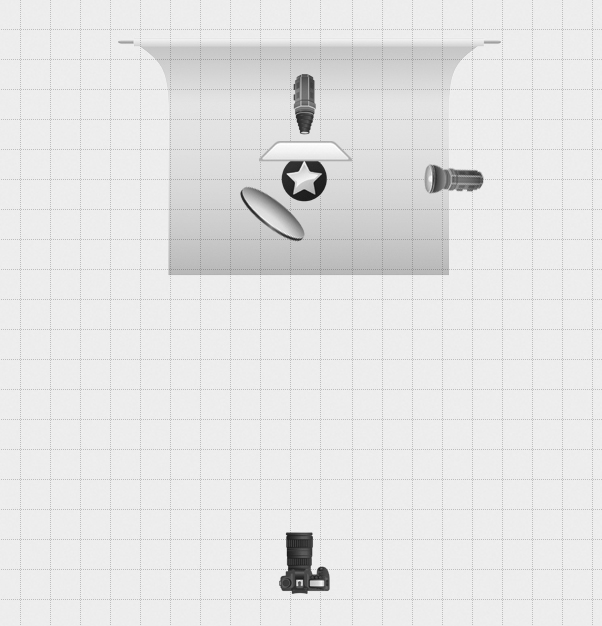
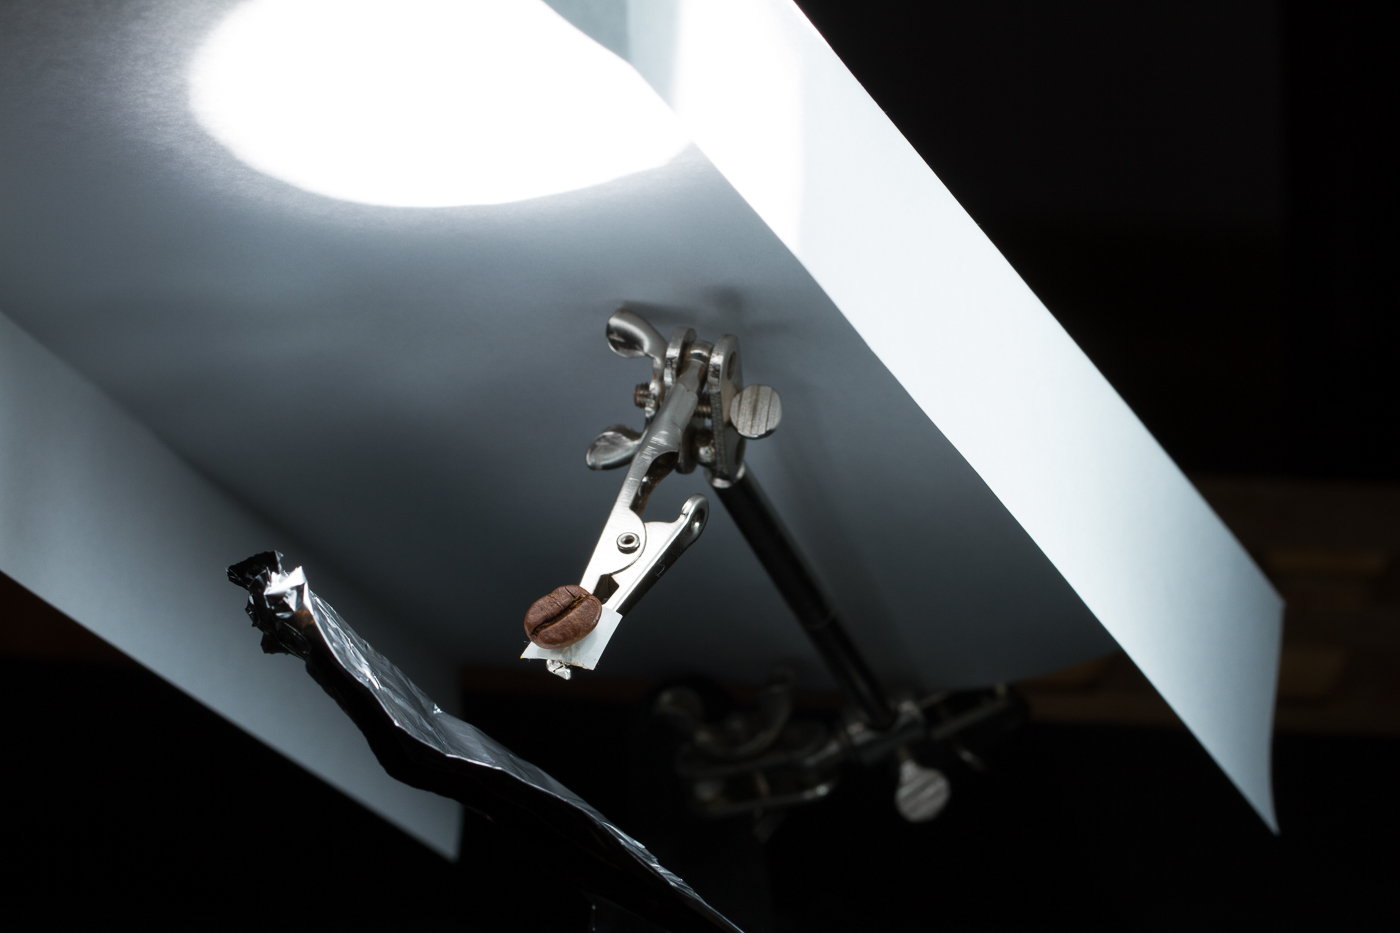
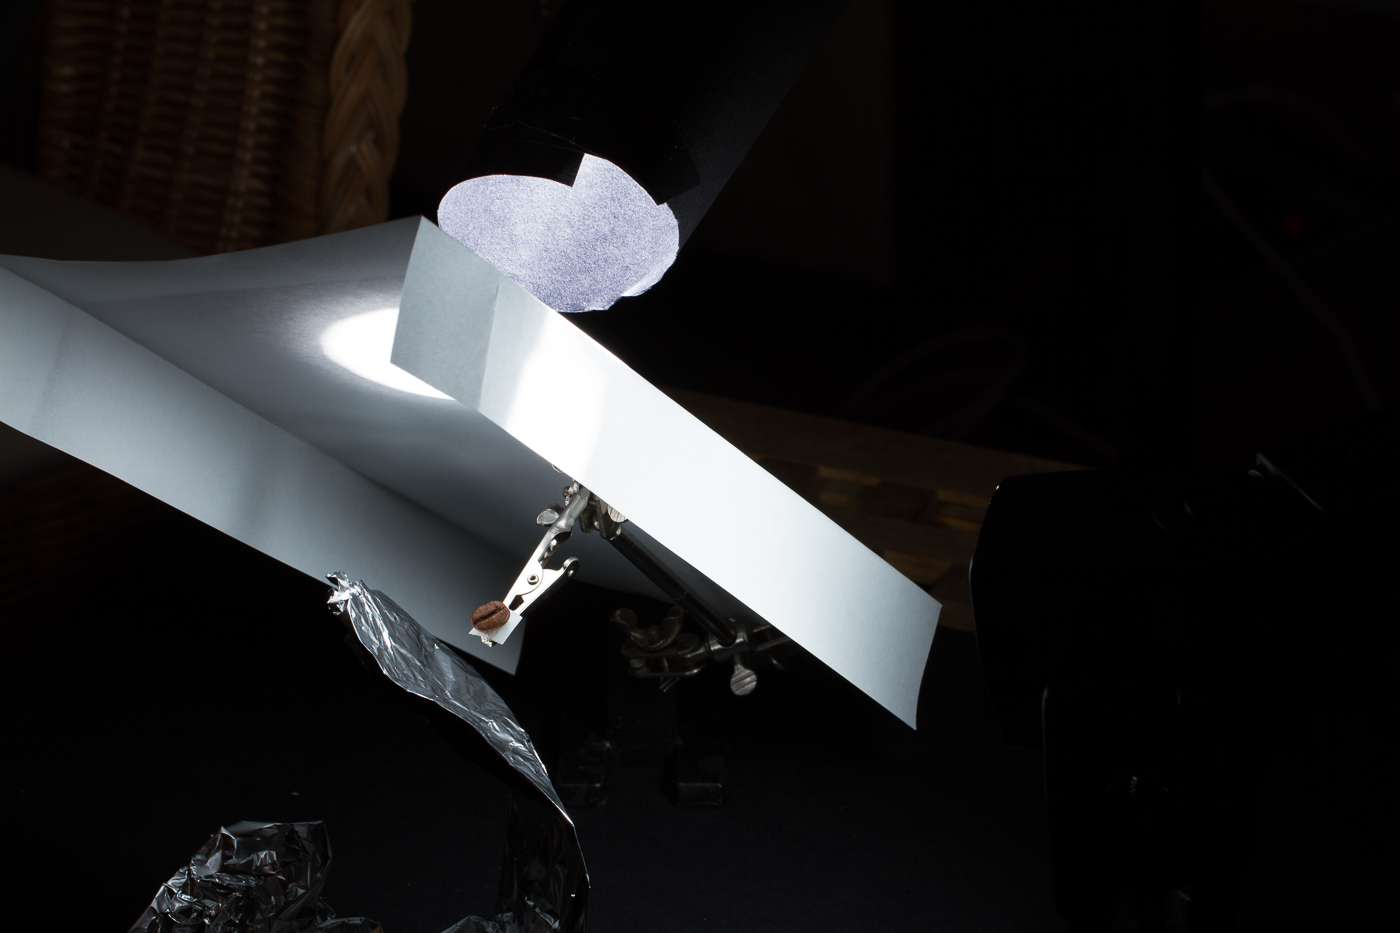
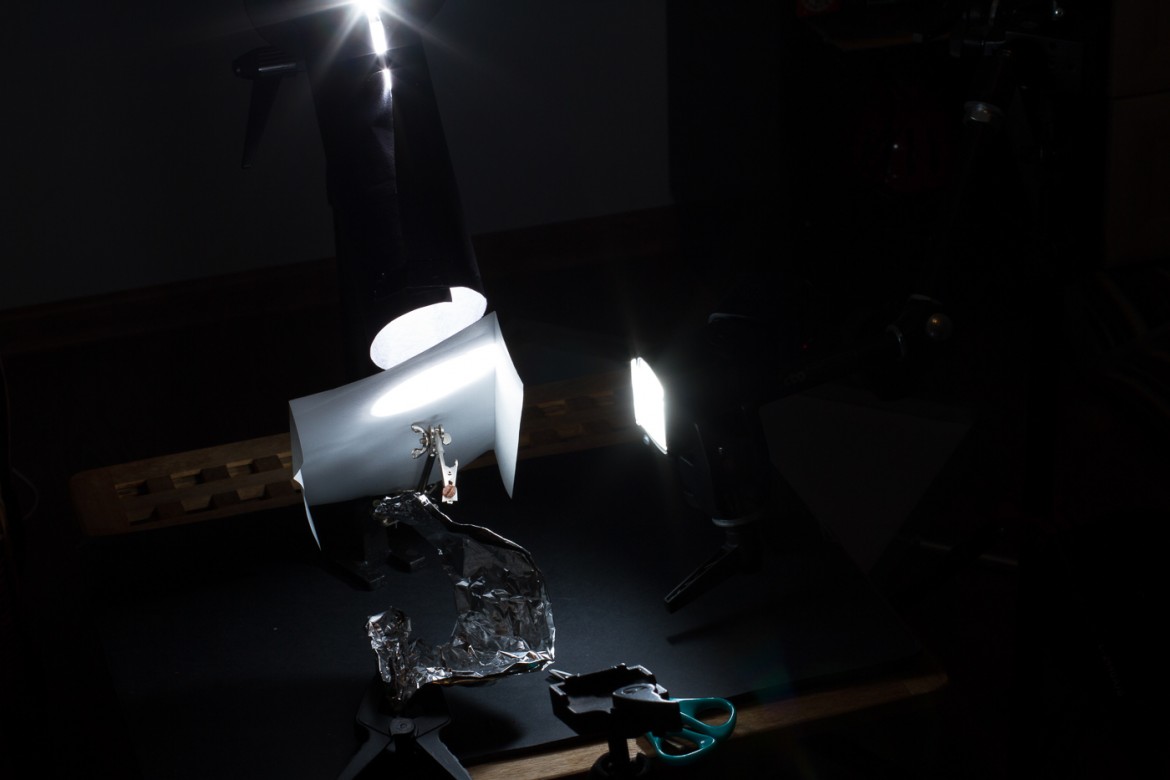
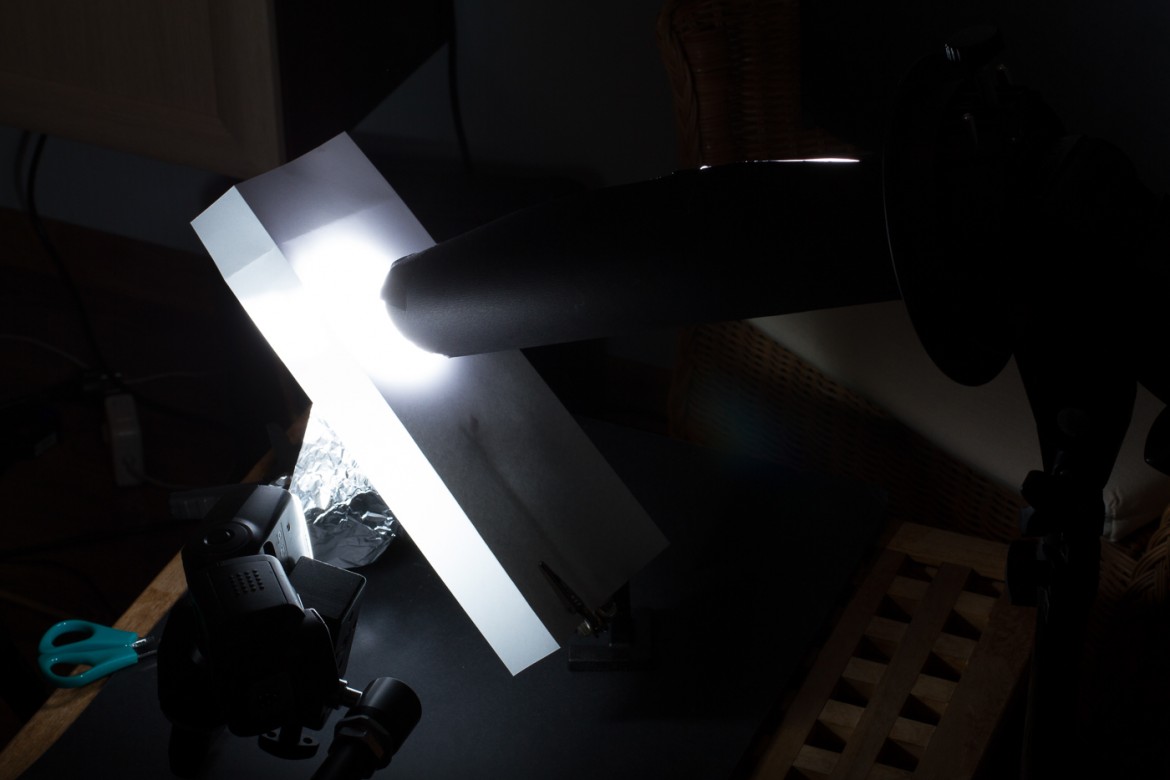
— Lighting setup. Coffee Beans —

Ingredients_Lighting_Diagrams_2
Ingredients_Lighting_Diagrams_3
Ingredients_Lighting_Diagrams_4
Ingredients_Lighting_Diagrams_5
Coffee beans are even smaller than pieces of chocolate. So lighting should be also changed concerning to a new objects. I put A4 sheet behind a coffee bean as a diffusor. Bare Canon 430 EX II on the right gives really punch light on the side of the bean and defines the shape. Sharpness defines not only by aperture, but also by lighting. You can deceive viewer’s eyes with crisp light. I didn’t get the whole coffee bean in DOF, there are some blurred areas here and there. But appropriate setup helps to create an illusion of very sharp image.
10
11
13
I’ve spent good two hours positioning those small pieces.
Screenshot_10
 

— Postproduction —

You can decrease speed in YouTube player to see more clearly what’s going on


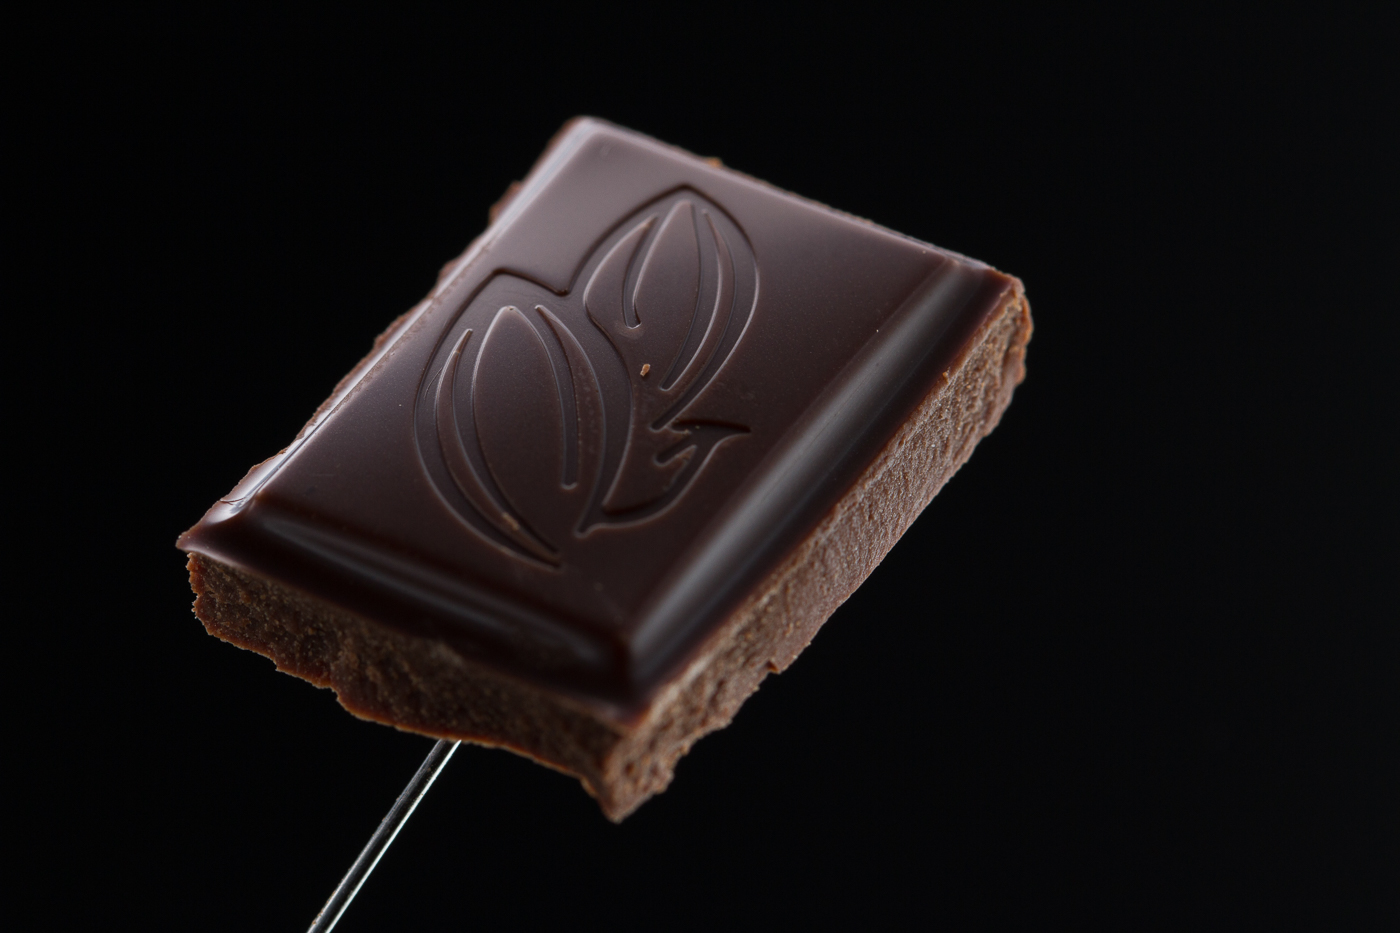
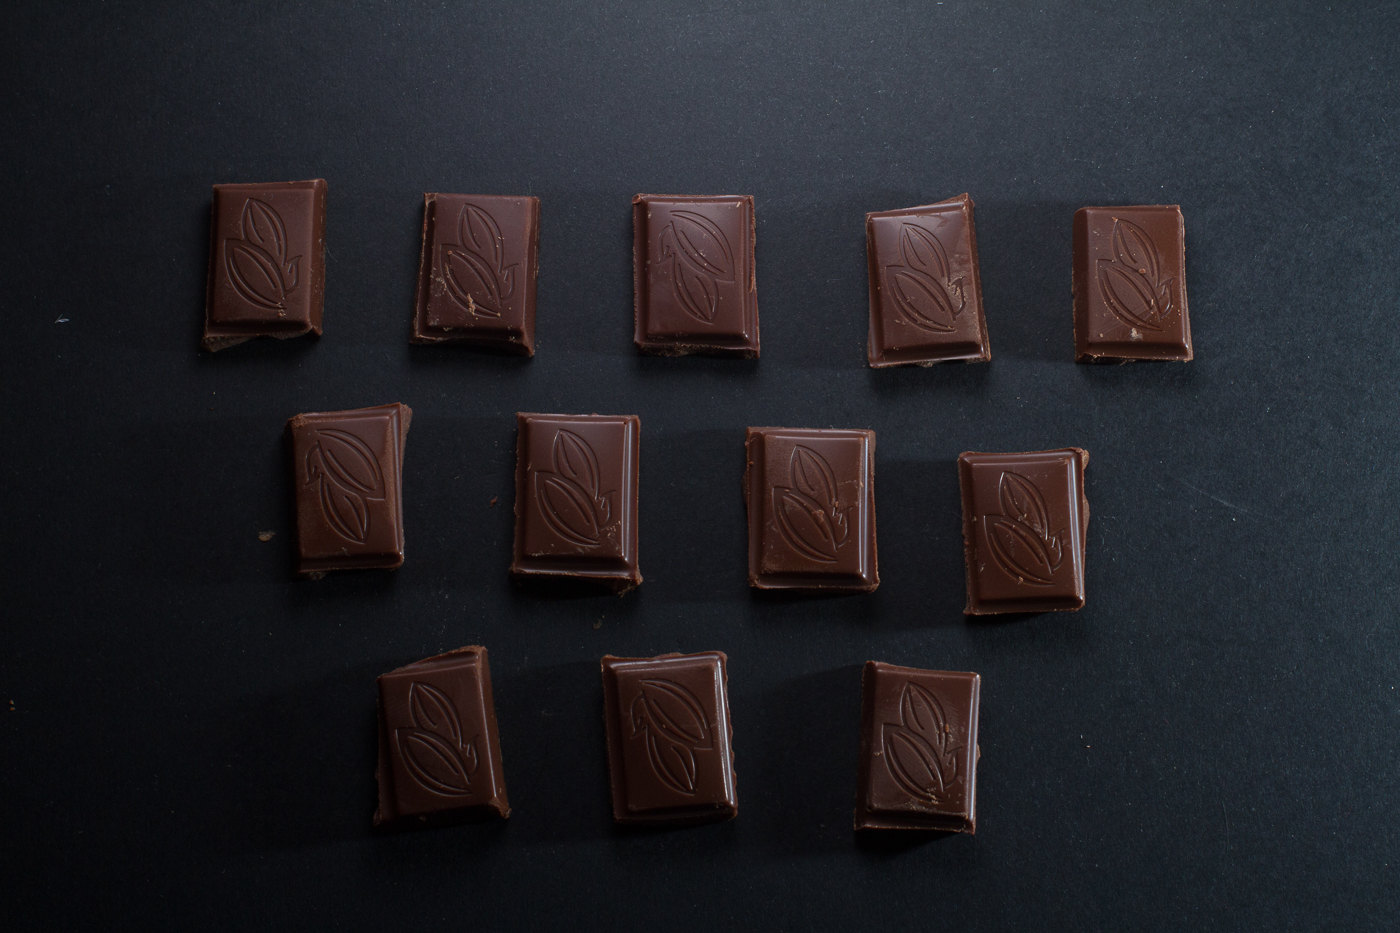
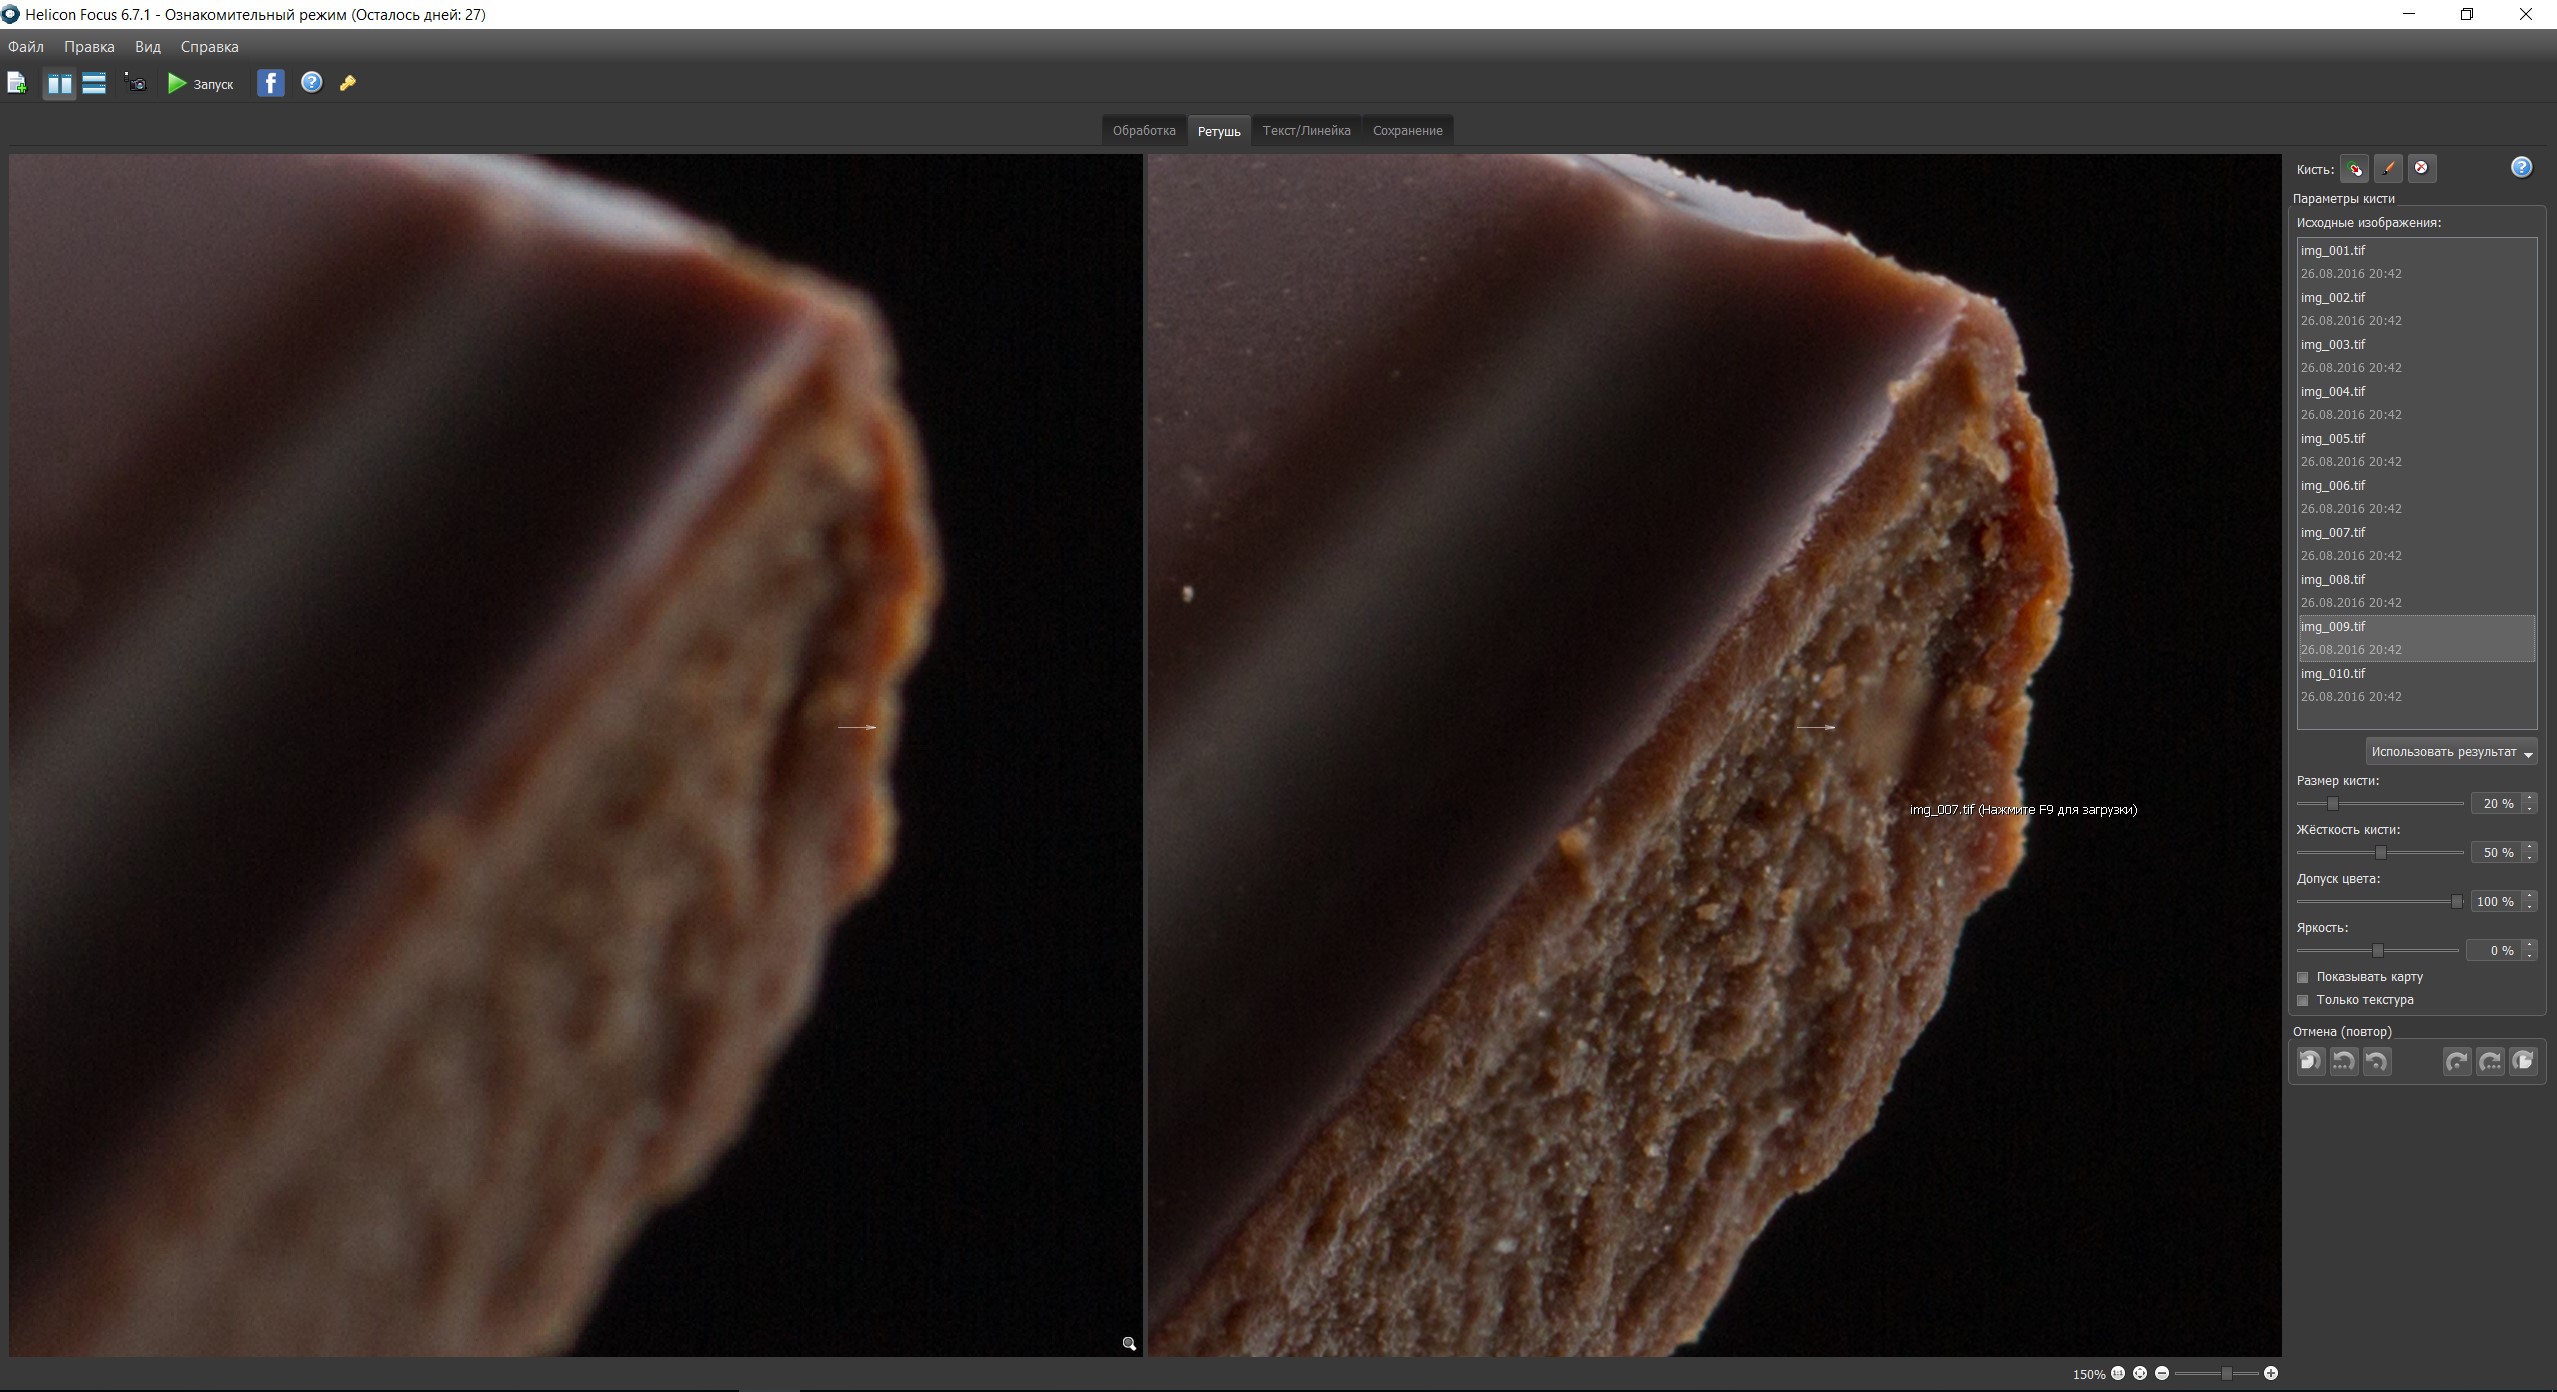
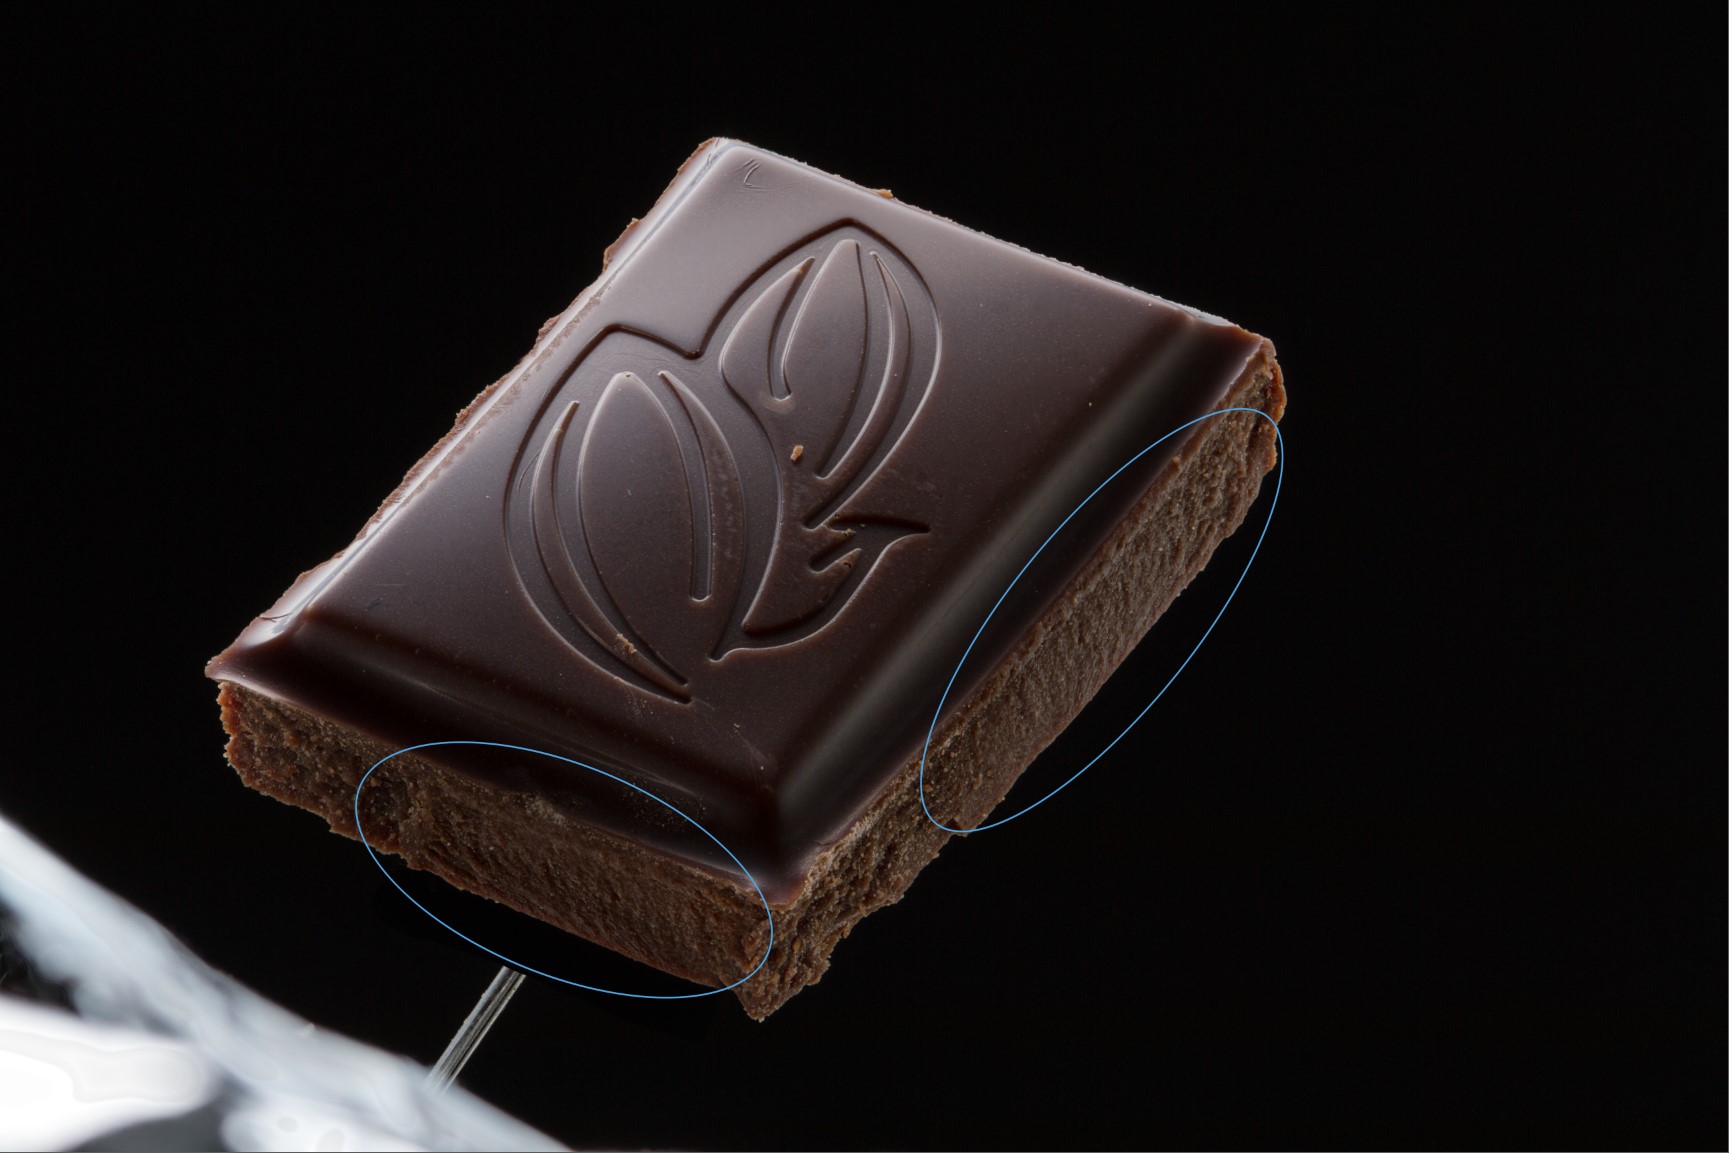
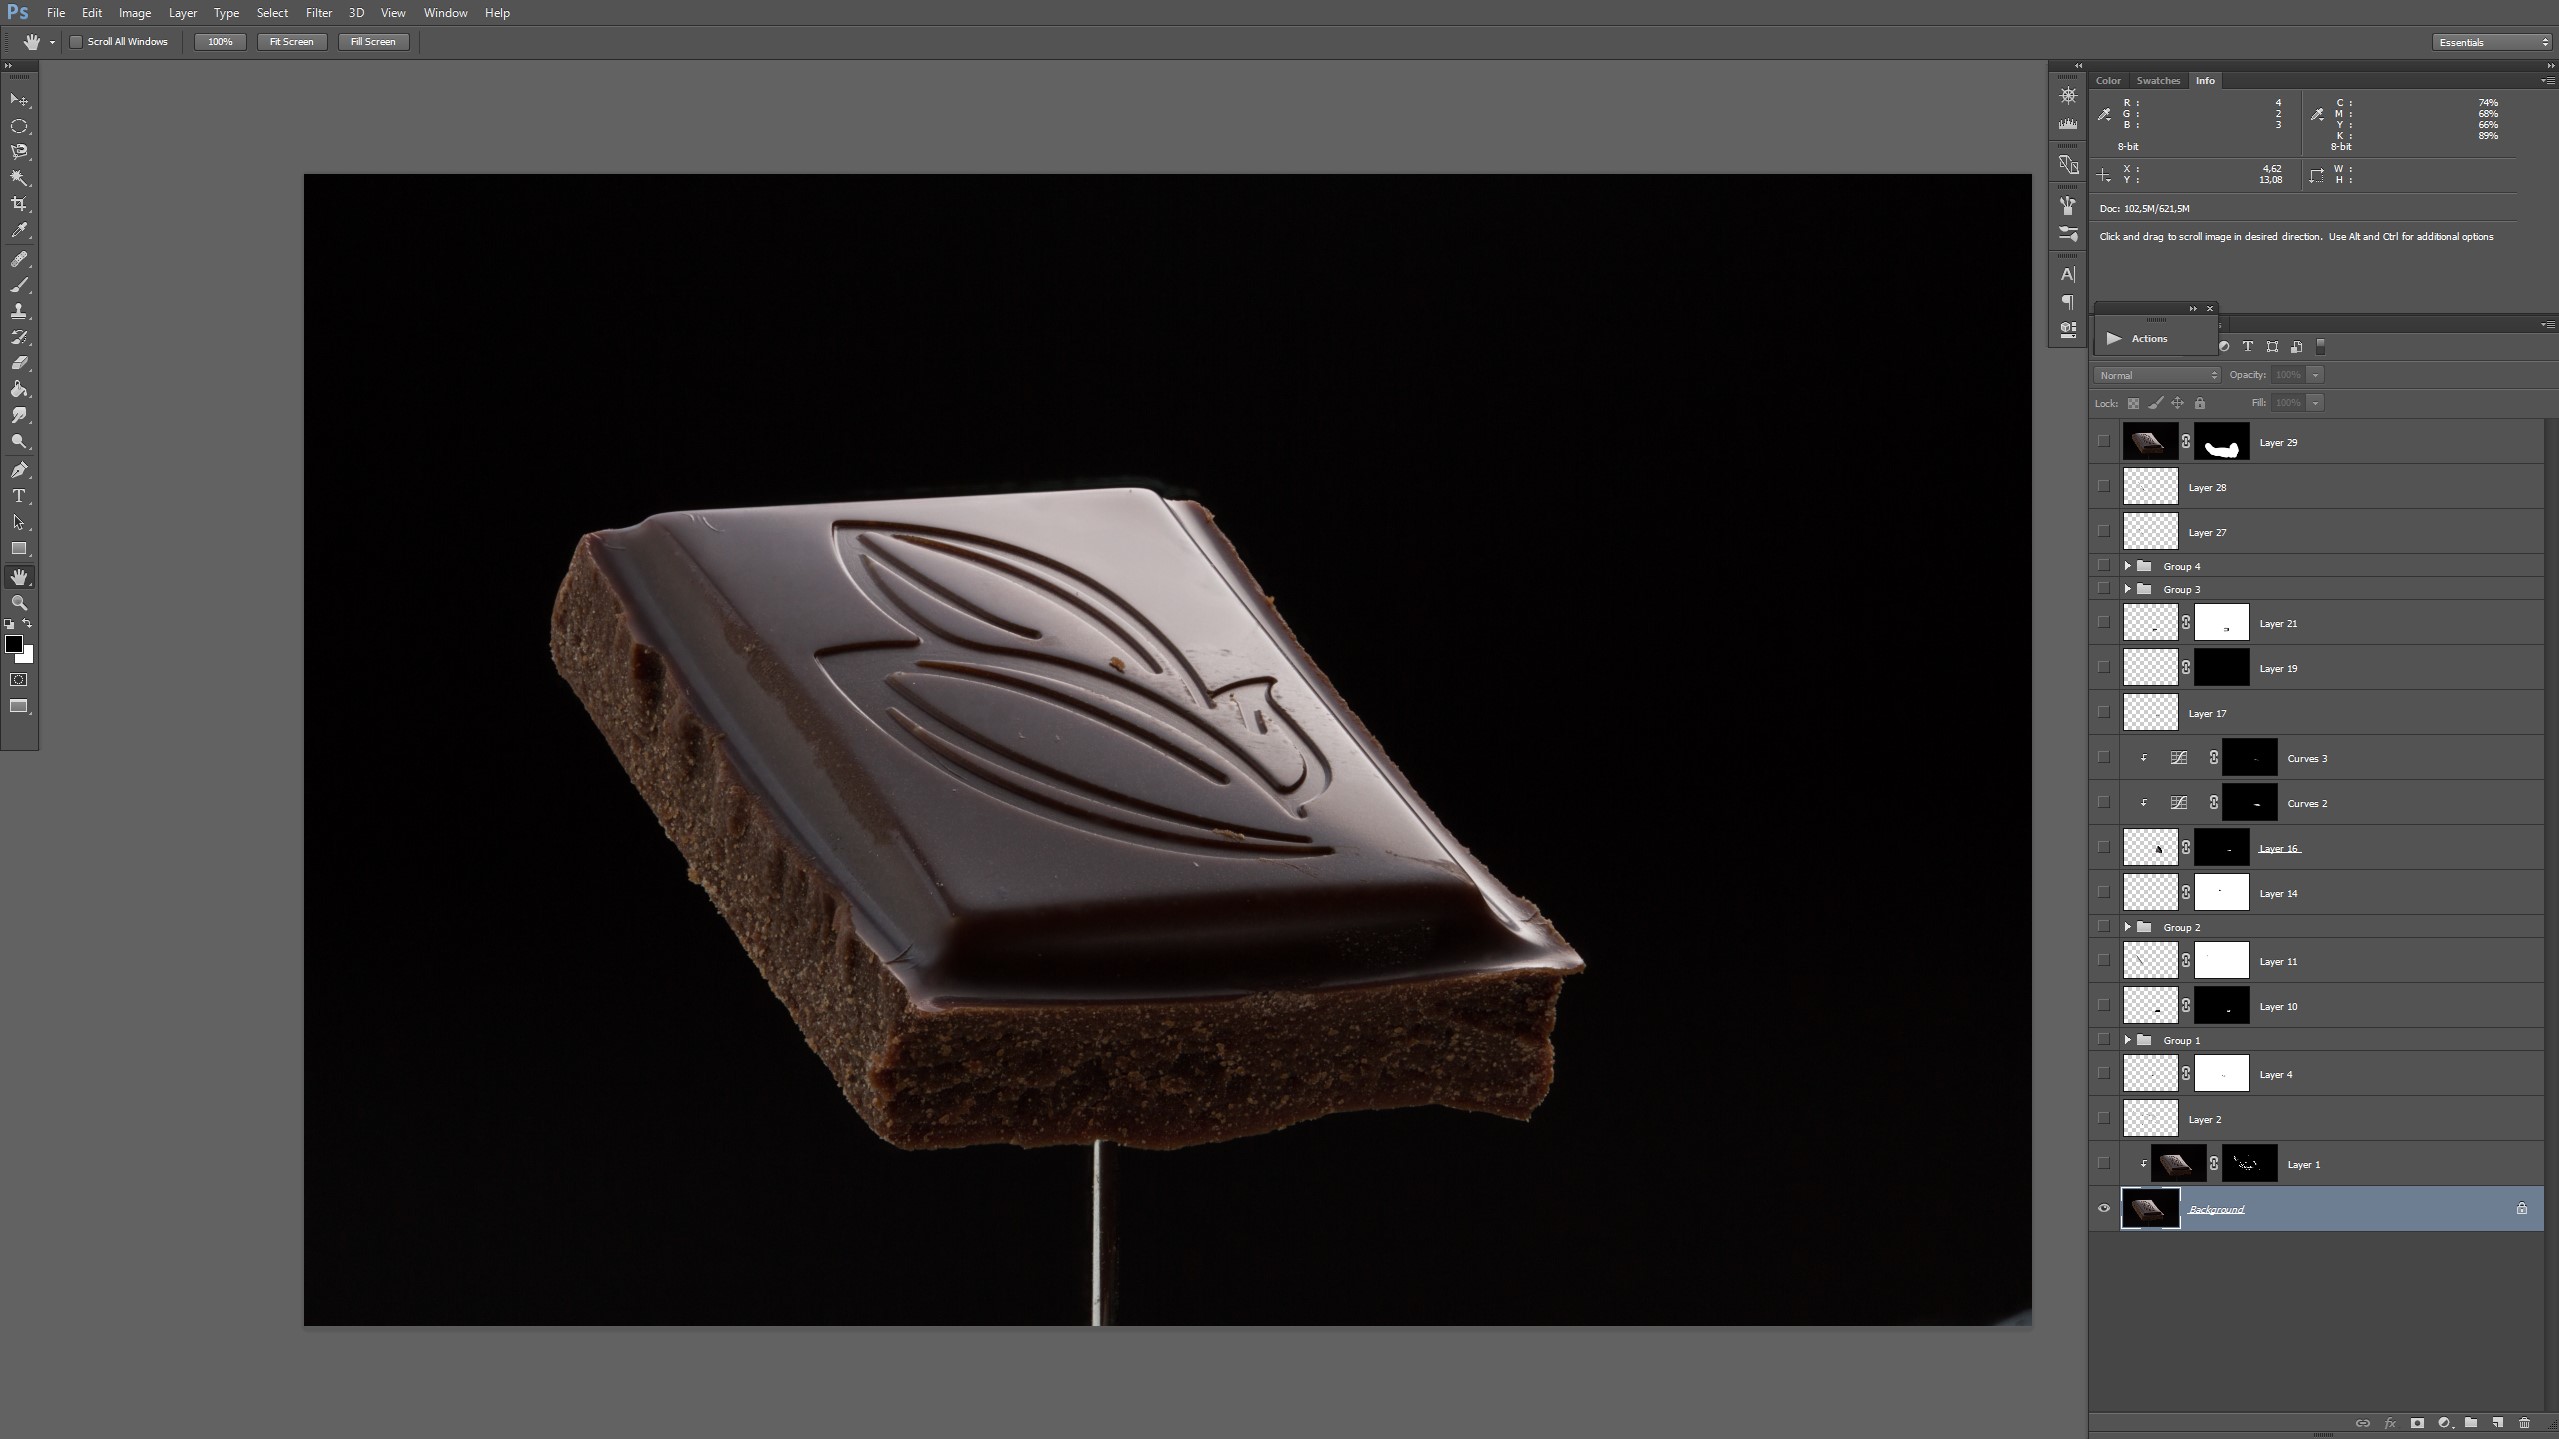
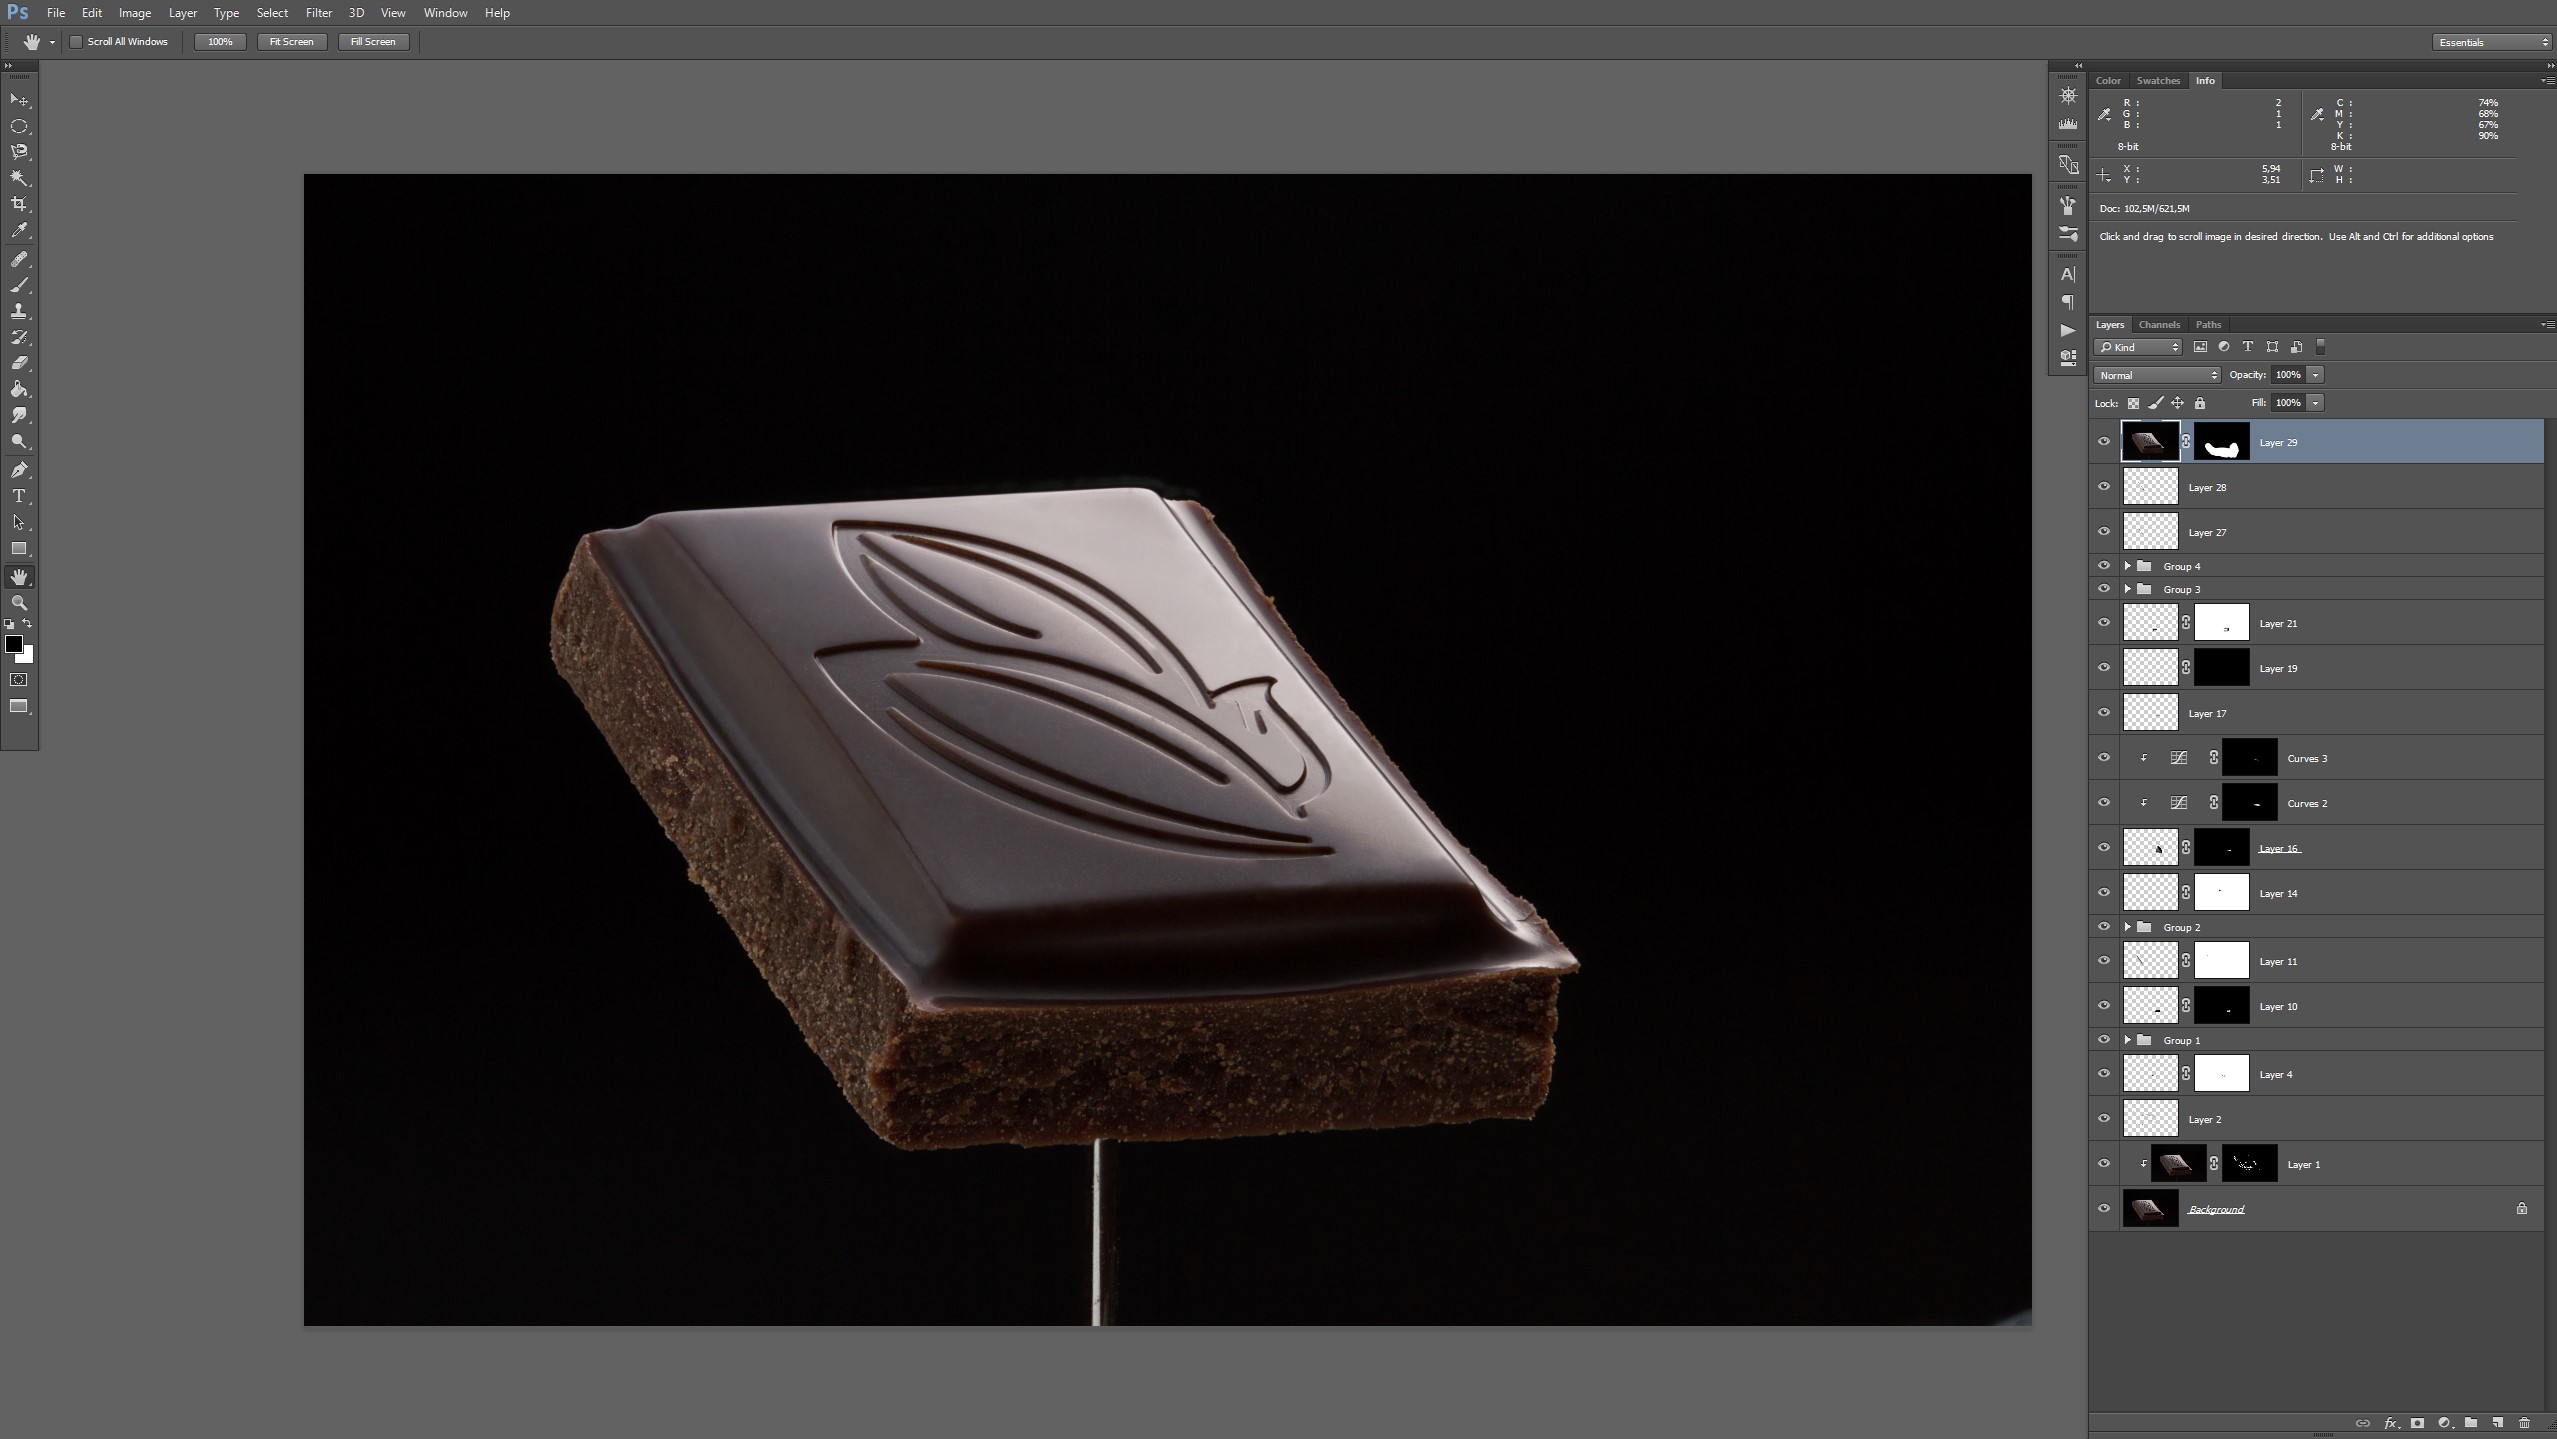
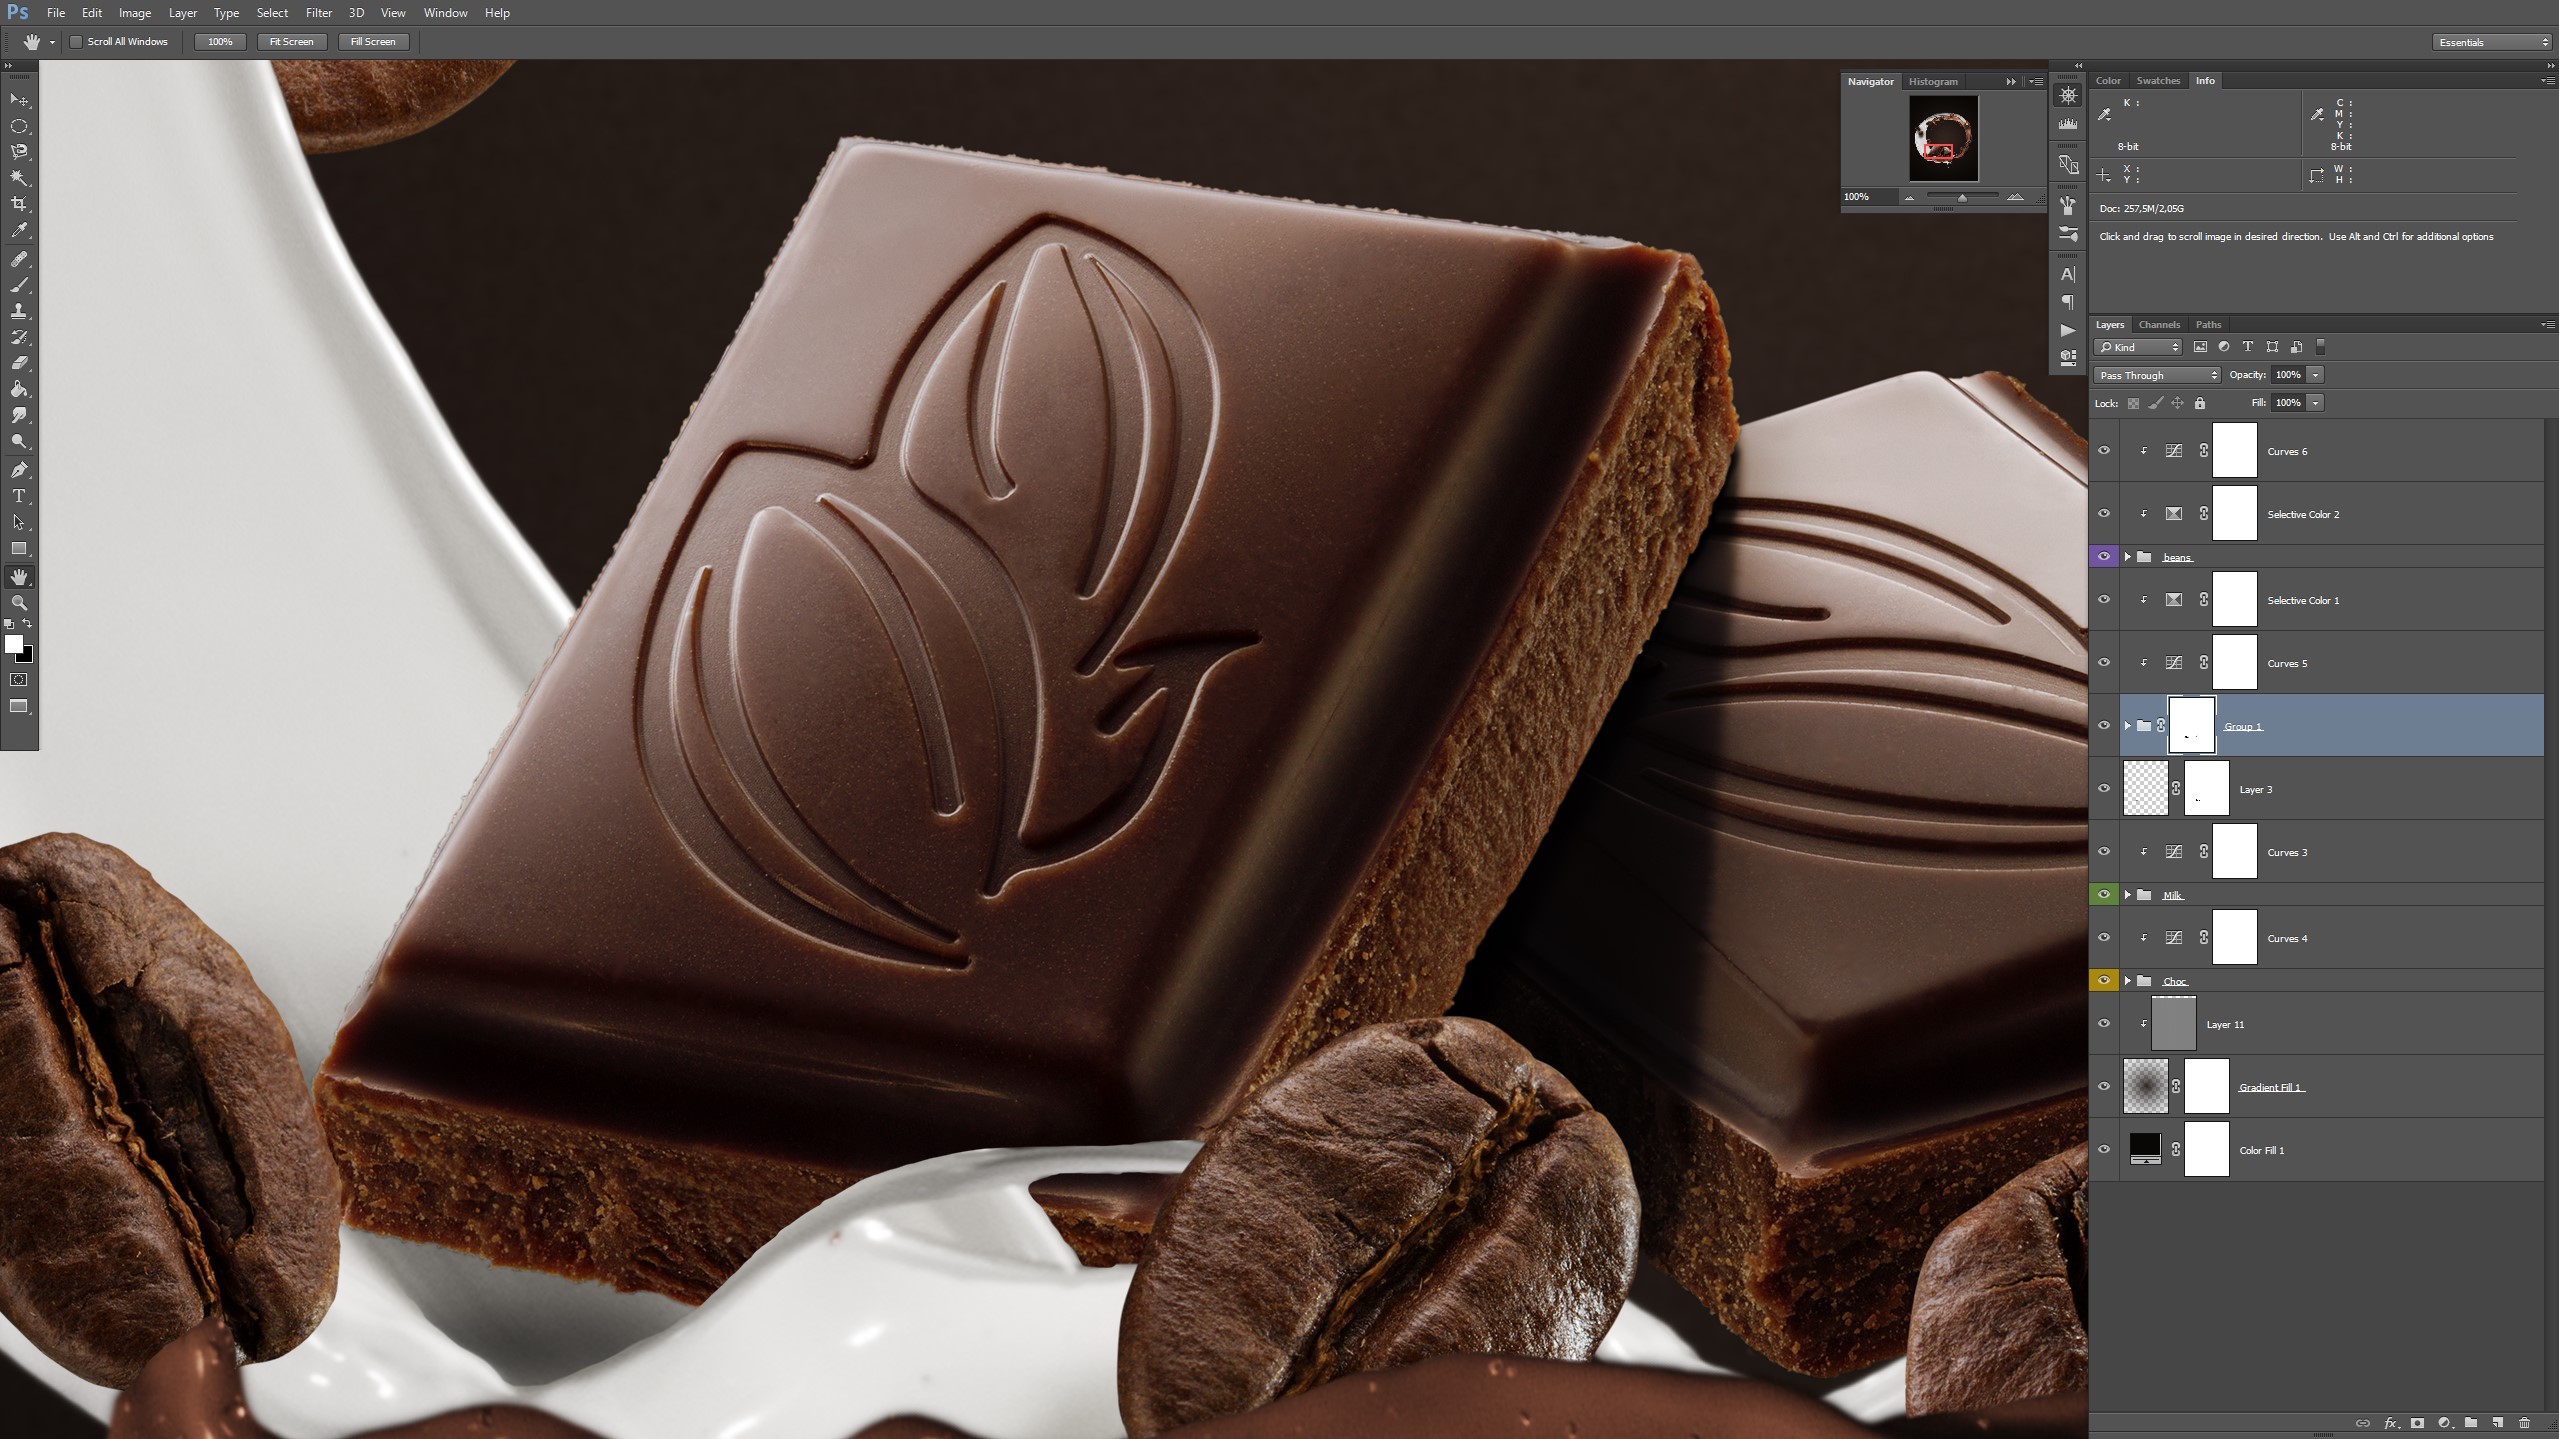
First of all, I did focus stacking in Helicon Focus. For each piece of chocolate I took 12 frames. Another cool thing about Helicon Focus is if programm stiеched frames not ideally, you can fix it manually by yourself. It works similar to masks in Photoshop.

51
52
After that I started to do really routine things for any retouching process. There were involved really basic tools like Clone Stamp, Healing Brush, Curves, Levels and so on. Good retouching requires a lot of patience and concentration, sometimes it’s hard to sit and do necessary things during long time, so I would suggest to move by small steps. 1 hour of retouching then 10 min break.
60
61
1Left
1right
70
Probably it’s interesting that I’ve used same corner twice. Also I grab a part of texture on the side to put on the front part.

Liquify tool to fine tune the shape.

80
Almost same approach were used for retouching right piece.
30
31

Time to put everything together. I got splashes from Solid Paint Splashes pack. Regardless I couldn’t find needed splashes out of the box, I did few manipulations with the most appropriate ones. By the way you may check my tutorial below. It’s about how to subtle change particular hue.

40
41

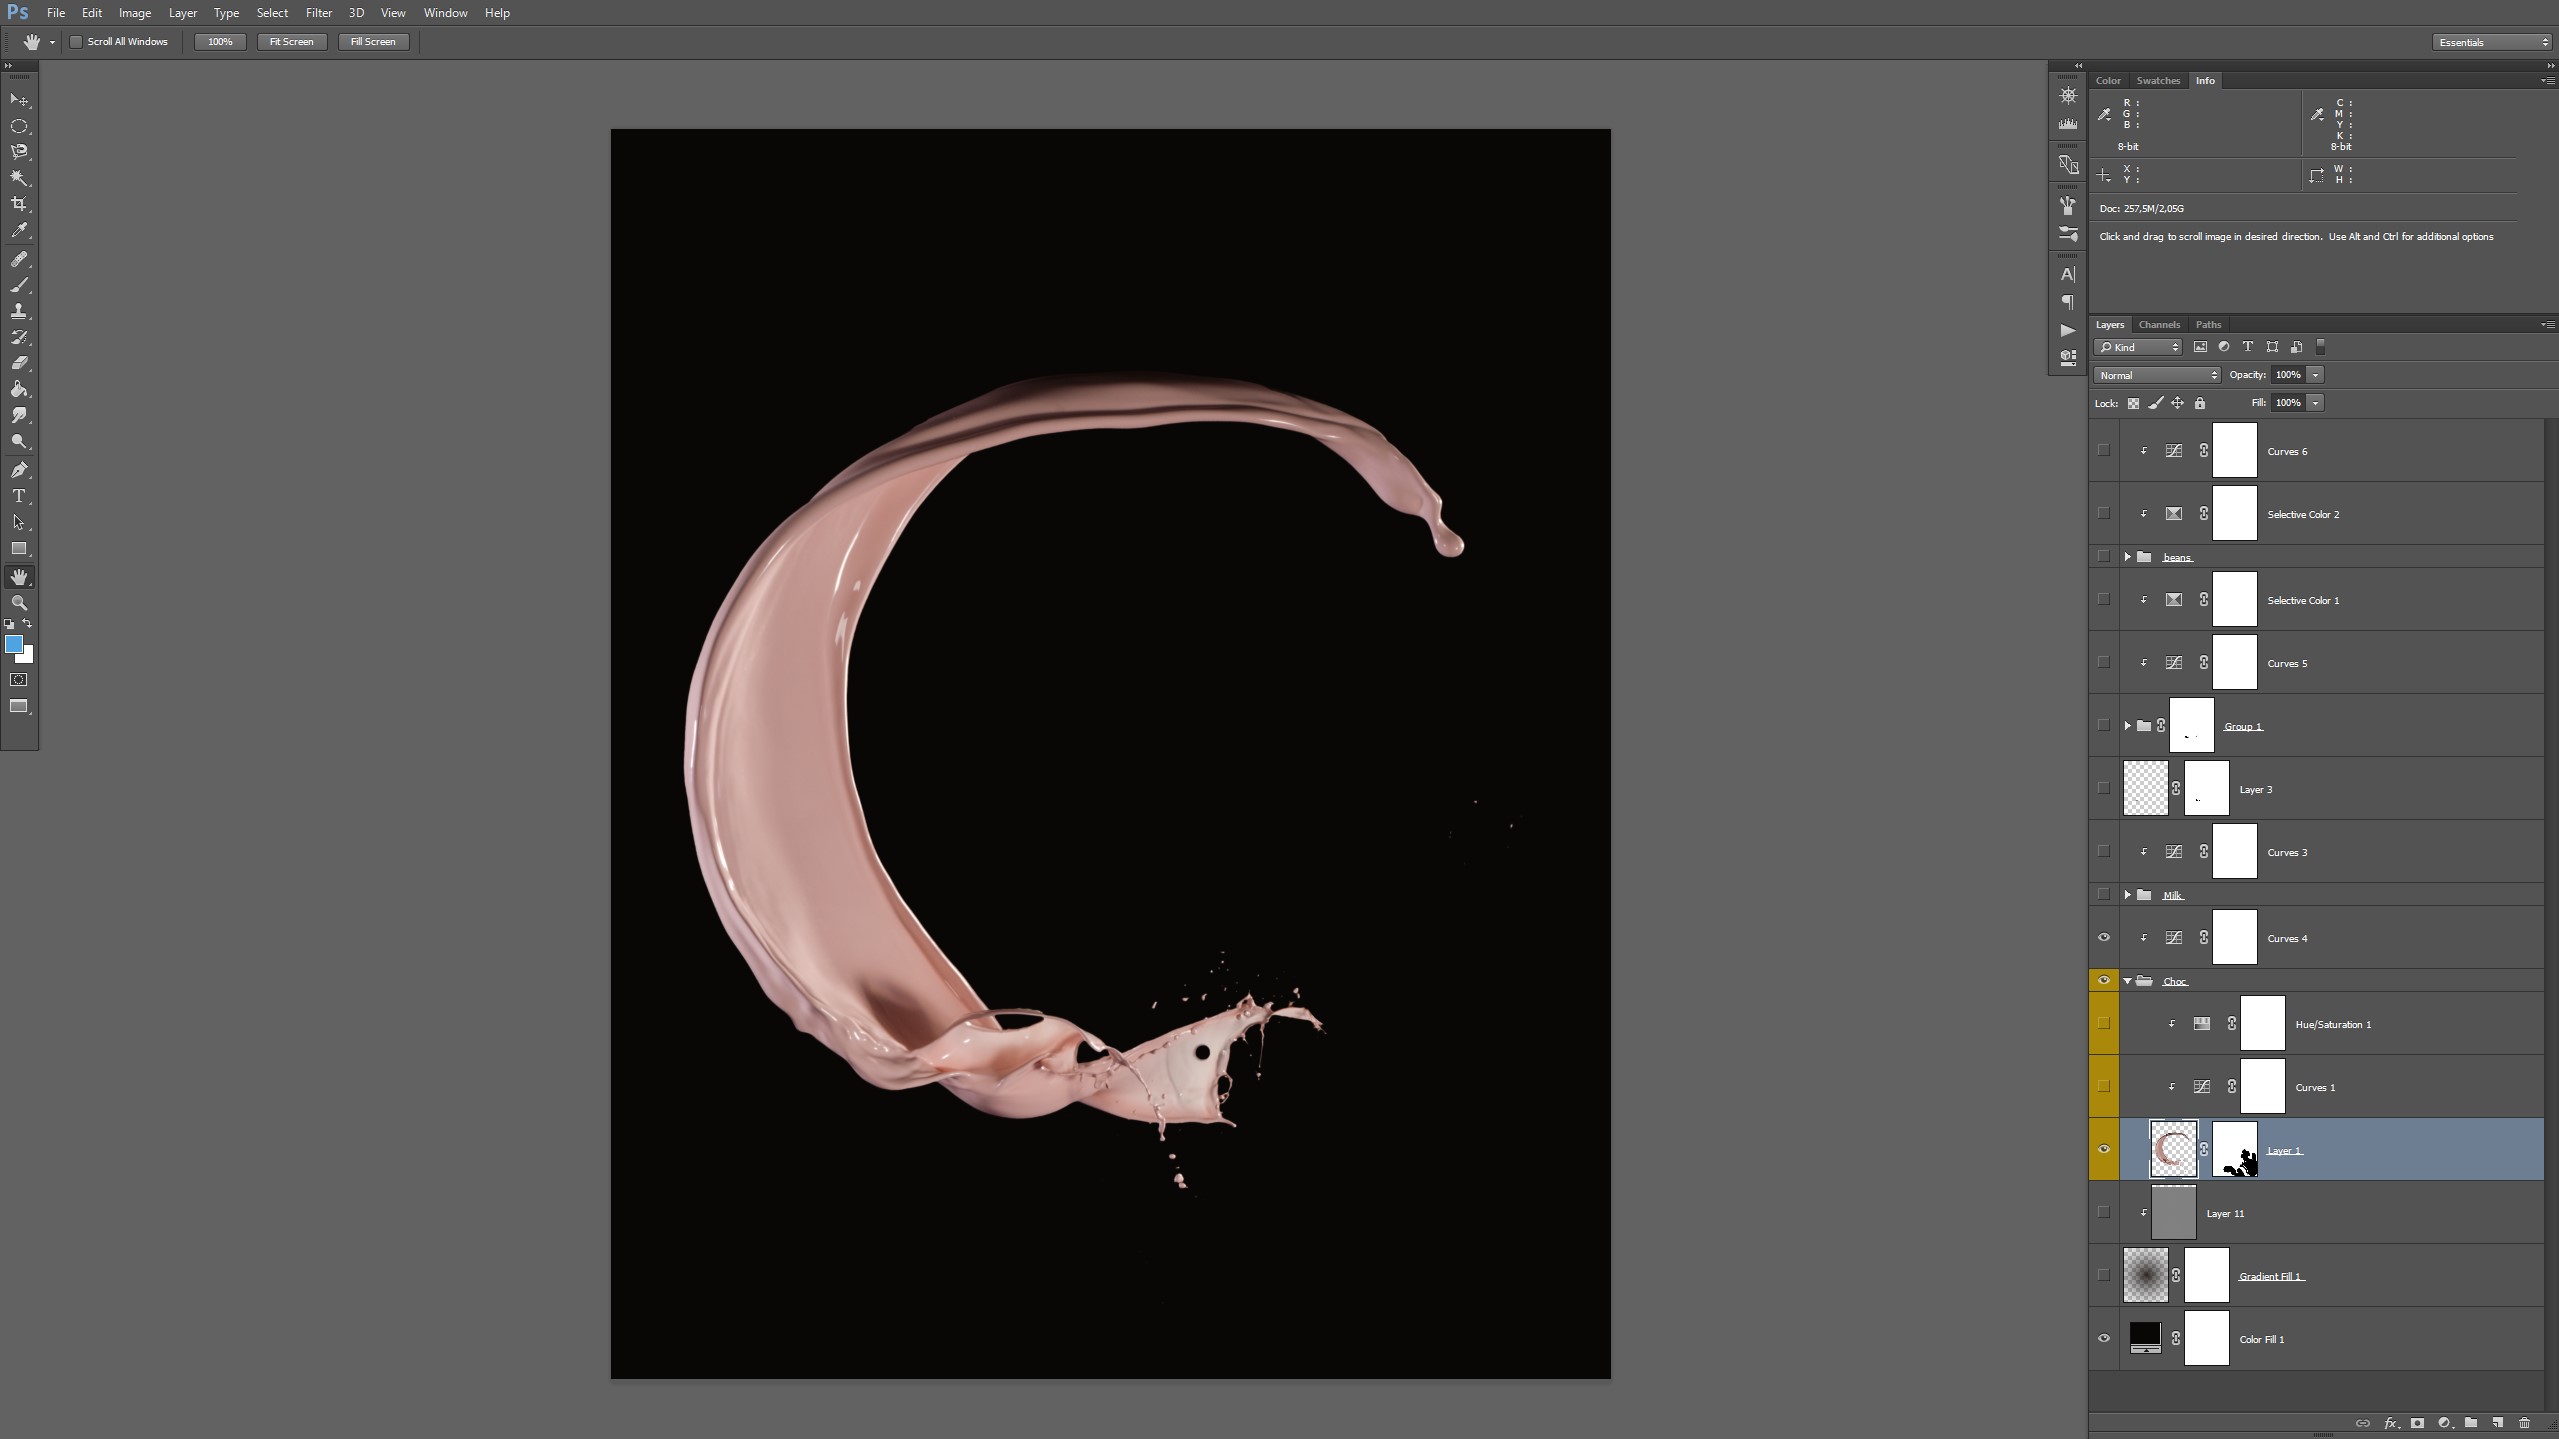
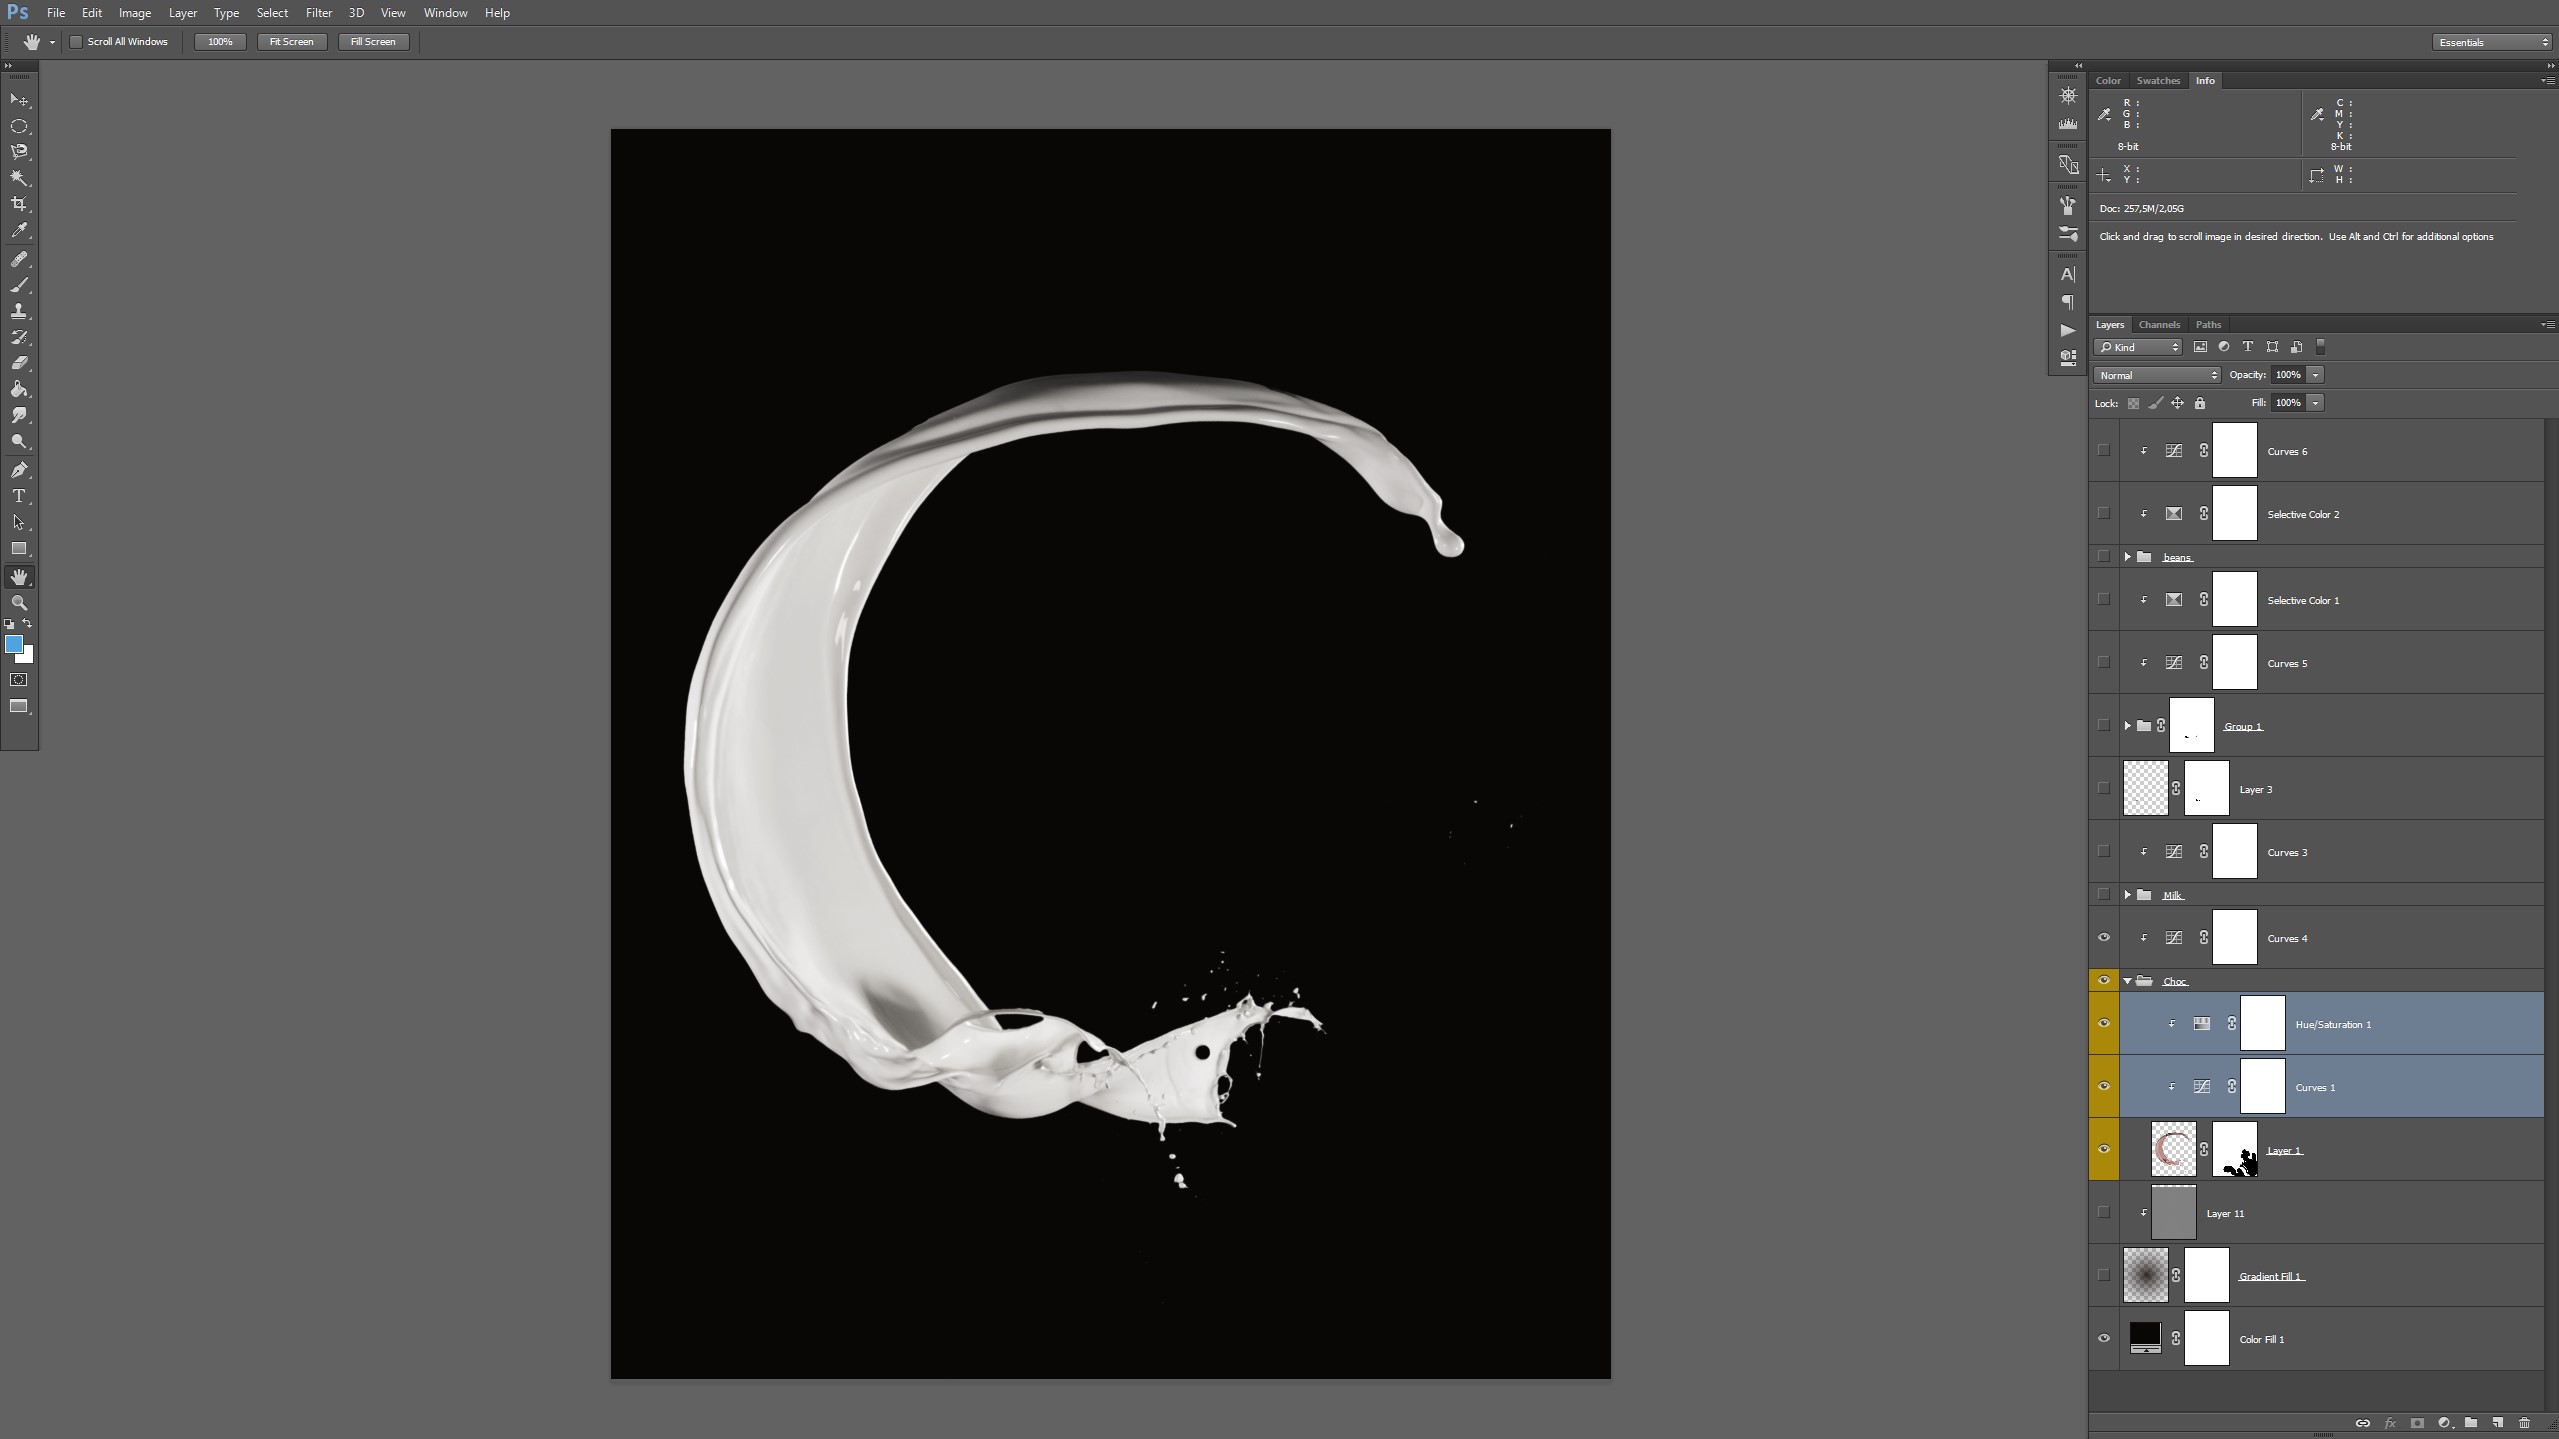
But in this case I needed to completely change color of a splash. So for the first one I desaturated the whole splash with Hue/Sat adjustment layer and increase brightness with Curves.

42
43

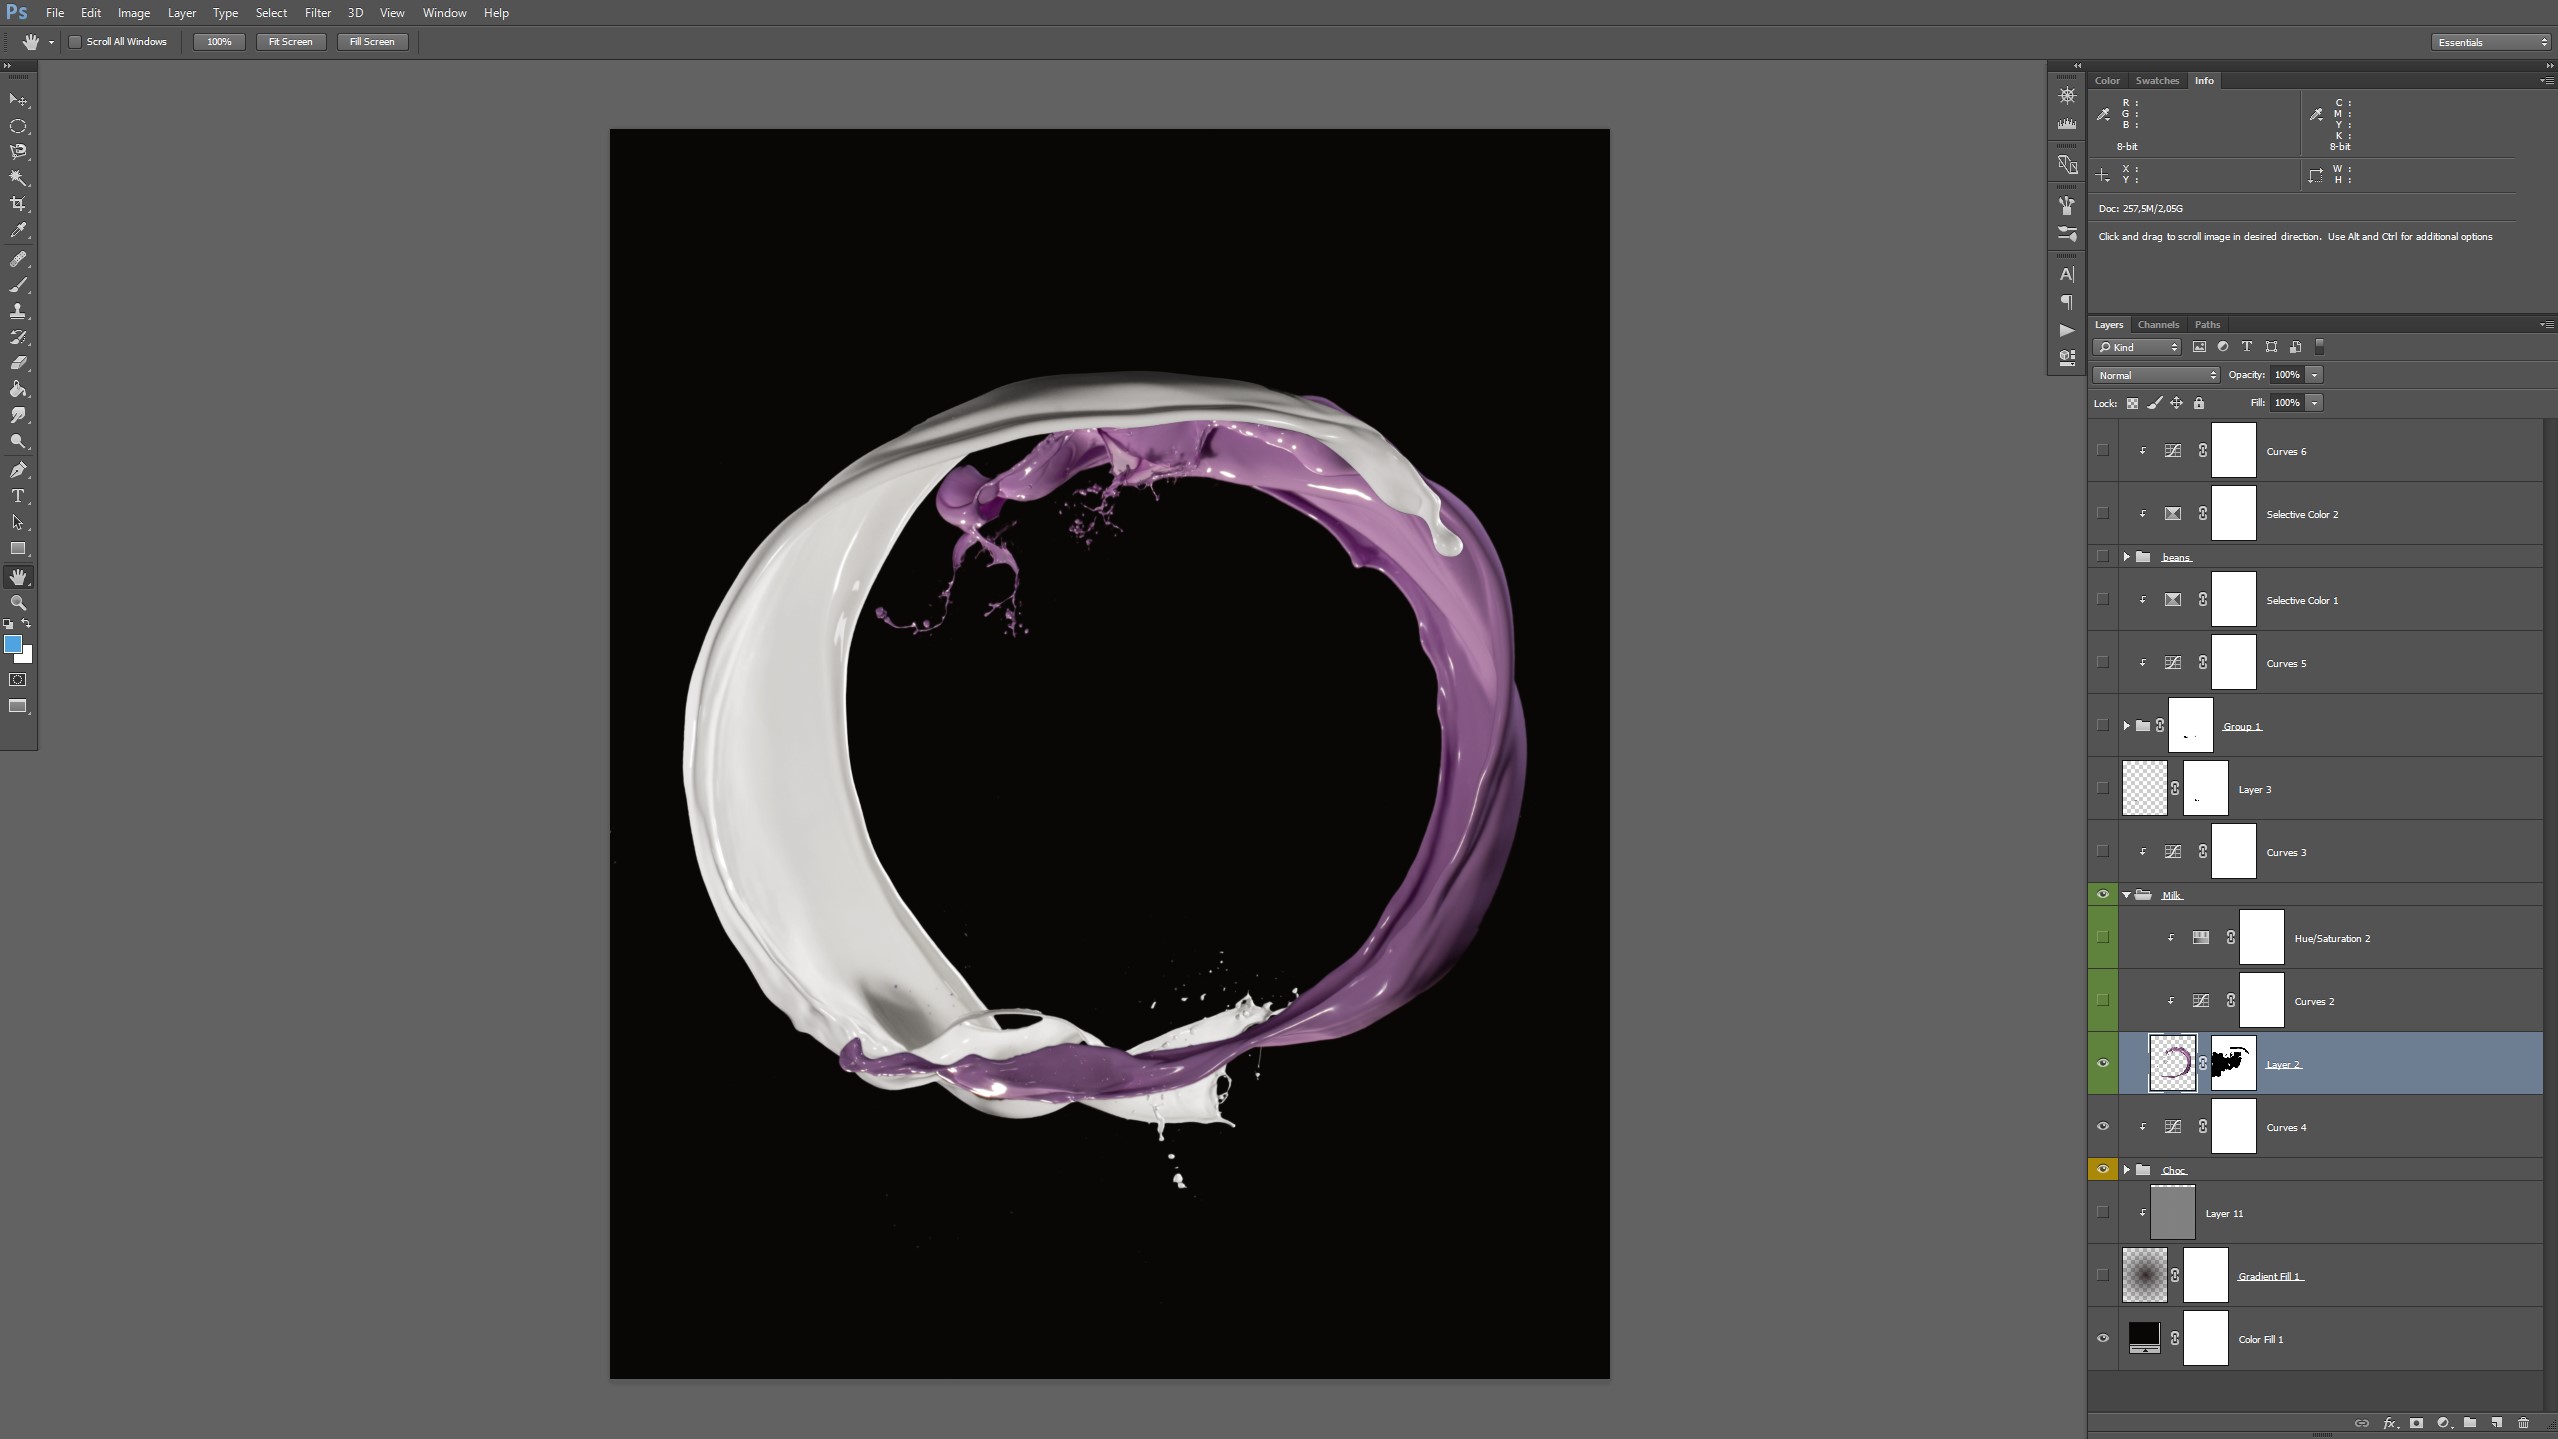
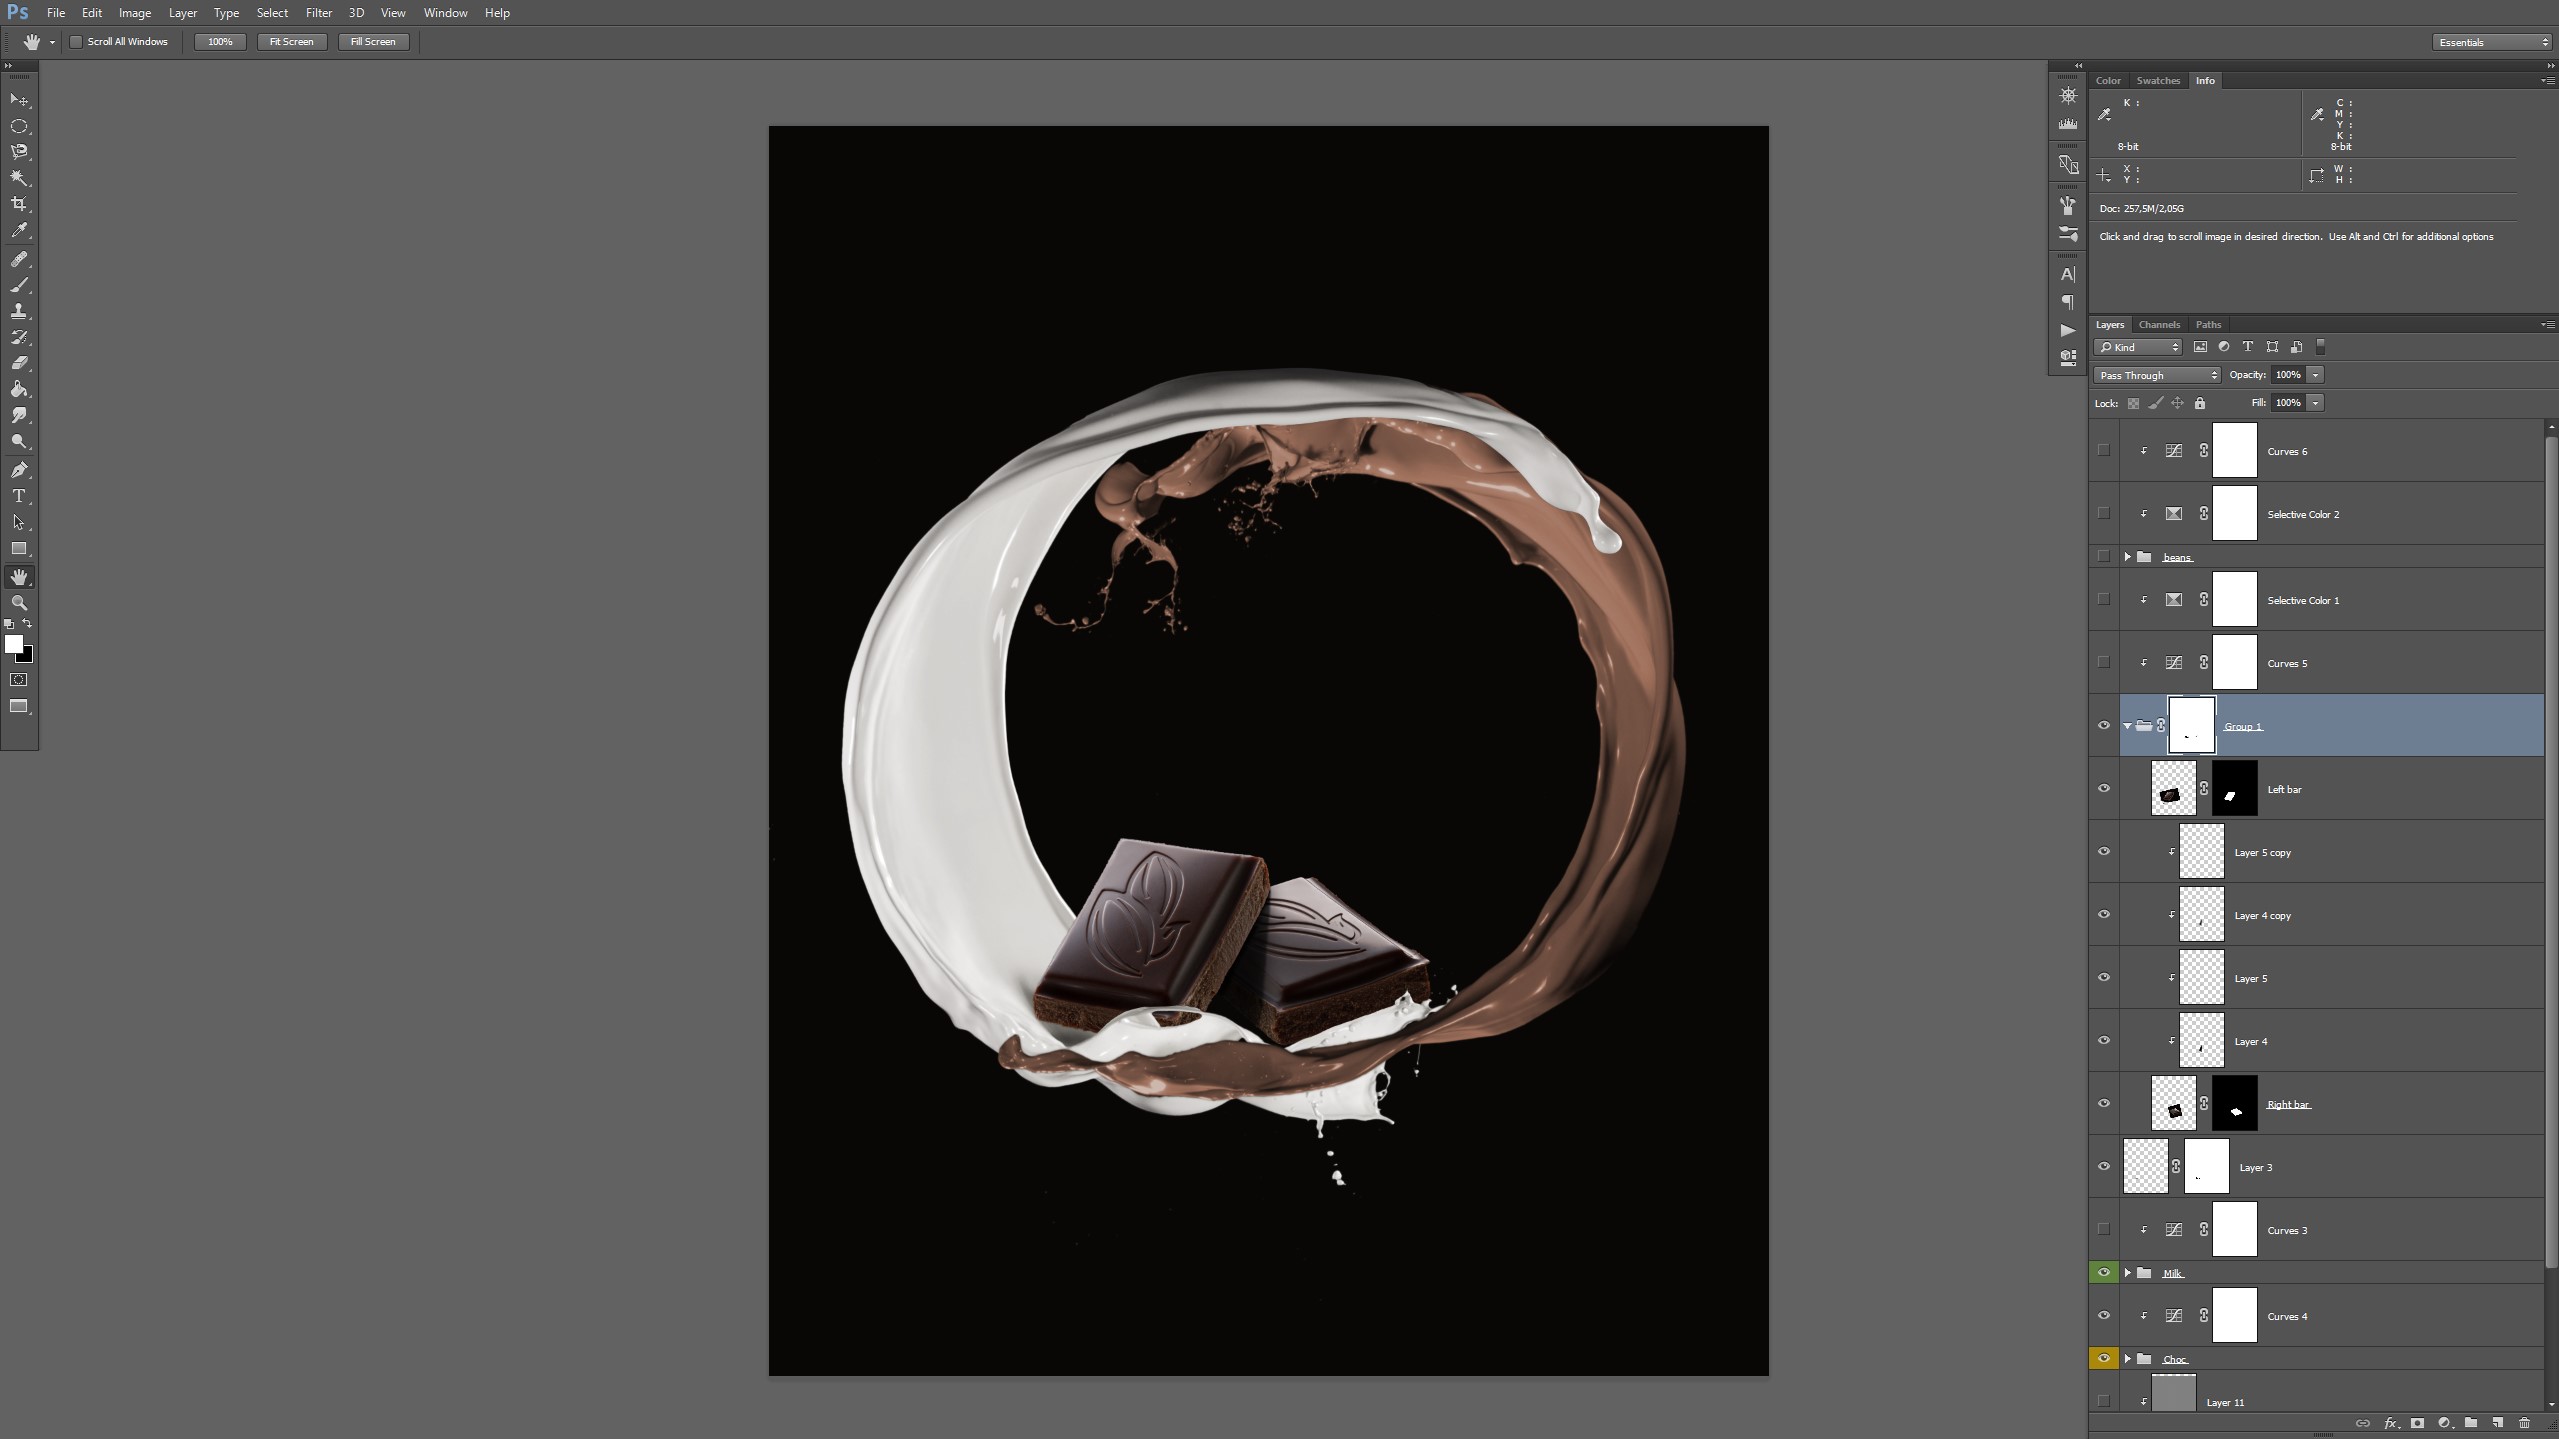
To shift color from purple to coffee color I added Hue/Saturation layer with settings you may see above. Just keep in mind that it’s much easier to shift colors with similar brightness. I mean it would be near impossible to convert black into white and vice versa.

44

I deliberately skip some parts of retouching process otherwise it would be super long read and this article would be not for easy reading. If you have any questions write me a PM on a Facebook or in the comments at the end of this page.

It may look like I perfectly position splashes at the first attempt but it’s not true. I spent probably a half an hour rotating, transforming and warping them. Another issue was a positioning of two chocolate pieces.

45

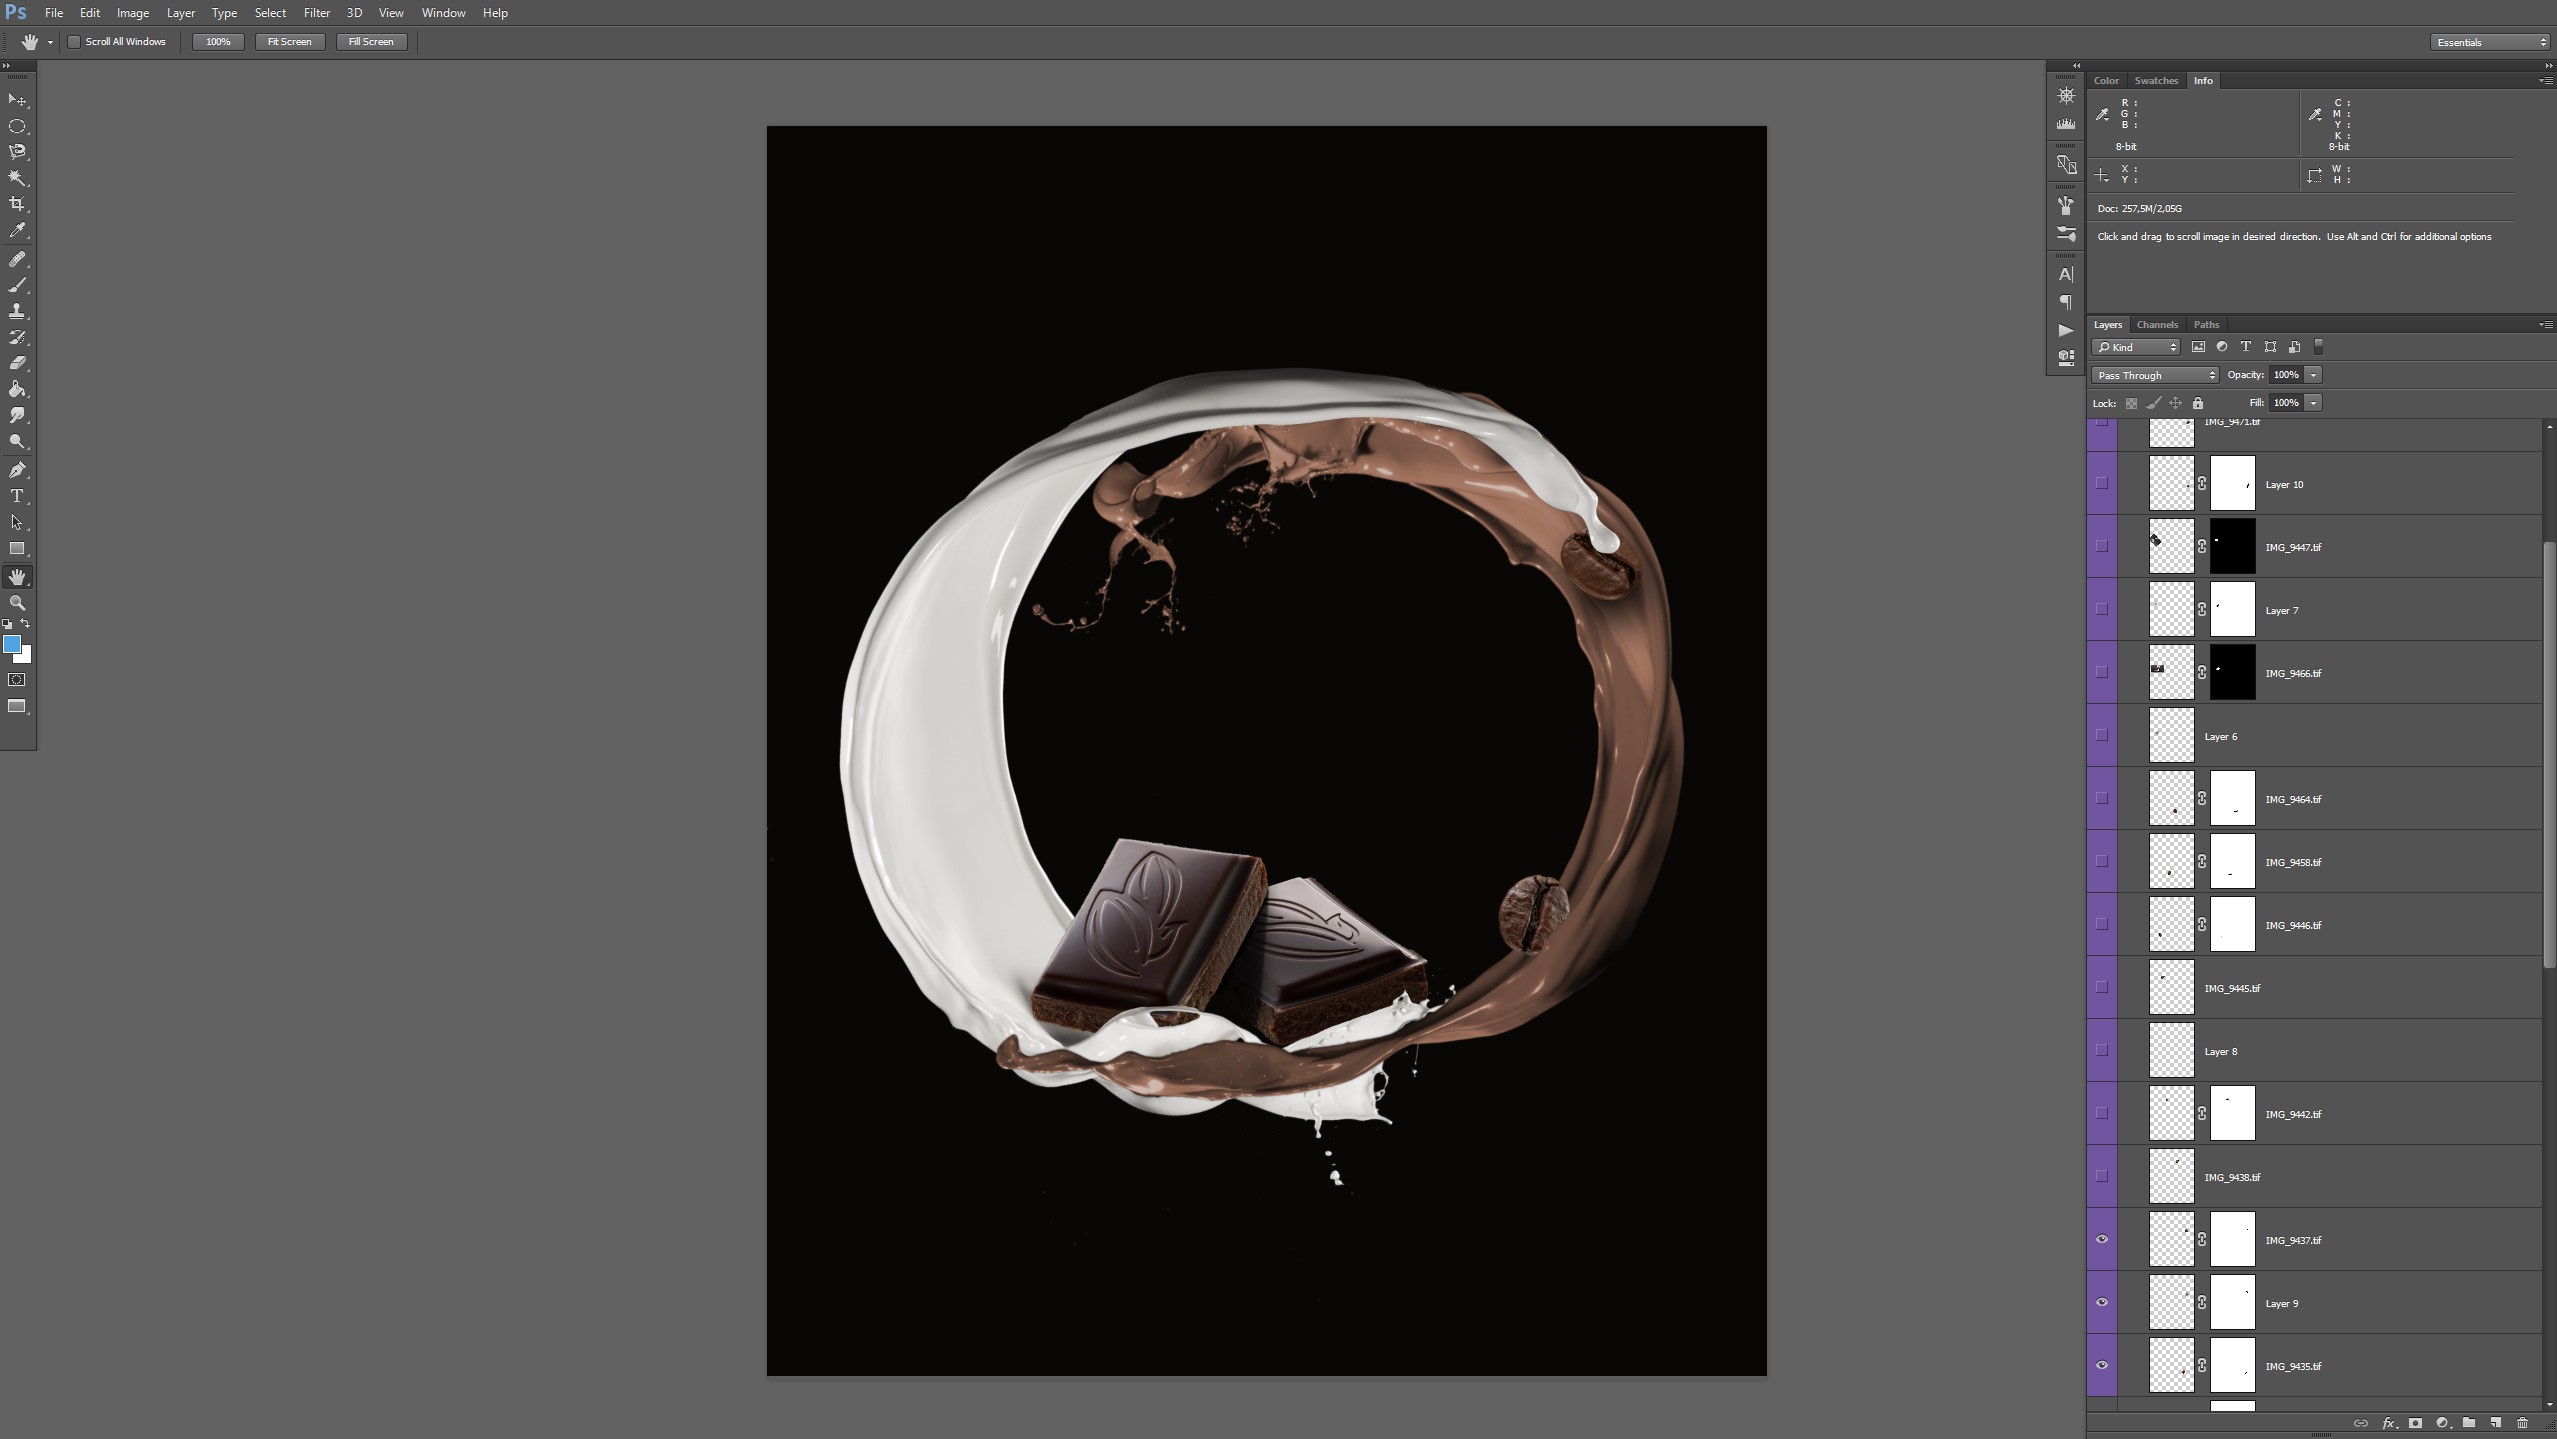
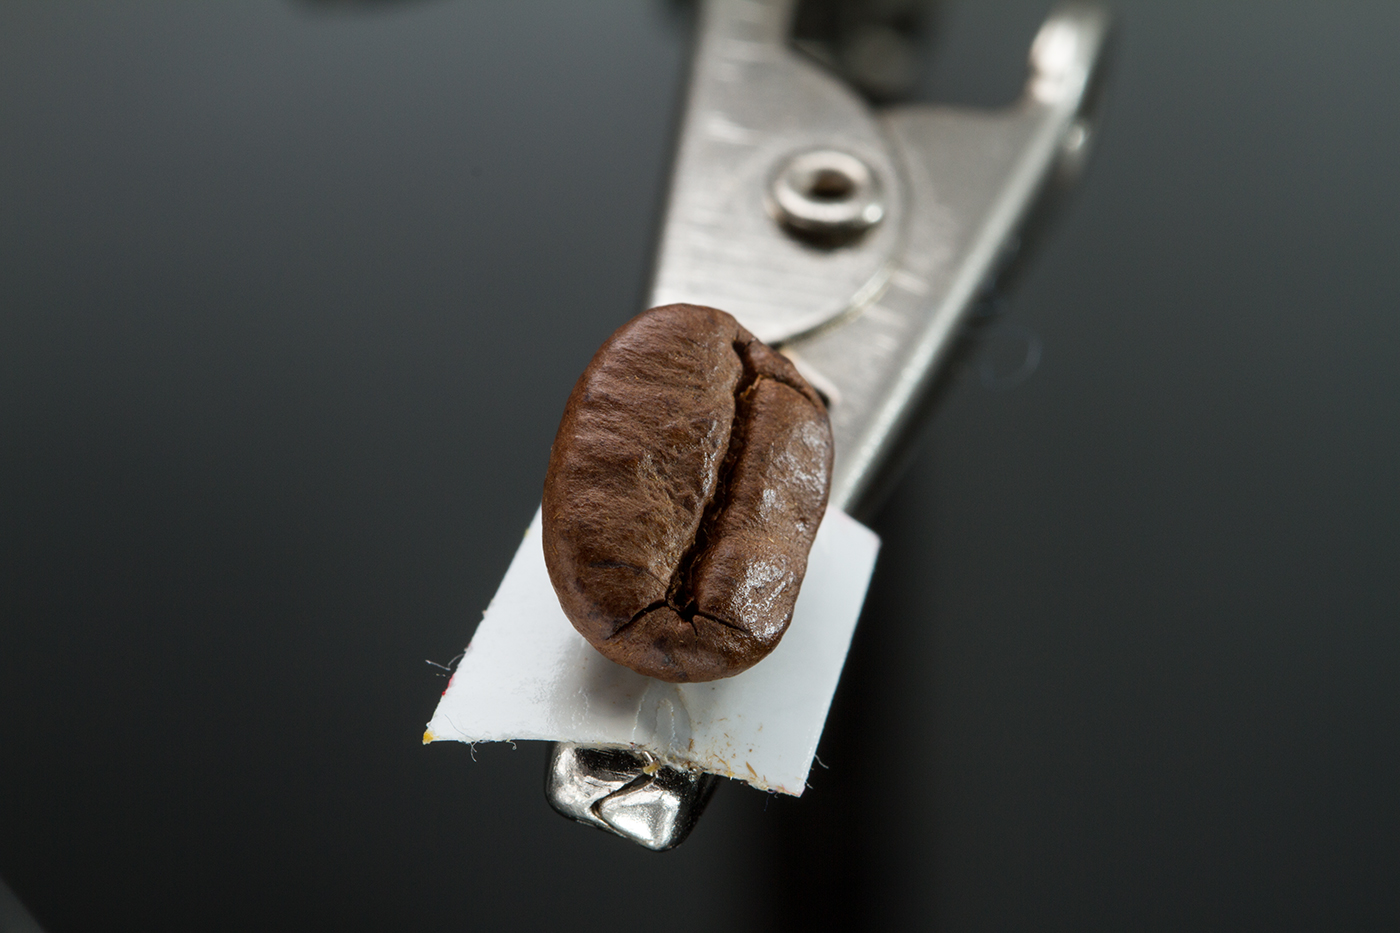
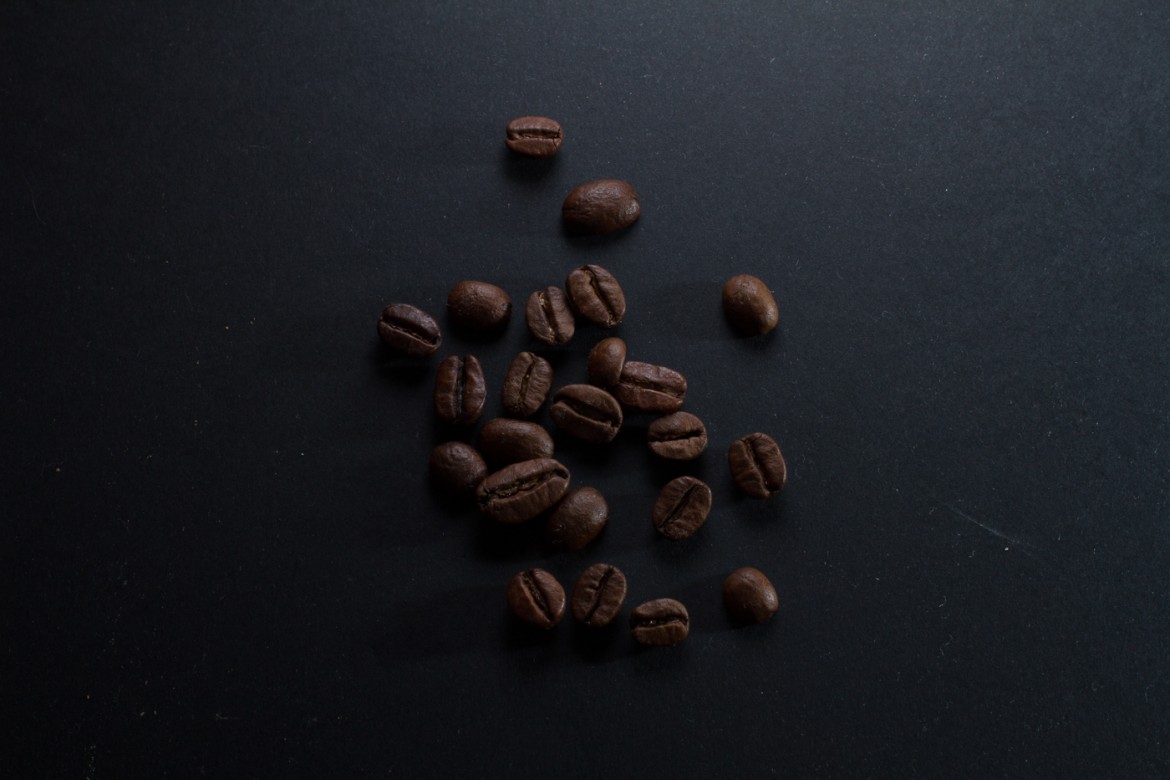
I cutted out coffee beans and started to put them into composition.

46

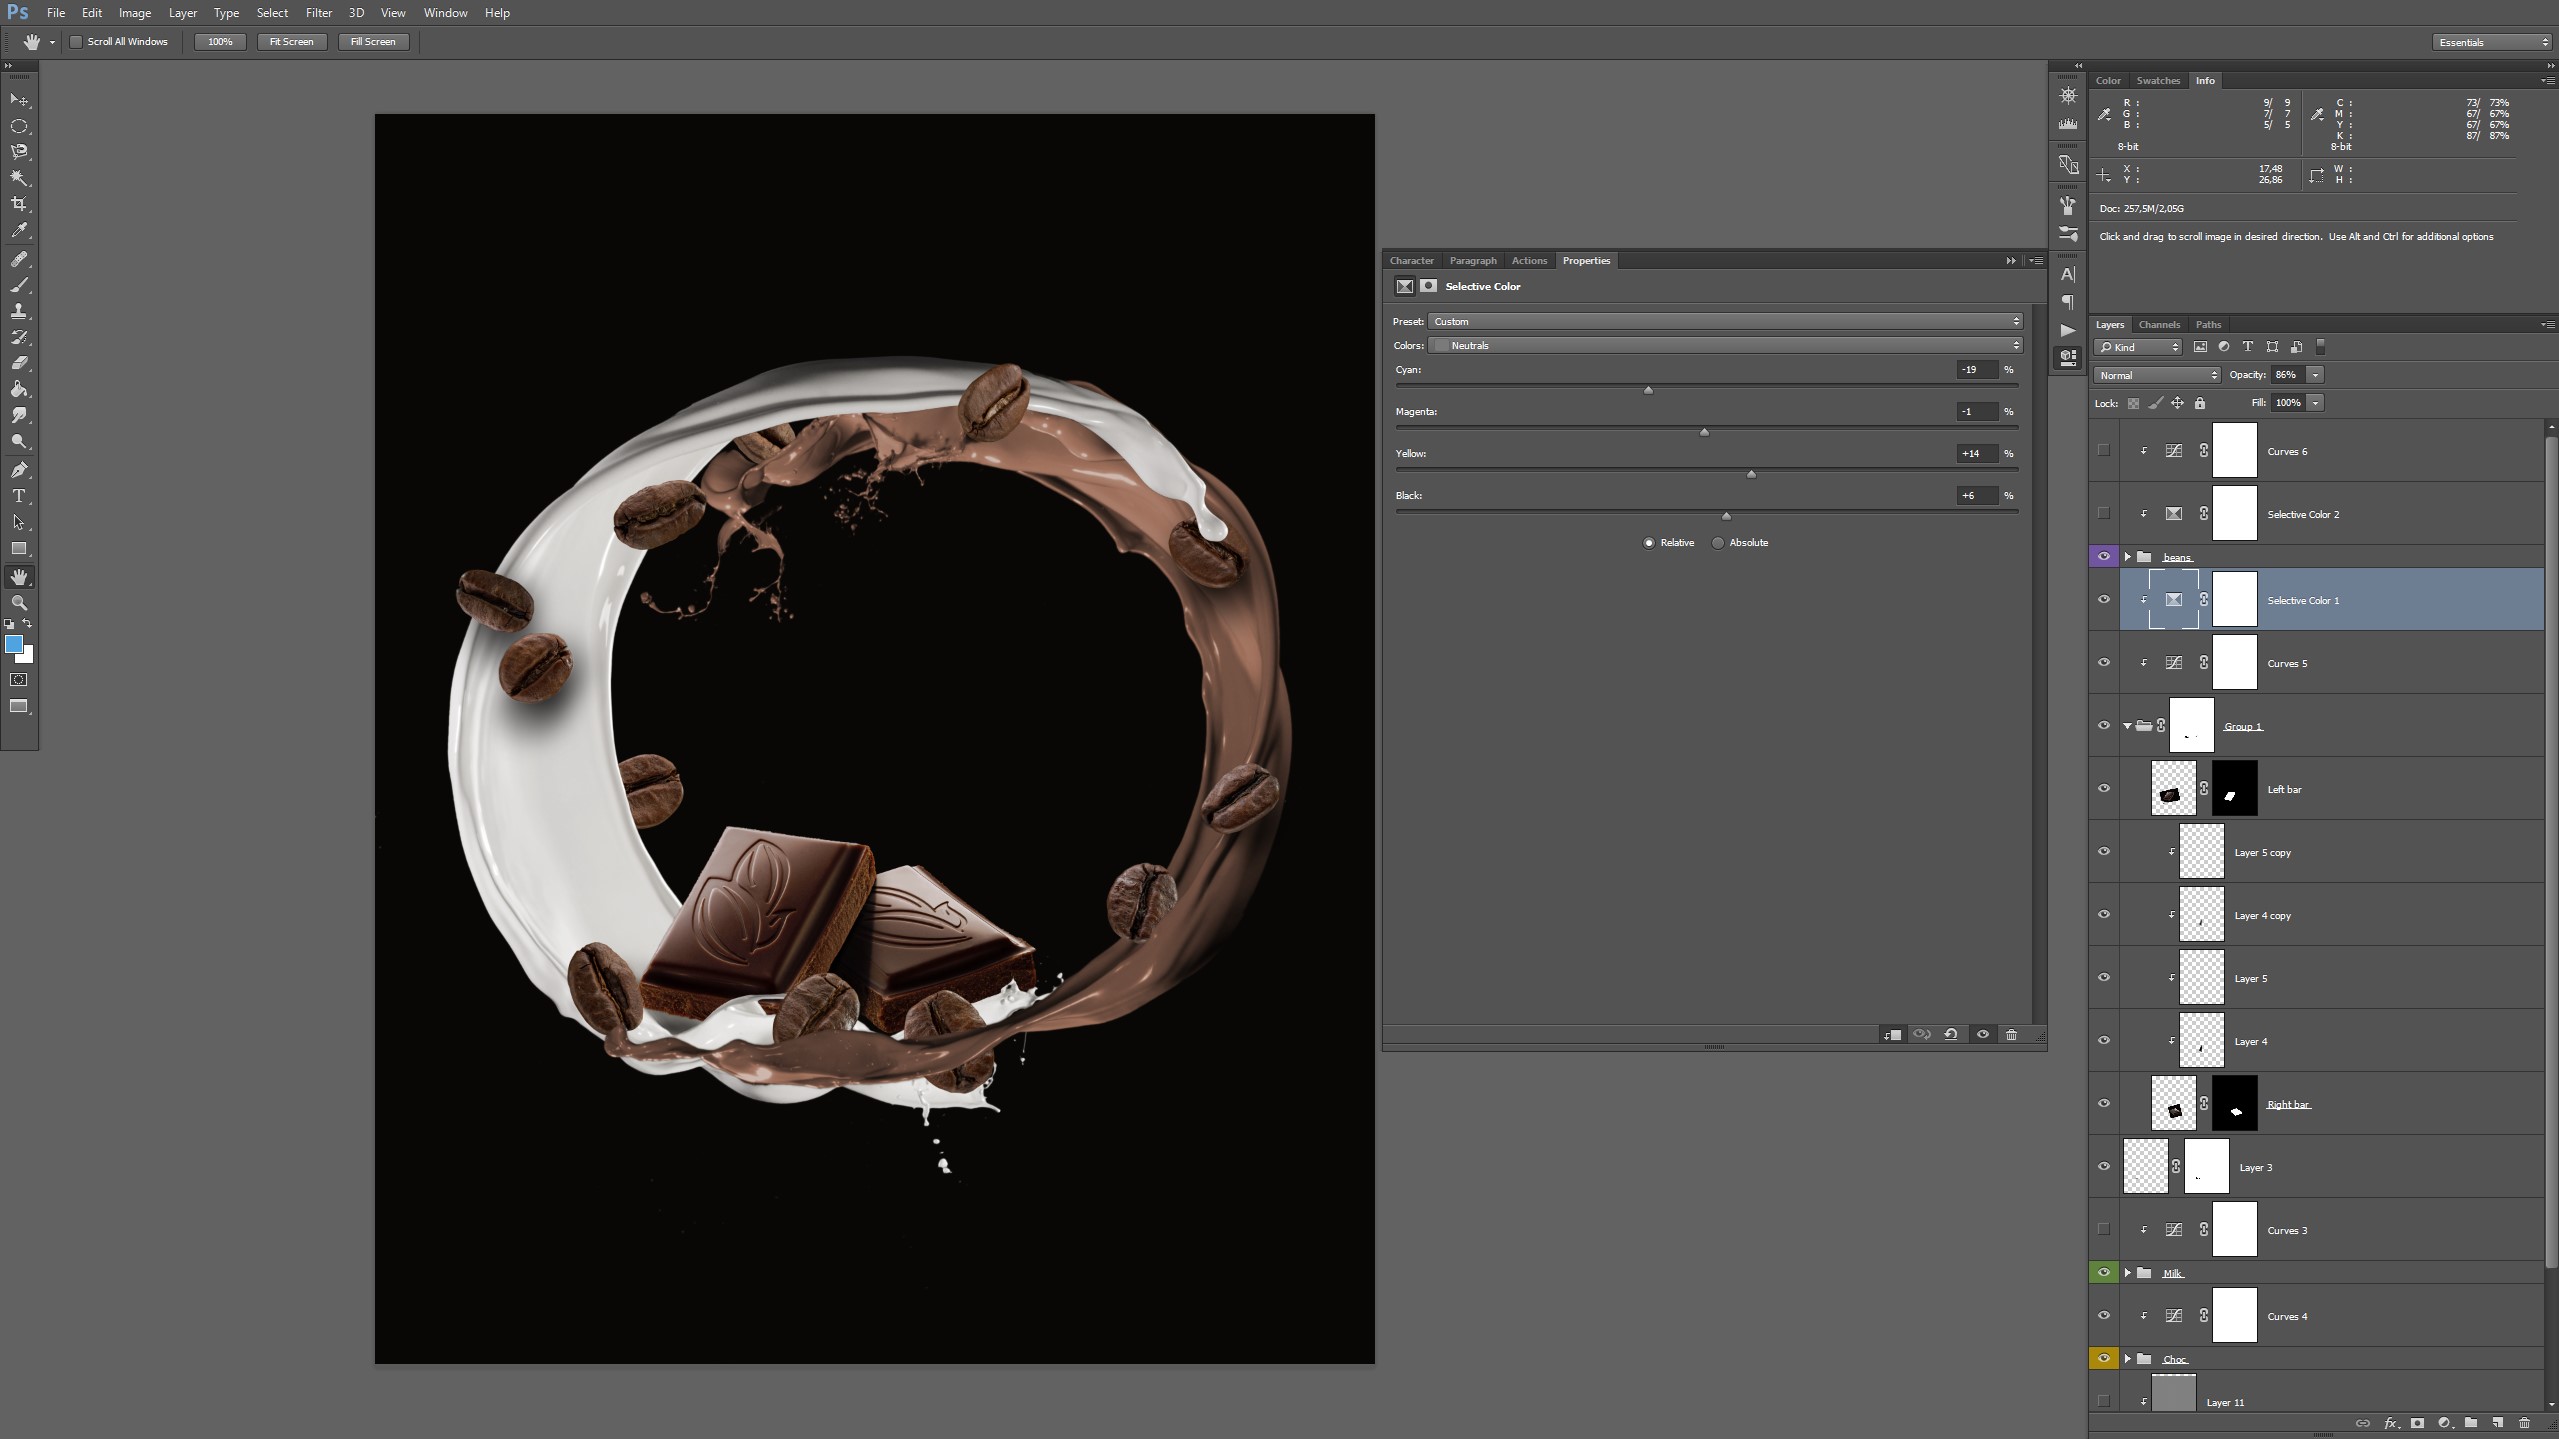
After I’m done with coffee beans, I started to work with colors. I’ve changed the color of chocolate with Selective Color adjustment layer as I didn’t like original look, it was dull.

46

At the end I increased contrast of splashes and overall contrast and also added gradient on the background.

47

Videos below contain few examples of retouching in real time. Please take a note videos don’t contain sound.

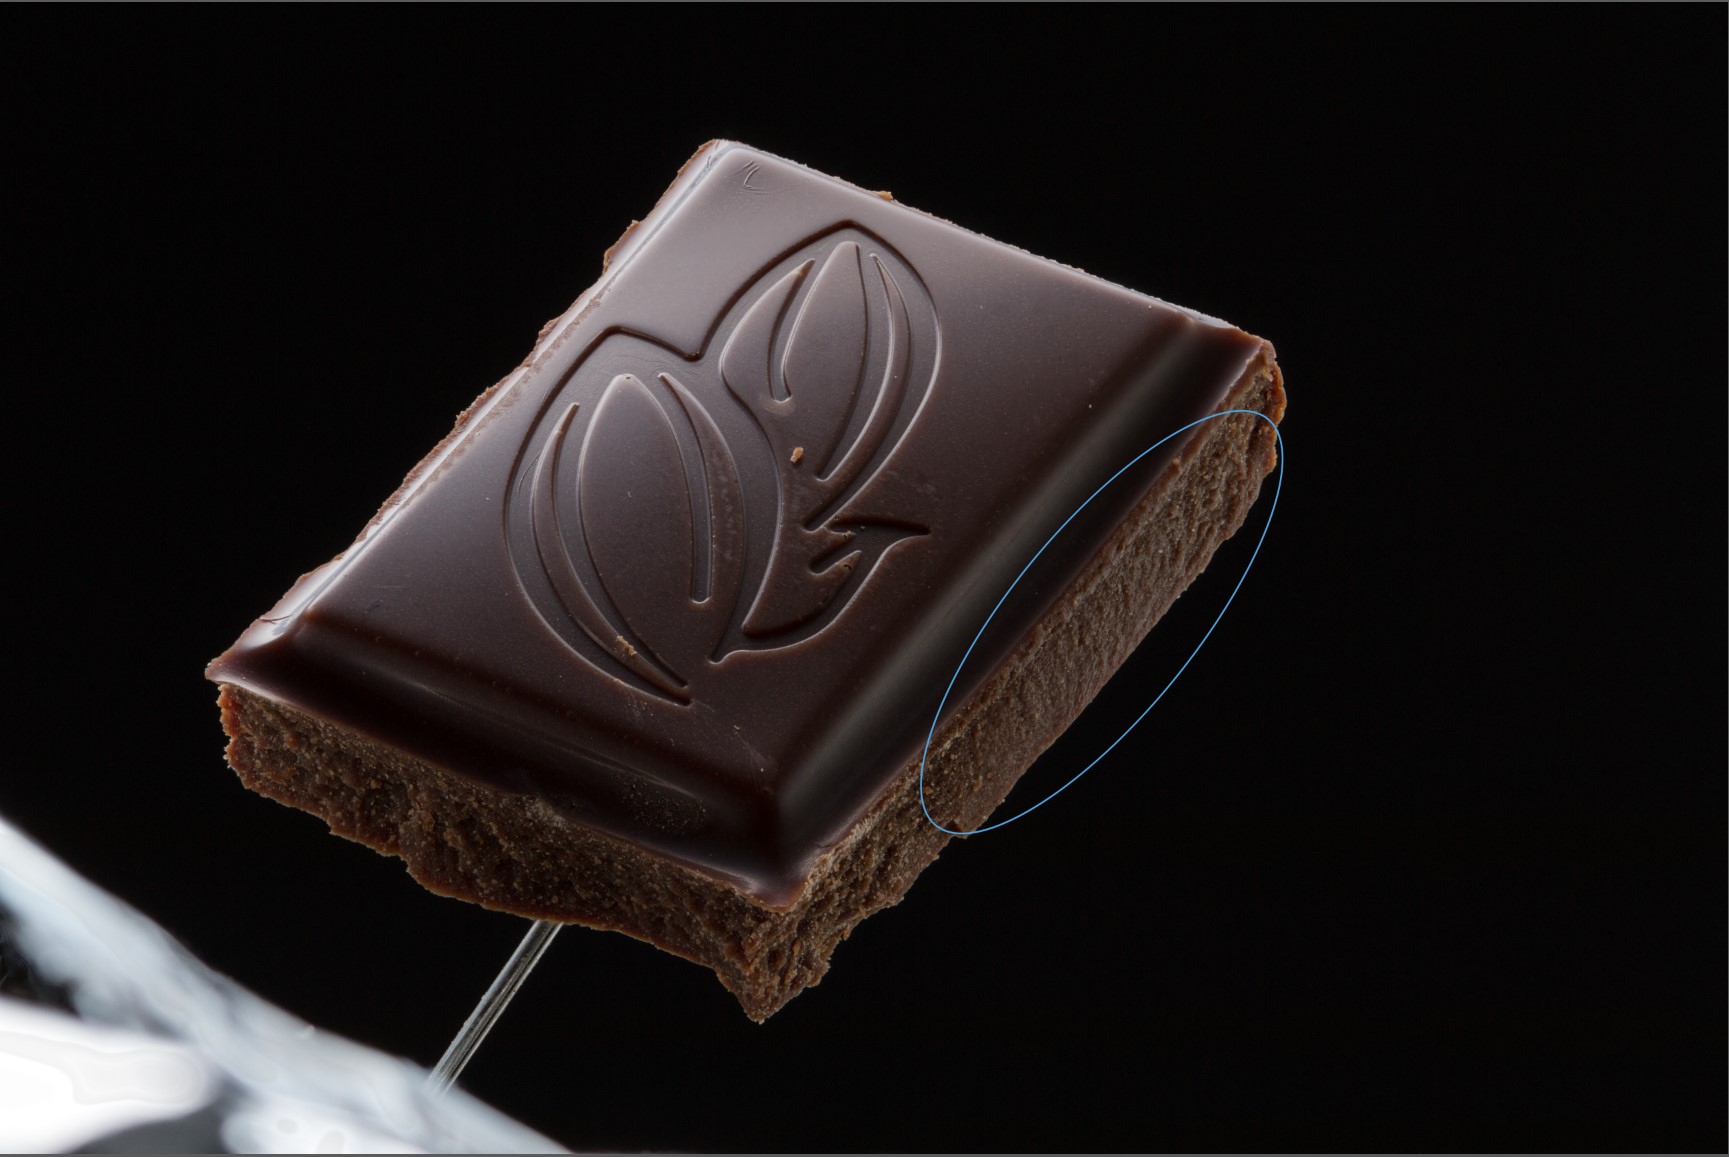
In the video above you’ll see how to retouch problematic areas and keep original texture.

Compositing in still life photography is very common thing. Here’s how to replace certain part of an image by another one.

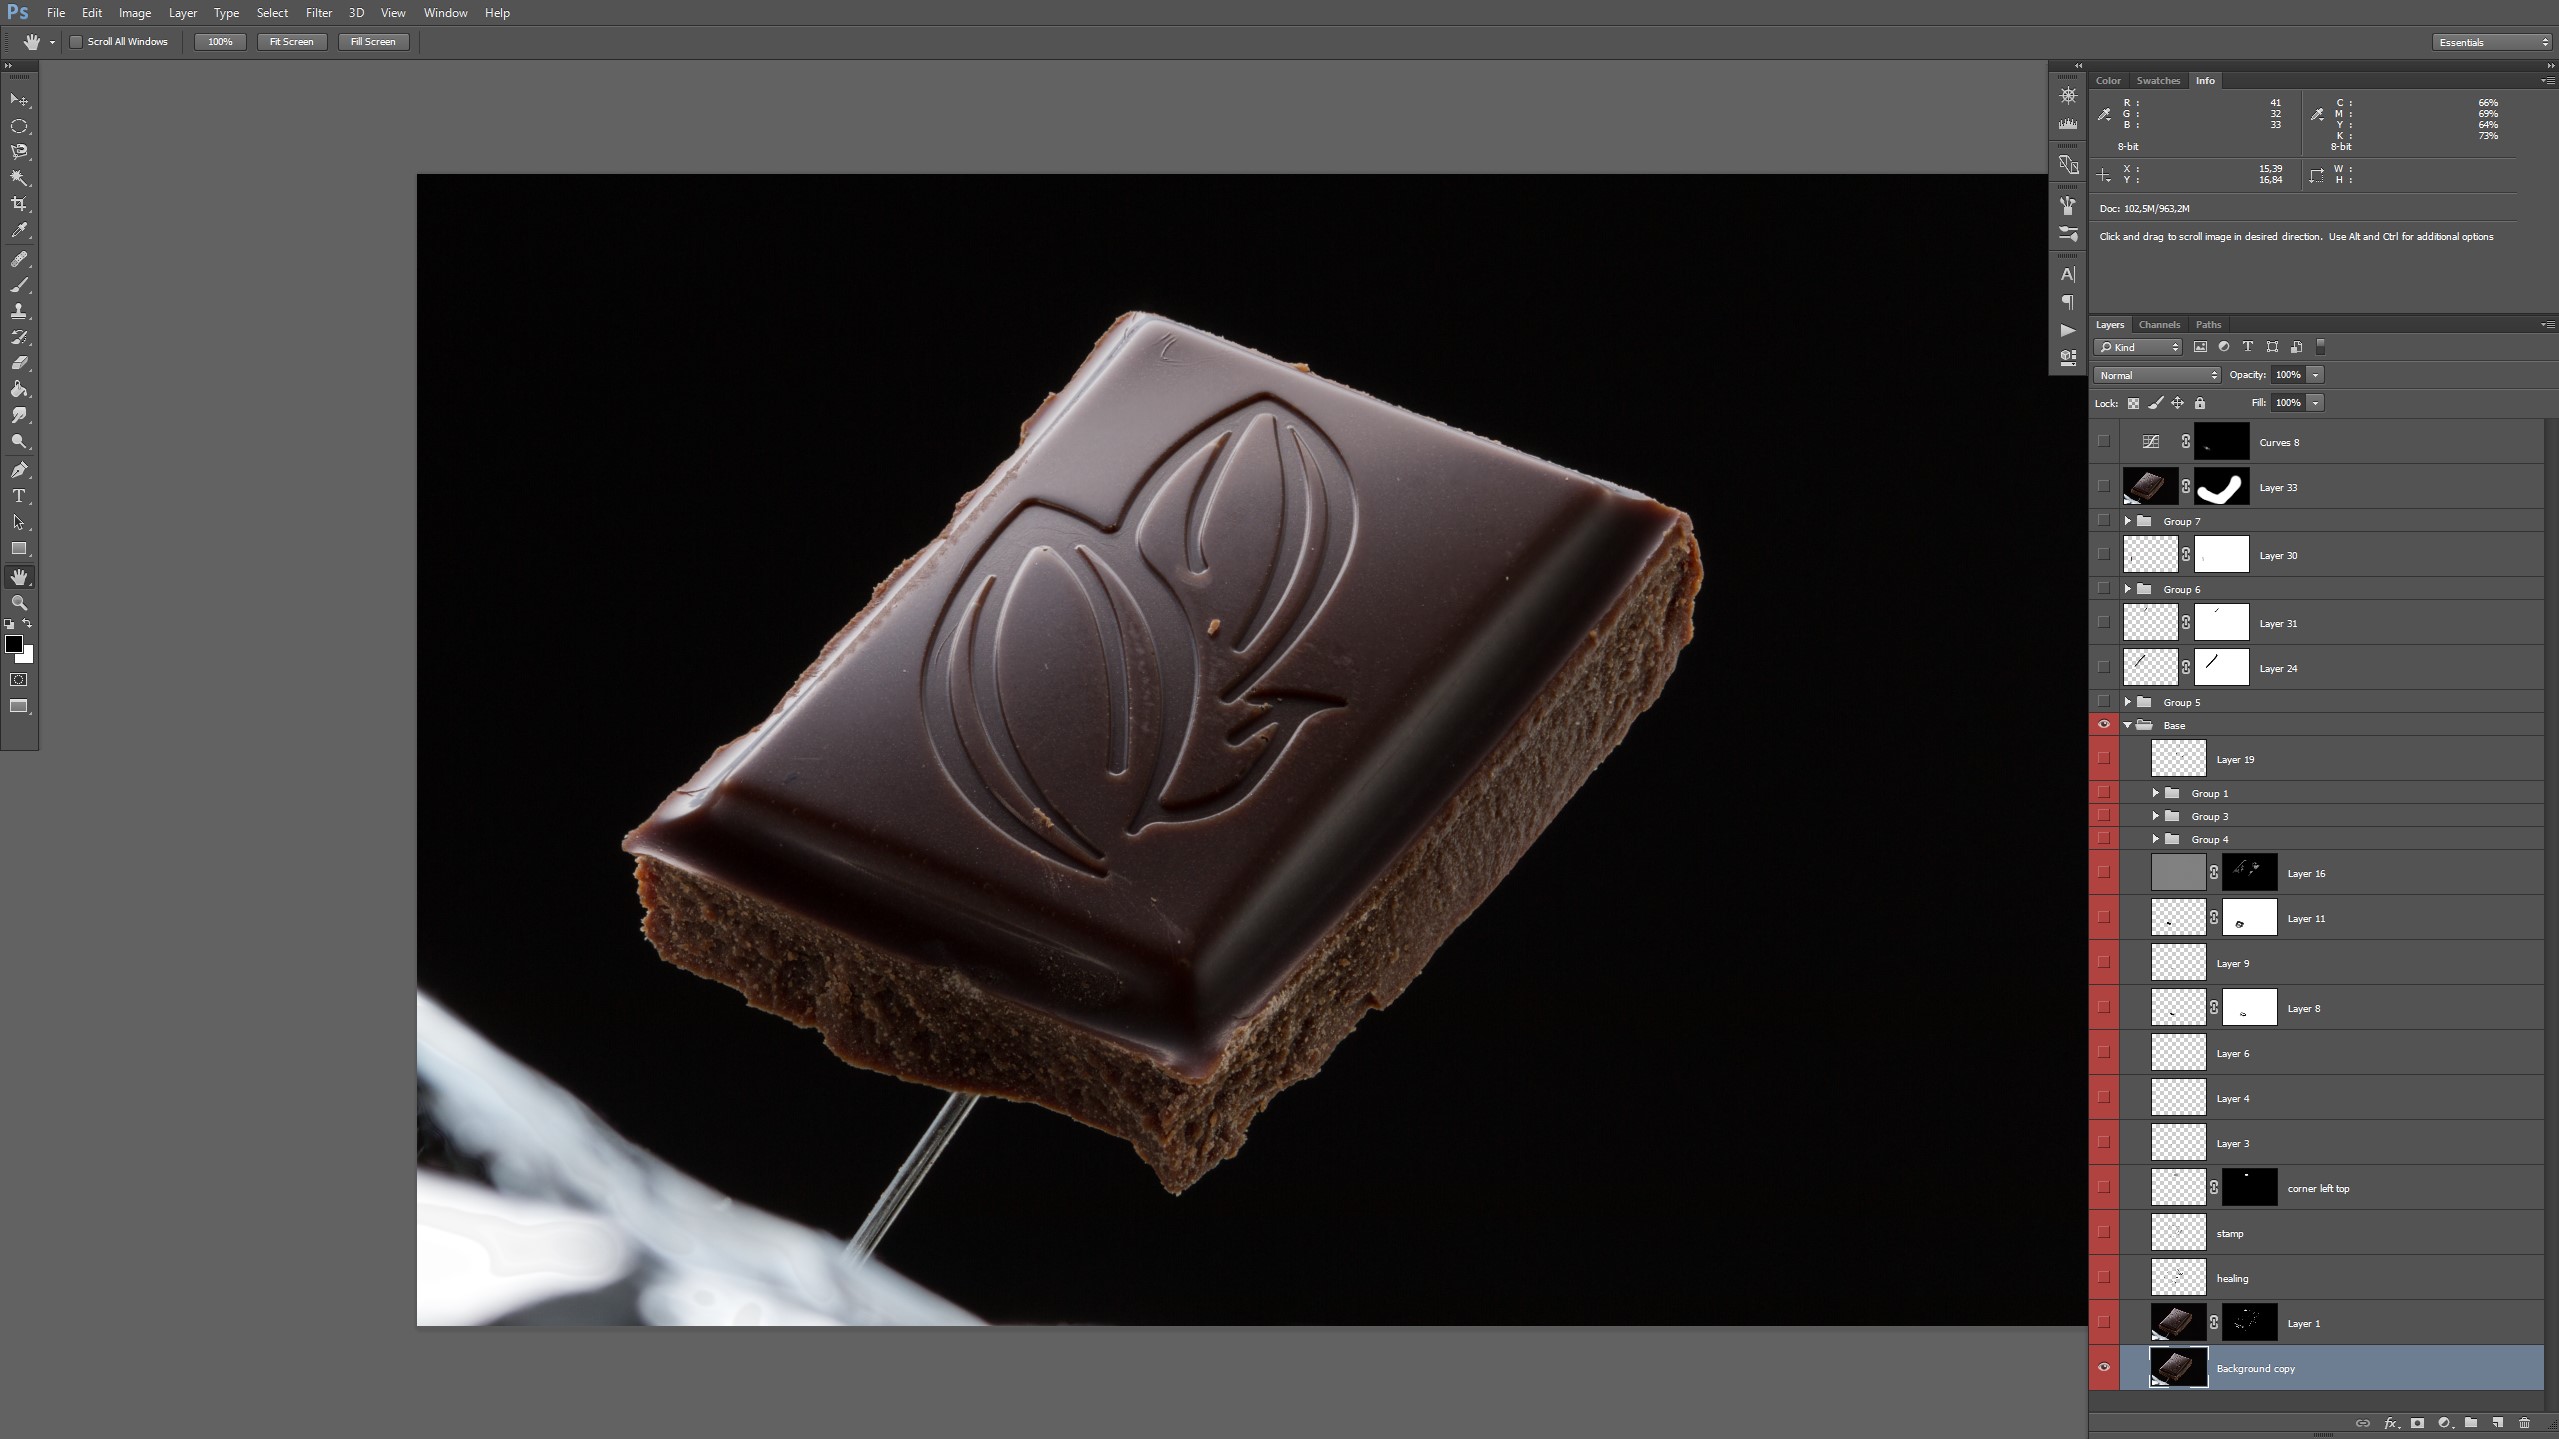
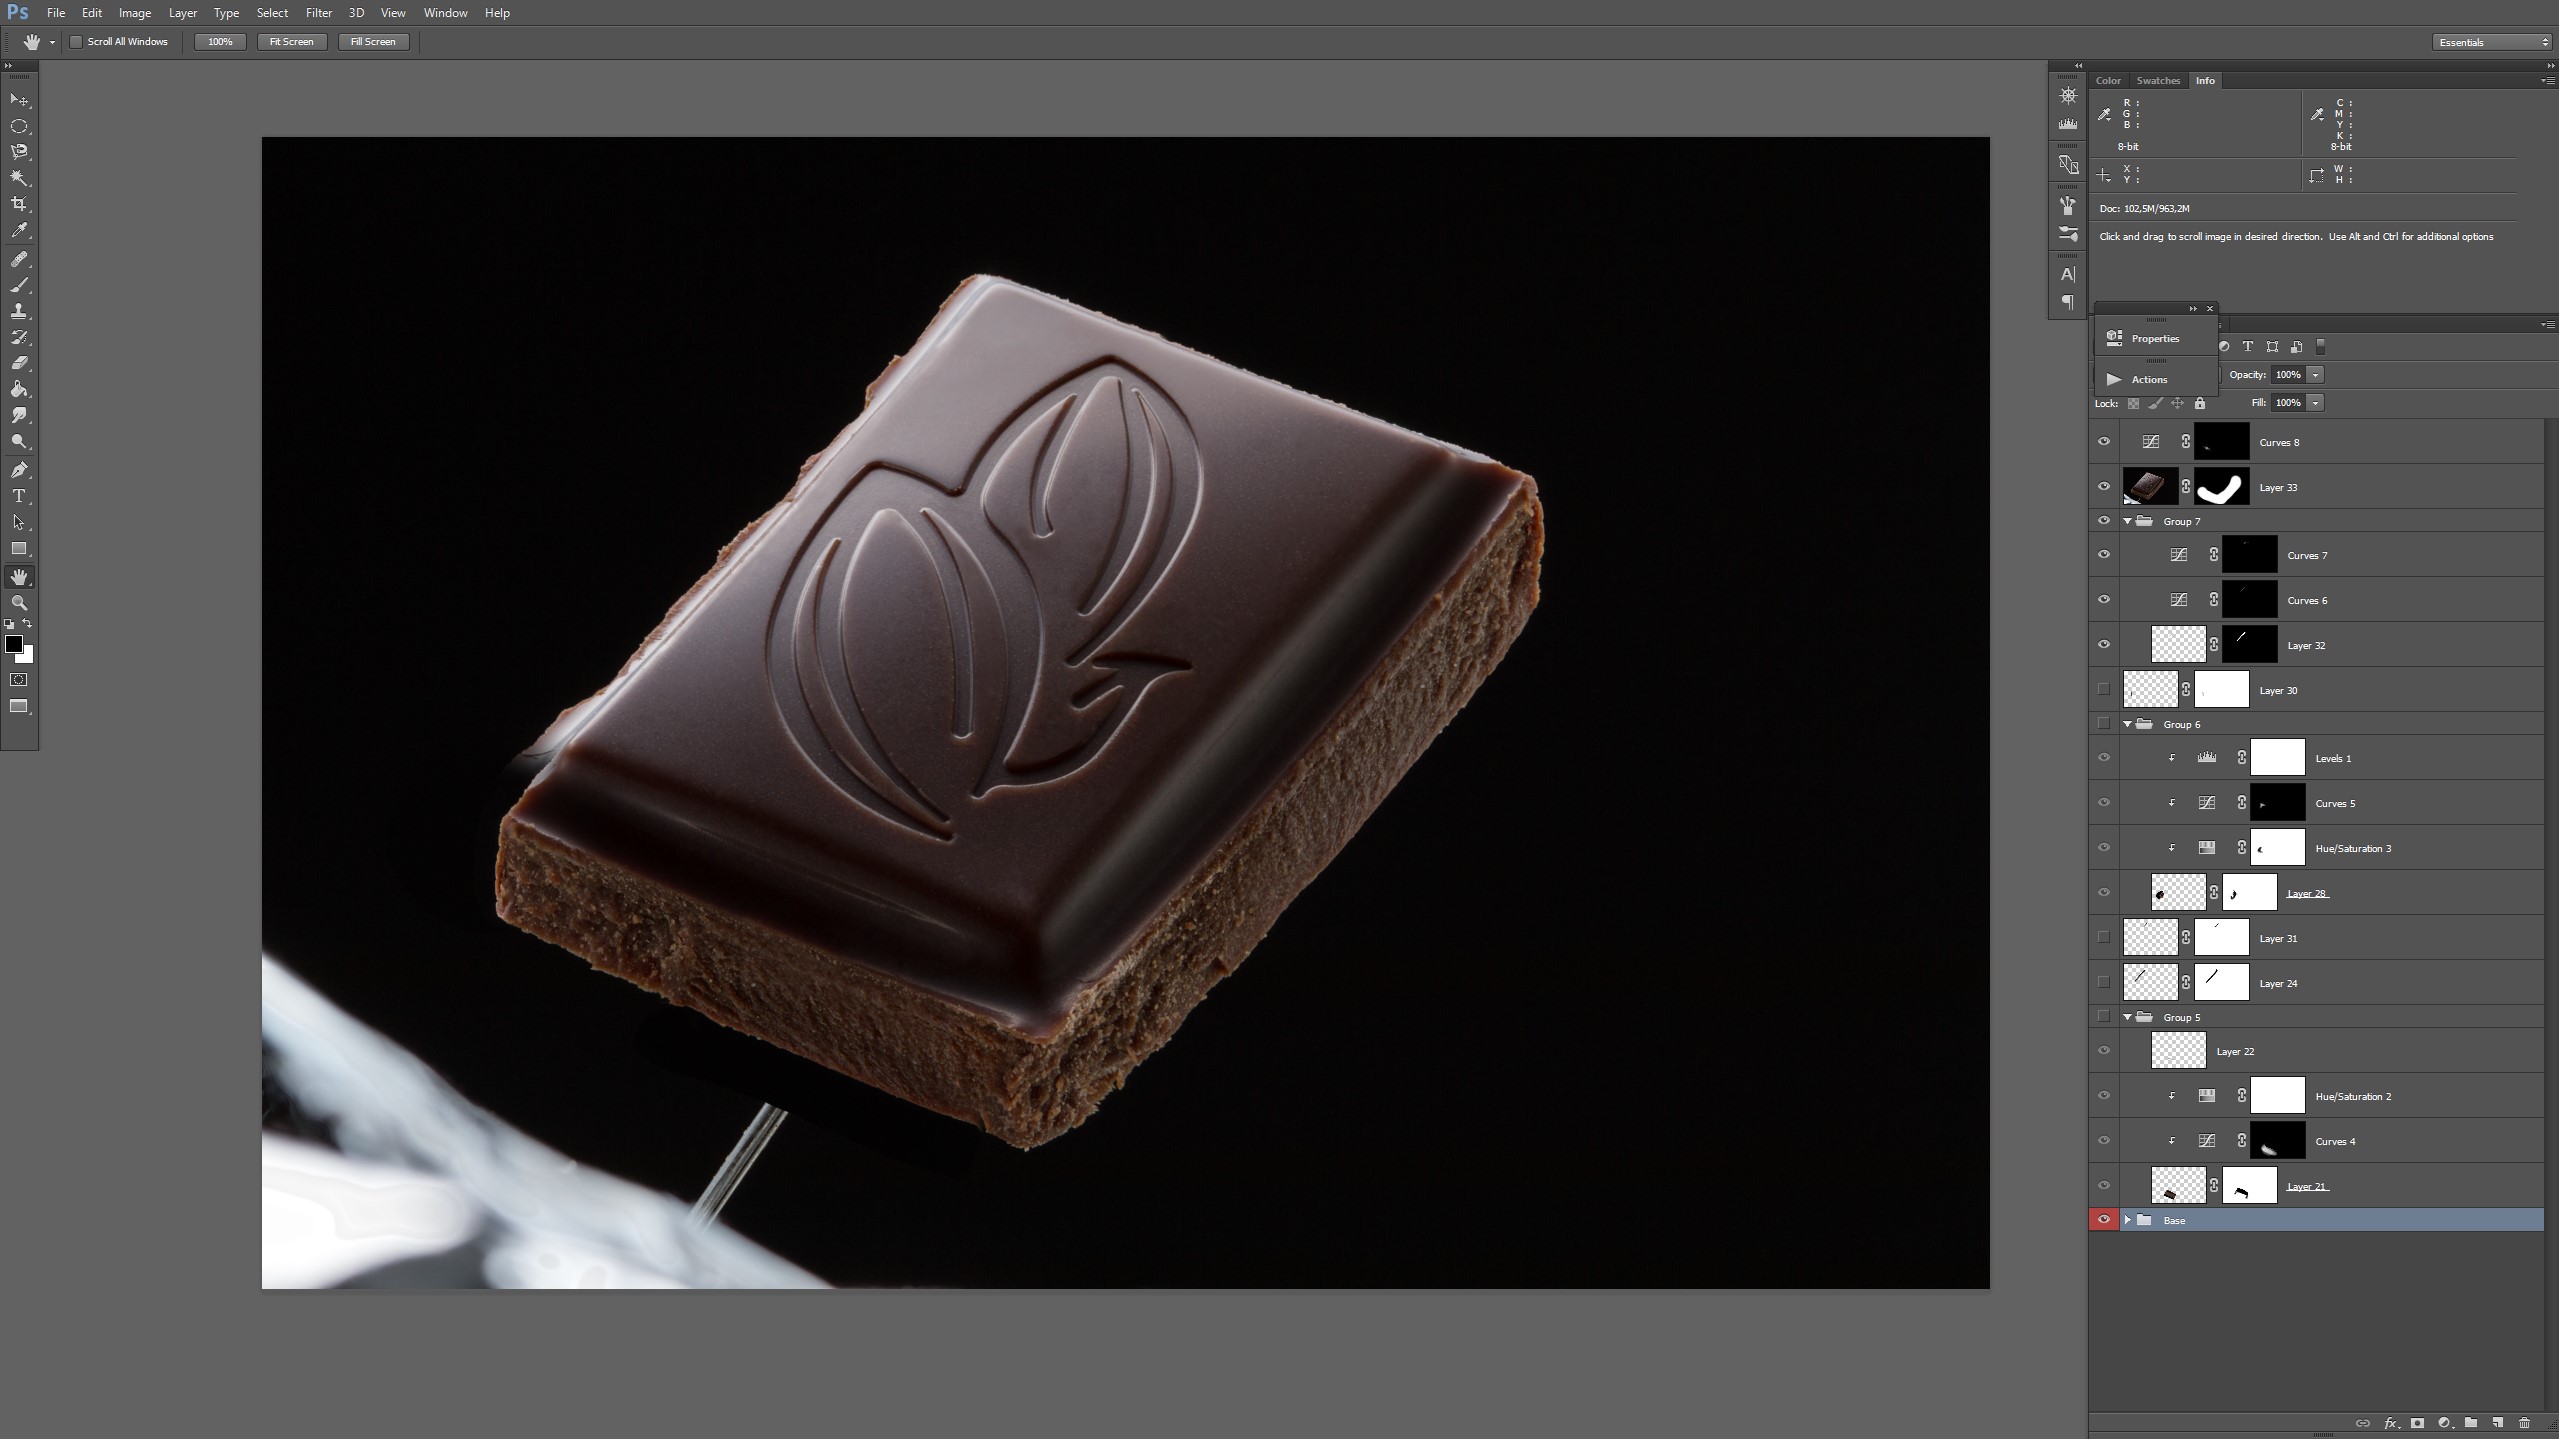
Overall postproduction process for this project wasn’t very complicated. I spent a lot of time trying to figuring out the best position of the chocolate pieces relatively to the splashes. Also retouching of chocolate bars is very time consuming. Now looking back I ask myself is that possible to get this shot done without focus stacking? Probably yes. Is that possible to get that level of details without focus stacking? Absolutely not. In my opinion details which I see at 100% crop are worth all efforts. Especially if you do something for your portfolio it should be all perfect.

I hope this making of was interesting and you learnt something new. If you have some specified questions about lighting, props, postproduction or whatever don’t hesitate to contact with me.

Let’s be in touch!

Visit our page on Facebook to keep up new posts and helpful materials

BACK TO SCHOOL SALE:

Use Code “BACK2SCHOOL”

and get 50% OFF

Sale Ends In:

Days
Hours
Minutes
Seconds

Register FREE for this online workshop with Alex Koloskov and Artem Pissarevskiy