Mastering jewelry photography:
Hands on a shooting cone
In this tutorial I will show you how to use a shooting cone in jewelry photography. In general, the idea of this light modifier is very similar to a shooting box (lighting tent) but have few very major advantages, especially if used to shoot jewelry. I personally do not like shooting tent (despite the fact I’ve used it recently) , but the cone I’ve made worked very well for a few test shots I’ve made for this article:
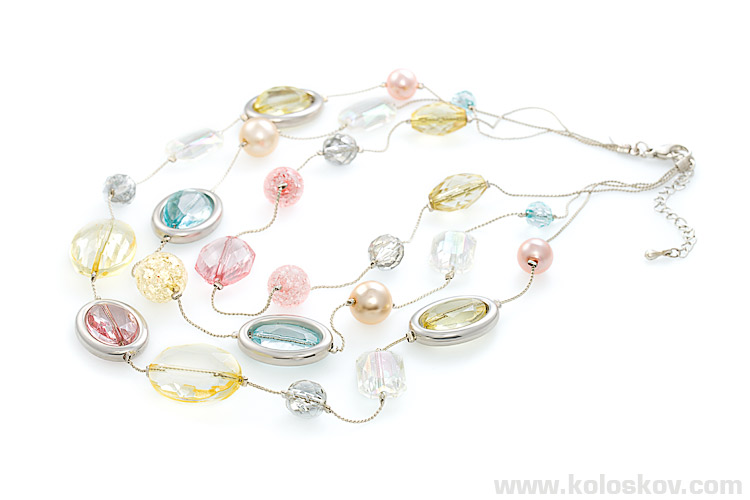
Jewelry photography using a shooting cone: Example 1

 Only for Pro Club Members
Jewelry photography by Alex Kolsokov
Jewelry photography using white cone: Example 2
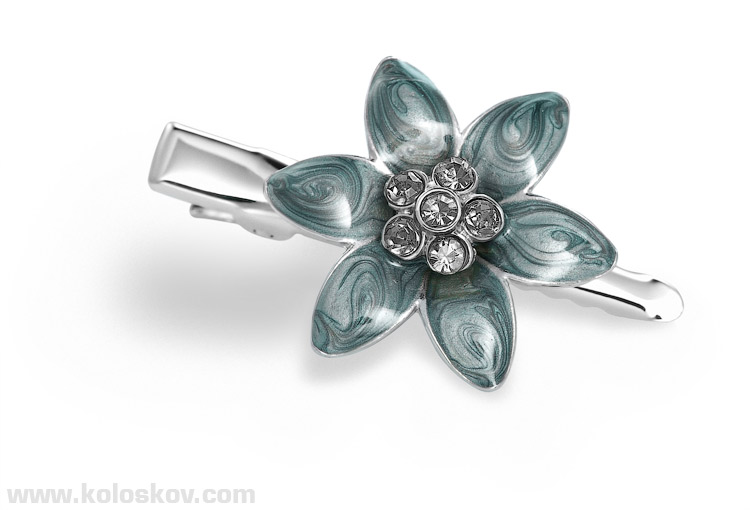
example of using shooting cone in jewelry photography
Note the highlights on a clip’s surface: this is a beautiful work of the shooting cone.
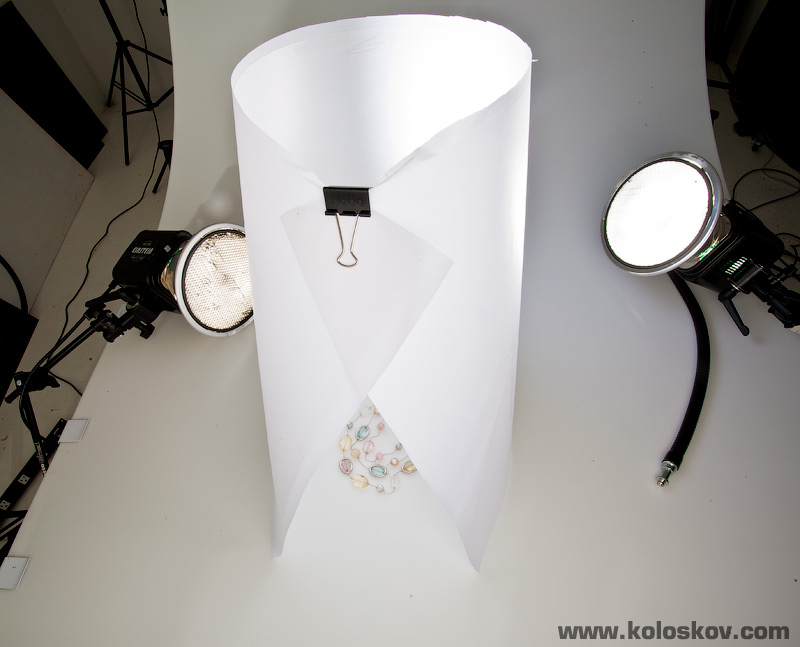
So, what is the shooting cone? At the time of creating this tutorial I haven’t seen it myself yet, only heard about it. However, I know what cone means, and below is my DIY implementation:
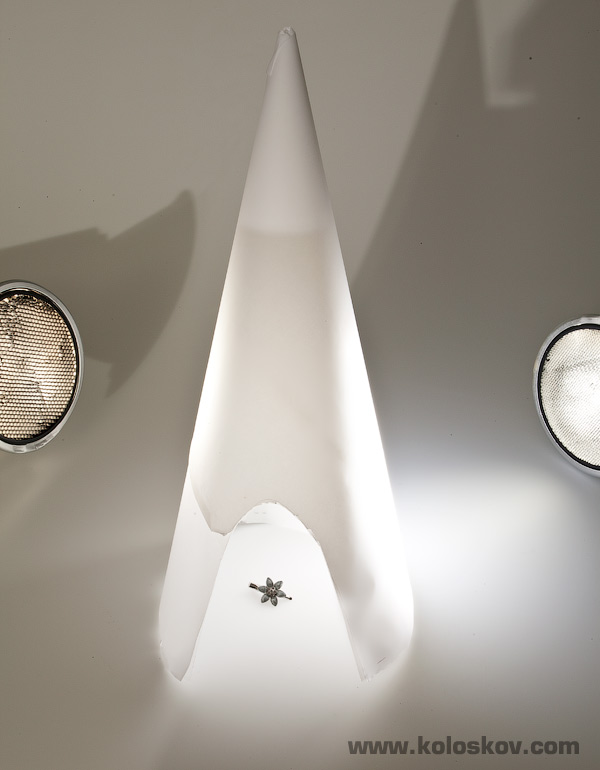
lighting setup for jewelry white cone by Atlanta photographer
The idea to have seamless reflector all around the subject, and use spot or narrow lights to create gradients. Something which is not possible with a shooting tent: because it’s a cube, the edges of it may interfere with a smooth glossy surface we would like to see on our jewelry. The key here is a smooth gradients all around.
Lets take a closer look to that jewelry piece:
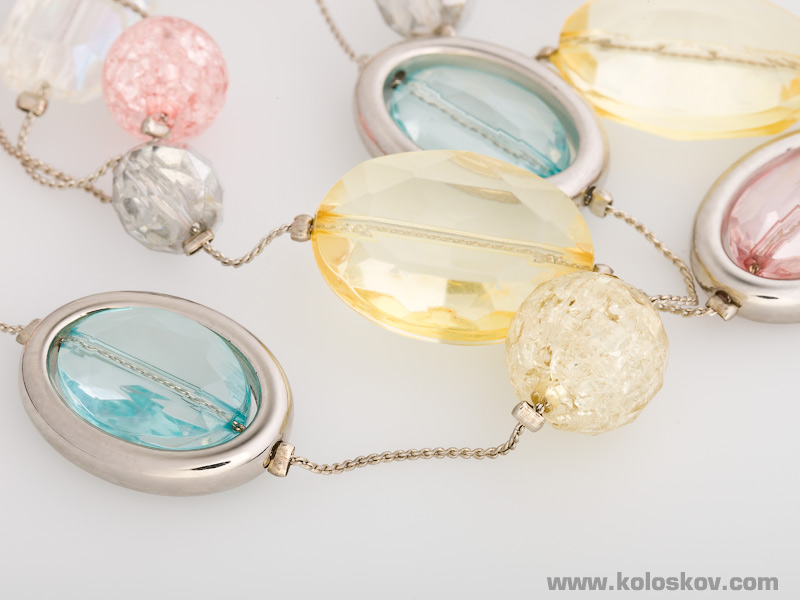
Jewelry photography using a cone. Closer look
Cone is not the best for the gems (light is too soft), but it works great for solid and glossy rounded pieces, like the canvas around stone you see on the photo above. Bright areas falls off to a darker, creating volume of the “ring” (unfortunately I did not have the thick ring for this shot). Note a black mark on the metal: this is reflection ftom a lens, and bright highlights around it is from a lens-mounted reflector (more details below).
Here is one more modification of that cone, I called it an “open cone“:
Atlanta photographer lighting setup jewelry using cone
The same idea here, with a little bit more room for modifications: we can have an additional translucent diffuser at the top, or black one (to make some dark accents on our subject), or even add a snooted light with a gel there to add some color accents… Also, we can make completely closed (from the sides) cone with only one opening on top and stick a camera into it (this is what I’ve seen on online: Foba Plexiglas cone) to get a top shot of the subject.
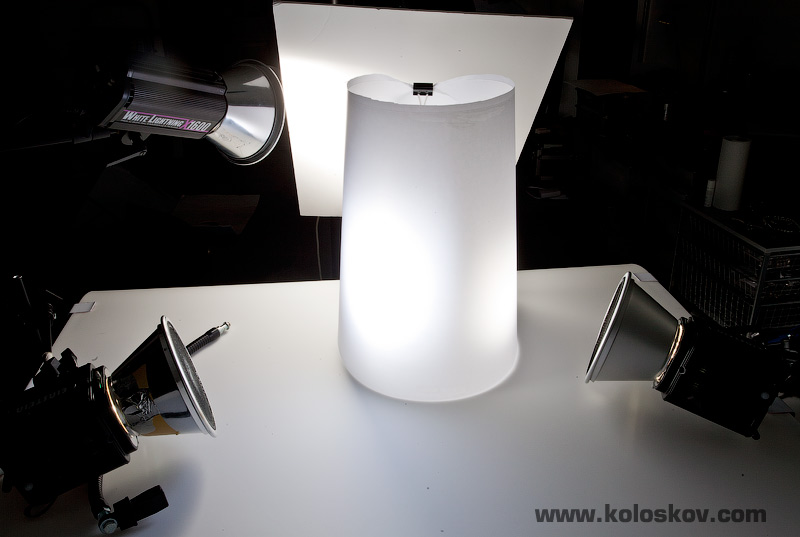
Now, the lighting setup:
As you can see, I have 2 snooted light sources pointed to a different parts of a cone, it is easy to move them till I get desired reflection. Below is the rest of the shooting setup:
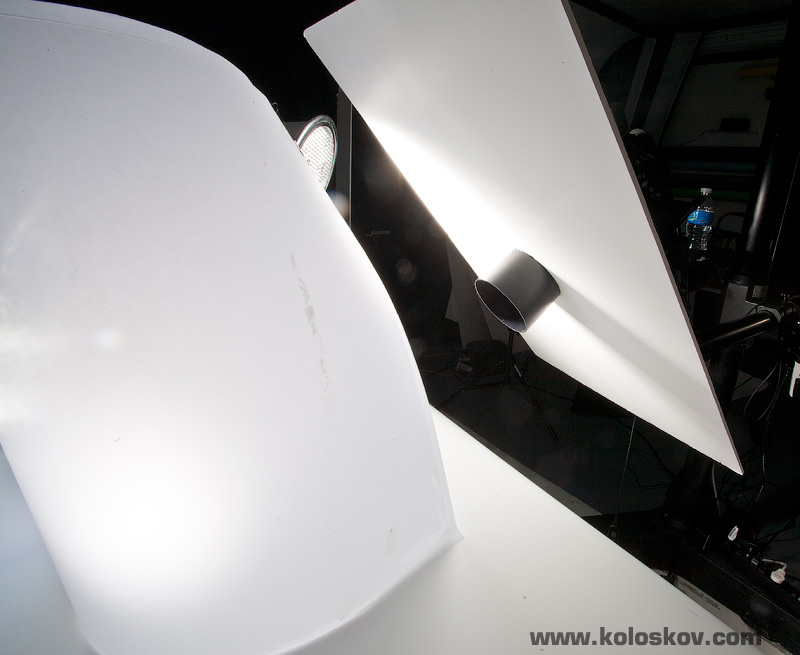
Back view:
Lighting setup for jewelry using cone, back view
Please note the way I’ve covered the camera: an additional reflector was mounted on a camera’s lens, with a third snoot pointed on it (second light from the left, WL X1600). This have created one more dimension for me to play with the gradient highlights.
The on-camera reflector:
The lighting setup for jewelry using cone camera view
I’ve used a white cardboard and made a hole in it just big enough fit the lens inside, but smaller then lens’s hood. Then I mount reflector on the lens, attached hood and it is ready to be used. It can be also pushed towards the end of the food to hide more of it. Simple yet efficient:-)
The only thing was left uncovered is a lens opening itself (can’t do anything about it:-), and this may create a small black line or spot on the subject’s glossy surface. We all know that it will be an easy fix in our digital darkroom, right?
Below is one more example (please do not tell me that it’s an ugly looking ring: I know it is :- ) I shot this example just to show how the look gets changed when I slightly move only one light: the one pointed to on-camera reflector. The current image had the light beam under the lens, mouse-over version is where the spot was moved above the lens.
Mouse over to see when I moved it to strike above the lens: This is as-is, unprocessed image from the camera
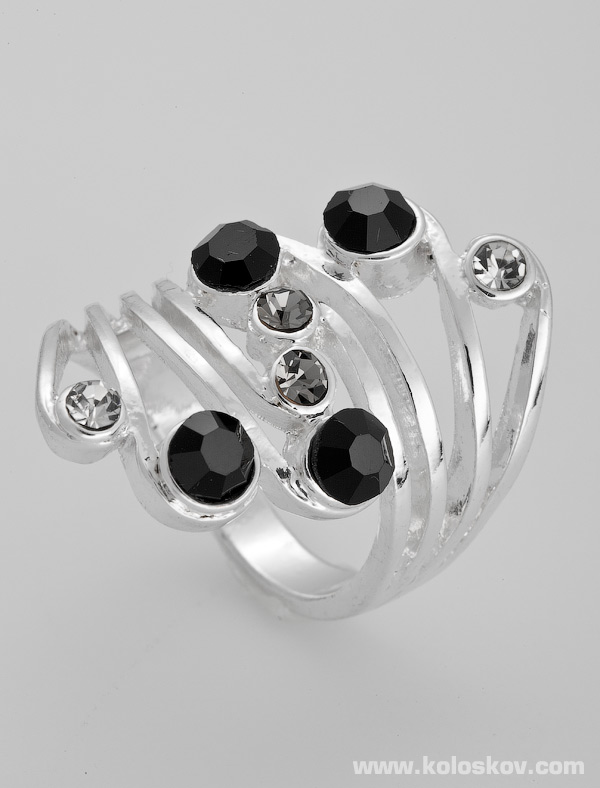
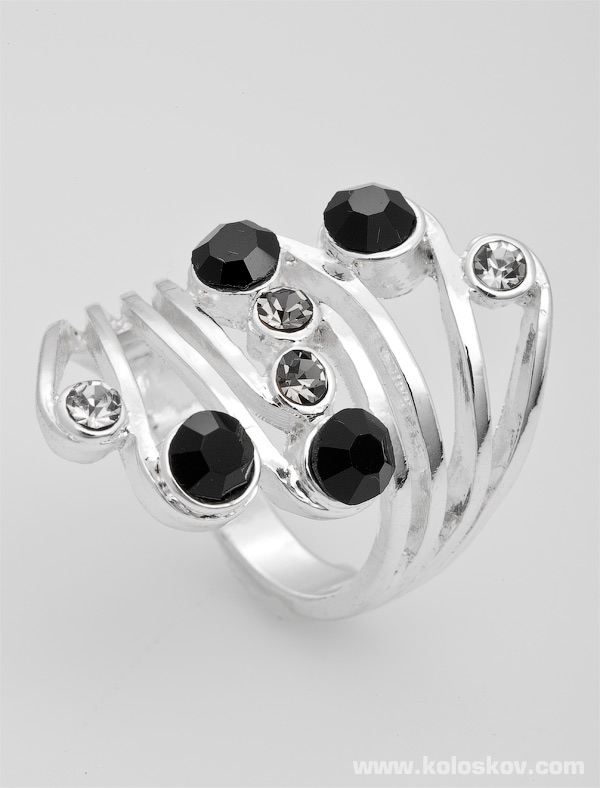
Using cone in jewelry photography highlights example such ring, positioned the way I have above, reflects everything in front of it. The shooting cone with camera mounted reflector did a great job here. It will work very well for any bare ring, especially for ones with spherical surface. Hope this was useful to you. Thank you!
 |
In the Gearbox |
||
Canon EOS 1Ds Mark III DSLR Lighting, light modifiers and accessories: Paul C. Buff Lighting: 3×640WS MK Digital Direct Holding Wax used to hold rings and small object in the uprigth position. Manfrotto 196AB-2 Articulated Arm Adobe Lightroom 3 and Canon EOS Utility as a remote capture solution for tethered shooting Exposure specification: shutter speed 1/250 sec, F18, ISO 100 |