Product Photography Using Your Smartphone:
The Lighting Matters, Camera Does Not


Product Photography Using Your Smartphone
Meet Tilo Gockel – a professional photographer and expert in the field of lighting and flash lighting.
He has published countless articles on photography and image processing in popular magazines (digit, DOCMA, DigitalPHOTO, Photographie) and has written several books.
His blog, fotopraxis.net, offers numerous tips and tricks learned from his extensive experience with photography.
Inspired by Alex’s cool iPhone vs Hasselblad whiskey shoot, I decided to try it out myself, to see, where exactly the limits are of a smartphone camera!
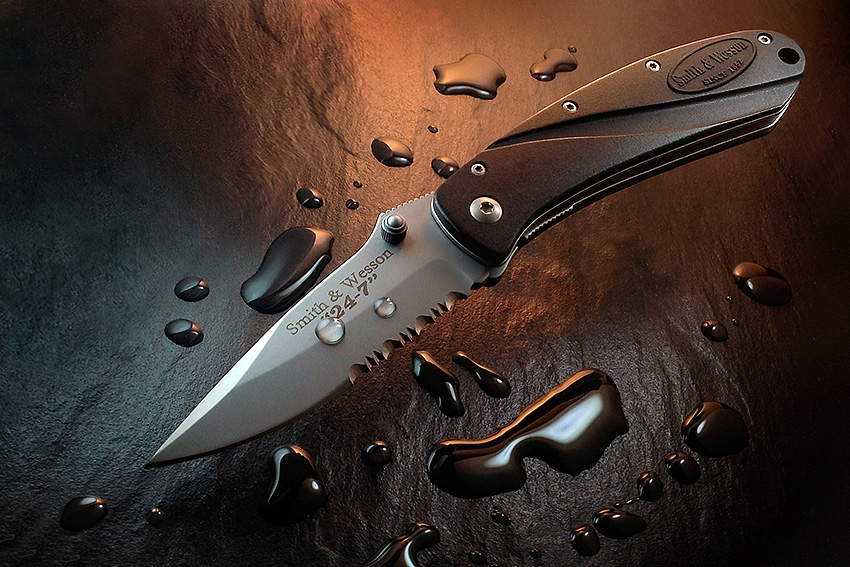
In my case it’s an iPhone 4s, but I am quite sure, that almost any other phone will be better. :- ) My subject is a little folding hunting knife from Smith & Wesson.
Product Photography Using Your Smartphone:
Let’s assume, you need a nice photo of that knife for your website, brochure or eBay. And so you put that knife on a piece of slate, take out your trusty smartphone and here is what happens:
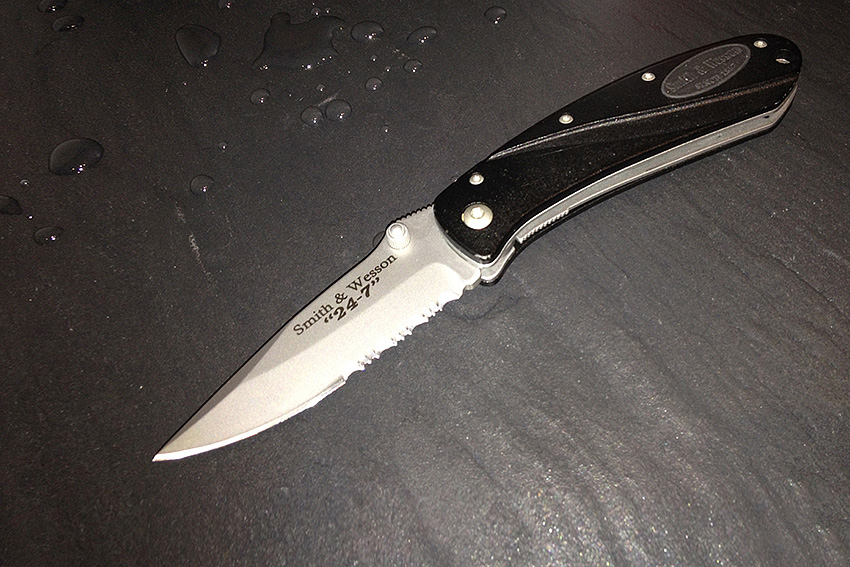
Yuk! That result is really not so nice. 🙁
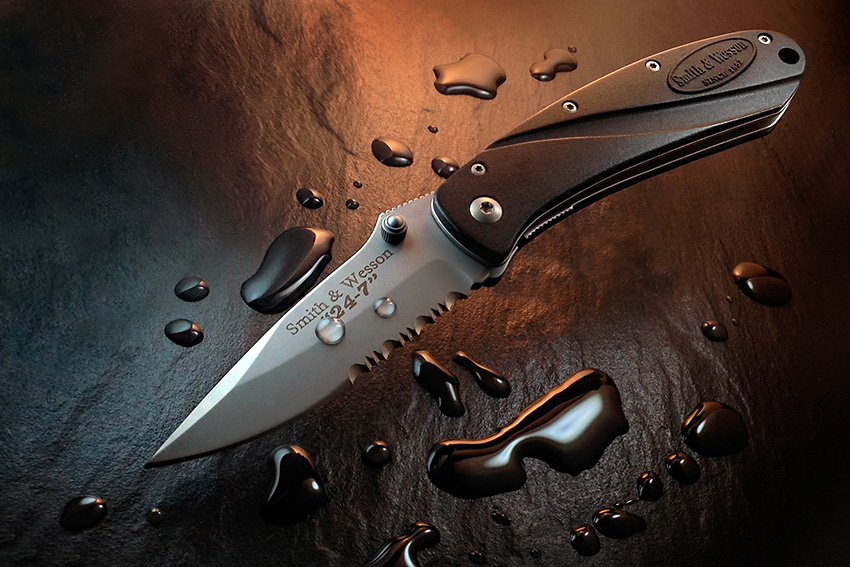
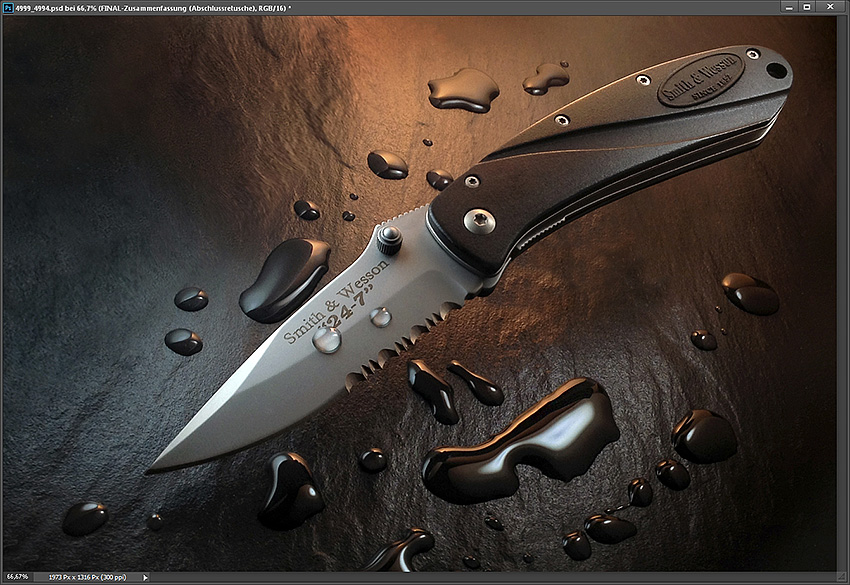
But we will fix that, and then, the same scene, shot with the same smartphone, will look like this:
PROBLEMS & SOLUTIONS for Product Photography Using Your Smartphone
So what exactly were the problems in the ugly shot and how can we solve these to get the second and nicer shot?
First of all, the first image lacks SHARPNESS.
That’s an easy fix: Just put the phone on a tripod and use a cable release.
Regarding the iPhone you can use the plus-button on the earphone cable. On other phones, you can use the self timer as an alternative. For a good depth-of-field, you can stack some shots with different focus.
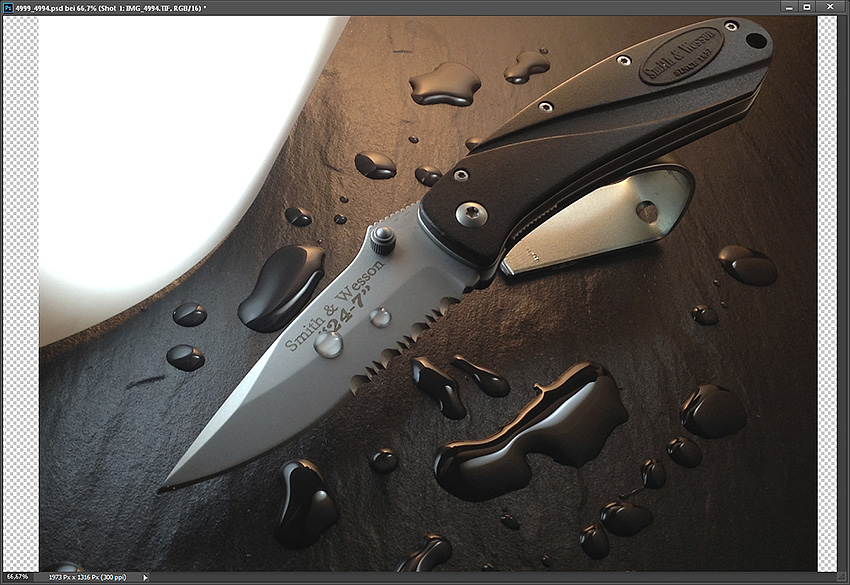
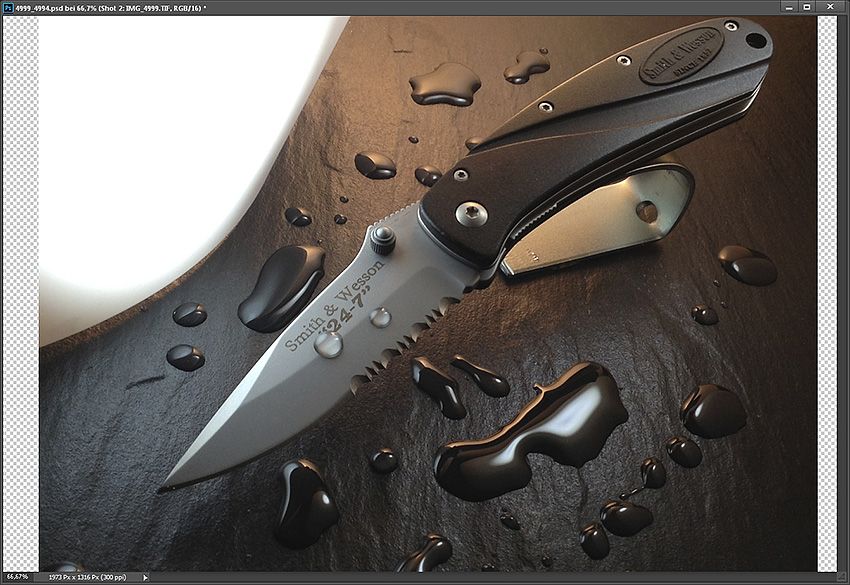
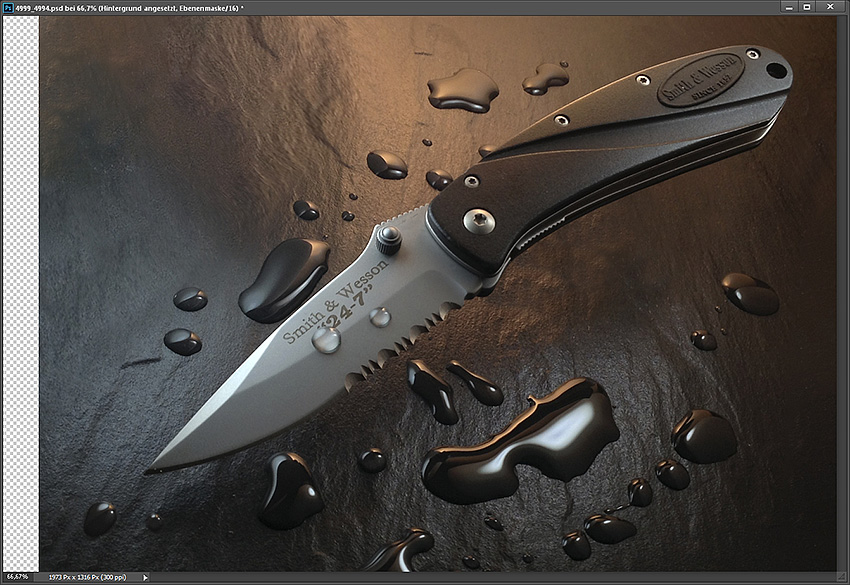
In the example above, I stacked two shots––one for the blade and one for the handle––and combined the two shots later-on in Photoshop (see the screenshots in the gallery below).
Then the EXPOSURE and the WHITE BALANCE are off. No big deal! Just switch to another app, that allows adjusting these settings.
I use 645 Pro Mk III for that purpose, select the ISO (to ISO 50) and adjust the exposure compensation until I get a decent result. The white balance can be set using a graycard and then the lock function of the WB button in the 645 Pro app.
Then I set up the scene: The slate tile stays, but I place the knife a bit higher using a piece of metal (which I clone out later in Photoshop). Around the knife I put some drops of Glycerine from the local pharmacy.
We are almost set, but the most important part is still missing––the LIGHT!
The first photo was shot with the internal LED flash of the iPhone, and the result was just plain ugly. So this takes some thoughts now. I illustrated the light sources needed in a little lighting diagram:
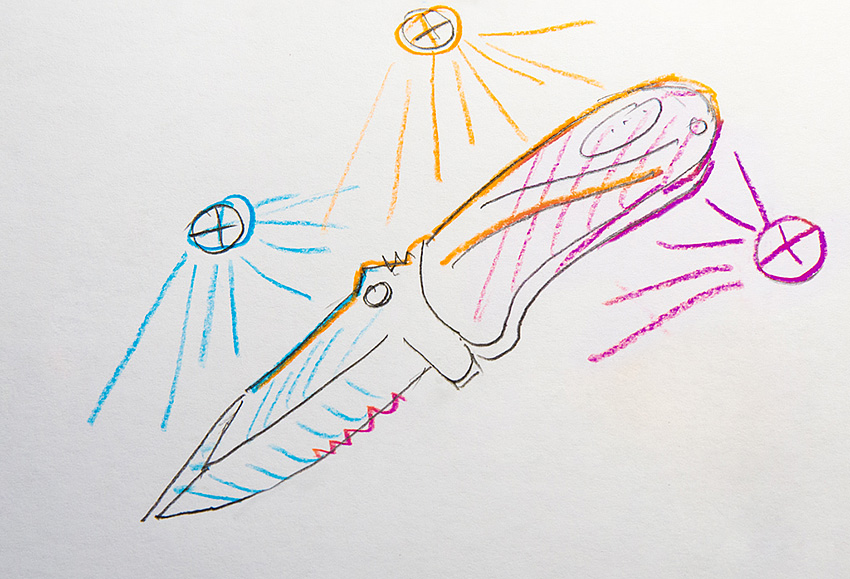
LIGHT SOURCE NO. 1 (coming from the left): The blade needs a rim-light on the upper edge. That light should be oriented in a way, that each of the three different planes of the blade’s cut comes out in another brightness, to make the cut clearly visible. Furthermore the writing on the blade should be clear and readable.
LIGHT SOURCE NO.2 (coming from the backside): The second light helps to illuminate the upper edge of the grip and the curved little pattern in the grip plate.
LIGHT SOURCE NO. 3 (coming from the right): The third and last light serves as grazing light to show the emblem on the grip. It also gives a nice shadowing along the grip.
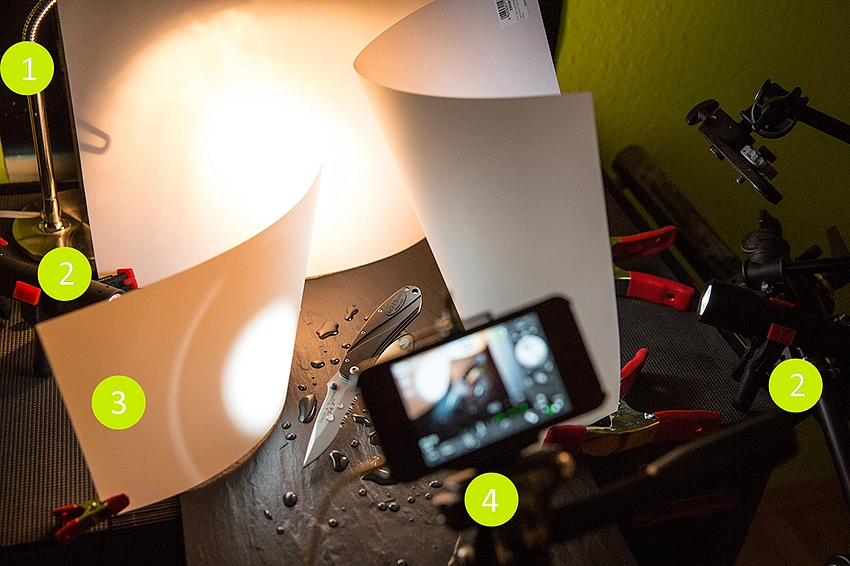
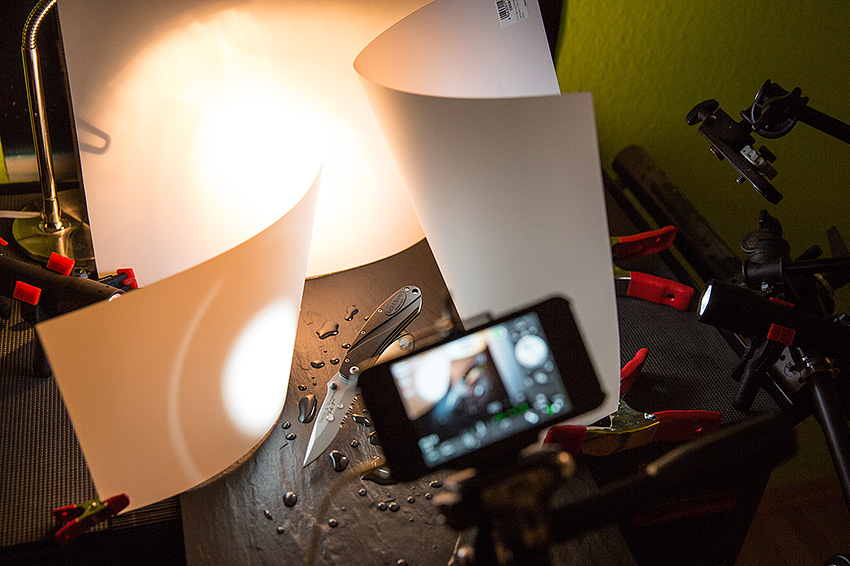
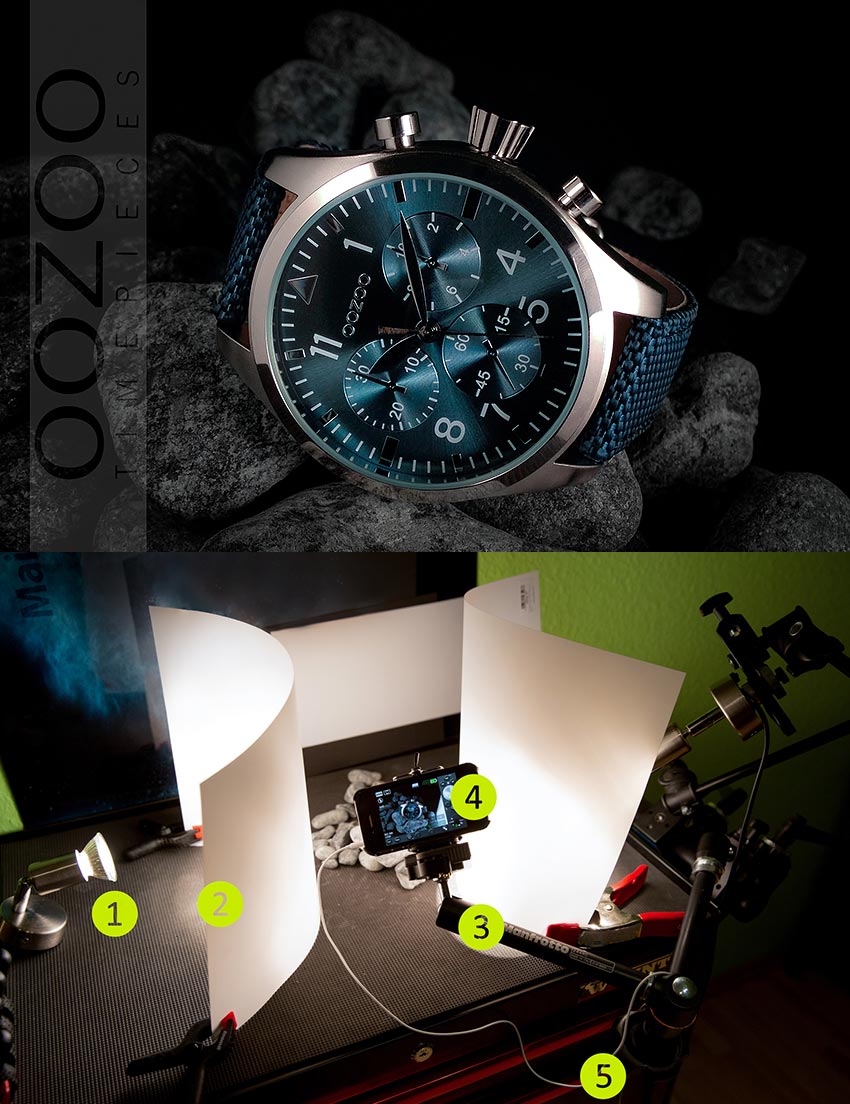
I tested different angles and also used translum foil (from www.modulor.de) to get a nice gradation across the knife’s surfaces. For the warm-cold contrast I used a halogen light from the back and two cool white LED torchlights from the sides. Lamps and foil are fixated using little clamps from the hardware store.
LIGHTING SETUP
1: Halogen lamp ( a little bedside lamp from Ikea)
2: LED torchlights (LED Lenser P7… but cheaper ones will do)
3: Translumfoil from Modulor.de (you could also use parchment )
4: SmartPhone on a tripod, in a little fixation, remote triggered using the earphone cable
The last thing, that bothers me about the first and ugly shot is the 35 mm PERSPECTIVE of the iPhone. I change that via using a longer distance in combination with a tight crop later-on in Photoshop. This gives me a perspective of a 50 or 60 mm lens, but it also costs resolution. An alternative might be to use these little telephoto lenses from iPRO or from other sellers, which Alex already tested.
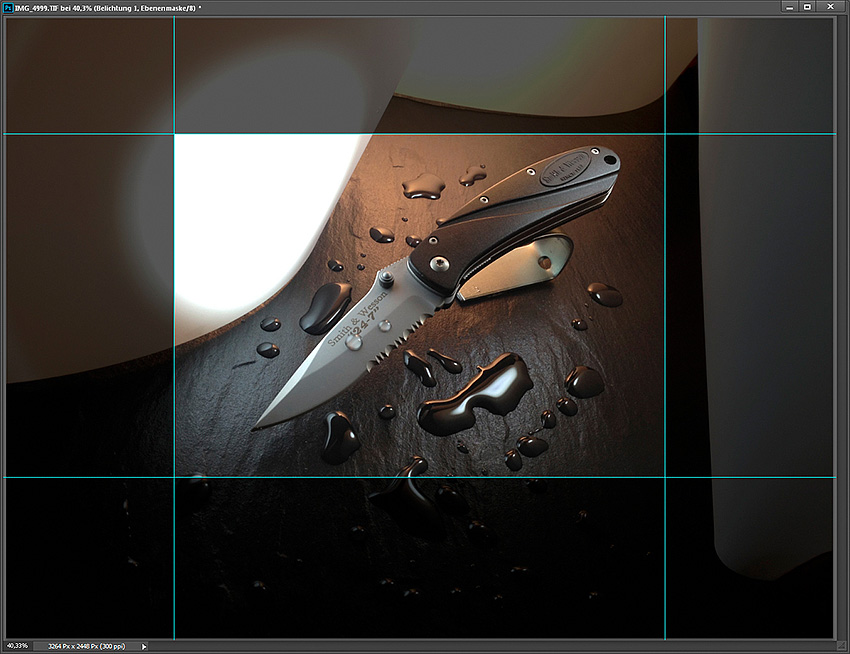
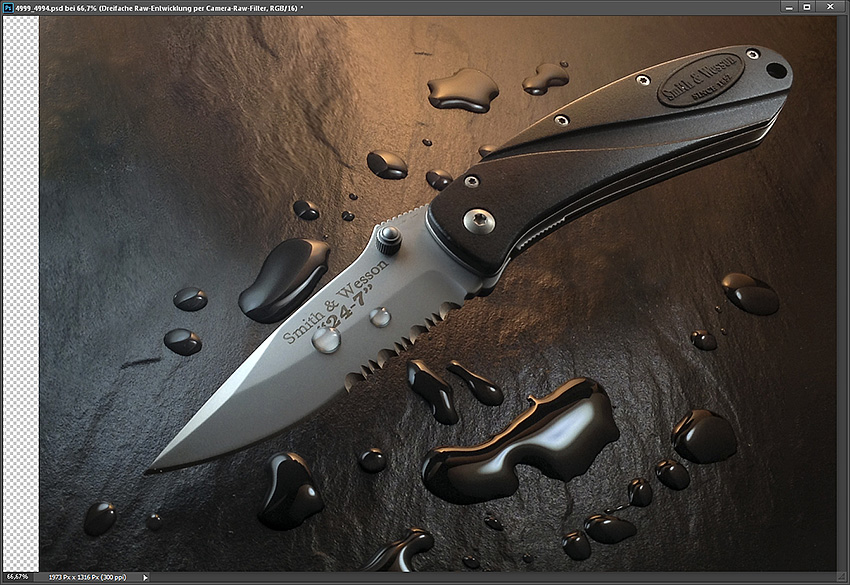
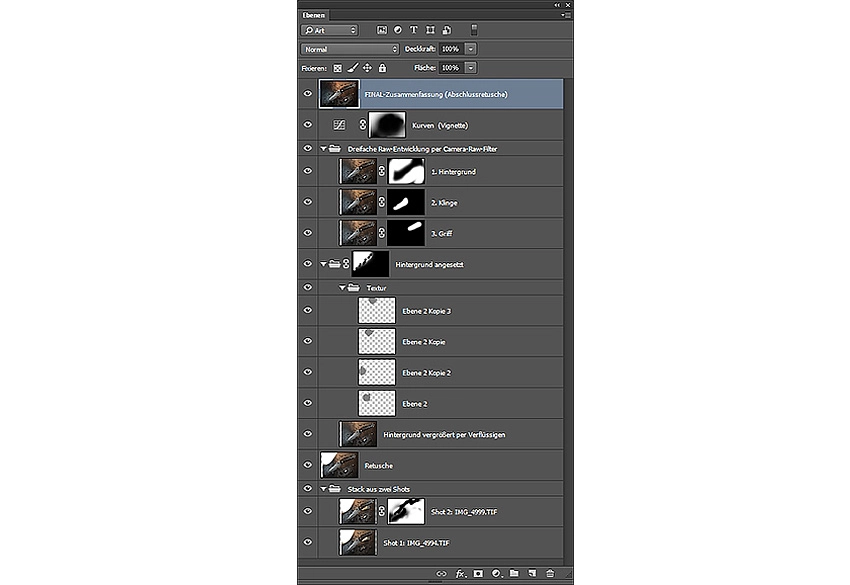
The last step is the PHOTOSHOP JOB: I set up a little stack from two shots and combine these, then I do the regular cloning and stuff, I patch the background, clone-out the little metal support stand and then I do a 3x Raw Adjustment (copy your image on three layers, then choose in Photoshop CC: >Filter, > Camera-Raw-Filter; then combine the three layers using masks).
The next step consists of some color and contrast adjustments, and the last step is sharpening. You can see the single steps in the gallery.
MAKING-OF GALLERY
The gallery shows the whole procedure, from the ugly first shot, over the light diagram, the setup, the photoshoping to the final result. Enjoy! :- )
Click on the arrow to go to the next slide*
LESSONS LEARNED
First of all, I learned, that Glycerin makes perfectly stable drops. I used no water with it, just pure Glycerin. Worked just fine.
Then I learned, that continuous light has advantages. It’s that WYSIWYG feeling that I really like (normally I use strobes).
Then I saw, that the iPhone works quite well for product shots. The only little thing that really annoyed me was the 35mm perspective. I just do not like that look and angle-of-view, I would prefer something between 50 to 80 mm for shots like these. You have already seen my little work-around, but with that tight crop, one looses really a lot of resolution. I ended up with 1200 x 1900 pix. A better way could be to use a little telephoto lens adapter. Alex already showed these parts from iPro and other brands in his blog.
And the most important experience I made: Stuff like that, these little experiments, is just so much fun!! Try it out, you will like it, too, I promise! :- )
ONE MORE EXAMPLE OF An iPHONE SHOT FROM TILO:
Check out Tilo’s Flickr stream to see more awesomeness: https://www.flickr.com/photos/galllo/
More articles from Tilo Gockel:
How to Shoot a Coin with Your iPhone
How to Shoot Food with Your iPhone
CONTACT
Tilo ~gallo~ Gockel, [email protected]
Also visit Tilo’s blog, fotopraxis.net, which offers numerous tips and tricks learned from his extensive experience with photography. (in German)

I have to say this is amazing! But, why not just shot it with a real camera. Most used Canons, Nikons, etc cost less than a new iphone. And if you pixel peep any iPhone shot it looks like, well, terrible. Plus, you can use flash photography with some higher end used cameras able to do HSS. Sooooooo….what exactly is the point of shooting with an iPhone.
Someone with this person’s talent with composition, creativity, and lighting I don’t understand why he would shoot anything with an iPhone. A challenge I suppose, but when you read to use an earphone cable to trigger your camera one really begins to think – what is the point of all this. I mean no disrespect at all – the shots on the web look great, fantastic actually.