Creative Photography Behind The Scene:
Lightbulb

Background story and tutorial for the Lightbulb shot:
I wanted to do something with a light bulb. I saw a photo online of a light bulb lying on a sheet of perforated aluminium. That inspired me to do something like that, but different.
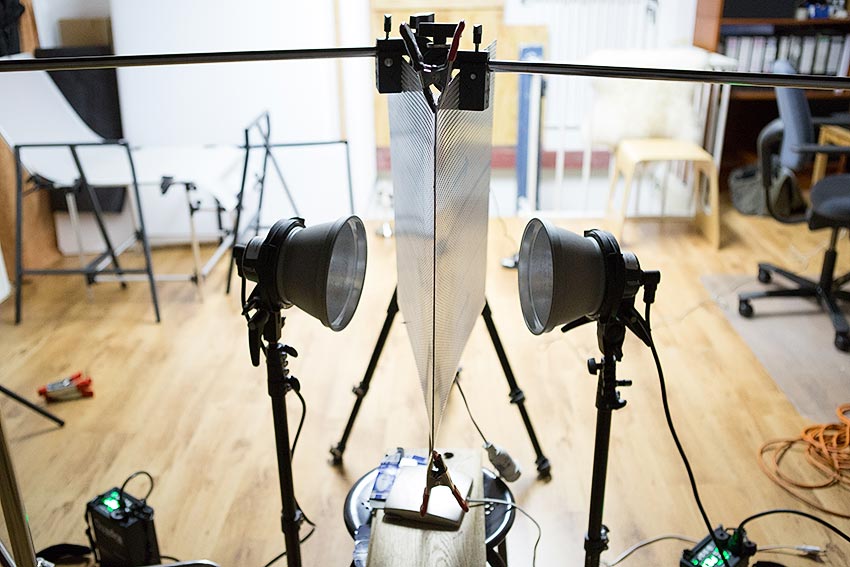
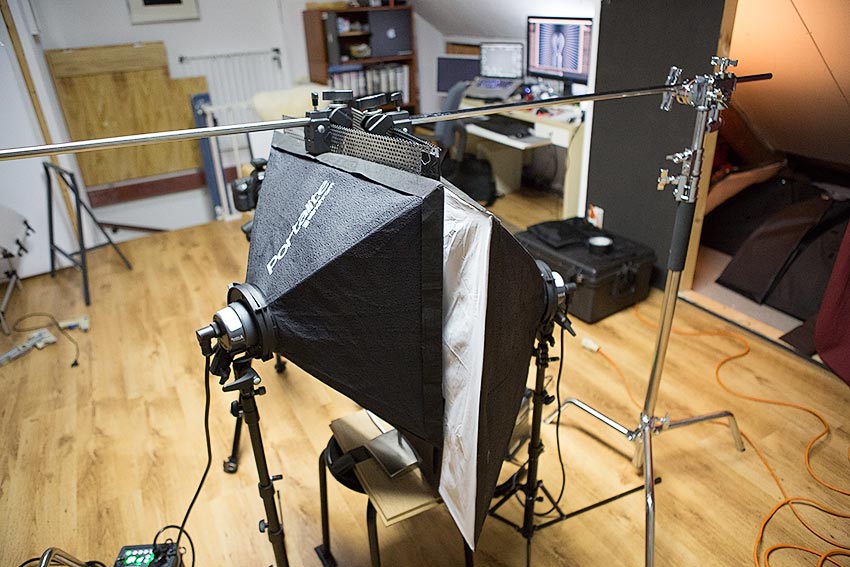
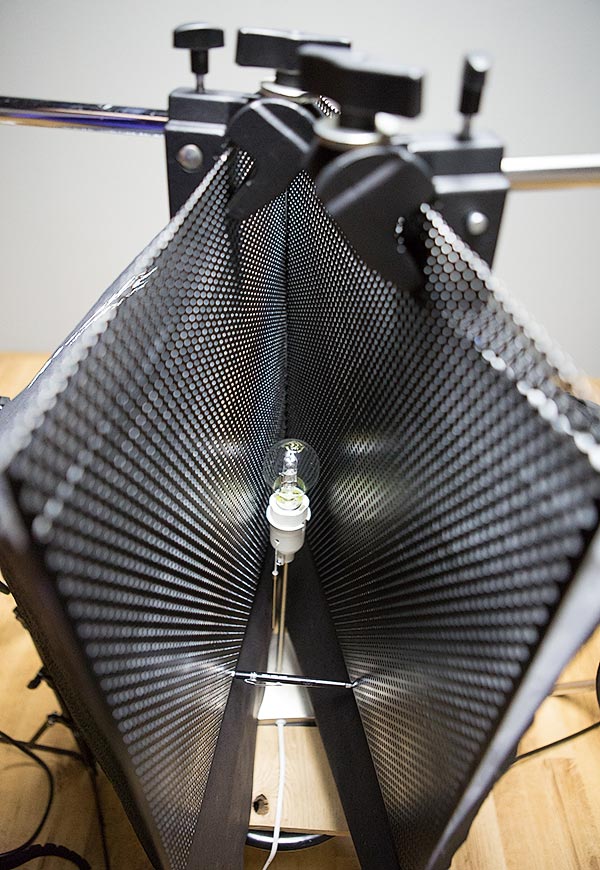
I already had a sheet of perforated aluminium, which I sew in half to be able to put it in a V shape.

 Only for Pro Club Members
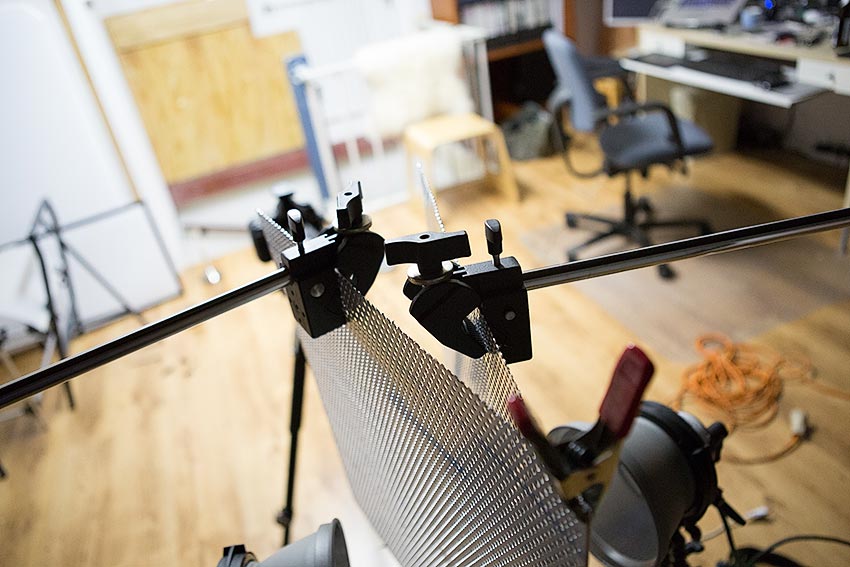
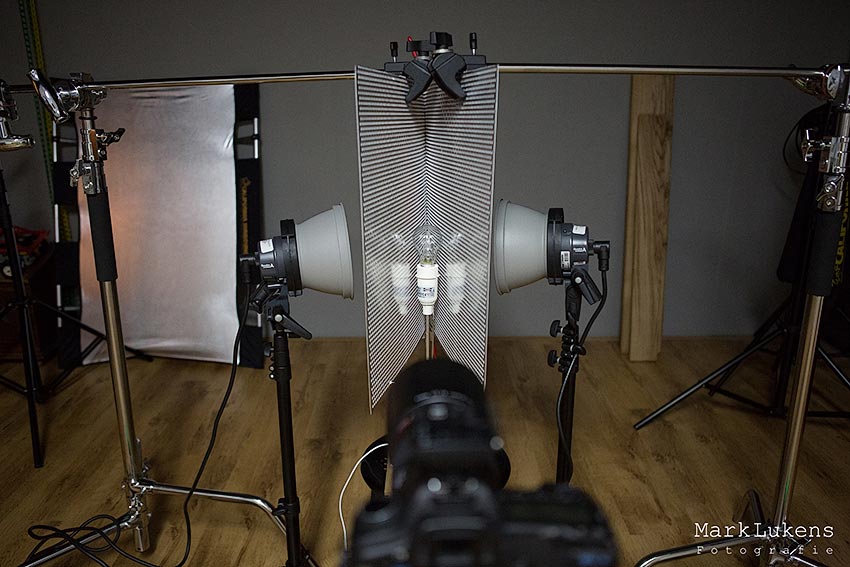
I’ve put a Quadra flash with a 60 degrees reflector on both sides to light the light bulb.
I took several shots, lighting the sides one at a time because I found that this was the best way to avoid unwanted reflections. First without the light bulb burning, then the same shots with the light bulb burning.
I took them at several shutterspeeds too to be able to choose the best light of the light bulb.
After shooting the light bulb in the mount, the hardest part came. I needed a shot of the light bulb screw.
I basically disassembled the lamp, gaffer-taped a strip of aluminium on the foot and hot-glued the light bulb onto the strip, at the right height.
After that I had to put back the lamp in the right position between the aluminium sheets, to be able to align it properly in Photoshop. Now thát was a PITA.
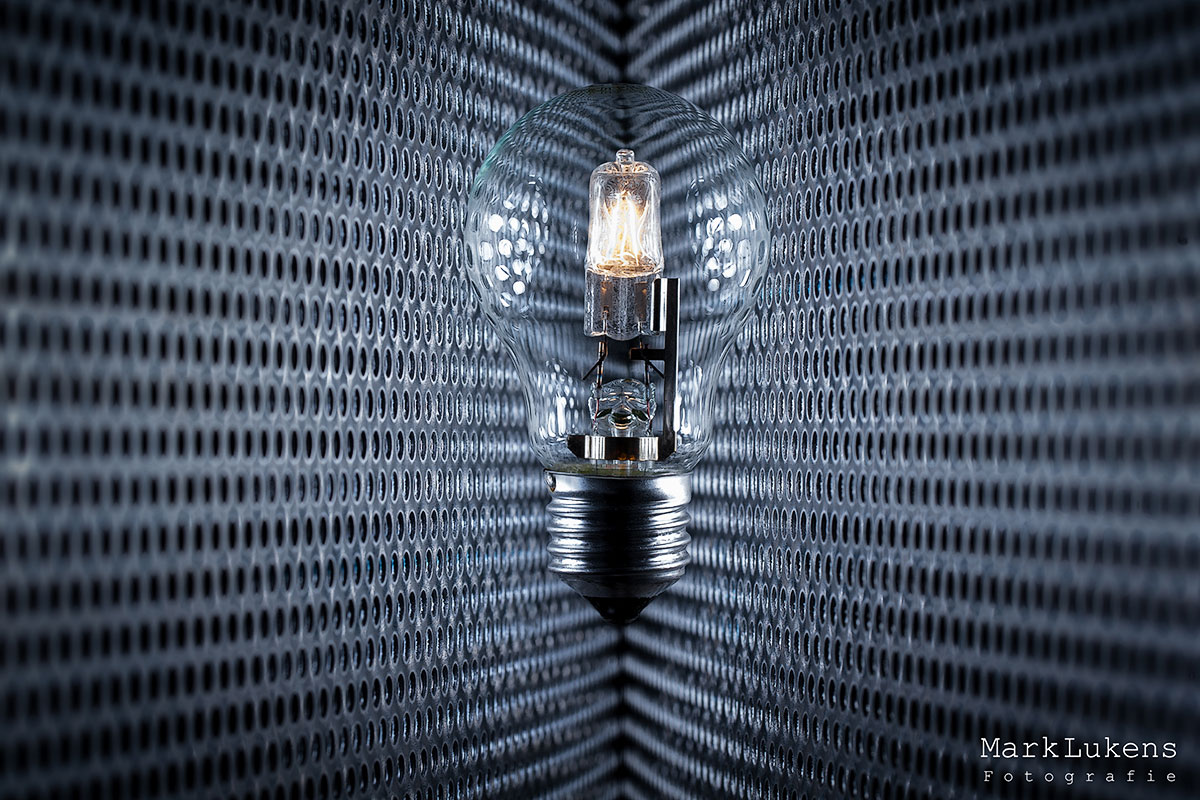
After blending and merging all these shots in Photoshop, image Lightbulb 1.0 was the outcome. I was happy with it, but it did not turn out the way I had planned it.
I woke up the next morning, realizing what I should have done differently. I should have used softboxes instead of reflectors…
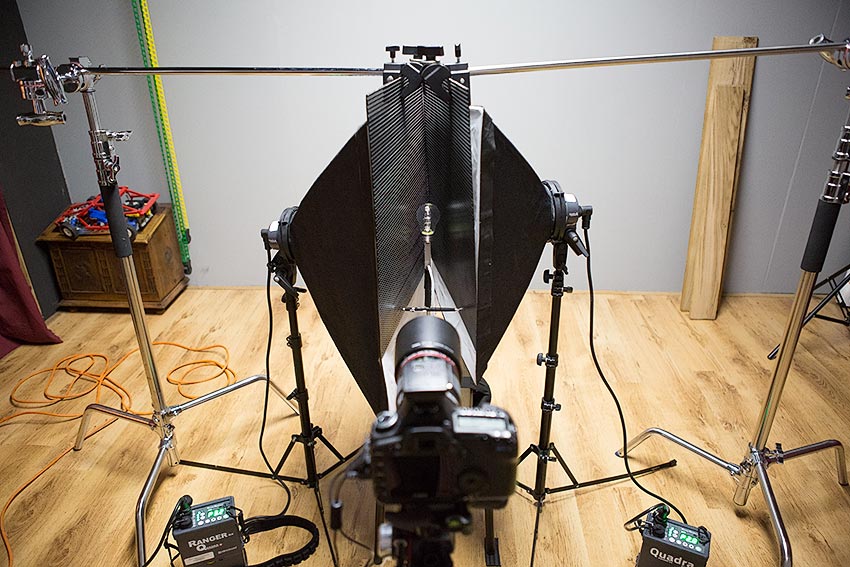
That evening I started over again, but then using softboxes. Now that did not go the way I expected.
I wasted over 1½ hour trying to get decent shots. The problem was that the aluminium was reflecting too much light to give nice reflections in the glass.
I tried to use black paper on each side of the light bulb and then combining them in Photoshop but that didn’t work either because I kept accidentally moving the light bulb, which made it a nightmare aligning it in Photoshop.
That’s where I figured I had to spray paint the sheets in a matte black. So that’s what I did.
With the sheets painted black it all went a lot smoother. It still took me about 6 hours to complete this shot though.
I started with the light bulb turned off, shooting one side at the time. This gave the nicest reflections in the bulb.
After shooting both sides, I did the same shots again but then with the bulb burning. After that I took two shots without the lamp in place, firing one flash at the time.
Then I disassembled the lamp again, taped the aluminium strip and hot-glued the bulb…. And then the same PITA of getting the screw in the right place…
Several attempts later I succeeded. Put all the shots in Photoshop (ended up with 10 layers) and created the final image (Lightbulb 2.0).
Another variant of the final image
 |
In the Gearbox |
|
Canon 5D mk II |
About the author:
I started photography as a hobby in 2006. When my son was born, I bought my first DSLR. I knew nothing about photography at that time and this was where my learning curve started. I am completely self-taught and in my first couple of years my shooting interests were very diverse. I shot landscapes, macro (mainly insects), sports (mainly auto- and motorsports), experimental stuff (strobist style), concerts, portraits and the life of my kids.
In 2010 I started my part-time photography business. Since then I’ve been mainly shooting weddings and portraits. In 2013/ 2014 I also began teaching a basic beginners photography course (offline). In the meantime I kept my full-time day job and invested most of my photography income in quality gear, sustaining my hobby.
The last couple of years I have been unhappy with my day job and decided that I want to take my photography business to the next level. I love doing weddings but don’t want to do weddings only. First of all because I want more variety in my life. Secondly because I want to be able to have work when the ‘wedding season’ is over.
I’ve always loved doing experimental stuff. Therefore I started learning (really learning 😉 ) high end product photography a couple of months ago. And building a portfolio along the way. All with the help of the Photigy Pro Club courses and tutorials. Which is the first time for me to invest in photography education.