Do-It-Yourself DIY Studio Lighting:
Sony speaker shot step-by-step
DIY Studio Lighting: Sony speaker shot step-by-step
Say what you want folks but I like watching shows like “American Test Kitchen”. First, I like good food. More important though, I like that those people always experiment and play with things that have been around forever and yet, they manage to come up with something new I have not heard before. In my studio photography, I try to experiment as much as I can and a big part of it has to do with DIY studio lighting – using different lighting techniques, mixing different types of lights, using custom lights and so forth. In this installment of “behind the scenes” we will go over a shot of the car speakers (Sony X-Plode), which was done entirely with the help of the luminescent do-it-yourself lights.
By Alex Stepanov (www.astepanov.com)
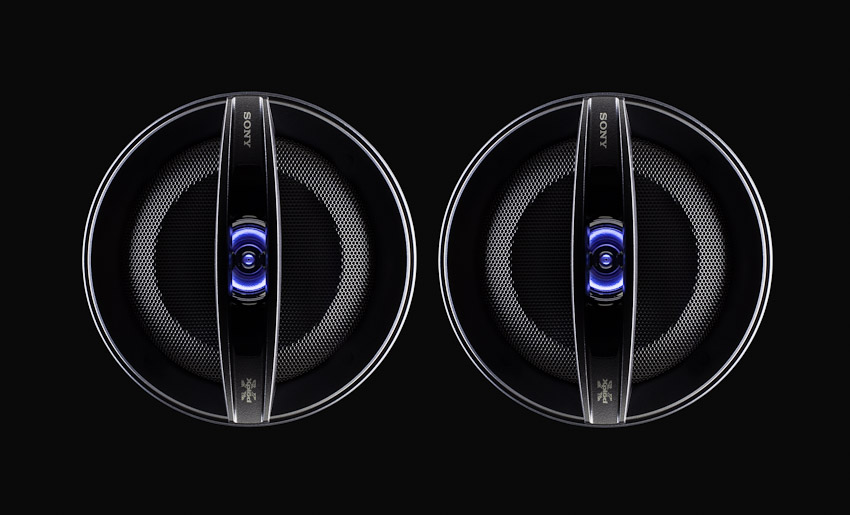
Sony Speakers, the final shot (DIY Studio Lighting)


 Only for Pro Club Members
DIY Studio Lighting
This is a tutorial from Photigy premium content area. Become a member of our community and get access to hundreds of tutorials, online webinars, critique and review sessions and more.
First, let’s begin with the lights. In my studio, I keep a set of four 18″ under-cabinet lights from Home Depot, which could be very useful when you need a long and narrow light source with controlled fall-off. Those lights are great for dramatic low key shots where rim lighting (or sometimes “slash”, or criss-cross lighting from behind or from the sides) is desired. In a moment, I will show you how I built my lights but first let’s touch upon a few things that will help you get the most out of each shot:
First, when you work with any non-calibrated lights (such as these), you should never trust your in-camera white balance and always take a shot of a color chart or grey patch
The lights we are talking about are fairly low powered and your exposures most likely will be in seconds; a cable release is highly recommended. Also, if your camera has mirror lock-up function, you may want to use it
If you decide to go out and buy some lights to play with, make sure you buy all the lights at once and make sure you don’t mix and match models. The reason is very simple – even the lights of the same model but from different batches are almost guaranteed to have noticeably different color temperatures
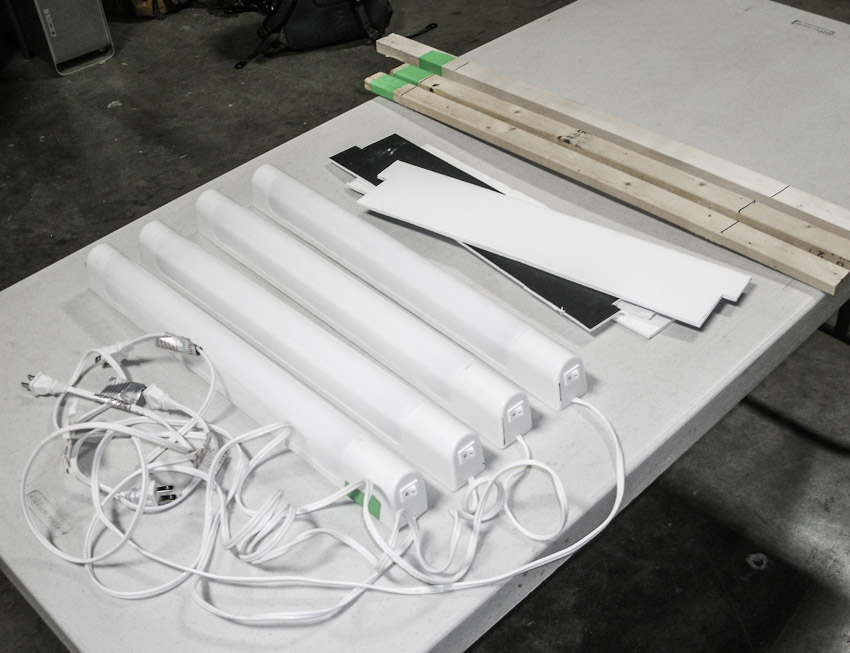
All right, now we are ready to start building the lights. For this particular shot, I used two luminescent under-cabinet lights from Home Depot (approx. $12 each). Since I want to be able to control the light fall-off, I cut a few pieces of black-white foamcore, which will be used as improvised barn doors. Below are the lights, the foamcode cutouts and pieces of wood I will attach the lights to – these will help me mount the lights to the stands, grip etc.
Building the lights
Building lights DIY Studio Lighting – step 1
The next step is to “sandwich” each light in the cutouts (white side towards the light) and attach the whole thing to the piece of wood. After mounting, the “sandwich” looks like this:
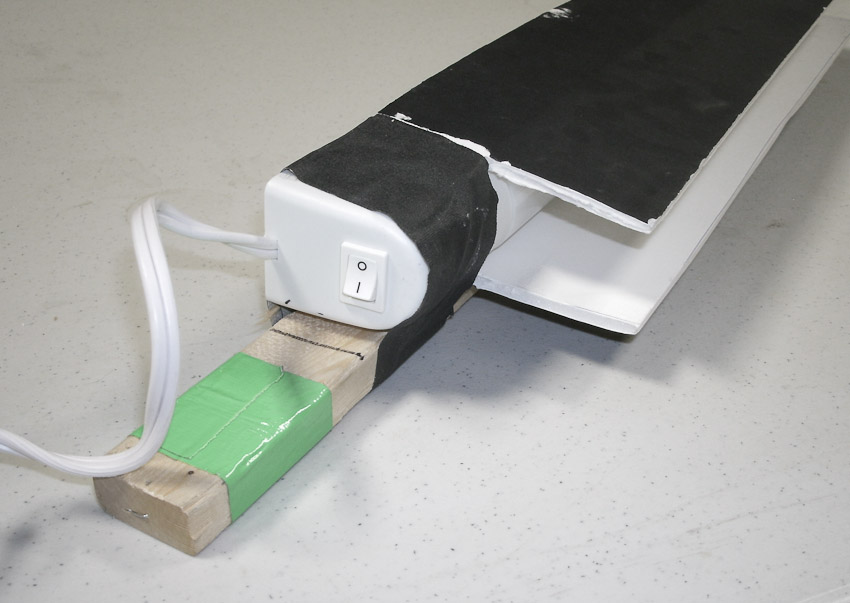
Building lights DIY Studio Lighting – step 2
The first shot with DIY Studio Lighting
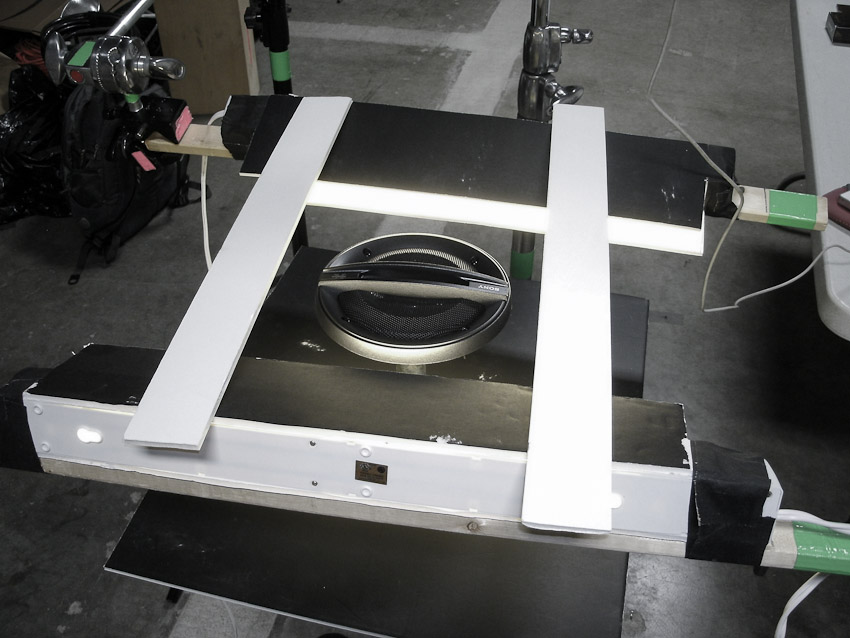
For my shot, I only need two lights so I leave the other two for the next time. Now, let’s set up our object and the lights. In this particular shot, I am going for dramatic low-key lighting from the top and from the bottom. The goal is to achieve that “serpent eye” look with bright core and dimly lit space around it. To start, I mount the lights on both sides of the speaker and slightly tilt them down to control the light spill-off – we don’t want too much light on the middle part of the speaker. The camera is mounted right above the speaker looking straight down.
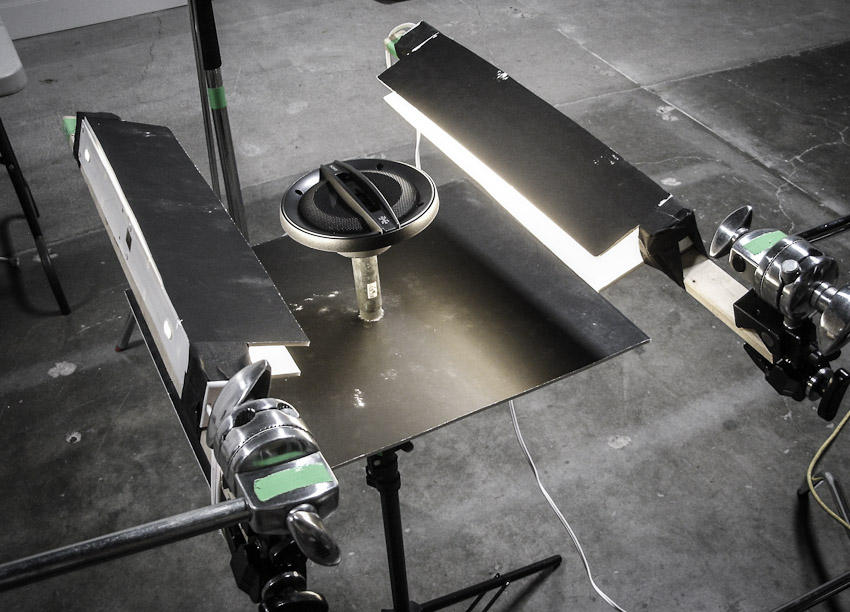
Lighting setup of – part 1
The very first photo shot confirms that we are on the right path – we are not “on the money” yet, but we are close.
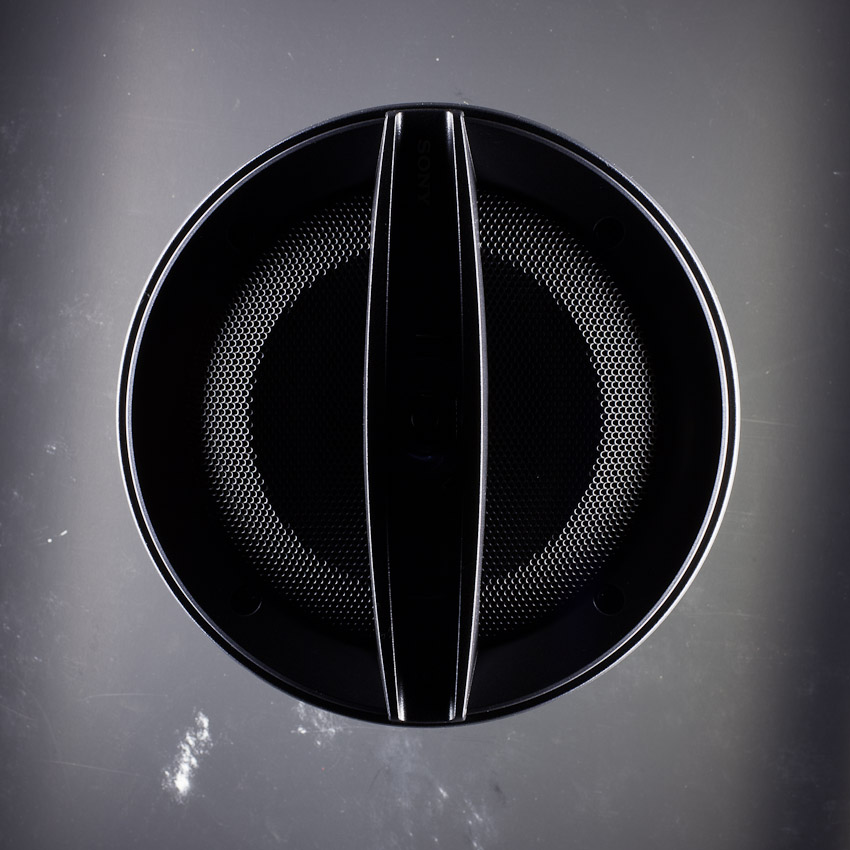
Speaker shot 1
Improving the image
The light on the grill is nice, the edge is nicely separated but not over lit. The only problem is that the entire central part of the speaker fell into the darkness. To correct that, we add a couple of narrow foamcore strips that act as mini-reflectors and help to open up the shadows in the middle.
Lighting setup – part 2
Much better now! We can see the label (Sony X-Plode) and even a glimpse of the blue core:
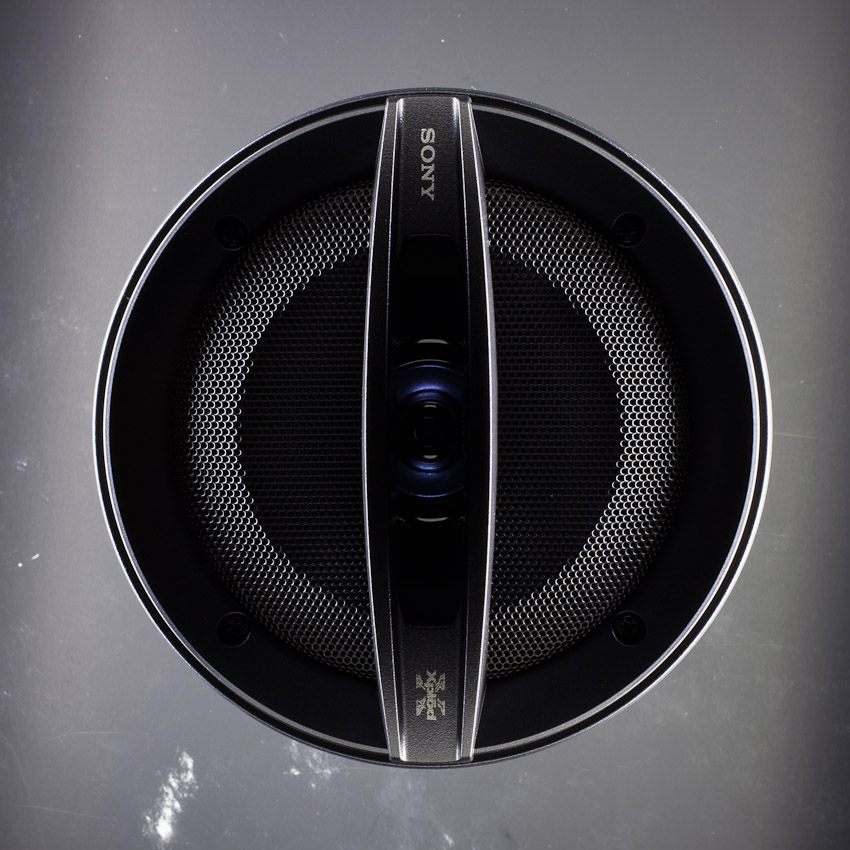
Speaker shot 2
Shooting for the “core”
Now, the above shot is not bad at all. But… it is still an “OK” shot and we are going for the “WOW” one! If we could somehow make the blue core shine, that would bring the image to that next level. Unfortunately, it would be exceedingly difficult to achieve it in one shot without sacrificing the nice light on the grill so we will shoot the blue core separately and then combine the two shots in post production. In order to light for the blue core, we turn the lights about 90 degrees and point them sharply down leaving just enough space for the camera to see the speaker core:
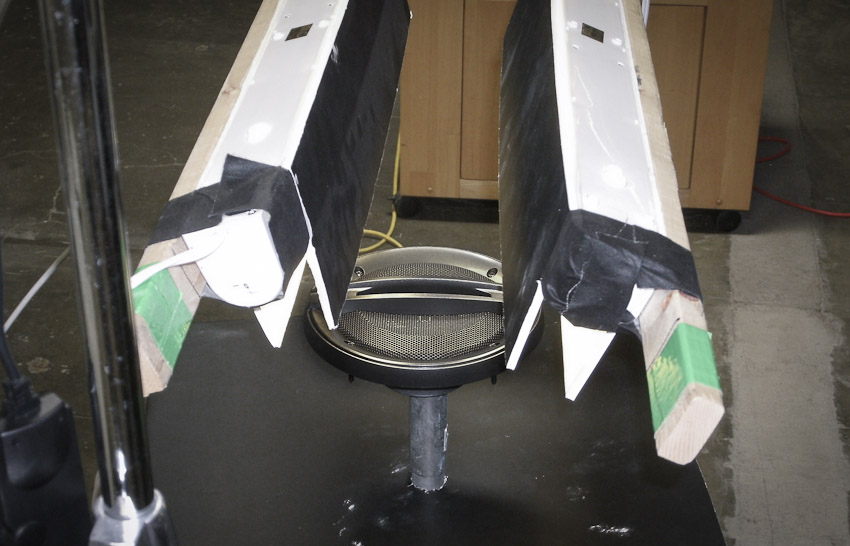
Lighting setup – part 3
The resulting image of the speaker core:
Speaker shot 3
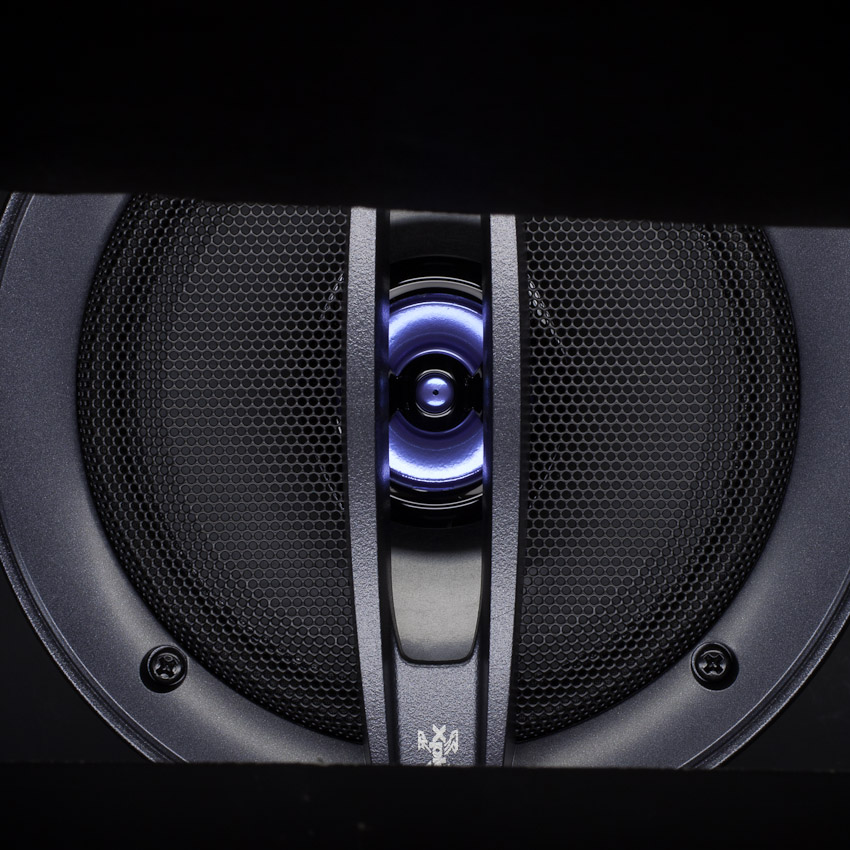
The final shot using DIY Studio Lighting
All right, now that we have all the parts, all we have to do is to cut out the speaker, put it on a background of your choice (I happen to like plain black but it is my personal preference; you may want to experiment with different backgrounds to see which one works best for you), do some very light cleanup and paste the bright blue core into the final image. The finished image looks too good to believe it was done with two $12 lights from the home improvement store!

Speaker shot – final
Technical information
Camera: Canon 5D Mk II
Lens: Canon 50mm 1:2.5 Compact Macro
Happy shooting and remember – never stop experimenting!
Cheers,
Alex Stepanov, Photographer.
www.astepanov.com