Beverage Photography Lighting Tutorial:
Shooting a vodka bottle with Ice
Beverage Photography Lighting Tutorial
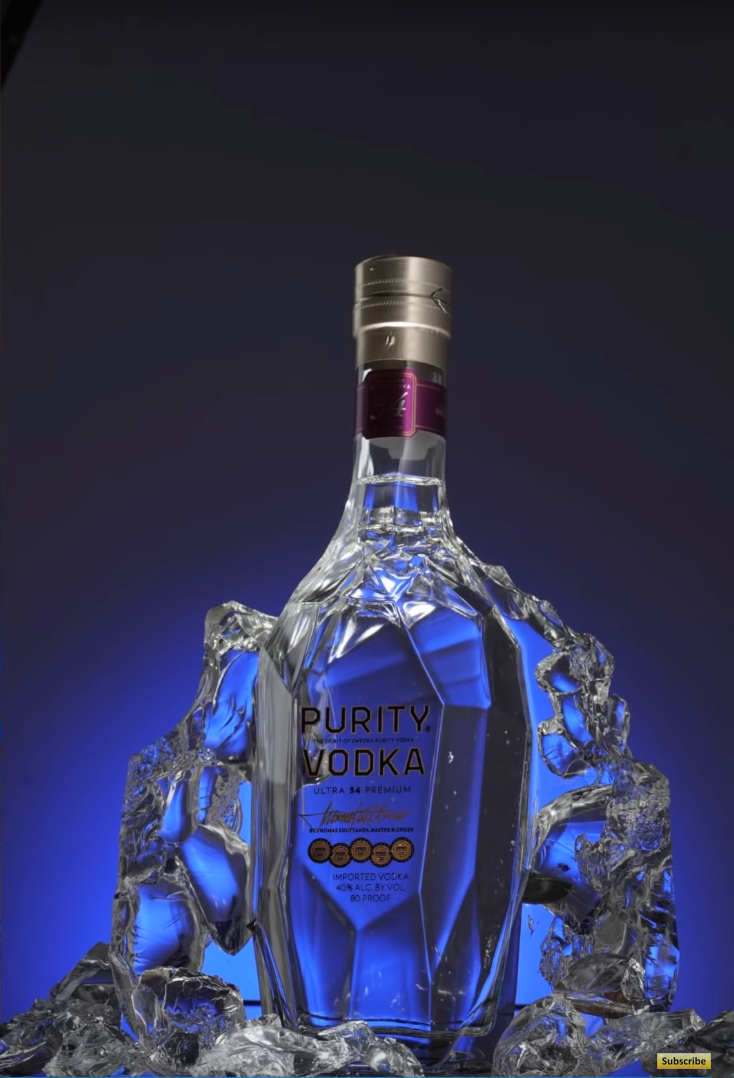
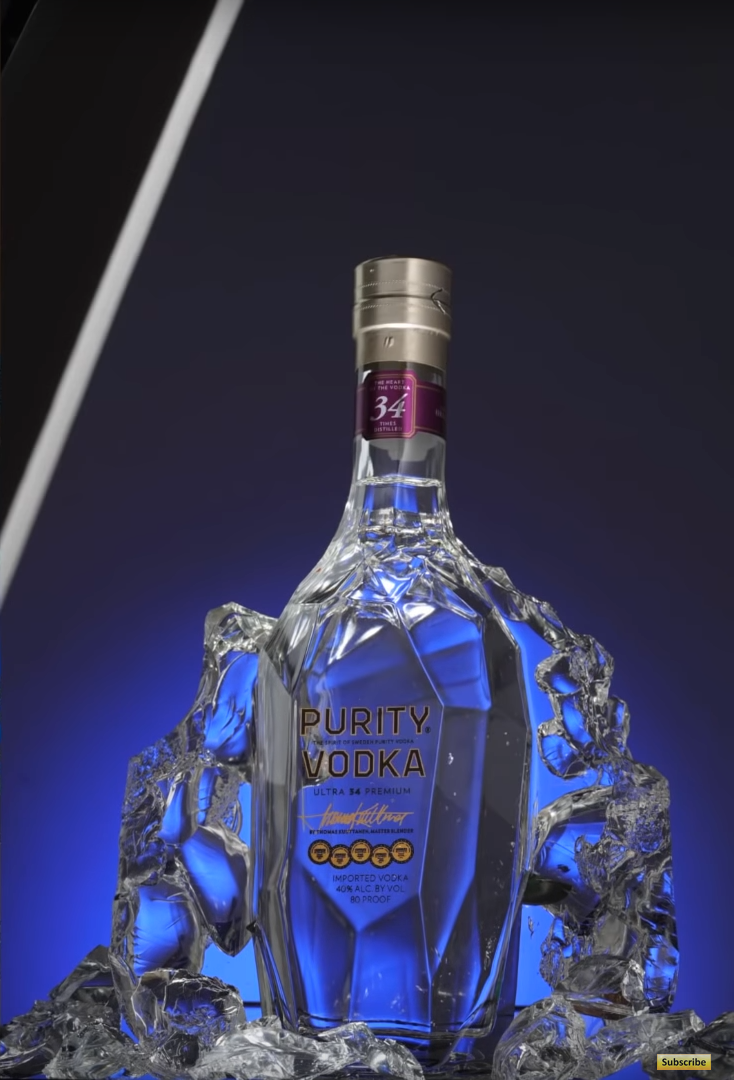
In this Beverage Photography Behind-The-Scenes Tutorial, we’ll take a brief look at the making of the Vodka on Ice image, from the chemicals used to create the ice prop to the lighting setup necessary to capture the basic image. Pro Club members can watch the complete beverage photography tutorial to get an in-depth understanding of the whole process, including the best practices used by post-production guru Artem Pissarevskiy to enhance commercial advertising-style images like this one.
And this is how we made it!
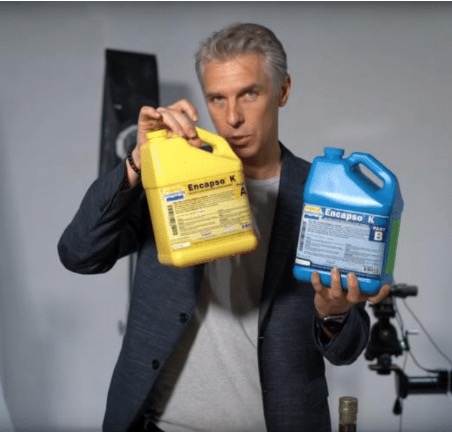
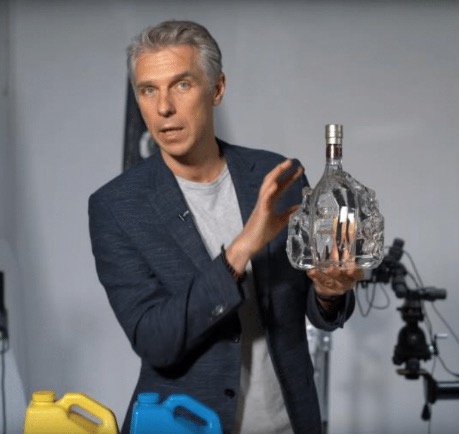
Despite its realistic appearance, the “ice” featured in this tutorial is actually a type of water clear encapsulating silicone rubber you can mix and sculpt to create just the look you need for your own icy project. The brand Alex uses in this Pro Club assignment, Encapso K, is available from Amazon. A smaller trial size is also available if you prefer to test it out before buying the more expensive gallon size kit.
Making Fake Ice
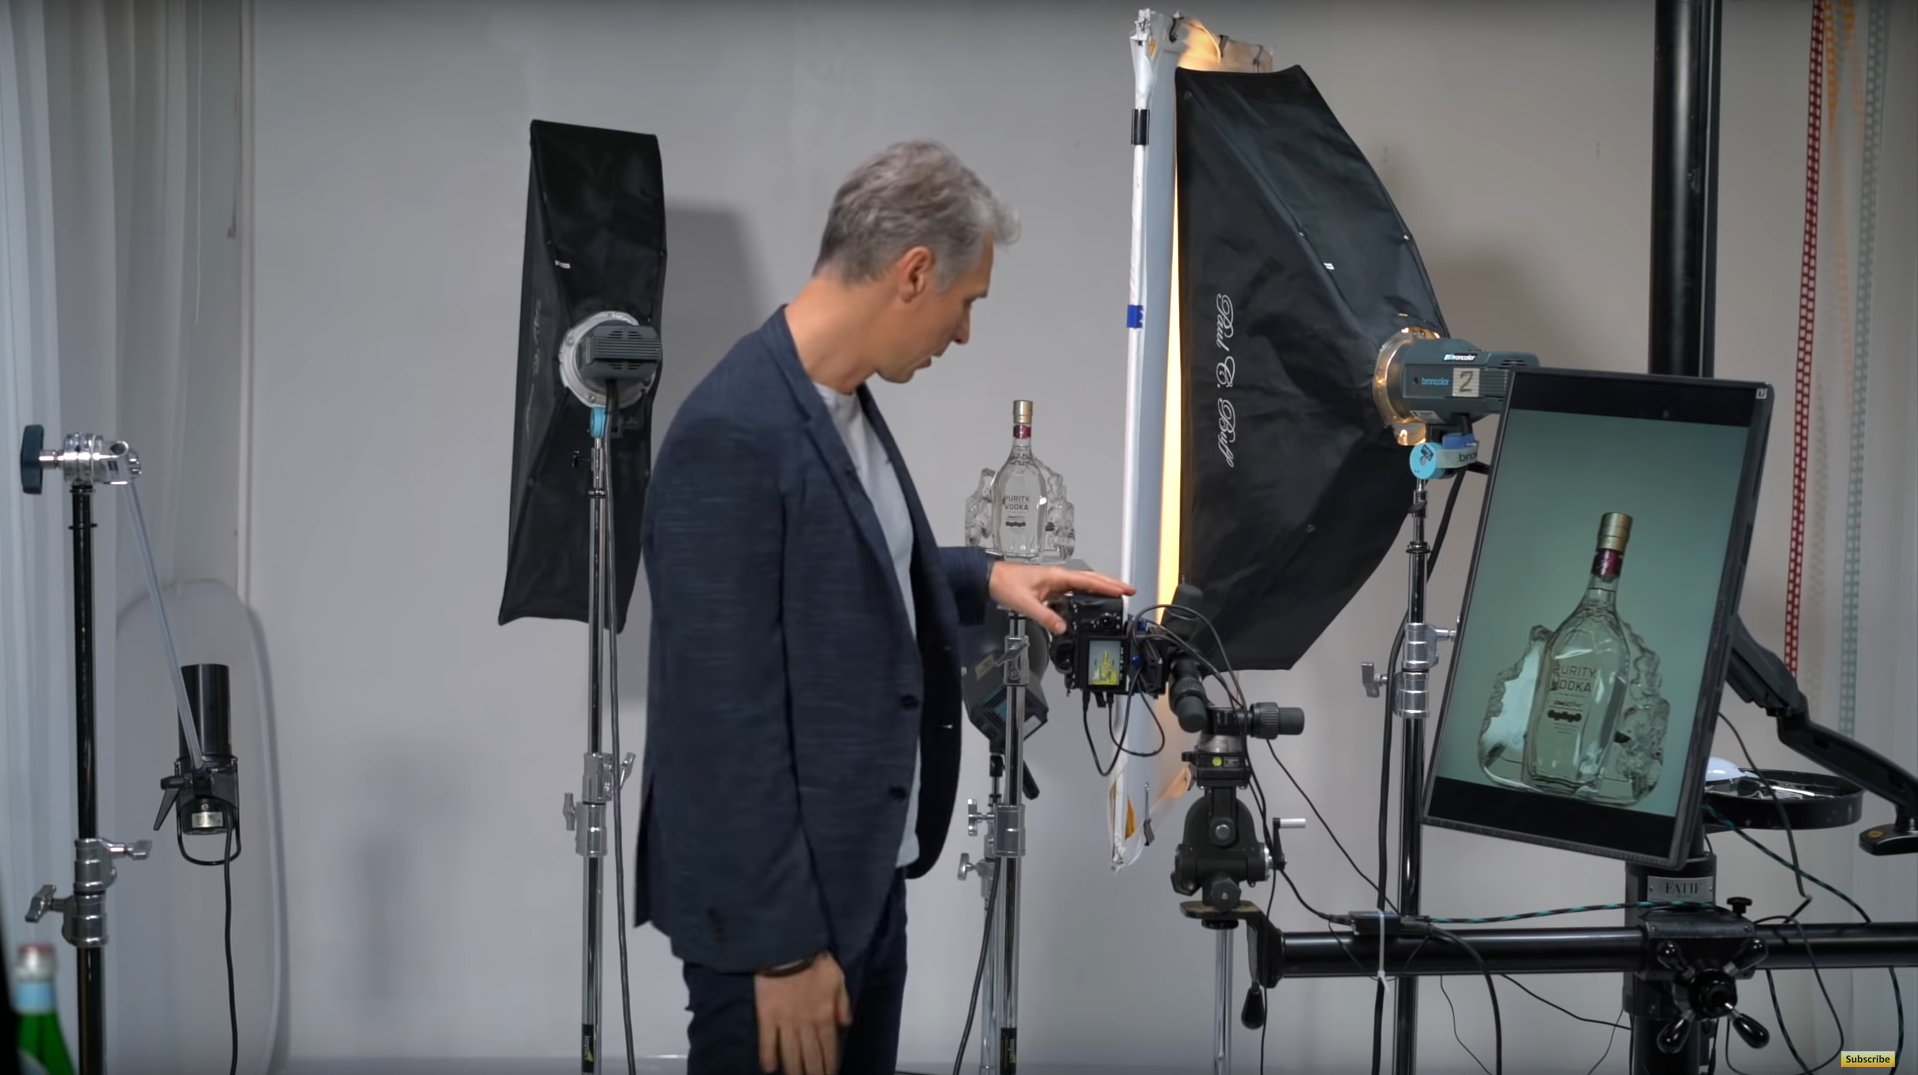
Beverage Photography Lighting: Setting Up
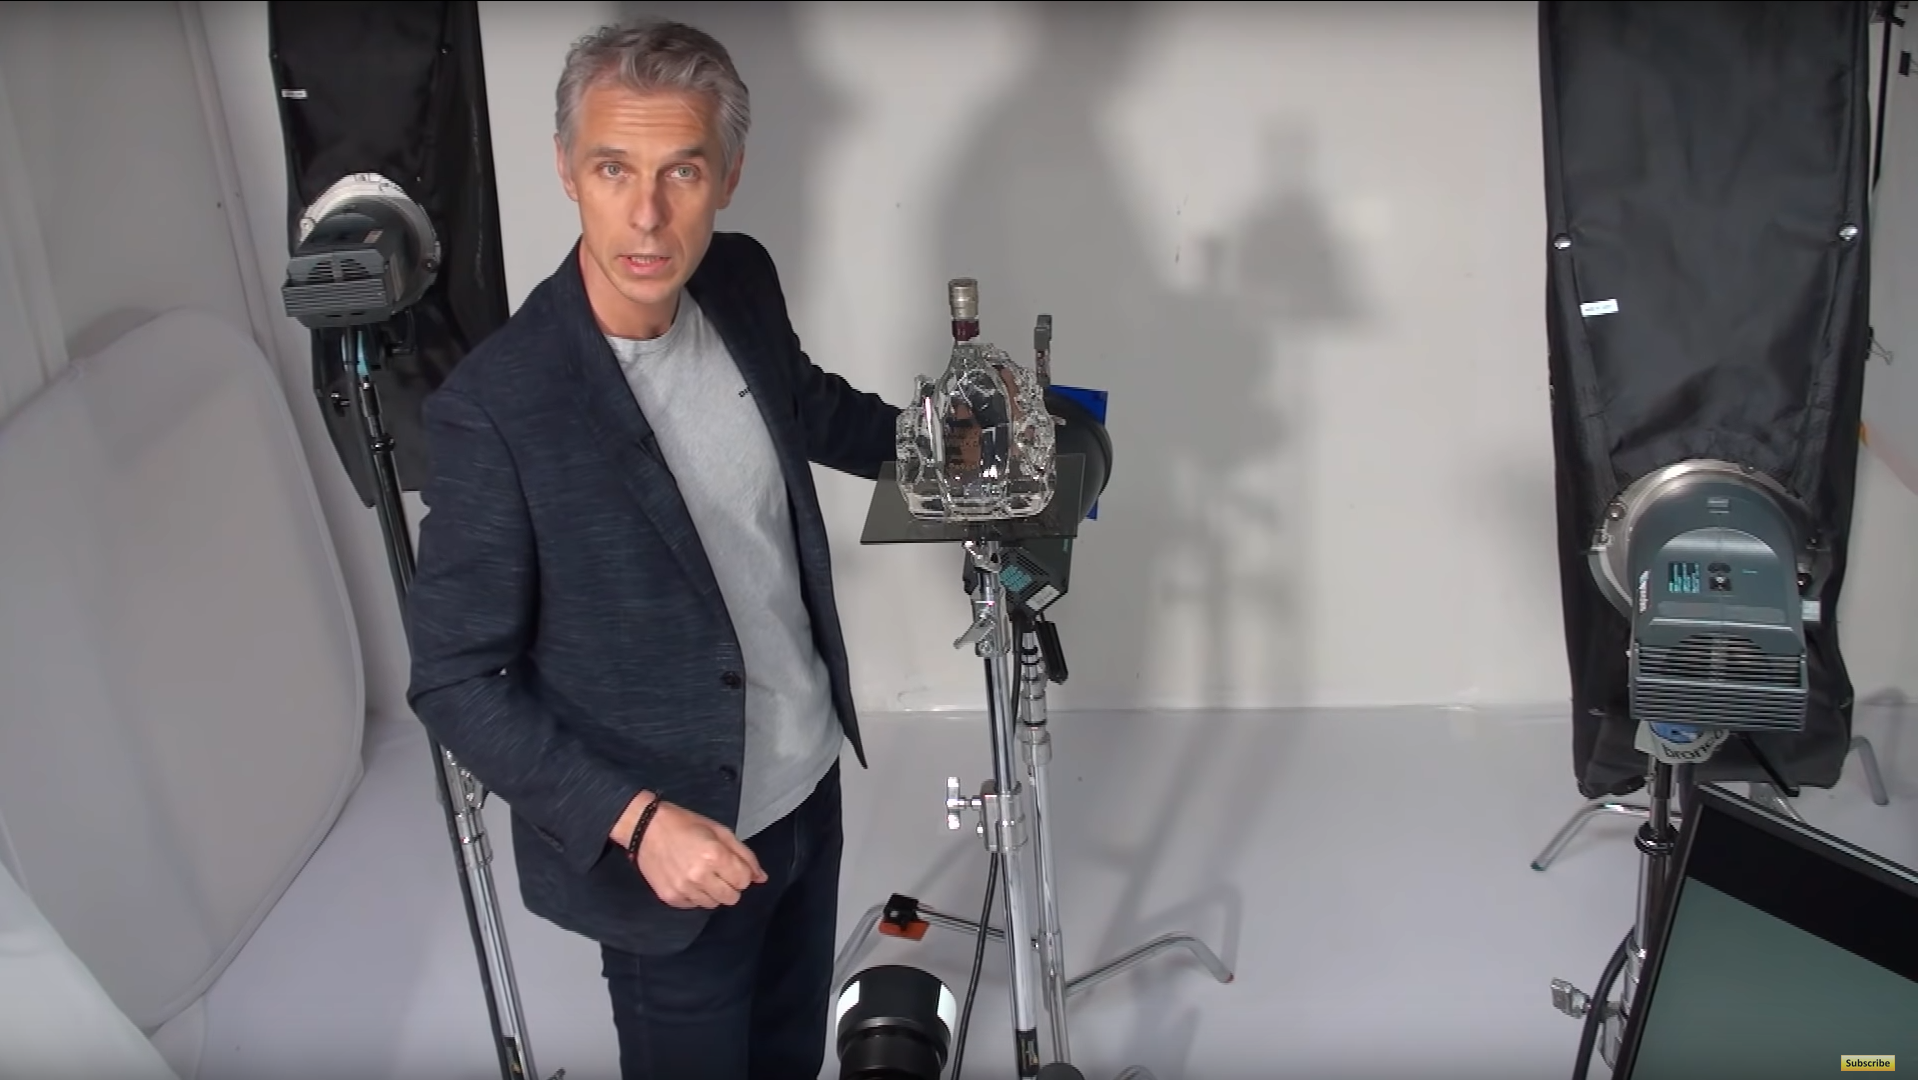
So, you’ve mixed your own icy rubber and sculpted a glacial masterpiece. Now it’s time to set the stage and light your hero subject. To achieve the lighting necessary to recreate the featured image, you’ll need to support your subject with a piece of translucent Plexiglas (or similar). Alex uses a sheet of smoked Plexiglas:
Beverage Photography Lighting
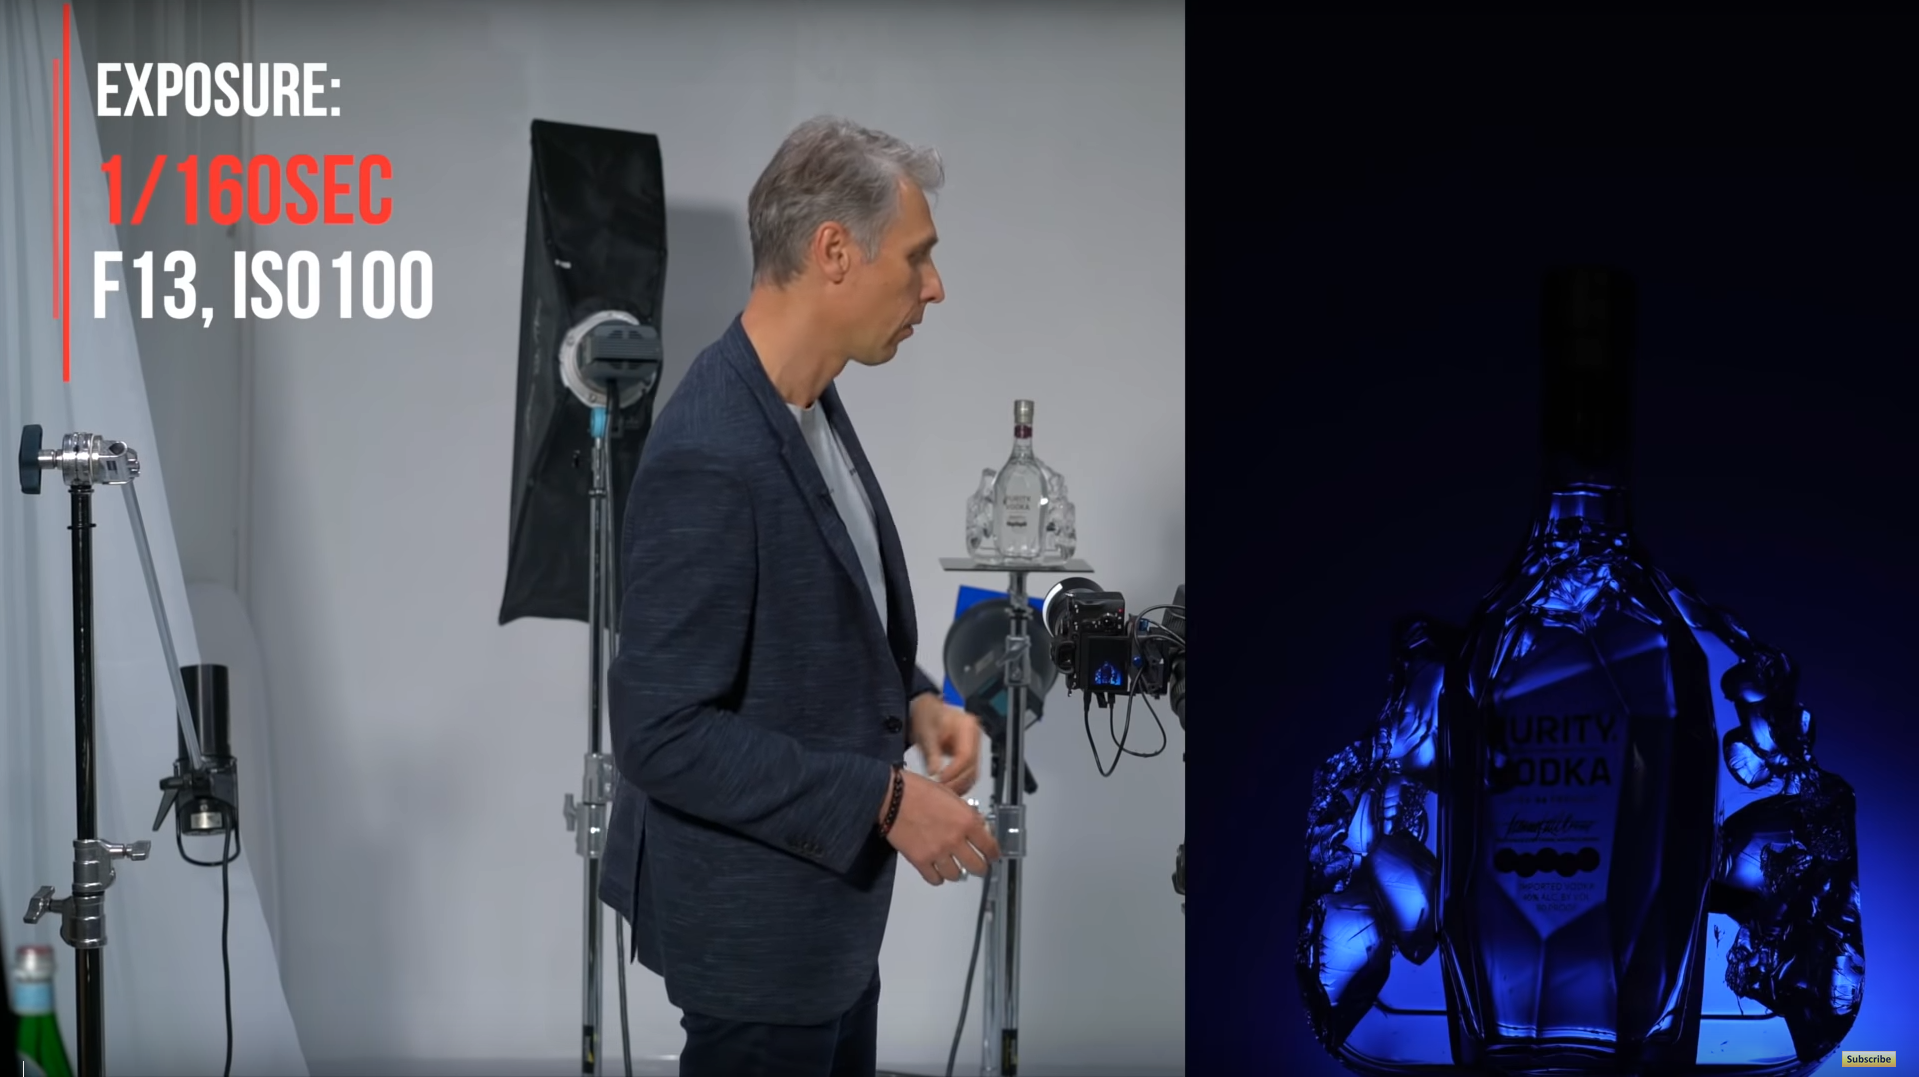
Alex uses a four-light setup to create the Vodka on Ice image. The benefit of this approach is that you can create the image in one take once all the lights are set. Of course, if you don’t have four lights available, you can create a reasonably similar look by shooting with fewer lights and then compositing the final result in post-production.
LIGHT #1: As seen above, the background light is a spotlight with a honeycomb grid covered with a blue gel. The blue gel was chosen because of the ice theme, but feel free to experiment with other colors to achieve different looks. Notice the positioning of Light #1 to ensure the light starts below the horizon. The honeycomb grid size is chosen based on distance of the light from the background and the desired size of the light behind the subject.
Beverage Photography Lighting #2: With the background light in place, the next step is to begin illuminating the subject. To create just the right gradation of light across the subject from the right side, Alex uses a strip softbox and diffuser screen positioned just out of frame. Notice the angle the softbox makes with the diffuser screen to ensure a pleasing gradient on the subject.
LIGHT #3: Now it’s time to introduce some light from the left side of the subject. Here, Alex uses another strip box, but without a diffuser screen.
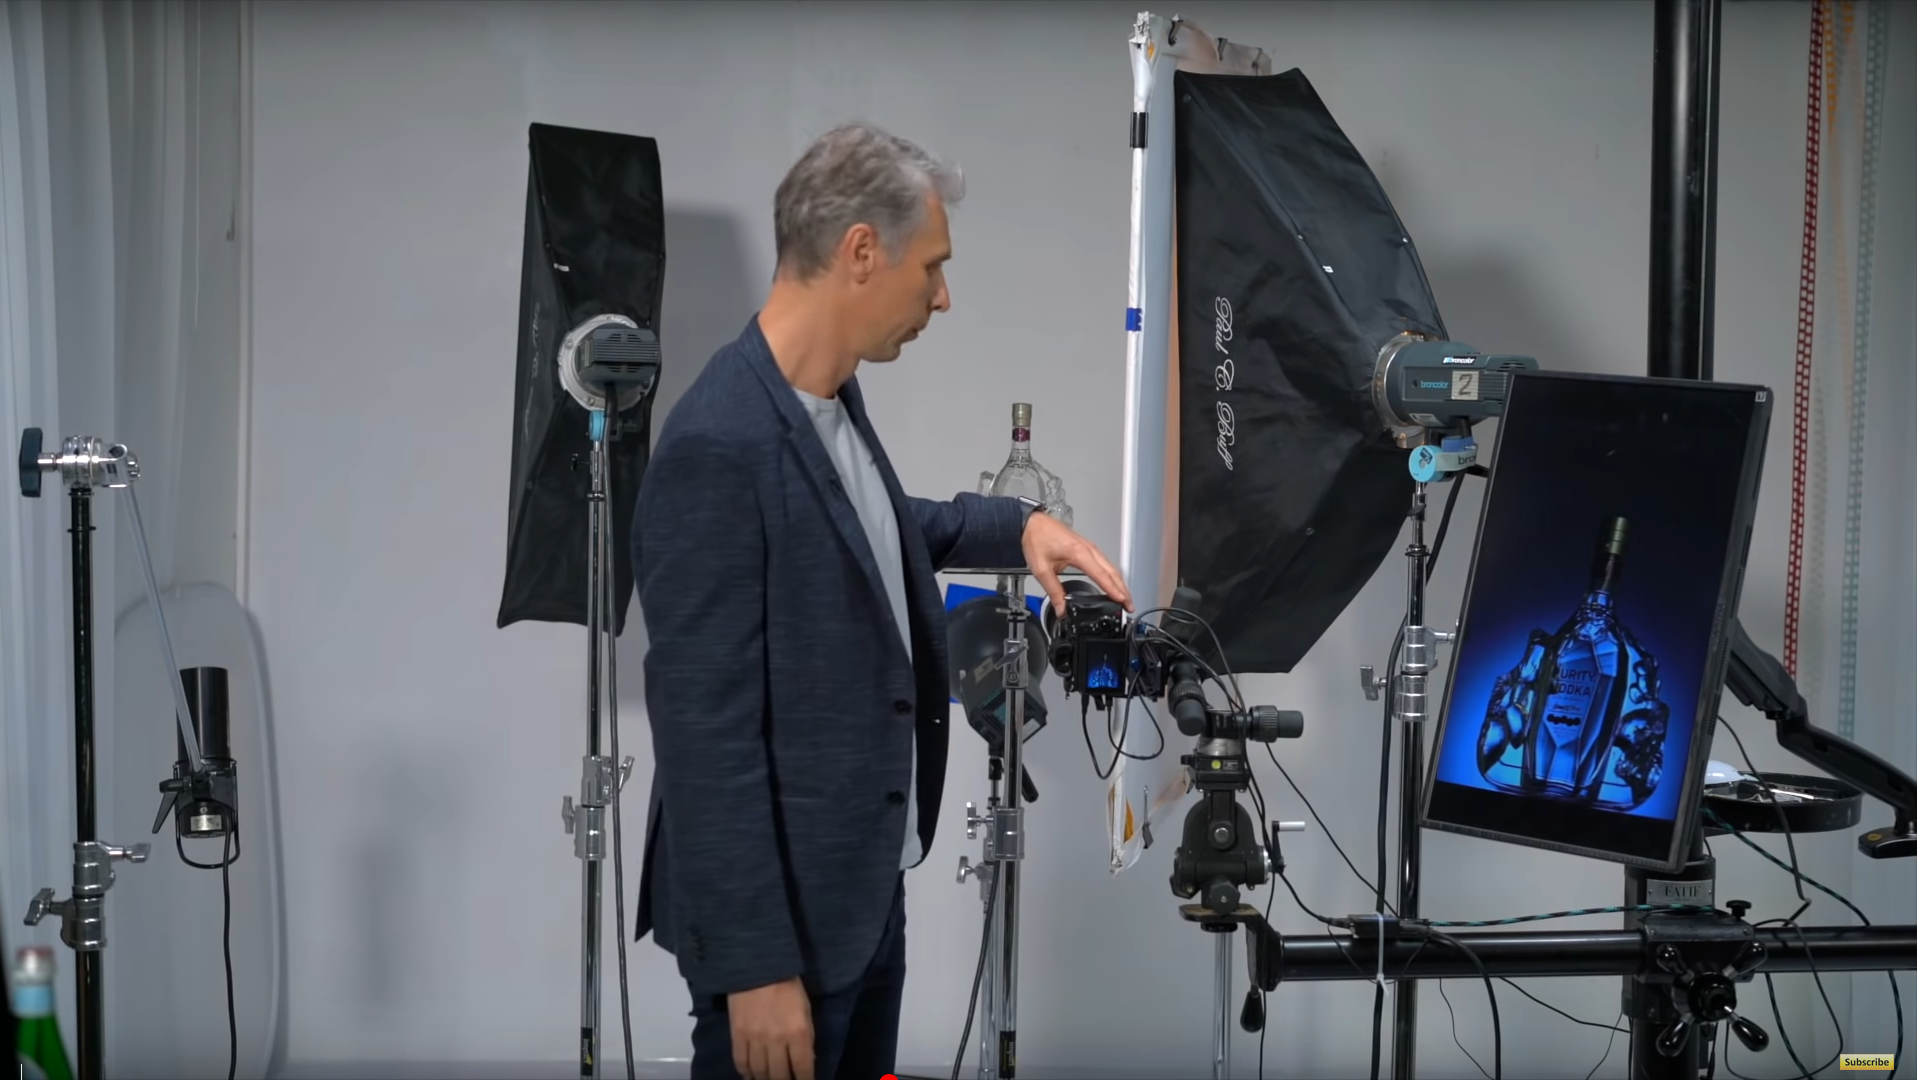
Beverage Photography Lighting #4: How do you illuminate the interior of the liquor bottle? In this setup, we can take advantage of the translucent Plexiglas base and light the subject from underneath. Alex uses a Broncolor Picolite beneath the subject, which you can see below.
Brightening the label:
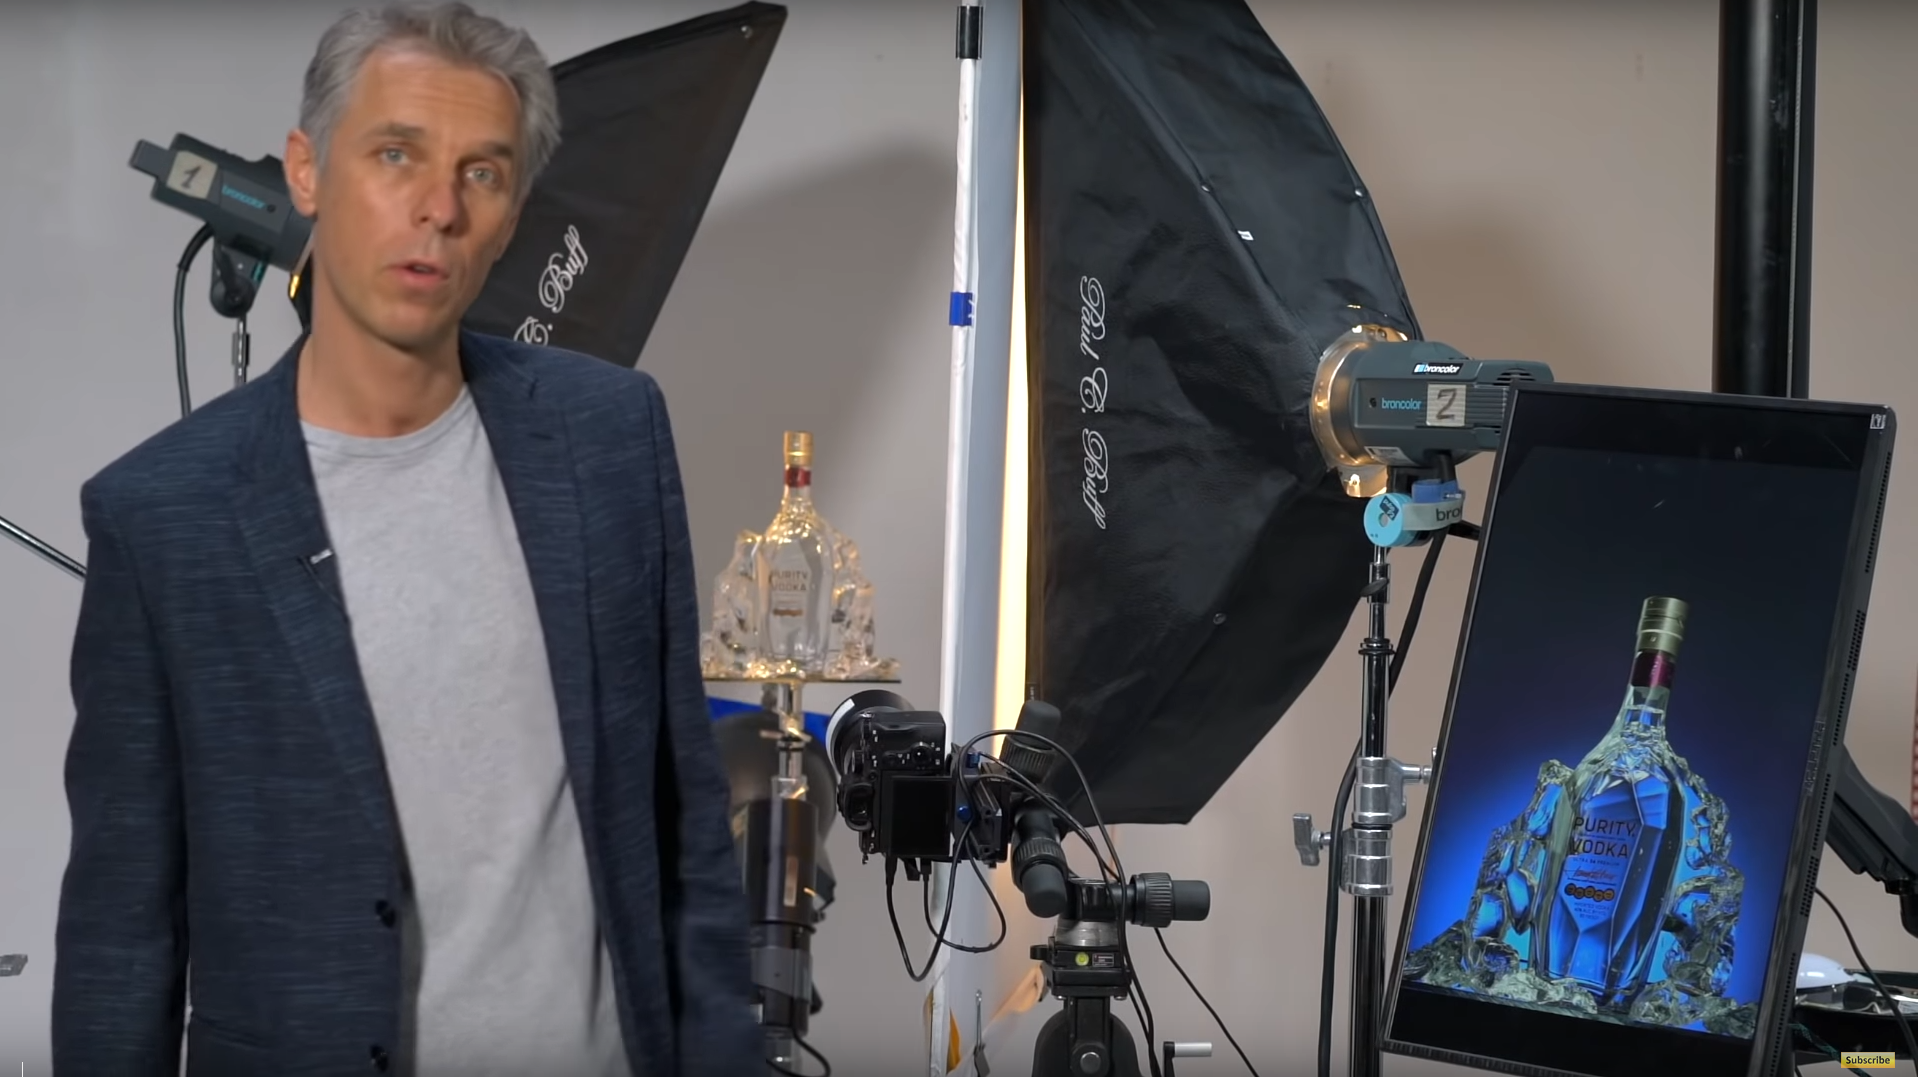
You may have noticed that despite using four lights on the subject, the label doesn’t exactly pop. Although there’s likely enough dynamic range to bring up the exposure of the label in post-production, it’s always best if you can get as close as possible to the final image in camera. To add more light to the label, Alex uses a small piece of white foamcore to reflect a bit of the strobe light back onto the label.
Before And After The Post-Production

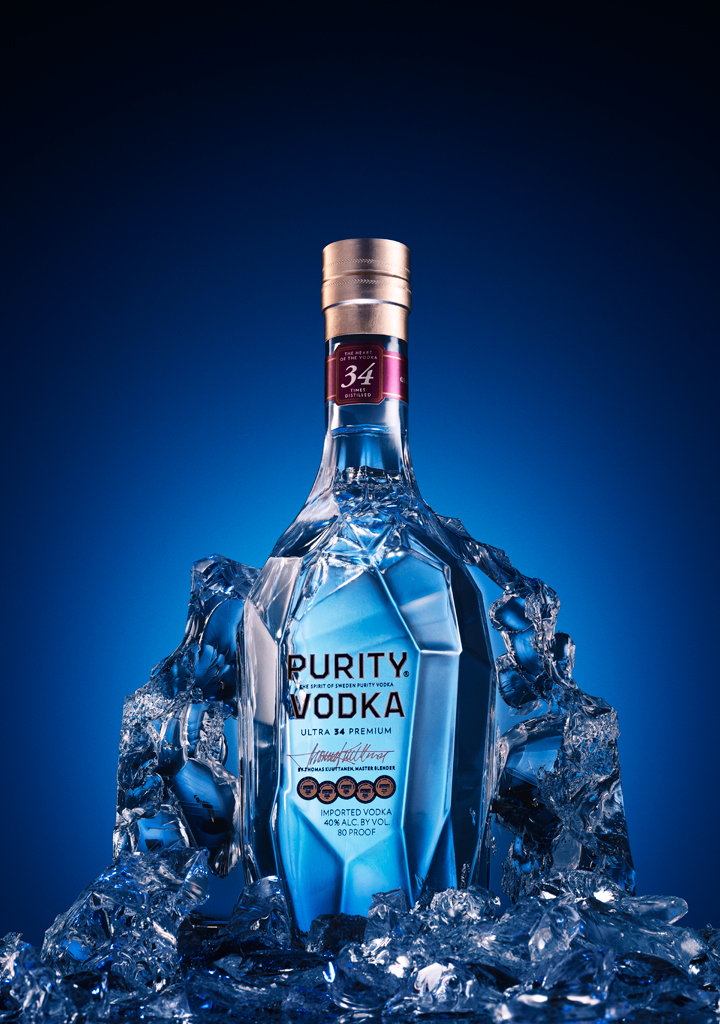
Full in-depth tutorial about Beverage Photography Lighting with post-production (over 3 hours of video) is available here: Beverage photography workshop #66

Recent Product Photography Workshops
That was a great session today. I’m so happy I found Photigy and Pro Corner. Before I started this, I was only mildly interested in product/still life photography but always have been interested in broadening my photographic skills and knowledge. I’ve found that I really like this type of photography and am very grateful for your instruction and critiques.