
How to Photograph Glassware on a Black Background
The Complete Guide To Product Photography
1 |
Mark the Lesson as Completed |
How to photograph reflective and transparent objects:
Bottle of vodka and martini glass on black
In this photography lesson, I’ll show you how we did our recent assignment: a bottle of vodka with a martini glass on a black background. This was a little unusual project: recently we shoot the same bottle with glass on white and gray gradient backgrounds, and lately I was teased by one of the readers of my blog who asked how would we shoot glass on a black backdrop.
So, we decided to give it a try and shoot similar composition on completely black background
This is how I was imagining the final image:
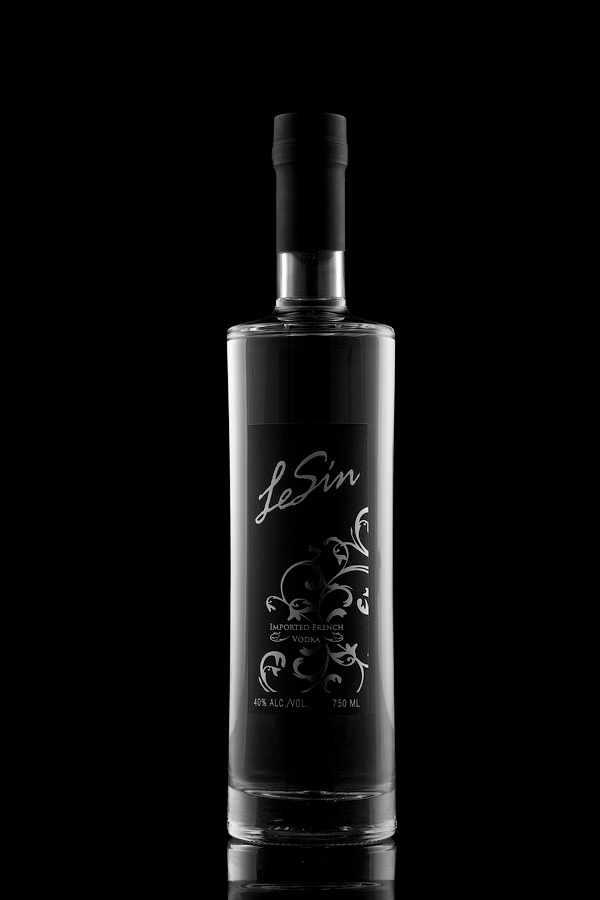
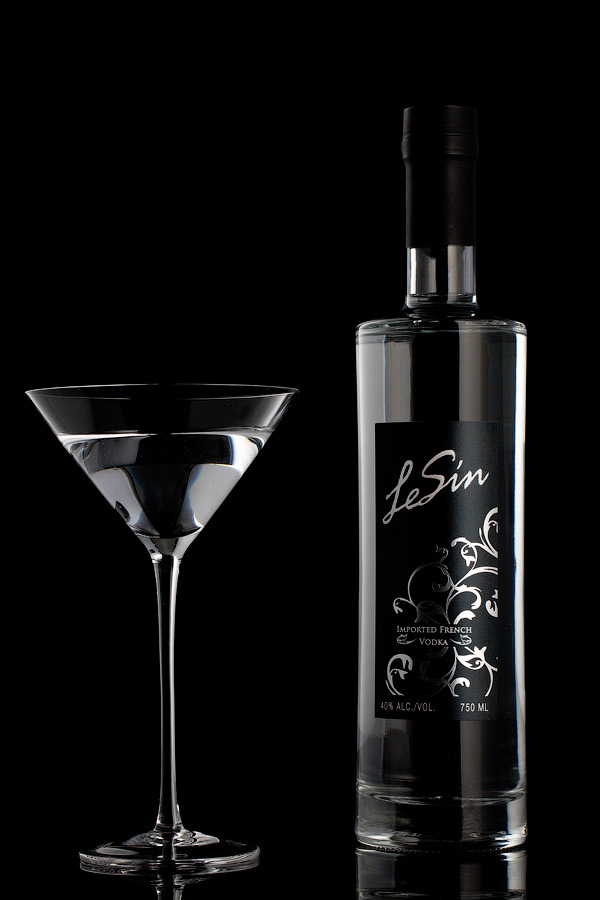
Crisp looking bottle with highlighted edges. The label is bright in the center, brightness slowly dims to the edges, making edges of the label even with the black background. Martini glass filled with vodka, contoured with light, bright colorful olive on a red stick in it. The rest of the image is really colorless.
First, let me tell you more about the specifics of shooting subjects made of glass.
Working with glass, the biggest difference from any other type of photography is that we can’t directly highlight our subject, as we do with portraiture, etc: glass is clear and glossy. Meaning it will only refract and partially reflect the light, and that reflects light won’t be diffused at all.
I need to keep this in mind when planning where to position the lights: usually, glass looks the best when a light is behind it (we lit background), not the object itself.
So the tricky parts of our shoot are these: background is black, no way we can have lights on it. Only front and sides are left for the lights. Plus, we have a label on the bottle which supposes to be highlighted somehow, without a reflection on the glass (later about this).
Now the photo-shoot, step by step of building the lighting
Step one. White diffuser panels on both sides.
We’ve used a black glossy Plexiglass sheet bent 90 degrees so it formed a shooting table. The very first iteration of the lighting was simple: 2 large diffuser panels on both sides of the Plexiglass panel and 2 strip boxes behind the diffuser panels to create nice gradient filling.
Below is the result, bottle alone:
Not too bad, right? But there are a few things which I did not like at all: Bottle surface was looking mate, but the actual bottle is completely transparent glossy glass.
This is how diffuser panel works: highlighted by strip-boxes it created a very smooth reflection. I quite often use this effect in product or jewelry shots, but it did not work well here.
Also, take a look below on how the picture looked like when I’ve added a martini glass filled with water (first time it was water:-). Same time I’ve moved strip-boxes closer to the diffusers (to create sharper reflections), but it did not help much:
Glass with liquid added:
Martini glass made thing looks pretty bad, as it reflected both white diffusers. Not really what I was looking for.
Step two of the building the light for the shot.
Strip boxes through a gap in black screens on both sides:
So, in the second step, I’ve started changing diffuser panels to a black (black product facing) screens, the light was coming from the gap between them.
Below is the actual photo of how such setup looked like:
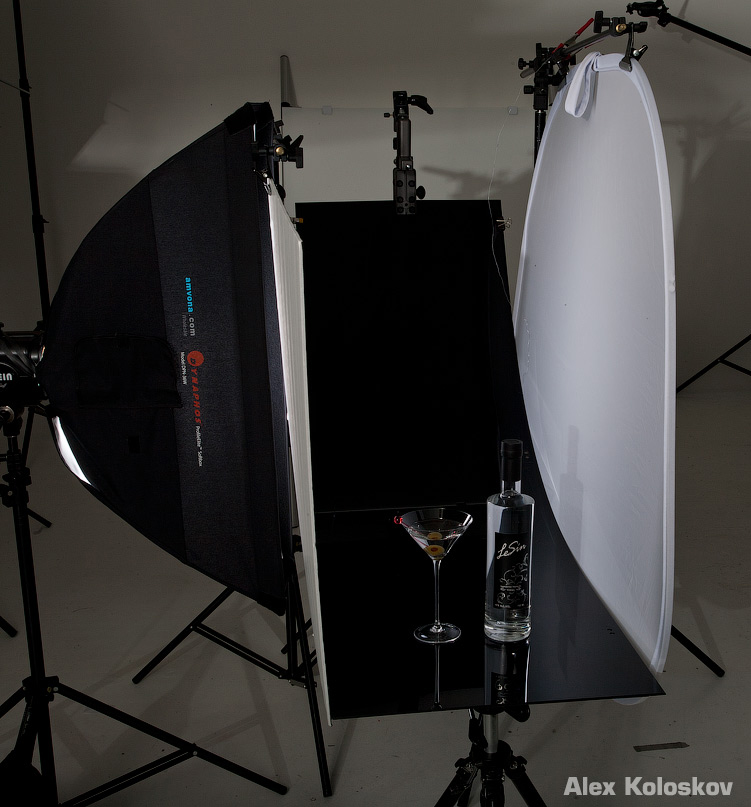
The second strip box was on the right behind the diffuser, not visible here. The result was not acceptable at all, and I’ve replaced diffuser with two black screens, with 3-4” gaps in between of them, filled with strip box lights:
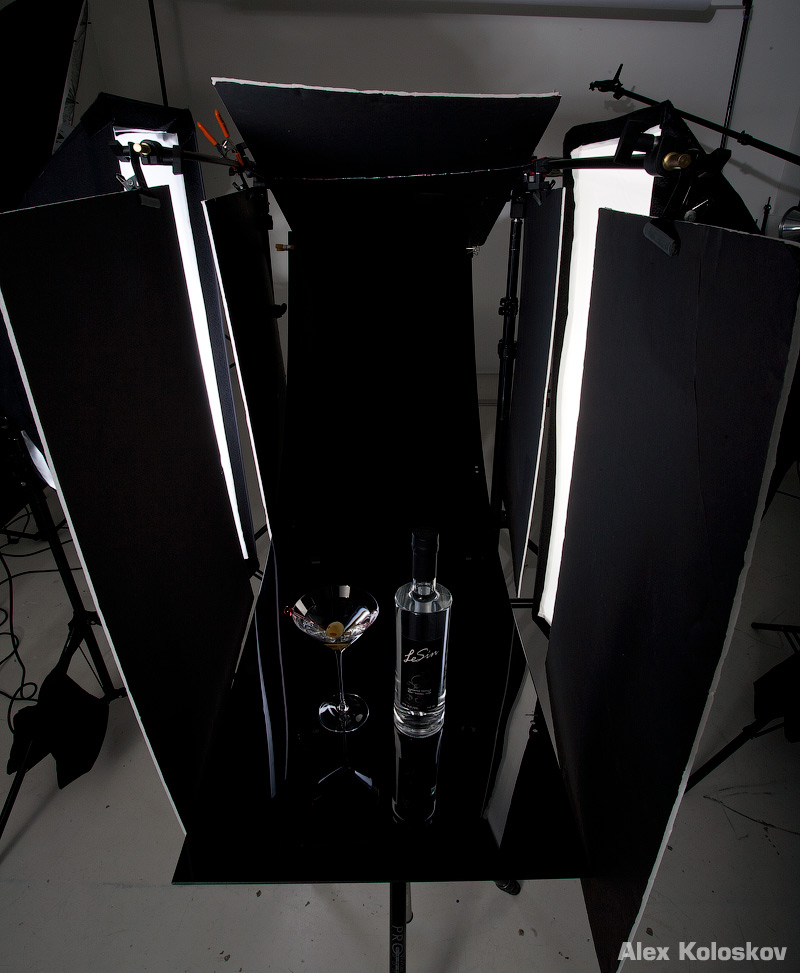
Because the table surface was dark and glossy, it worked like a mirror, reflecting the white ceiling above the table. This why one more black screen was placed on top of the table.
This setup worked really well, and I was able to easily control the size of the light sources: it was necessary to adjust it differently on each side because the bottle was not positioned at a center of the scene. Light source from the right was making a larger reflection on a bottle’s left (yes, left:-), and I’d have to move gap more to a front or change it width to make highlights on both sides of the bottle even: the idea was to create the same size of contour lines on the bottle and glass.
The same lighting setup, side view:
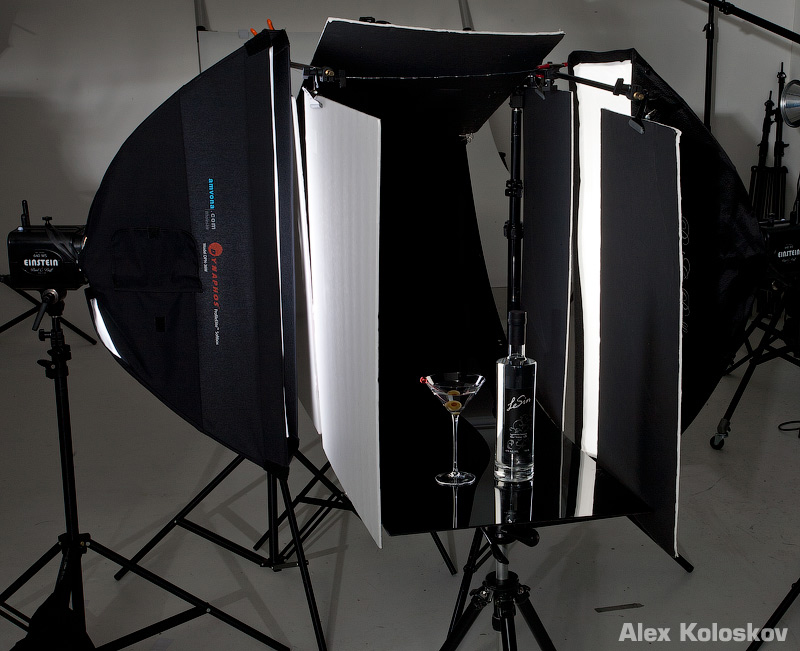
This what such studio lighting setup produced for me when everything was positioned properly:
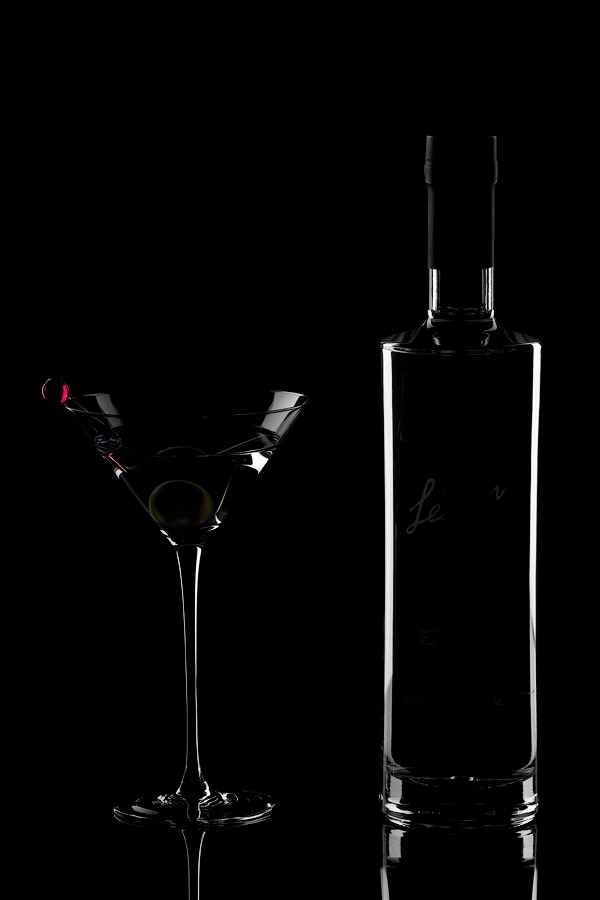
The glass itself looked exactly like we wanted, and the next step was to highlight the label on the bottle and olive in the martini glass. When we added one more soft-box in front of the subject (left to a camera), bottle got a full body reflection from it, see step 3 below.
Step 3. Highlighting the front elements (bottle’s label):
Added Softbox on the front
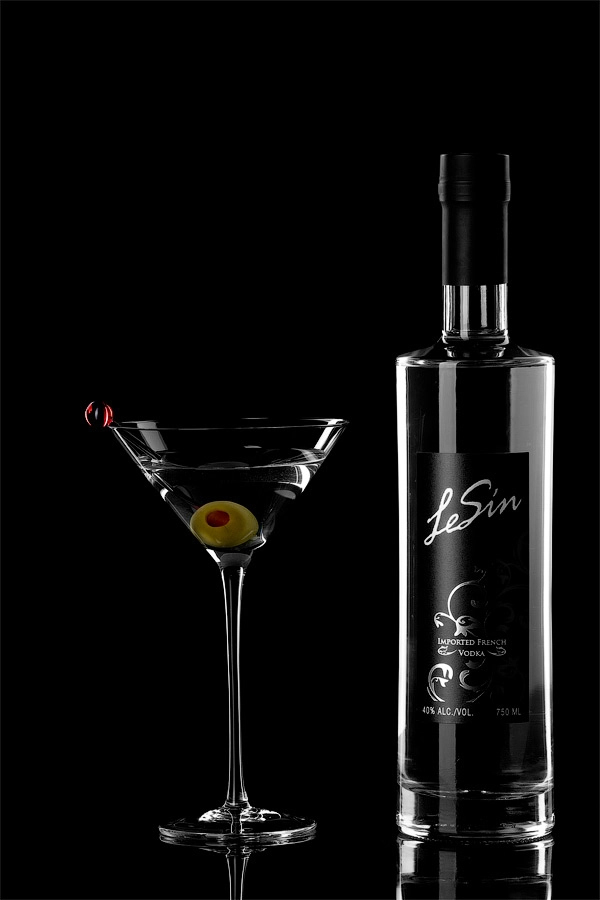
Explanation of how changes in the lighting setup impacted the result:
See these 2 vertical lines appeared on the bottle? One slim (left) one fat (right)? This is what one small strip box can do for the subject like our bottle. The first line is a reflection from the outer surface of the bottle, the second one is a magnified reflection from the inner surface.
The bottle looked like a zebra, far from what I had in mind.
What do we do to highlight a subject with both types of surfaces: glossy finish and matte surface to avoid direct, non-diffused reflection on the glossy part of the subject? The only way I know (polarizer won’t work here if you were wondering) is to have the light source positioned at such angle that “hard” reflection from the glossy surface won’t be visible at all (meaning reflected light won’t reach the camera).
On the other hand, matte surface (label in our case) will reflect diffused light, which means it will get back to a camera sensor, making the label look brighter…
This is what I did to the lighting setup: large strip box, positioned below the shooting table, so the reflection on the glass won’t be visible from the camera. The label got enough light to become much brighter in the center, exactly how I wanted.
Front strip box added to the light setup of this studio shot:
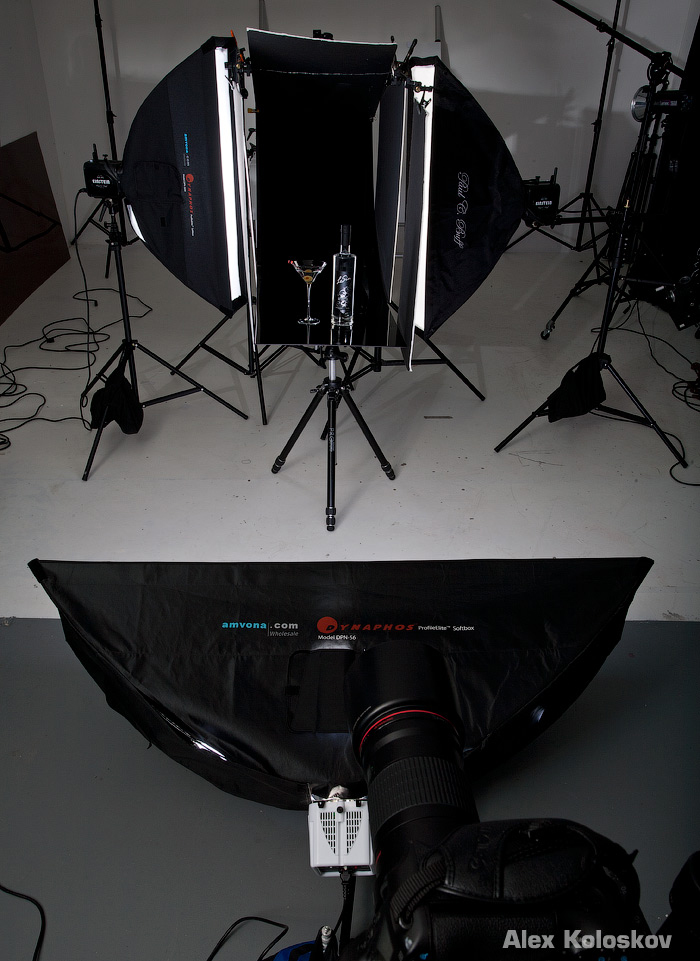
The lighting setup, step 3: softbox added directly in front, below the shooting table
Below the outcome:
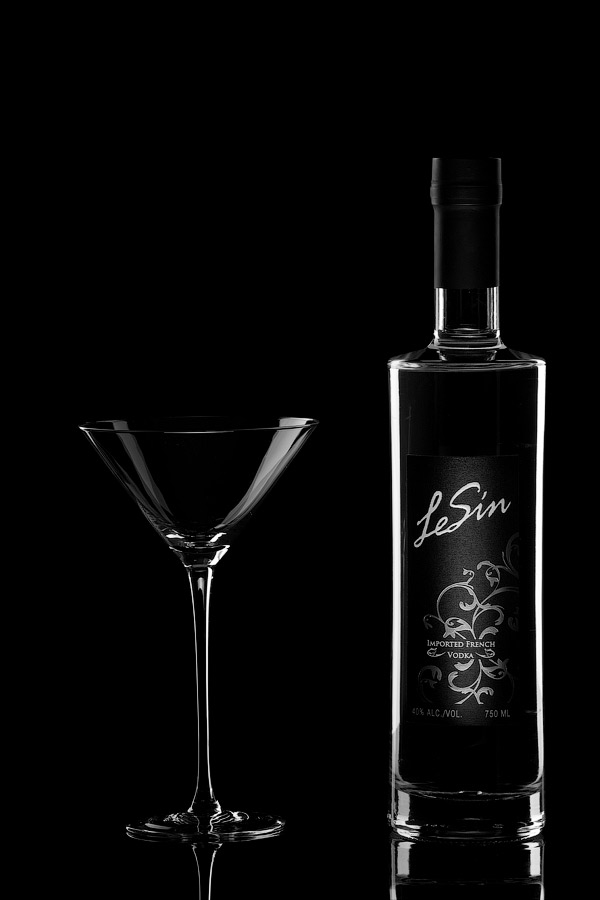
Empty glass and fill the glass with exactly the same lighting, just to give you some ideas on how much difference liquid can make for the whole composition:
No liquid in the glass, a photography tutorial intermediate result:
The dramatic change happened when we got Liquid (vodka) added (we did not drink it yet:
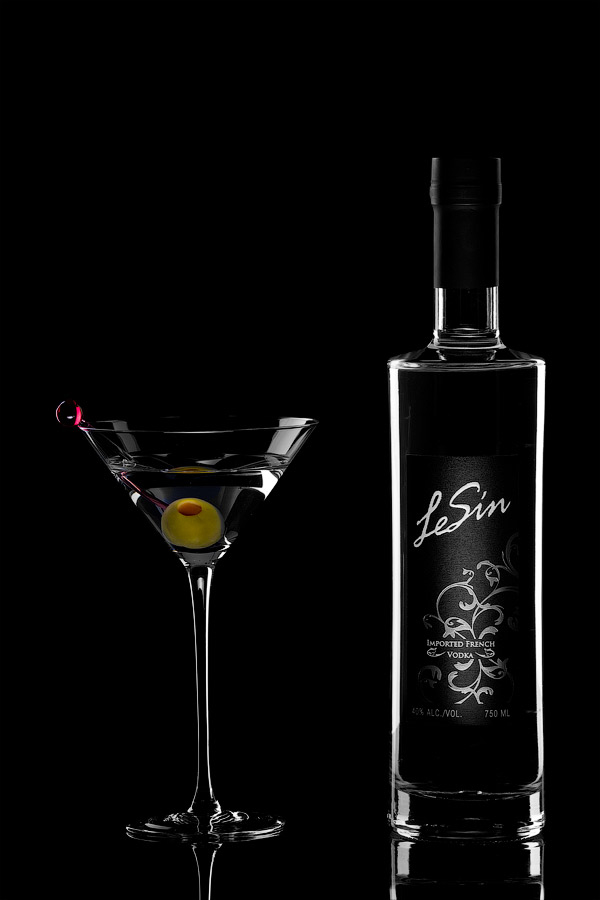
As you see, the liquid added one more element to our composition, and definitely, that was not the best addition (looking at ll these crazy reflections in it) for a photographer. However, the result was quite acceptable this time. 30 minutes of a post-production will fix the rest. The final result is below.
The final image, a slight touch-up was applied in Photoshop:
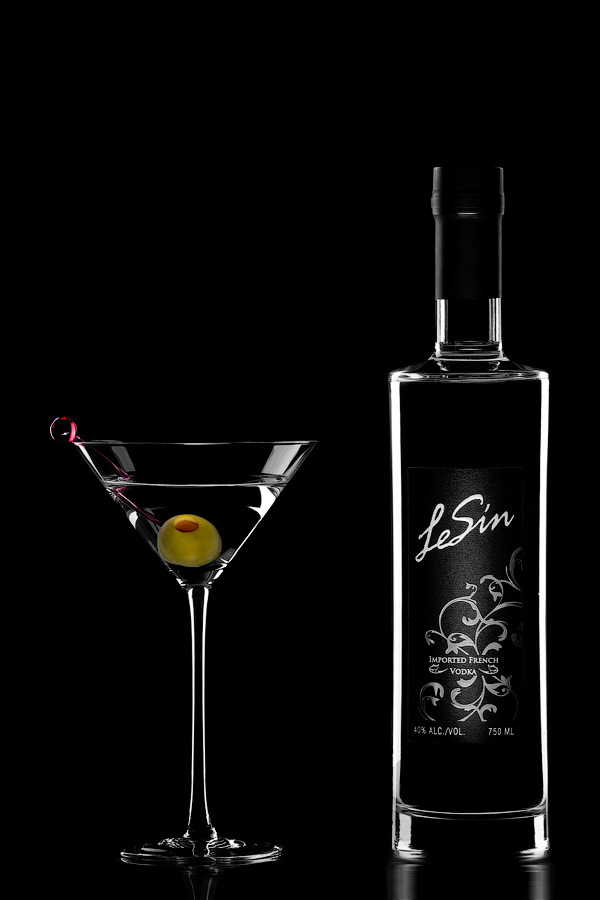
The follow-up product shot: an easy way to photograph glass on a black background
Simplified studio light set to get glassware on a black with only 2 strobes (or continues lights)
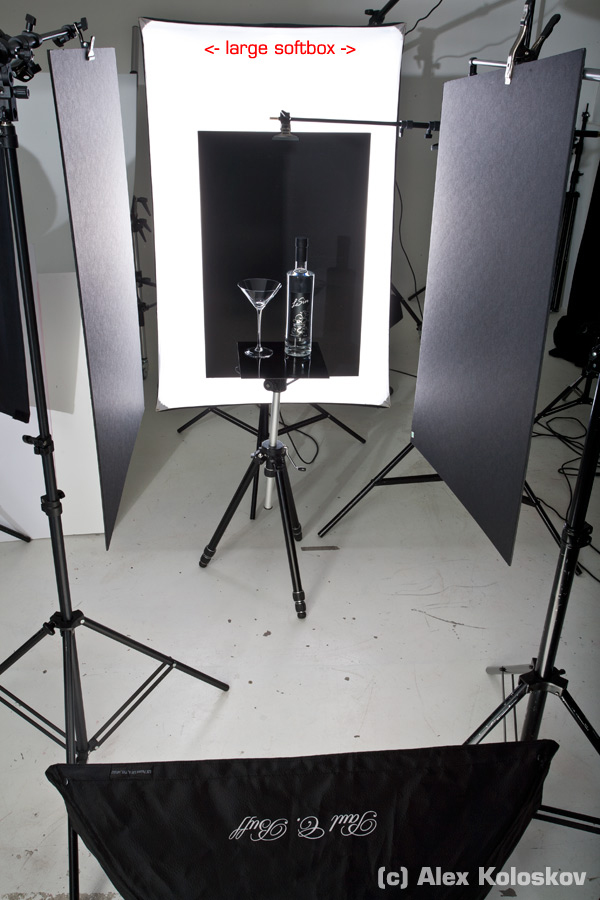
Simple, isn’t it? Large softbox behind our subjects, covered in the middle with black/white screen: black side facing front, white inside the softbox (to reflect back the light). By moving screen side to side I can adjust both gaps, making the reflection on our products even
Black screens on each side were covering the scene from studio surroundings. The same low-level softbox on the front to highlight a label on the bottle.
Nice solution. Put it in your lighting setup’s bag, it may be useful:-) I am too spoiled having more than 10 strobes available for me in the studio, but I really like when it is simple.
The resulted shot (slight touch-up was added) from this photography lesson is below
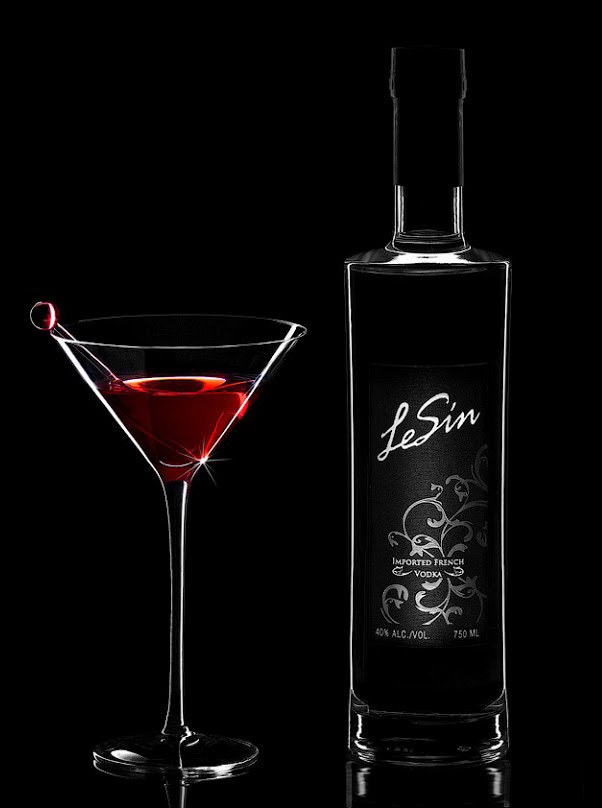
This is an almost as-is image, only a few adjustments in the RAW converter and few touches in Photoshop.