Trash Can as a Tool for a Professional Photographer:
The End Result is all that Matters?

In this lesson, you will see another DIY solution for a shooting cone. On one of the forums, a fellow photographer suggested that they have used a white trash can as a substitute for the cone… I got a smile at first when I read the comment, but then I realized that this is such a great and simple ( I love simple things:-) idea, and it’s a shame I did not get it myself.
Trash cans are usually cone-shaped, and can be used as a shooting cone with minor modifications.. same as a $500 shooting cone can be used as a perfect trash can:-) I know this solution may not look serious for a true “pro” photographers, but being 100% self-made and dogma-free person I always look for the end result instead of judging on how my work process may look from the side. Yes, it will be a good idea not to use trash can while having a client in the studio: they want to see how well you spend their money.
On the other hand, if the client will know that you can deliver outstanding result regardless of the equipment availability, it may help to get an assignment… true? Long story short: The next day I’ve bought few trash cans, one black SKAGEN watch and spent some time in the studio…
The End Result:

Product photography lighting tutorial end result that matters
Now, the Lighting Setup:
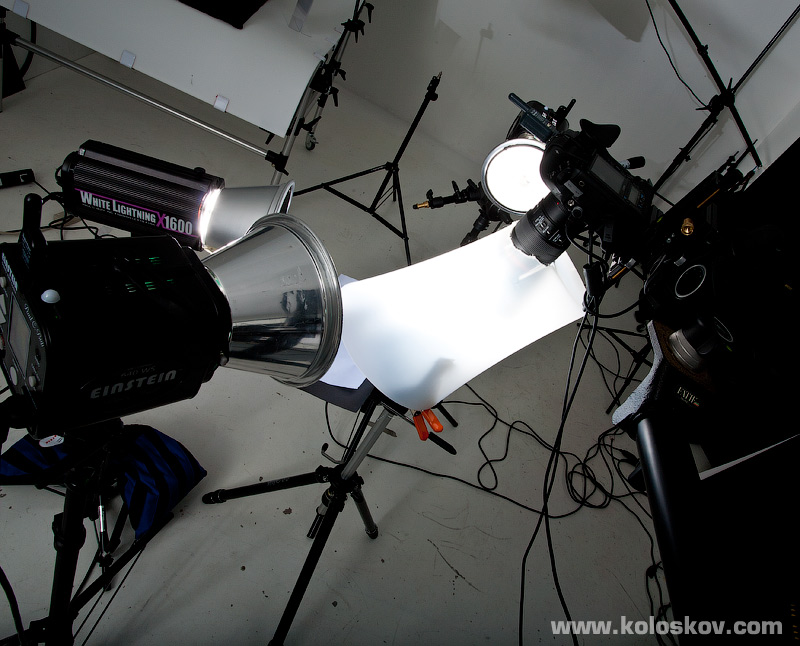
Shooting cone product photography example lighting setup
A very simple setup as you can see. The tricky part was to get lighting to lay down on the subject exactly symmetrical. It was not that easy on that particular setup because I did not make the cone symmetrical: the opening for the lens is not in the center of the cone top. It cost me about 10 additional minutes to eventually set the lighting to get what I needed, carefully positioning them on both sides of the cone.
Another view is below, just to show you more how I used the cone. Again, I would better make the opening for lens exactly in the middle of the cone. Why did I not do it? I was thinking to use this particular cone (I’ve got few) for a jewelry shot, where asymmetrical lighting would work better, but ended up working with the watch.
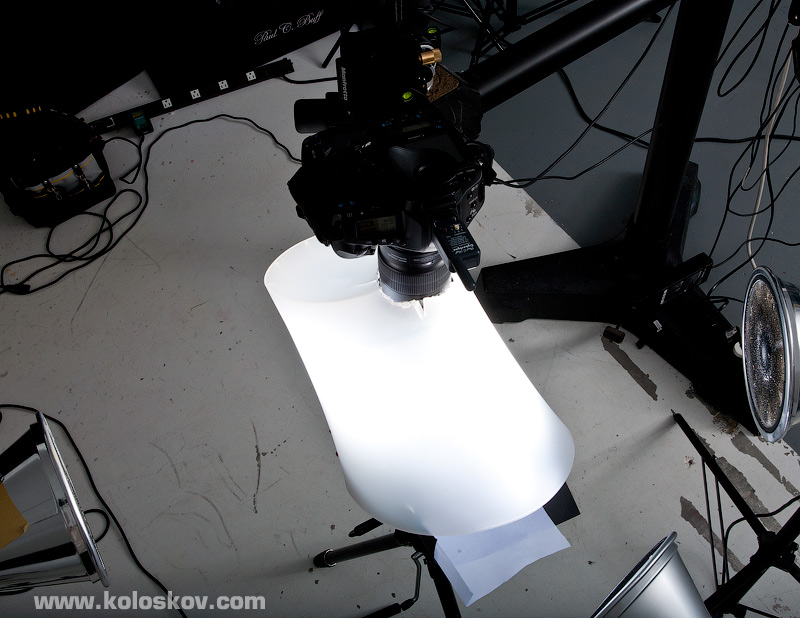
DIY shooting cone example lighting setup
The Bottom View – This is how the watch was positioned inside the cone:
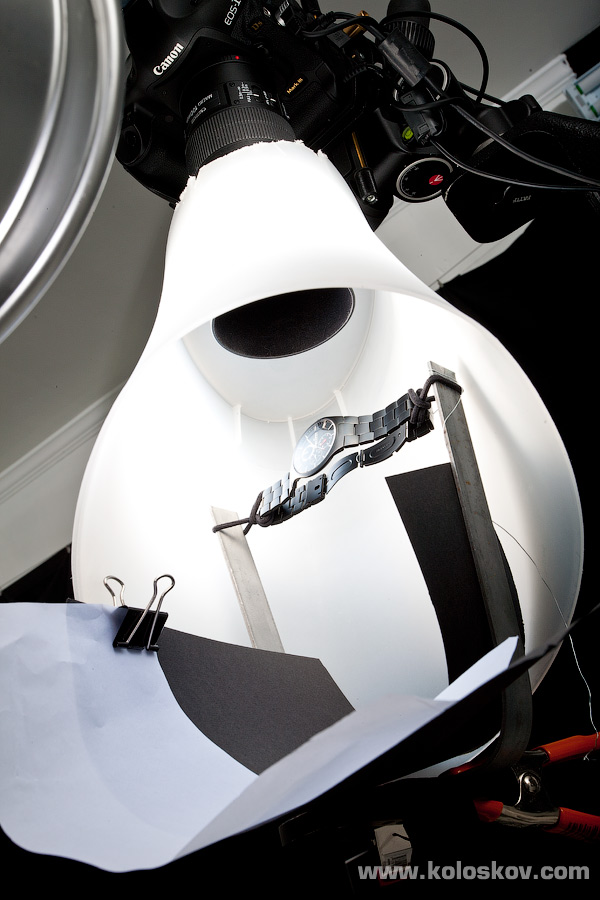
DIY shooting cone in product photography: watch position
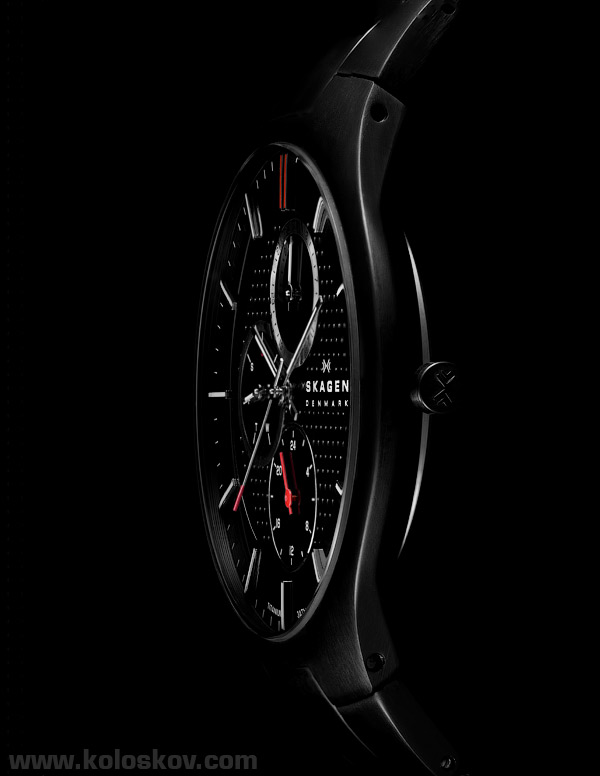
Note the white paper fixed on top of the black background: It was necessary to create the gradient white reflection on the watch glass, it can be seen in the final photo at the beginning of the post. Below is the as-is, directly from the camera RAW image with that white reflection from the white piece of the background:

white reflection on watch glass added
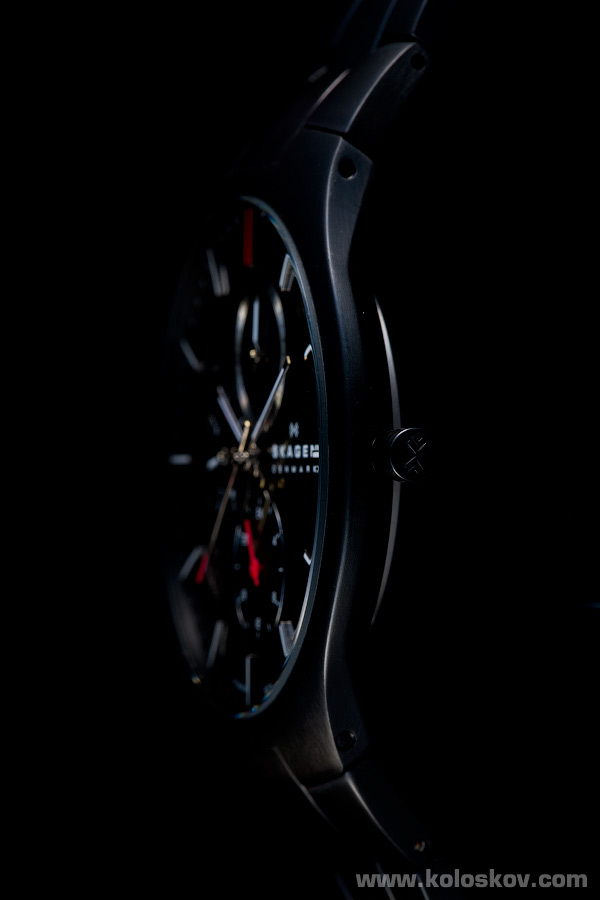
The alternative (final, Focus Stacked) version, without that foggy addition:
Product photography using shooting cone, Men’s watch
I did a total 11 exposures for the final shot: The first five were needed to get it all in focus, using a focus stacking technique (explained in this article). Also, to get watch dial highlighted the way I wanted I would have to combine 2 exposures every time I moved the camera.
I wanted to have the watch body lit by only 2 lights (from both sides), but the watch face was not lit well this way. Adding one more light from the front of the watch face inevitably affects the watch body. Below is what I am talking about: mouse over to see how the 3rd light was changing the composition:
With and without the dial light
The combination of two photos (multiplied by 5, for each focus stacking move) was the most efficient and fastest way to get the job done: total 1.5 hours for shooting, few more hours to get everything fixed (including digital background) in Photoshop. Do you call this cheating? If yes, think about what really matters: the process or the end result?
 |
In the Gearbox |
|
Canon EOS 1Ds Mark III DSLR Lighting, Light Modifiers, and Accessories: Paul C. Buff Lighting: 3×640WS Adobe Lightroom 3 and Canon EOS Utility as a remote capture solution for tethered shooting Exposure Specification: shutter speed 1/250 sec, F16, ISO 100 |
