Advertising Photography –
Behind the Scenes: Making of “Exotic Waffle”
 I want to thank Alex Koloskov and Max Sivyi for the opportunity to be featured on this awesome site full of great artists and valuable knowledge, Photigy.
My name is Mario Olvera and I’ll be sharing with you the process on how this shot was composed and the steps I went through to achive this result, hope you find this interesting and more than anything, helpful for your future composites.
Photographing and compositing the Exotic Waffle
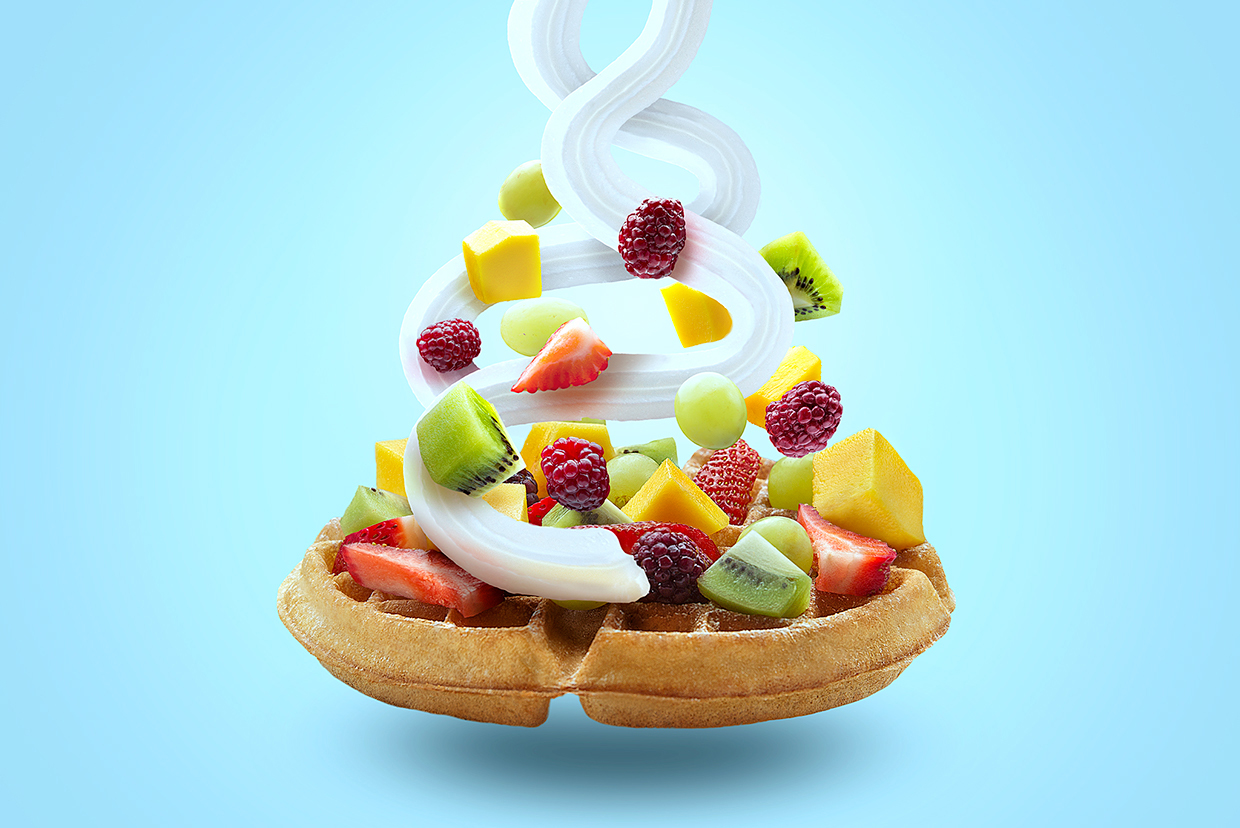
So, this is the final comp that was delivered to the client. At the beginning, he asked for food photography session of 15 plates and 5 beverages, and then I showed him some references of creative product/food/beverages shots that I saw on “Behance.net”, and he got excited by the idea. So, we choose this Exotic waffle to make the creative shot for the big ad.
About the shot
How does the idea came to life – We had a food shooting of about 21 plates, with beverages included, and the client and I choose one plate to be more creative than the others, because it was going to be printed in huge scale.
So, we decided to take the “Exotic Waffle” to make something awesome, this plate was the favorite of them. At the beginning we started with the idea of the fruits exploding all over the place, but through the process I decided that falling would look better because the elements I had for compositing.
Lighting
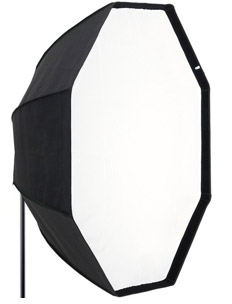
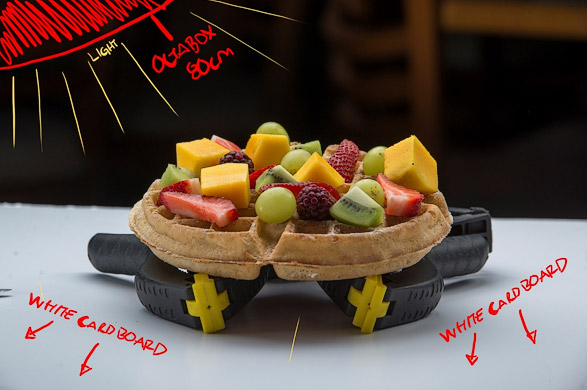
Believe it or not, I used just one light to photograph all the elements. It was the octabox above what made the whole lighting, as the elements where relatively tiny, all the light emitted by the modifier filled the waffle and made really smooth shadow and light transitions. The modifier was positioned on the back/top/right at 45° pointing to the cardboard.
This is the modifier that I used for the shot:
But, that’s not all, on the bottom of every shot, I had a big white cardboard to reflect the light emitted by the modifier, you can see it on the next picture:
The floating fruits
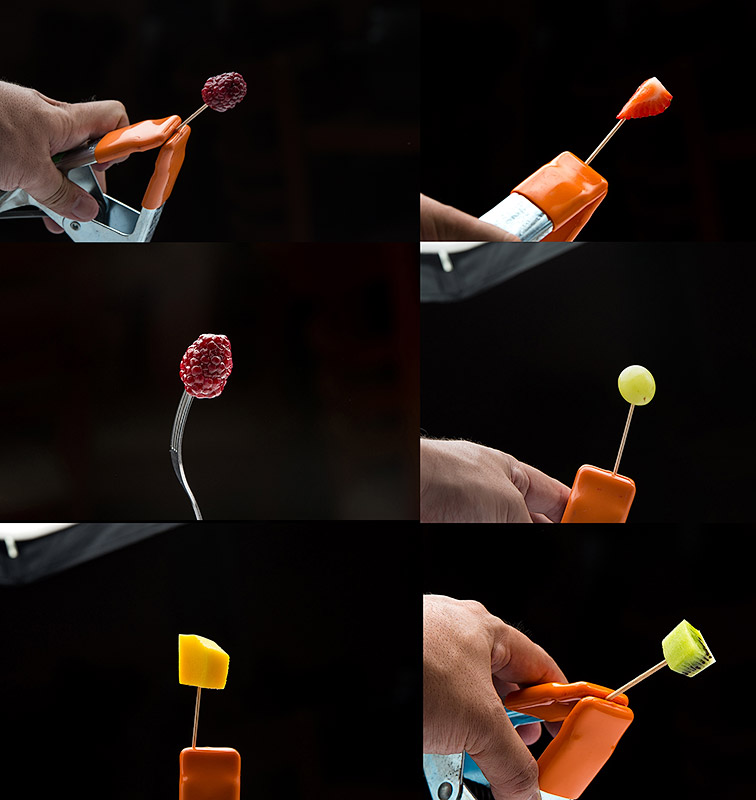
– We took like 5 different variants of each fruit, and with the help of a toothpick held by a clip, we stabilized them in the air, shooting against with an underexposed background, so that way it was going to be easier to separate the fruits from the background in post-production.
As you can see, I firstly used a fork to hold the fruits, but then I ask for a toothpick and it made my job easier.
Post-production
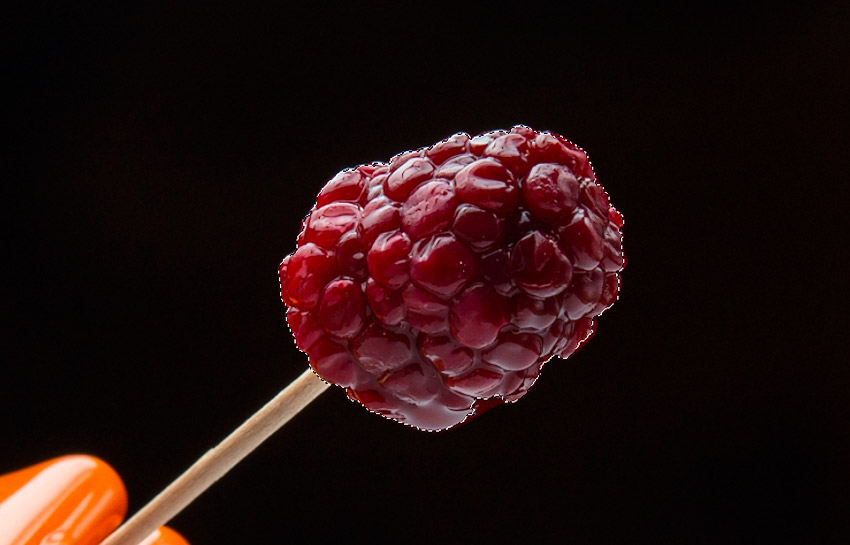
Here comes the fun part, well everything is fun but I love post!! – I thought I was going to need to rotoscope the fruits with the pen, every one of us know that is the most boring job but doing it with patient you’ll have the results, but in this case, I used the “Quick Selection Tool”, so I just clicked at the center of the fruits, and as Photoshop is so intelligent, it selected me to the perfection the fruit, then I just contracted the selection by 2px and feather it by 2px so that way fruits could be integrated better. (Remember that sharp edges make compositing look fake, so that way always blur a little bit the edges of every element you are compositing).
About the background and shadow – It is a gradient from cyan to a lighter cyan, and for the shadow I used a deep blue almost desaturated in “multiply” mode, all in separated layers.
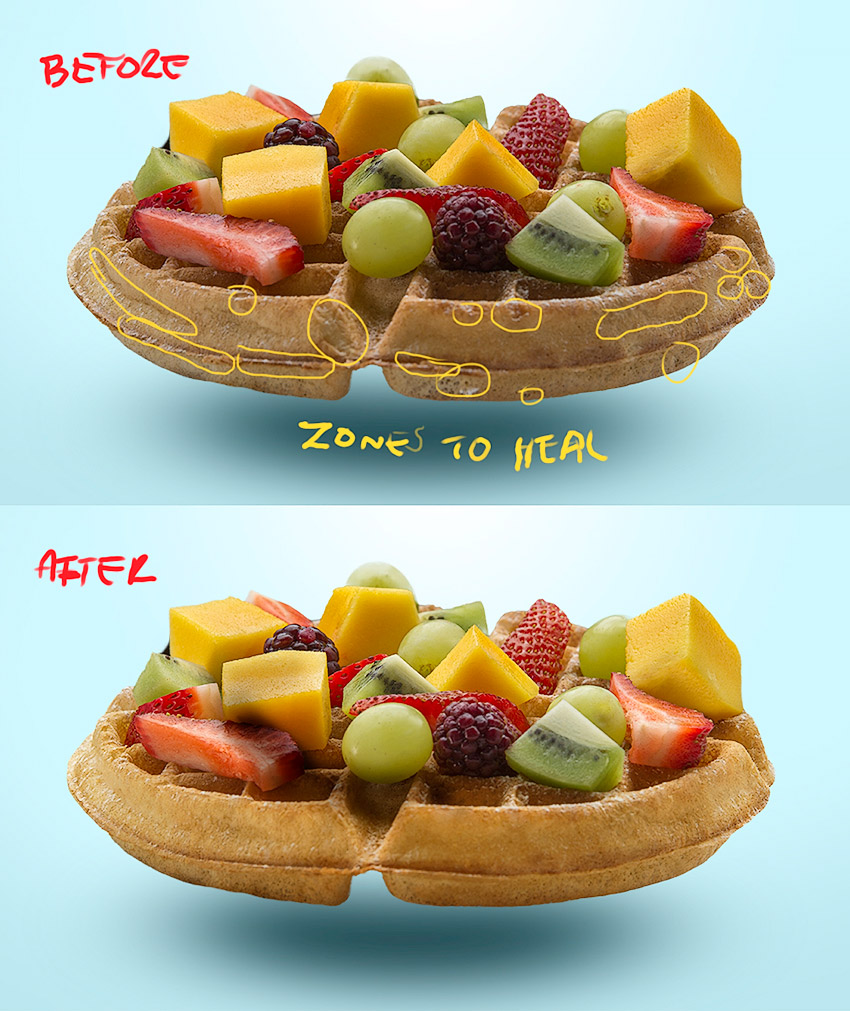
Cleaning the waffle – As all we know, food photography has to be always retouched, it always have scratches or holes that we must clone, heal or smooth to make the food look more “tasty” or “perfect”.
Here is the before and after retouched waffle only and the zones that has to be healed. Also I did a little bit of color correction by zones because the waffle was a little bit death, I gave it more color.
I used three of my favorite tools that Photoshop has: Clone Stamp Tool , Healing Brush Tool and the Patch Tool
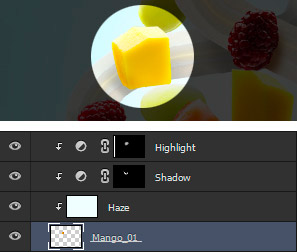
Retouching and integrating the flying fruits – Once I had every fruit masked, I made 3 layers with a clipping mask above each one to make a better integration, the first layer with a solid color filled by the color of the background, so that way I could add a little bit of haze to it, then, two curves adjustment layers like dodge and burn, as shadows and highlights.
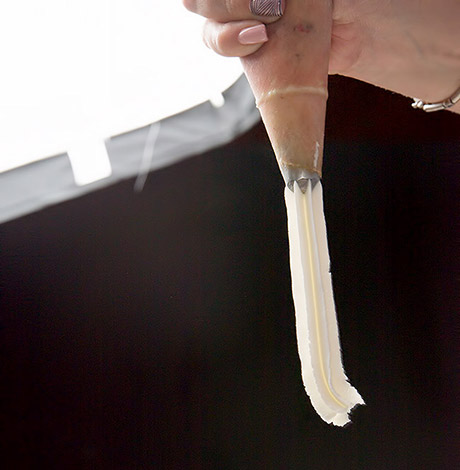
About the whipped cream, the biggest challenge – I took just one shot of the whipped cream, and I was going to take it out of the concept because the SOOC was very underexposed, but before quitting, I tried if I could do something with it and guess what, it worked :D!
I turned up a lot the exposure in Camera RAW, and then I had something like this, also you can see a little bit of the octabox I used for the lighting:
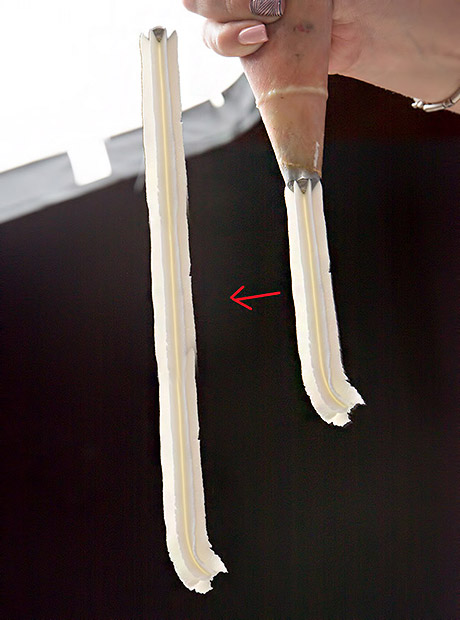
Then, with the beautiful “Quick Selection Tool” I selected just the whipped cream, separated it into another layer, and to make a larger whipped cream, I duplicated the layer two times and I got something like this:
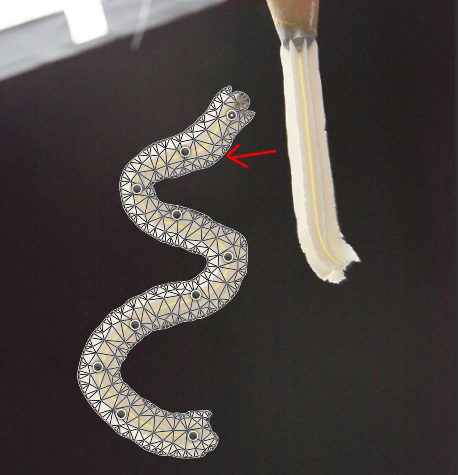
After that, I deformed the whipped cream with the awesome future of Photoshop: Edit -> Puppet Warp, for those who don’t know, the tool lead you deform the pixels with pins you put in the mesh, as an example of what I did:
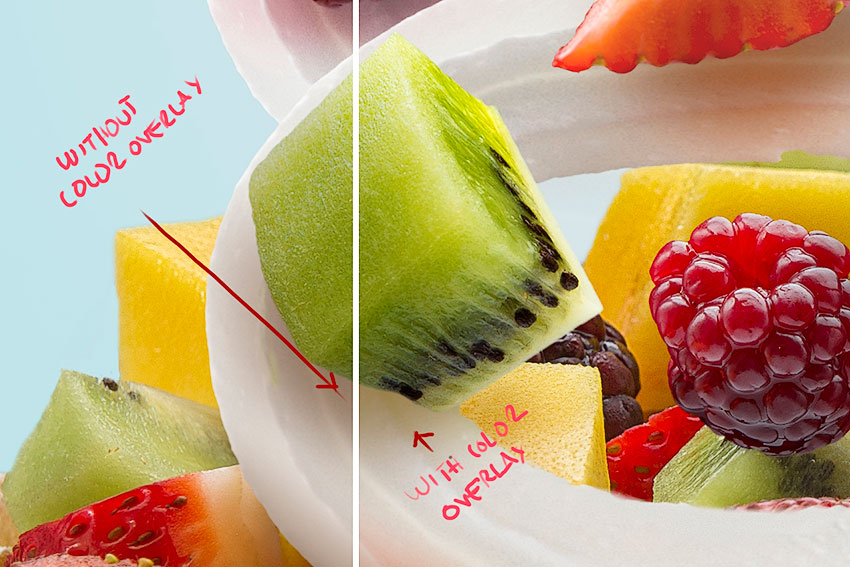
Once I had the shape, I putted it on a layer above all and made some adjustment layers for color correction, shadows and highlights. Another layer was done to simulate the light reflected by the fruits, I used the color of each fruit to tint its own shadow casted on the whipped cream to make it more believable and natural.
Everything reflects light and the white color reflects all colors, I’ll show you on the next picture:
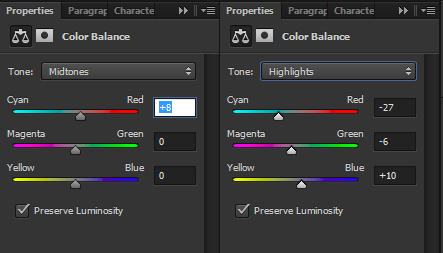
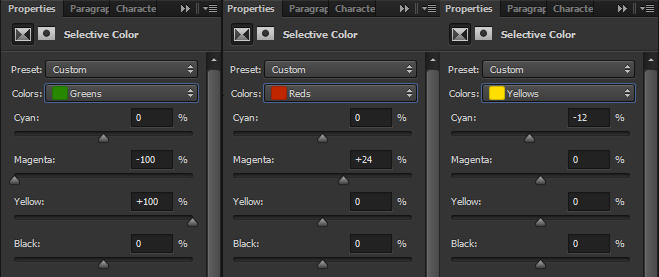
Final Touch – For the final touch, I always made a global color correction, this time I used two adjustment layers, “Color Balance” to change the midtones and highlights, and “Selective Color” To give it color more of its color, for example: Greens (-100% Magenta) Reds (+24 Magenta) Yellows (-12% Cyan).
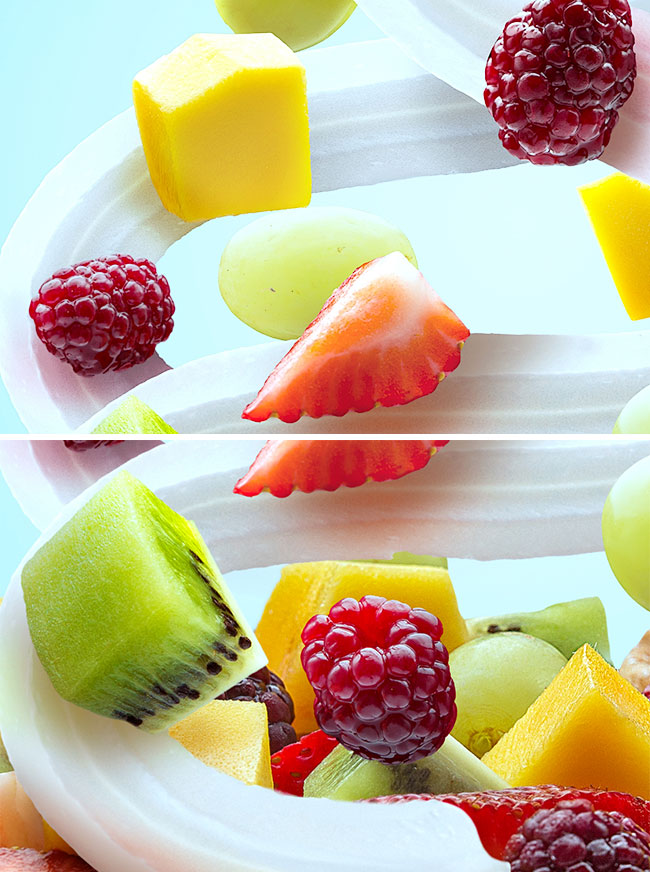
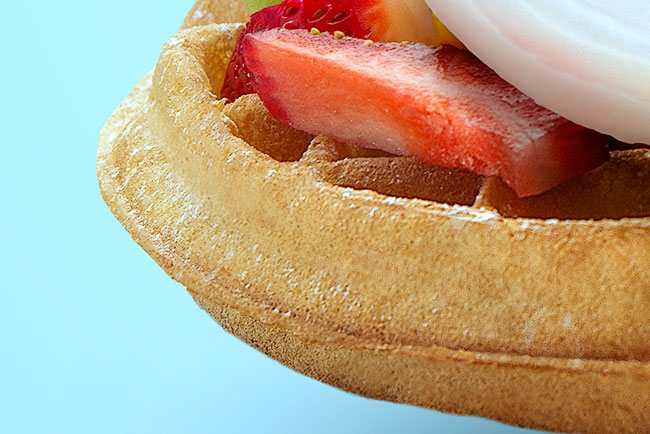
Some close up to see details.
Final image
In the Gearbox |
|
|
This is it :-)!
Thank you for reading and i hope you’ve enjoyed watching the process as much as I did making the composition, was a huge challenge for me and I learned so much from this one!
I’m happy to share knowledge and I feel really grateful to be part of this awesome community where I know there’s so much to learn from.
Thanks once again to Alex Koloskov and Max Sivyi for giving me the opportunity to write the article.
Now I’m going to take a waffle because this made me hungry haha!

