Cosmetic Brushes Shot:
BTS from a commercial assignment
This time it was a shoot for the front page of the new Design website, and we had new, “creative” requirements from the client. Meaning we were free to select how many products to shoot and how to position them. The most cool thing that we were required was to compose the shot on a dark background.
Why do I like to shoot on dark backgrounds? One of the reasons is because we did so many product shots (mostly for web and print catalogs), and all of them on a white background, and it became a little boring. The second reason is that almost any product looks better, more dramatic, on a darker background: this is why Lightroom and the majority of the photo viewers (now even flickr lighbox) have a gray or darkish-gray background by default.
Rest of the Requirements:
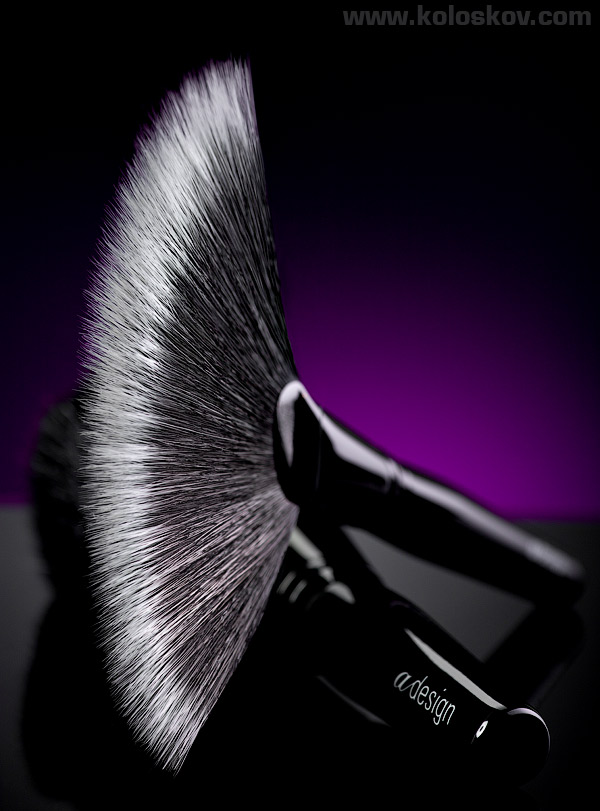
No other props beside brushes are used, no female model or powder (was my first intention to use). The quality of the brush hair must be clearly shown.
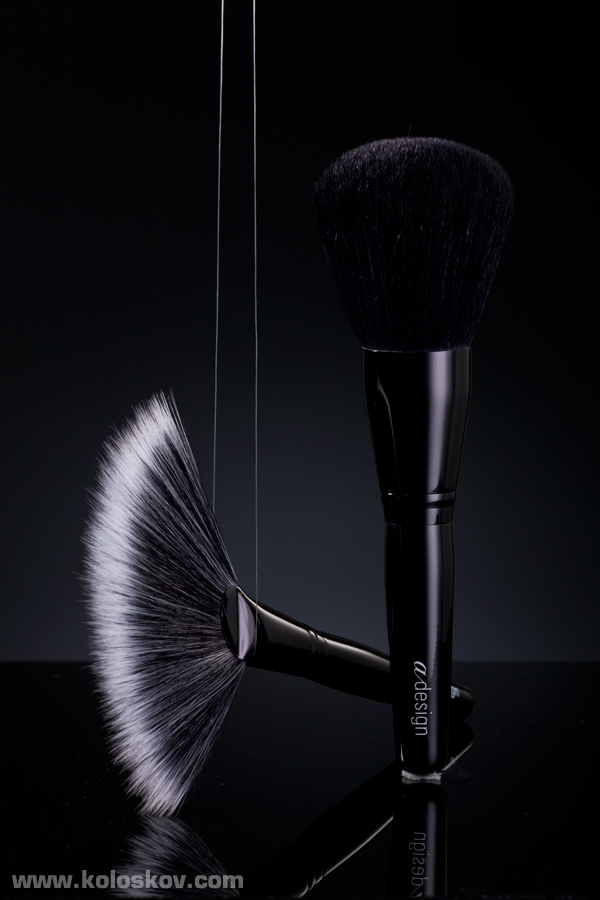
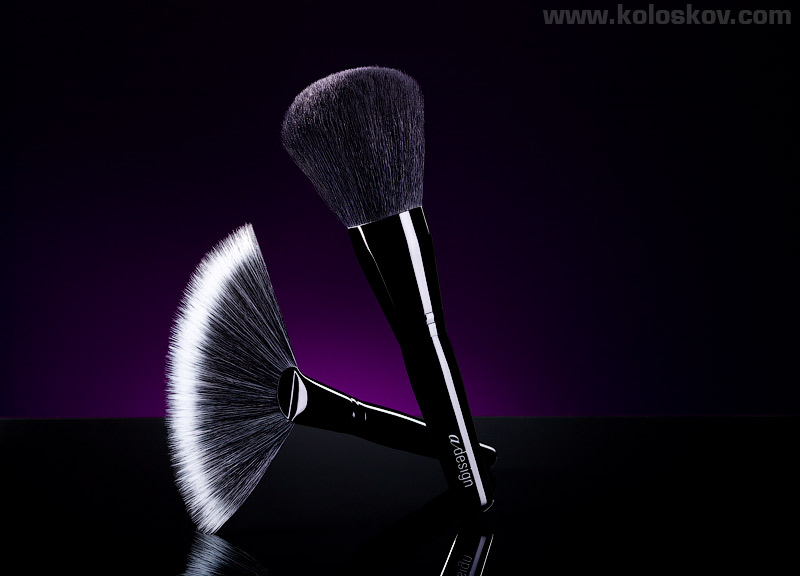
So, after 3.5 hours in the studio, 5+ different lighting setups and different product compositions we got this:
Now, let me show you how it was done.
The Lighting Setup
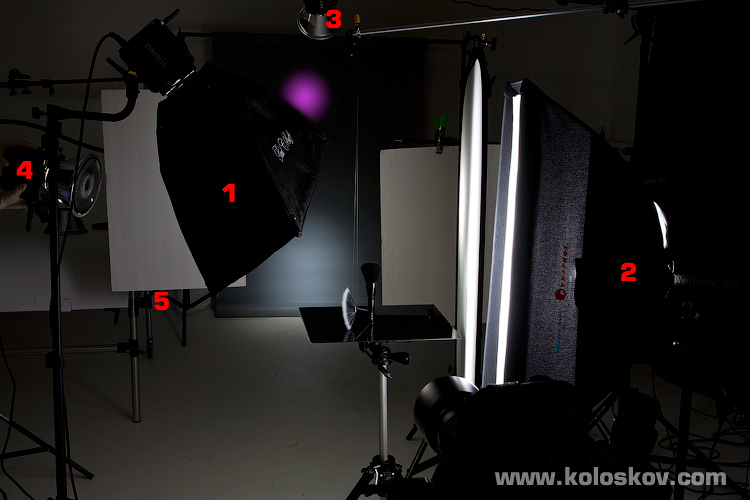
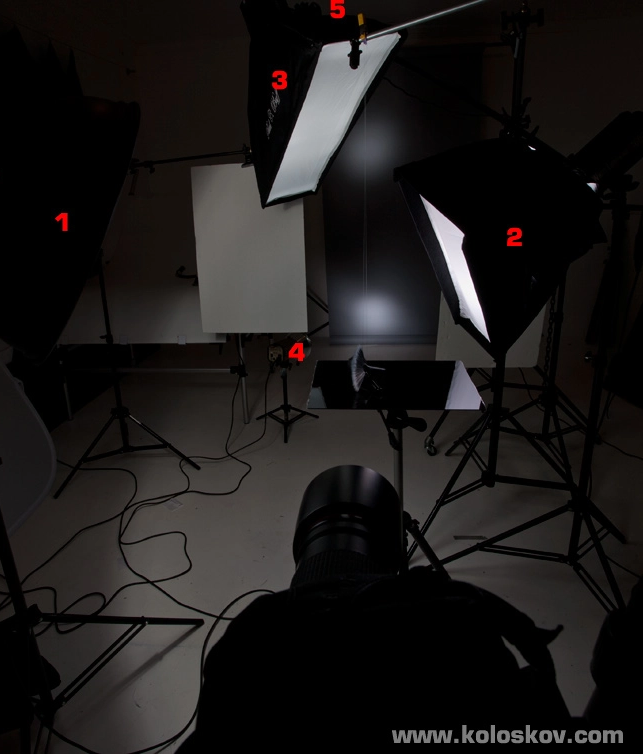
Unfortunately, I did not have the final look of the lighting setup. But this is even better, as I have several “builder edition” setups photographed, and I’ll use them to explain how we got to the final shot. So, lets look at this one:
Two brushes were placed on the black glossy Plexiglas (why does spell check makes it uppercase?:)), one was hung on a fishing line. I used a DIY adjustable table made from my old heavy metal tripod: a small adjustable shooting table is a must for such projects, this way I can easily place any light modifier around it.
A total of five light sources were used: Lights one, two and four were highlighting the brushes, three and five (fifth is not visible here, it is hidden behind the screen: It is that large spot low on a background made by #5) were for the backstage. I also used 2 screens (one side black other white foam-boards), placed from both sides from the shooting plane to protect the backdrop from light spills.
Our “first edition” setup was different: we did not have lights #3, and #4.
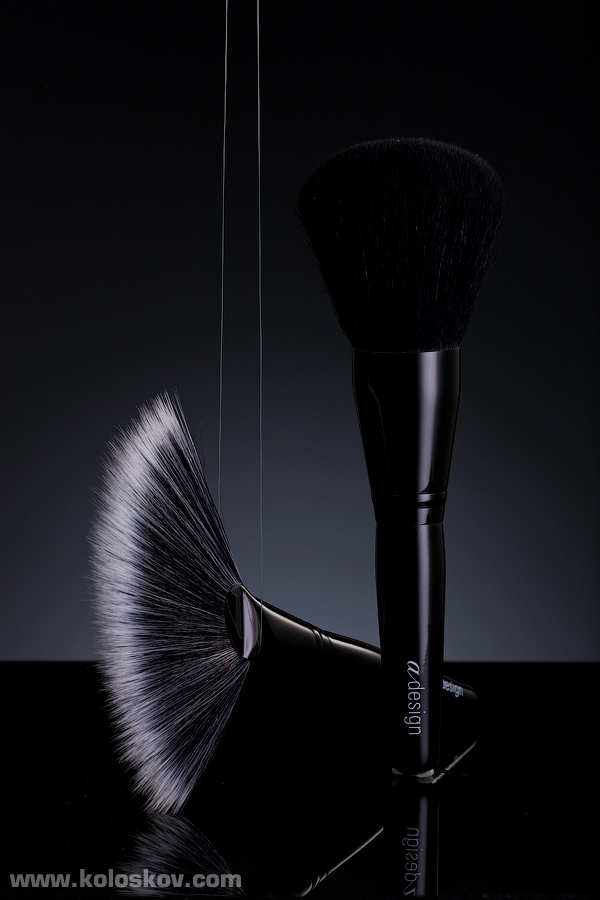
Lets see what we got without these two light sources:
Looks nice, but right after we got it on a studio’s monitor (I shoot tethered), I immediately noticed that the black brushes were indistinguishable from the black background plate. There was no way (and reason) to highlight a tabletop surface directly, so I’ve added a spot (purple spot on a gray background in our setup shot from light #3) to light the background (gray paper) the way it gets reflected from the table surface. Also, I’ve dialed down light #5 to a dim a spot behind the brushes.
Below is the Result:
As we see, the reflection from that additional spot on a background created a very little, but clearly visible illumination on the black glossy table surface. It was enough to separate brushes from the table. The shot looks better now, however lets look at the black brush hair: the left side of it sinks in the deep black blacks of the backdrop.
Therefore, #4 light source was added: a 10º spot light, aimed at the black brush hair. You can see on the setup photo how assistant was holding it to find a right spot.
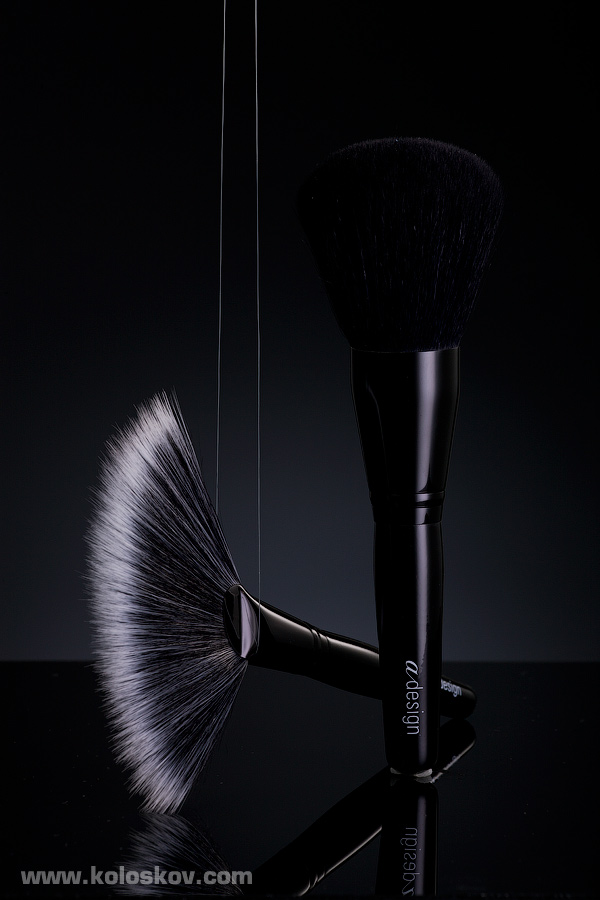
The result:
Now the shoot was much closer to a satisfactory result I was looking for. I just need to add a screen to mask a spill from that hair spot.
However this was not the end: We did a few more variations of this shot (we often do such), so the client will have a wider selection of the proofs. One of them was a version from a very similar setup without a diffuser panel on the right: this way glossy brush handle had a more glossy look. When the client looked at the proofs, they liked the other, “sharp” lighting version, and also suggested that the vertical brush be tilted towards the horizon, which would make the composition softer.
So, this is what we did, I also added a gel to a lower background spot, to make it purple. Purple was one of the colors of aDesing, and the client liked the idea. Lighting setup was also changed to support a new composition. Like I said, I do not have the exact shot of it, but here is a similar one, from the same photo-session:
The main difference was that now we have two stripboxes: each created a reflection for the corresponded brush (brush which was in parallel with the box light). If you look at the first photo of this post, you’ll see what I mean: each brush has a nice long reflection on its handle, and that was from these two different stripboxes positioned exactly the same way as the brushes were positioned.
BTW, this is what we got from this setup (except a gel was added):
In the Gearbox |
|
|
Canon EOS 1Ds Mark III DSLR Lighting, Light Modifiers, and Accessories: Paul C. Buff Lighting: 4×1600WS, 2xAB800 Exposure specification: shutter speed 1/250 sec, F18, ISO 100 |


 Only for Pro Club Members