How to photograph cosmetic with a DIY cone and two speedlites
Hi everyone! Today I’ll provide you through the process of shooting cosmetic can.
In this article you’ll know how to use DIY cone for shooting highly reflective surfaces. You can create similar cone by yourself or buy the floor lamp in IKEA. It’s easy to use cone in many different scenarios, not only for shooting cosmetic stuff.
Every product photographer should deliver clear result for viewers. Using appropriate techniques will help you not only deliver outstanding pictures, but do it with ease. And that’s how you can achieve your goal.
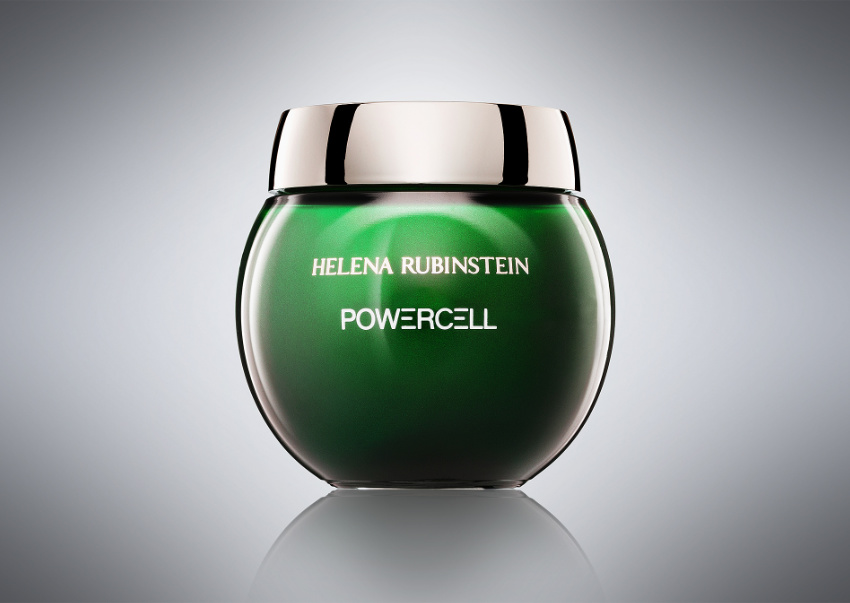
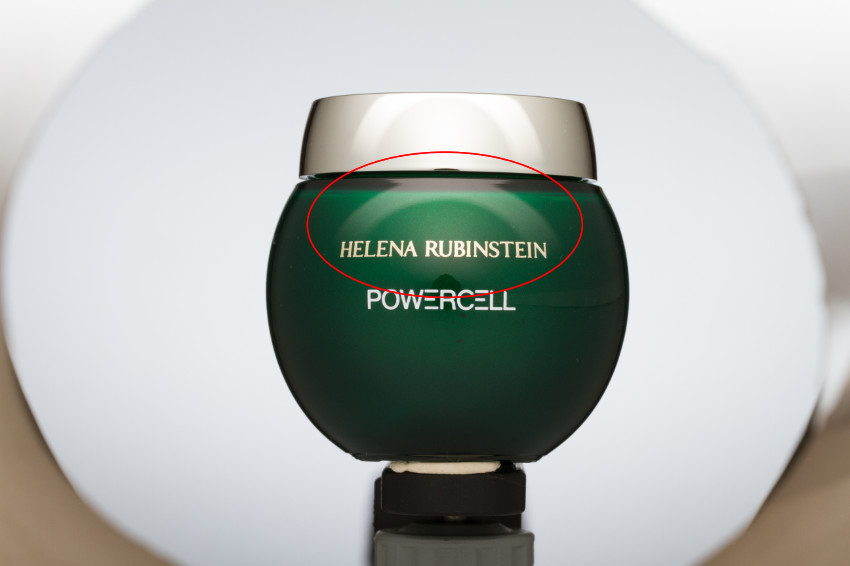
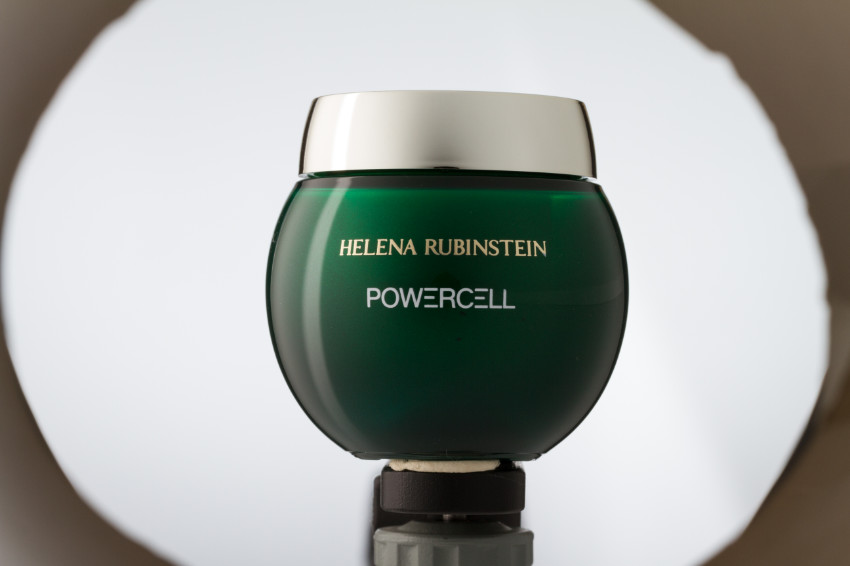
The idea behind this shot is pretty simple. I got some nice cosmetic stuff in interesting packaging. It’s rounded and has kinda 2 layers structure. First layer is plastic sphere where actually creme is located. And 2nd layer is clear plexiglass.
I’ve tried to find a good reference images in the Internet. And how do you think how many I found? Zero.
Really, no good photos of this product. Just type in Google if you curious: “powercell helena rubinstein”.
Since that moment I realized that I have to rely on myself. I’ve tried to use diffusion panels on both sides of the creme. But the area which I should cover is supposed to be pretty big! The whole object acts like a cylindrical mirror, especially shiny cap. So I decided to use DIY cone. If we put something inside a cone, it will reflects only white surface, because cone is covers shooting object completely. There aren’t any gaps inside it, like when you shoot with few diffusion panels. Other side of “magic” cone is that you should to create a volume for your object. Otherwise any shiny surfaces will be look completely flat.
 Only for Pro Club Members
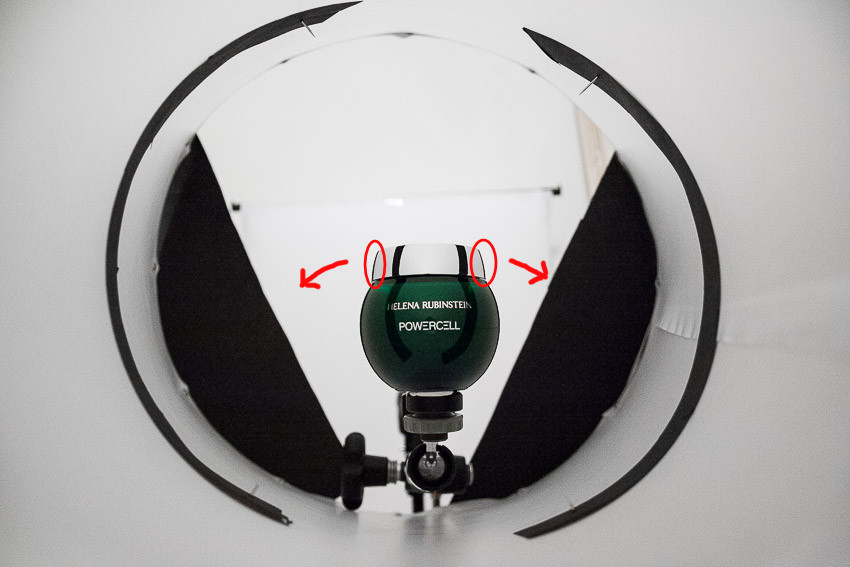
I put the creme on the end of Manfrotto Magic Arm (that plate for mounting camera) and covered it by cone. I think the main thing which you should worry about is what reflection picks up your shooting object at the both sides. I was surprised when I put the creme so deep into cone and still seen unwanted reflections. You can see two black stripes attached to the metal rim. They are create black lines on the cap.
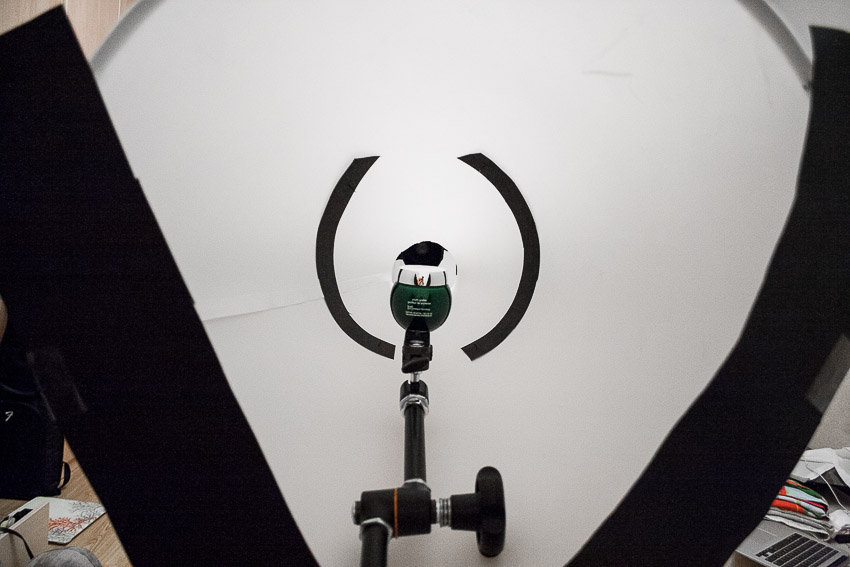
View from another side if the cone.
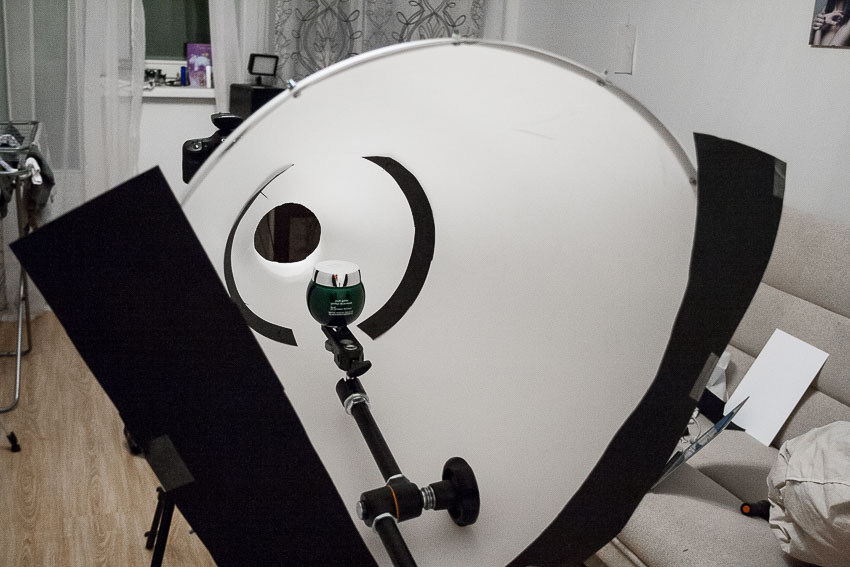
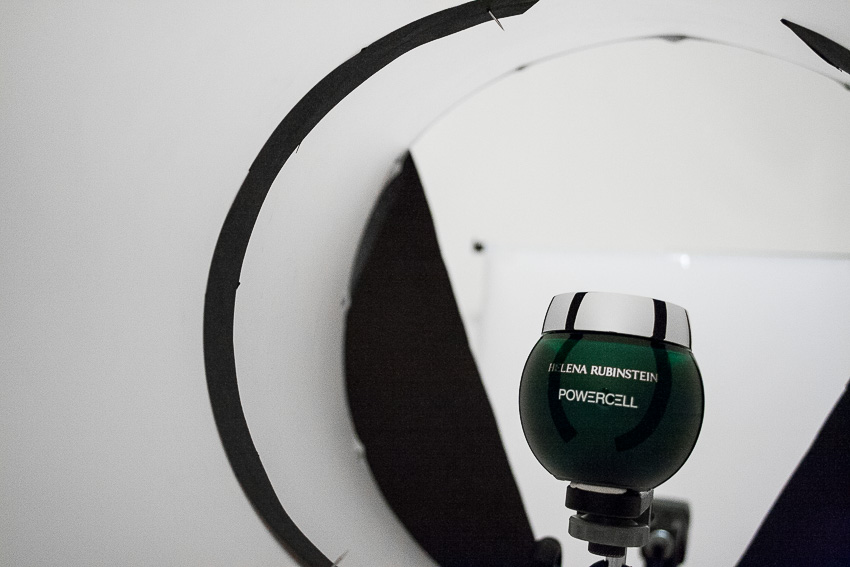
I sticked black pieces of cardboard to the inner surface using pins. Those black stripes are reflect on the cap, but at this time in different position. It was tricky part since define right location for stripes is uneasy task if you don’t have an assistant.
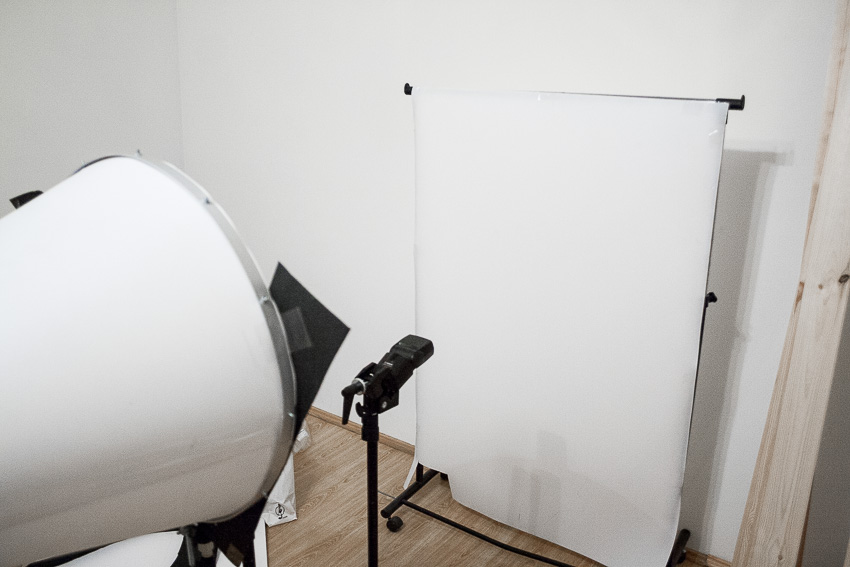
As a background I used white scrim. Frame is a rack for clothes, while diffusion material is Savage Translum plastic. Light source for background is naked Canon 430 EX II zoomed to 80 mm.
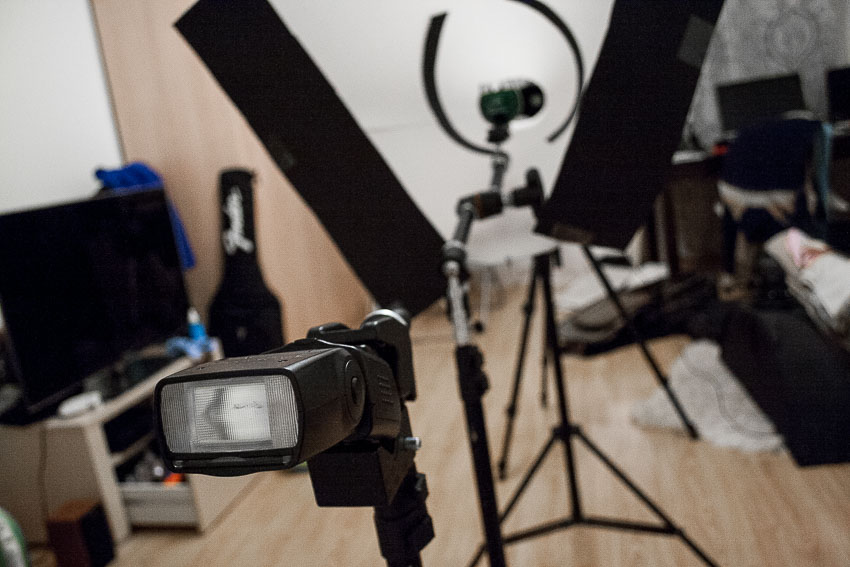
You may ask, where the heck whole lighting setup? Don’t worry, you’ll set in a moment. Since I used only two speedlites, there’s only one way to create a sense of using 5-6 light sources. The answer is a composite. By combining several shots in one scene we can achieve our goal. Object is completely static, it allows to put light anywhere you want. Just make sure you don’t move camera during shooting. Otherwise you’ll spend more time in Photoshop matching different layers, which undoubtedly takes more time.
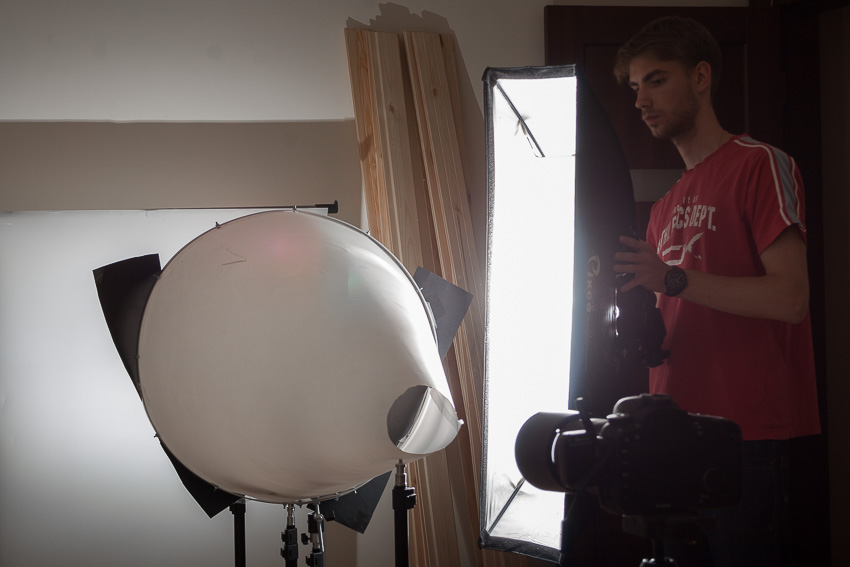
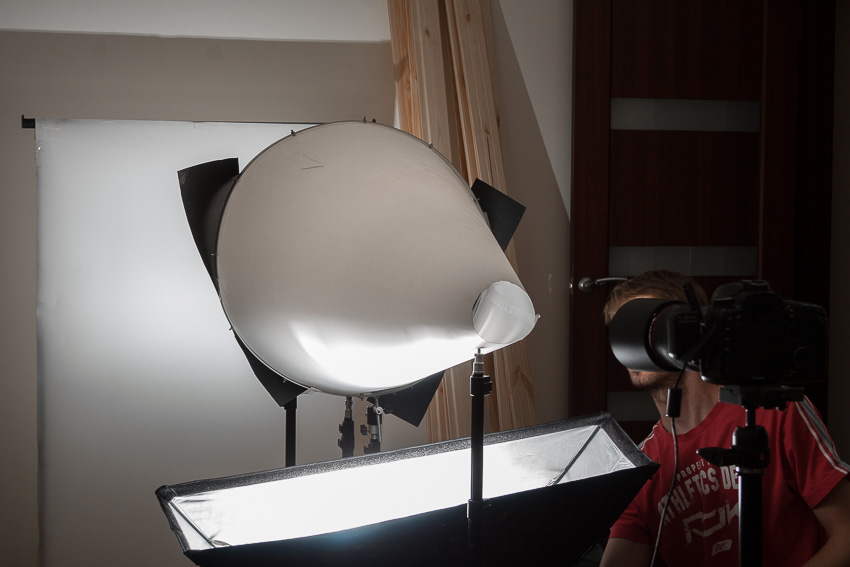
I removed outer diffusion layer from stripbox to get harder light. I did it because I wanted to see sharp and clean reflections and highlights, regular set up of stripbox with 2 diffusion layers didn’t work.
I can’t suggest exactly position of light source, because it almost depends of object. Just shoot and watch what you’re getting. Pay attention to any minor changes.
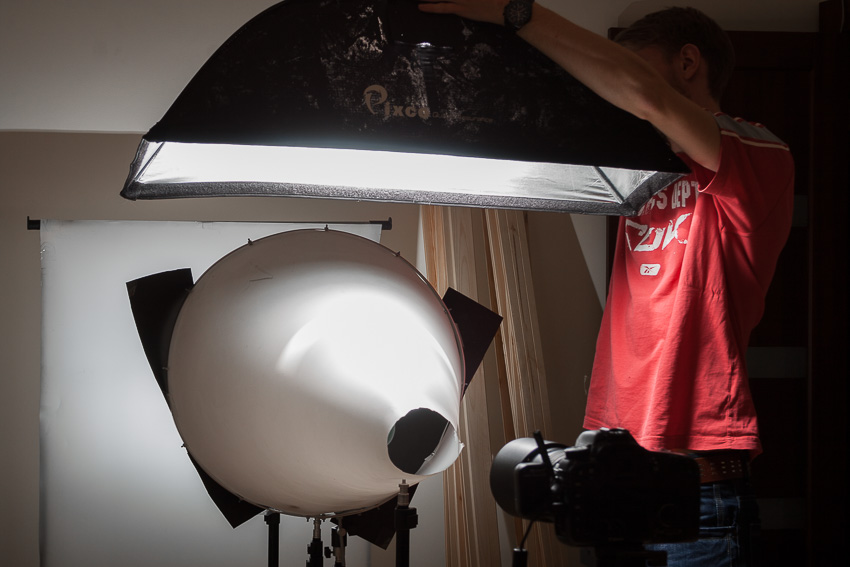
You can adjust diffusion value of highlight by position of light source. Here I hanged stripbox at 20 cm above the cone, this position gave crisp highlight on the can. If I would get more softer look, I likely put a front diffuser on the stripbox and move stripbox closer to the cone.
If you don’t have a bunch of light sources, composite work will help you to improve your vision. Evaluate lack of equipment as opportunity to reveal your talent. Because each frame which you’ll use in final work should be nailed. You can’t just get average shots and make a nice image. Every tiny lines counts.
Good idea is get as many shots as possible to choose desired shots later. You’ll be upset if you’ll miss something. I know, I was.
I didn’t use the shot above in final work, but I got some lesson how light interacts with diffusion material at different angles. To get this type of highlight I put stripbox as close as I can to the cone which gives nice thin line.
POSTPRODUCTION VIDEO
Below you can see the whole process of retouching during 5 min. The actual time of retouching was approximately 2 hours. I used basic techniques to blend all shots into final composition. If you have any questions about this part, feel free to ask me.
Here it is, I hope you learned something new from my article. Please contact me if you have some questions or suggestions.
 |
In the Gearbox |
|
Canon 7D |

Good Tutorial. Thanks a lot!
Thanks Daniel! 😉