In the second article of our series, “Top Tools for Managing the Workflow of a Production Shoot,” we talked about the step-by-step process of planning, budgeting, and invoicing an in-studio shoot through BlinkBid. In this article, we’ll focus on going through the same process for an on-location shoot. There are a few additional line items and differences with regard to costs for things such as travel and rentals, which we’ll also cover in this article.
To walk you through using BlinkBid for an on-location shoot, let’s create a realistic scenario for an assignment. In our example, the fictitious client is a local restaurant that needs imagery for its new physical and online menu. Each item needs to be shot with the restaurant’s environment featured prominently, hence the need for on-location work. Once you log into BlinkBid, you can start jotting down the initial job descriptions and estimates.
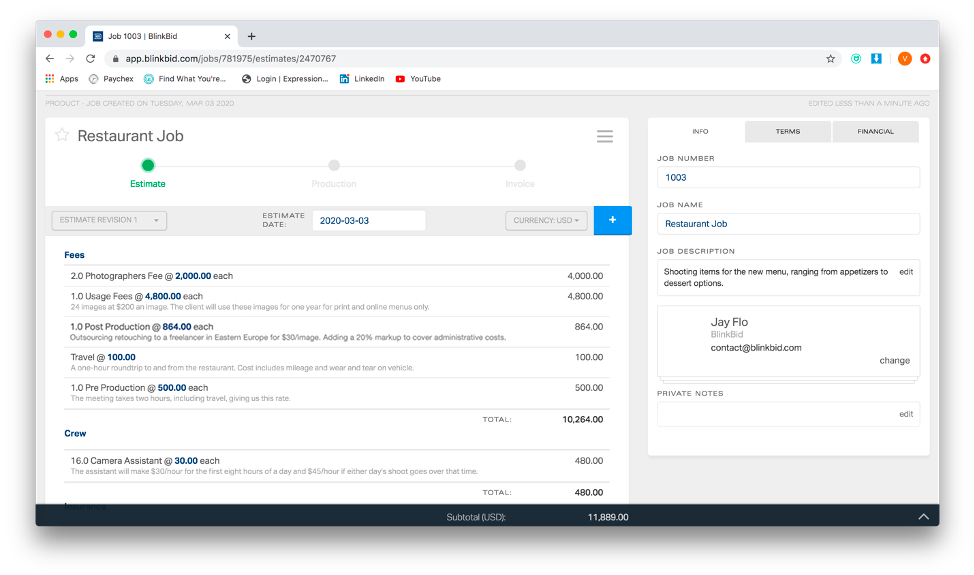
Though there isn’t enough money in the budget for a food stylist, the chef will prepare the food according to your schedule so that the dishes look nice and fresh. After sitting down with the restaurant’s owner, you’ve determined that a two-day shoot, eight hours each day should suffice. Within this eight-hour window each day, you’ve accounted for the amount of time it will take to shoot each dish (you’ll be photographing twelve total menu items and getting two shots per item) along with setup time, a lunch break, packing up, and overall travel to and from the location.
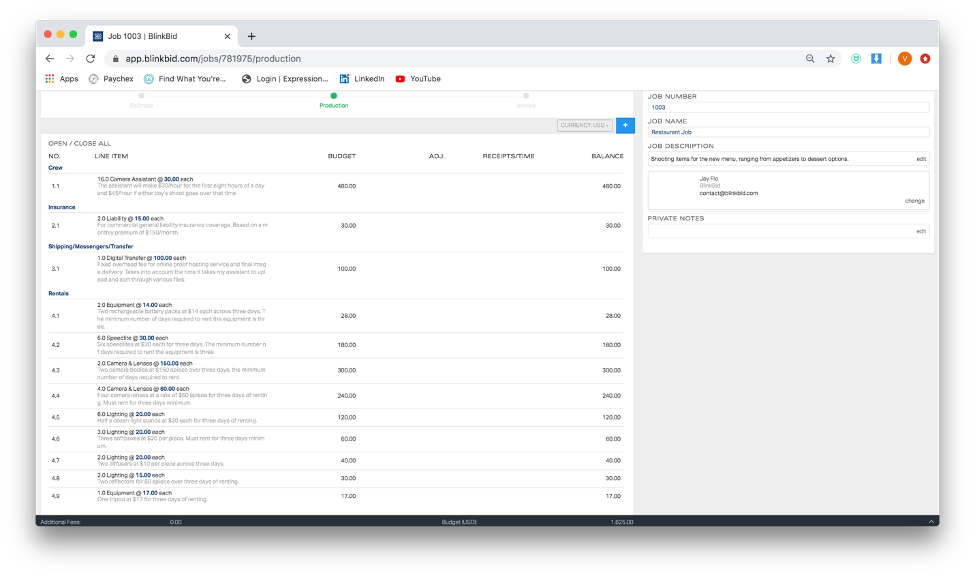
In the above image, we can see that you’ve quoted your services at a $2,000 day-rate to cover fees as well as pre- and post-production phases. You’ve budgeted for an assistant and come to terms with the client on things like usage, post-production, and travel fees ahead of shoot day. Those rates don’t differ too much from what you’d expect to see for an in-studio shoot. Instead, keep an eye out for the “travel” and “rental” portions of the estimate. Since you’re going to be making two separate hour-long roundtrips over two days, we’ll make the travel costs $100 to account for things like mileage and wear and tear on your vehicle. Now to the big change: rental costs.
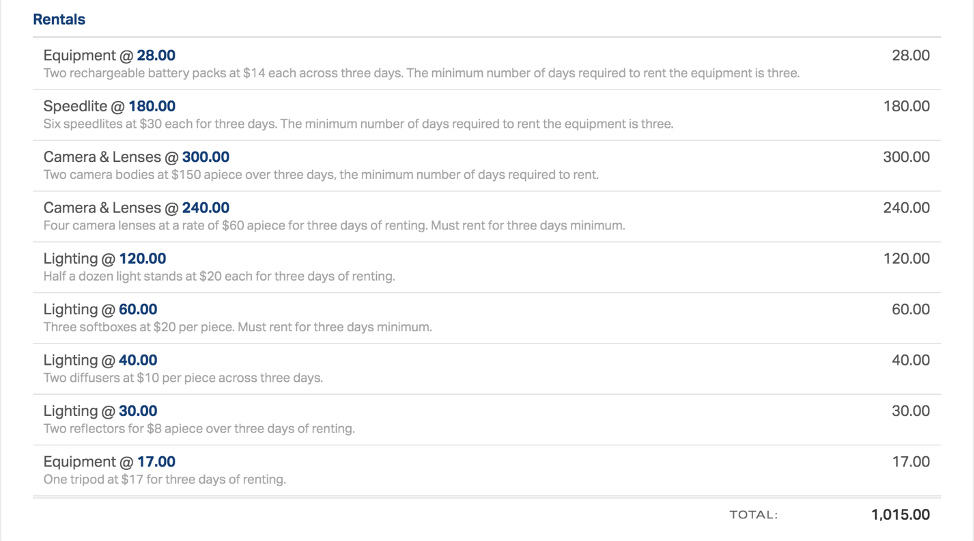
There are a couple of things to note here. First, many (but not all) rental houses require you to take their equipment out for a minimum of three days. So, even though the shoot itself is two days, you’ll have the equipment for an extra day. Second, since the client is paying for this equipment, you want to make sure you’re armed with quality gear to get the best imagery. Don’t be afraid to budget for more pricy pieces of equipment if it means the work will be enhanced as a result. Another way of putting it: don’t cheap out, or the final deliverables could suffer. This doesn’t mean you need a top-of-the-line camera body, but it does mean you should use the best lenses available.
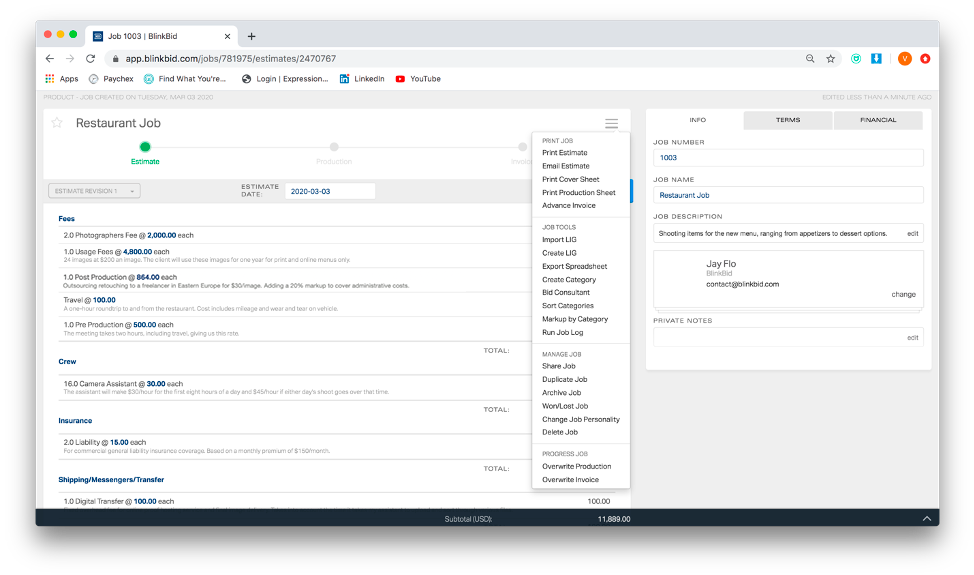
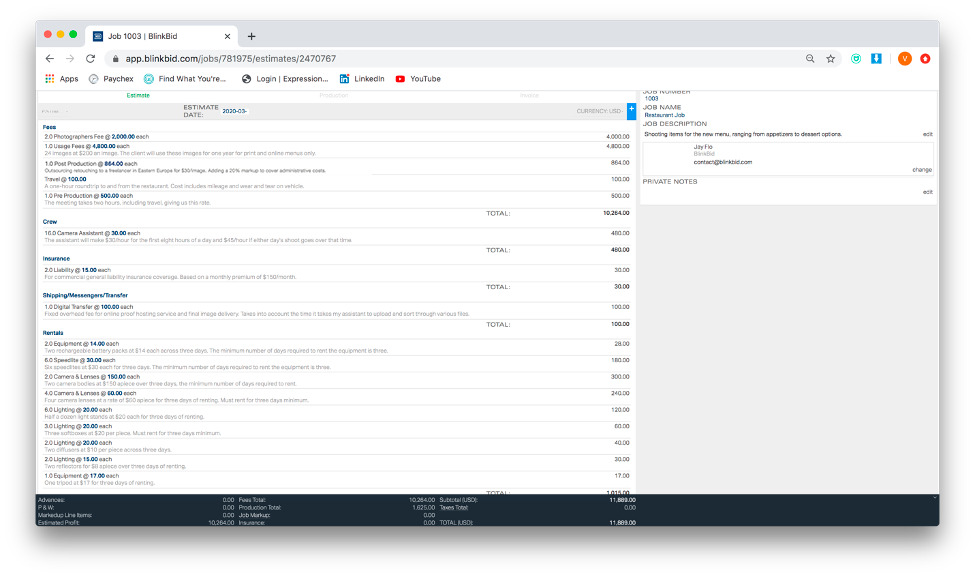
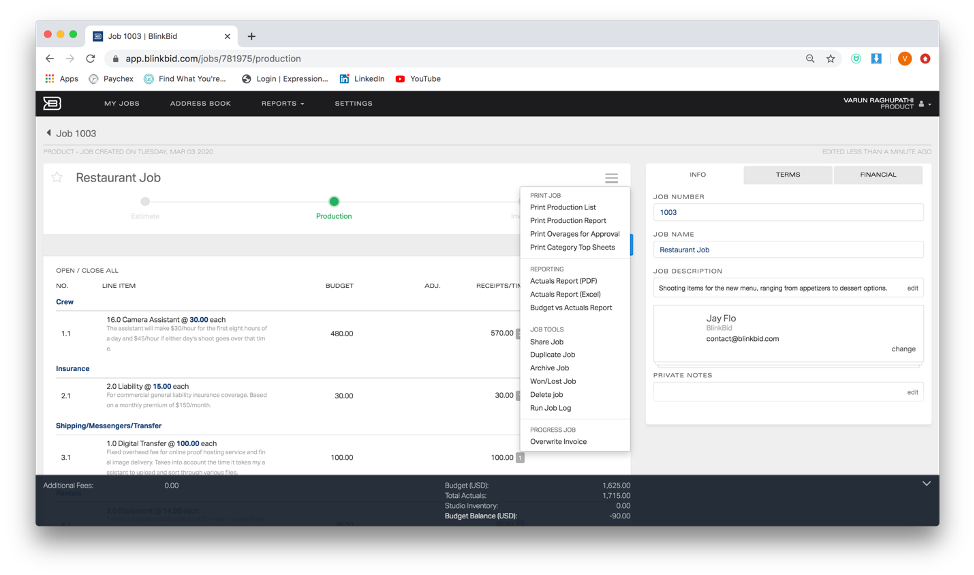
Once you have your estimate squared away, you’ll want to click on the three lines (those three lines will become your best friend on this site) and scroll down until you see “transfer to production” (or in our case, “overwrite production,” since we went back and made changes to the estimate). This will get you to the next page, which covers the actual budget for things like an assistant fee, insurance costs, and those rentals we covered earlier.
The beauty of BlinkBid is that it allows you to go back and redo your invoice to account for a variety of circumstances. The site then saves these changes and lets you come back to these pages time and time again to make sure everything is good to go before you send the final invoice to the client. One of those bits of happenstance could be the shoot days running long. For example, if both days are supposed to be eight-hour sessions and end up nine hours each, that’s two extra hours of overtime you need to pay your assistant at the standard time-and-a-half rate.
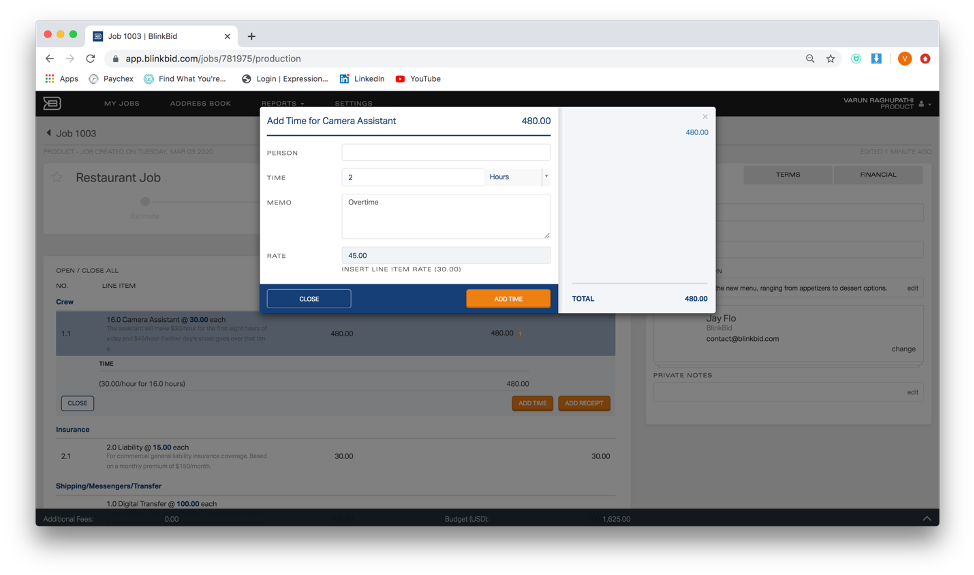
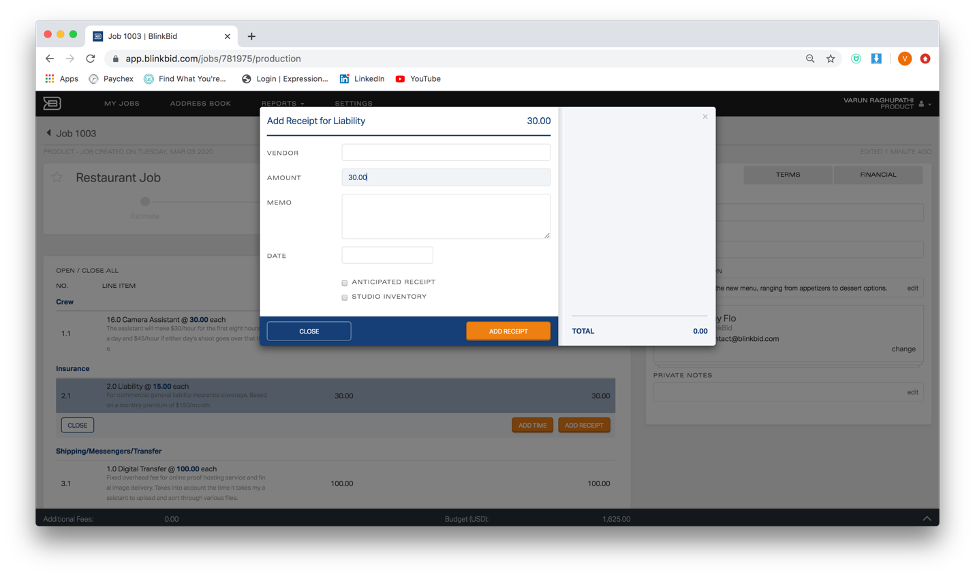
To add the new rate, click on the line item, hit “add time,” and fill in the boxes. Then, click “add time” again and hit close. Once you’ve taken care of the outstanding fees, go through the line items and add the receipts for each one.
Once you’ve noted every cost, your new production budget will look like this:
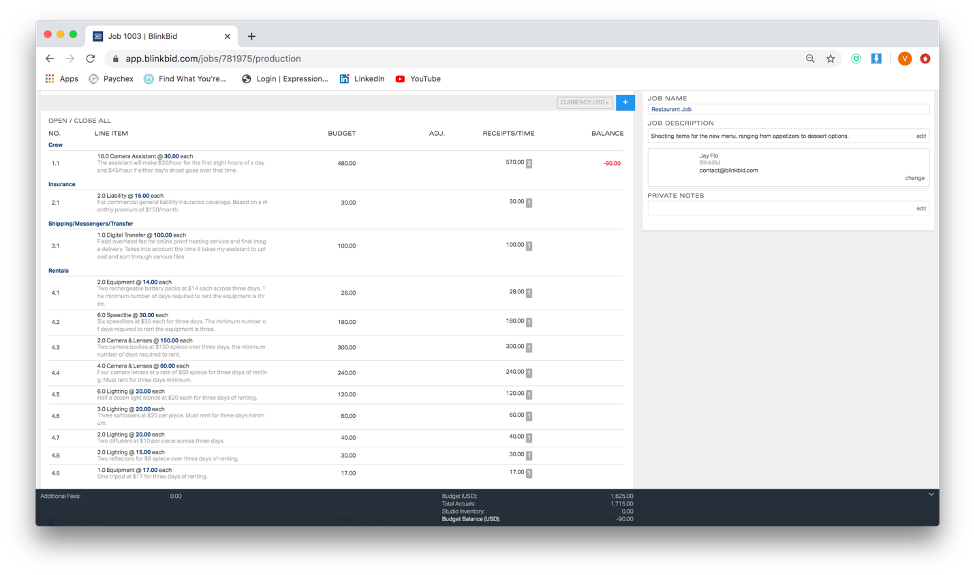
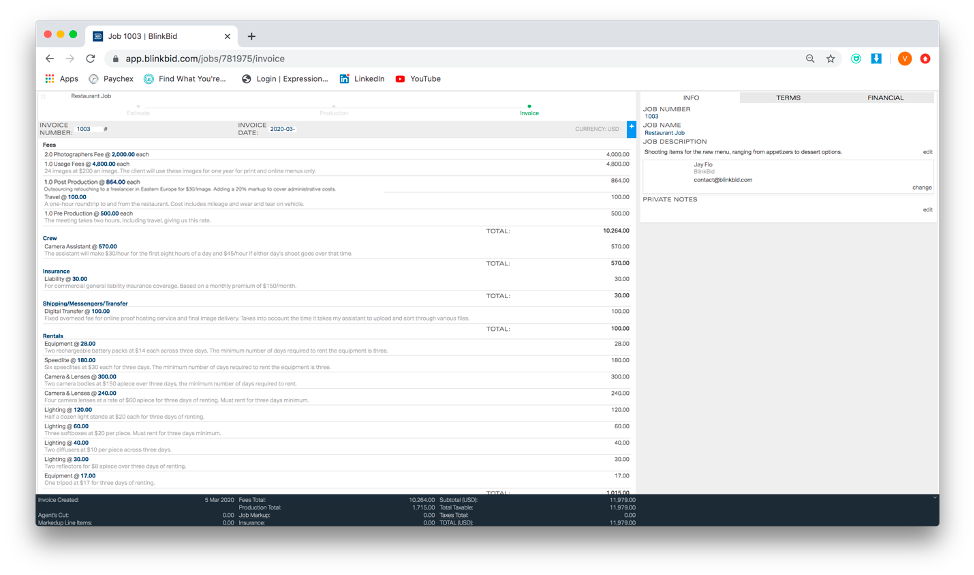
This shows that we went $90 over budget and that will be reflected on the final invoice. To get to the last page, click on those three lines again and select “Transfer to Invoice” (or, again, “Overwrite Invoice,” if you had to go back and make changes). You’ll see a tally of all the costs from the shoot in a format that you can send to the client after the assignment is completed.
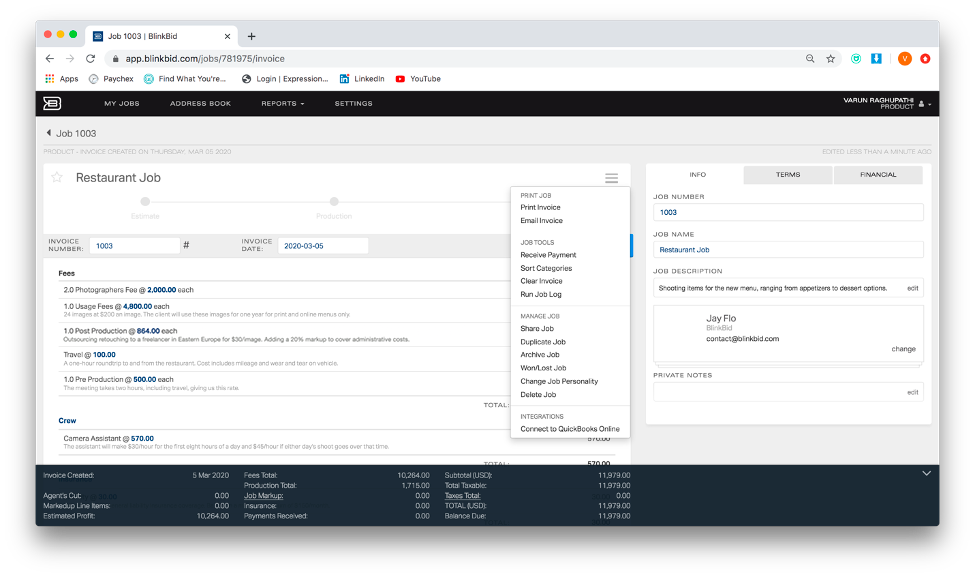
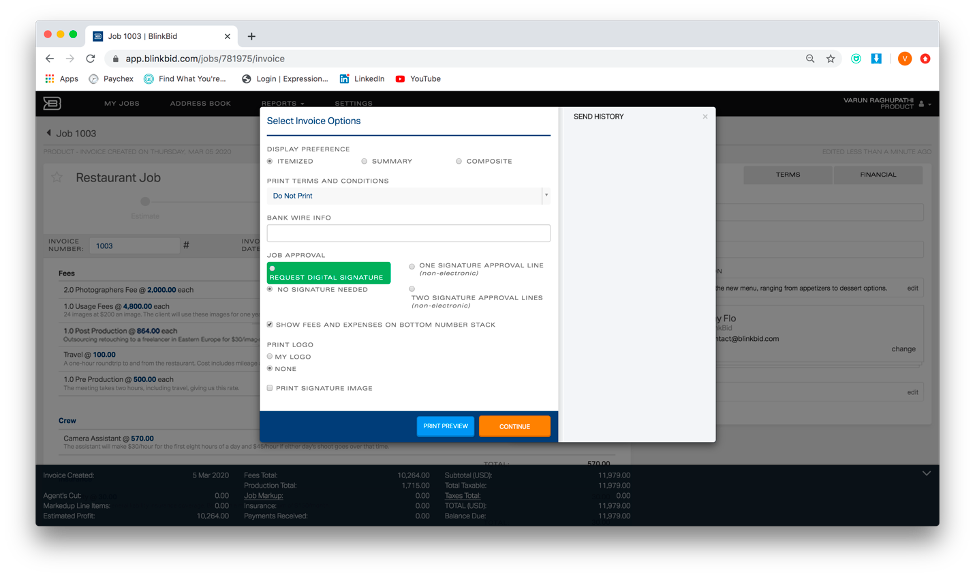
To send the invoice, head on back to those three lines (see, we told you they’d become your best friend) and click “Print Invoice” or “Email Invoice” depending on what you need. We recommend printing out a physical copy for your records even if the client only requires you to email them the final invoice.
At this point, you’ve successfully navigated BlinkBid for both in-studio and on-location work. In the next article of our series, we’ll discuss image licensing.