Tips and Tricks of Photographing Watch:
Behind The Scene
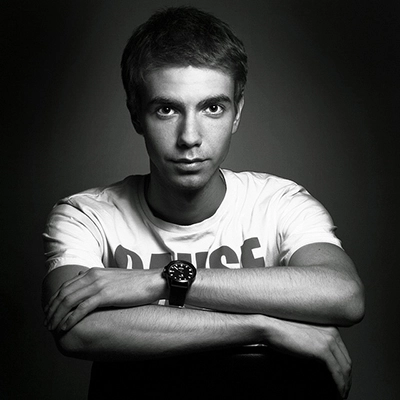
First I would like to say that it means a lot to me to have my shot featured on Photigy and be able to share with you how this shot came to life!
This is my first début on Photigy as a photographer and not many people know me. I would like to use this opportunity and introduce myself.
My name is Maxim (Max) Sivyi. Born in Ukraine now living in America since 1994.
Photography was my hobby for many years but studio photography was totally new world to me and I had no idea what’s involved in producing this type of images.
One day I came across Alex’s pictures on the internet and was stunned. So I got curious and this is how I found Photigy.
I’ve been a member on Photigy for over a year now but didn’t really try to take it to the next level. Shooting with LED bulbs was making it very challenging to achieve decent results. Also shooting in my detached garage, where it gets damn cold in the winter and very hot in the summer, was killing my desire to be more dedicated UNTIL I finally got much better equipment. Now I even have a window Air Conditioner unit and a heater in the garage : )
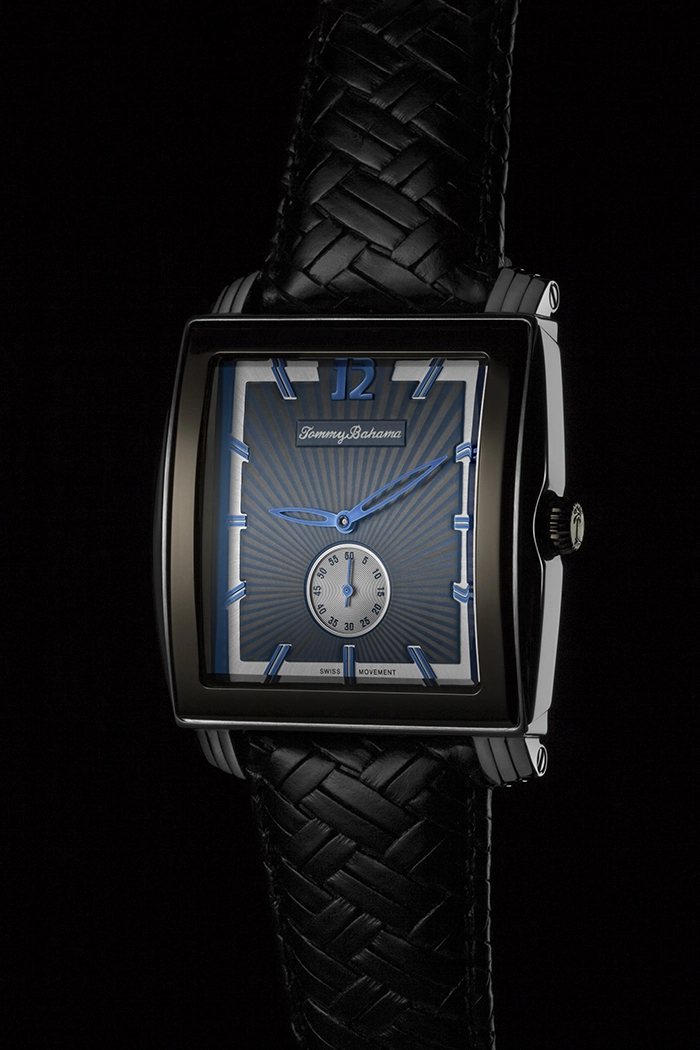
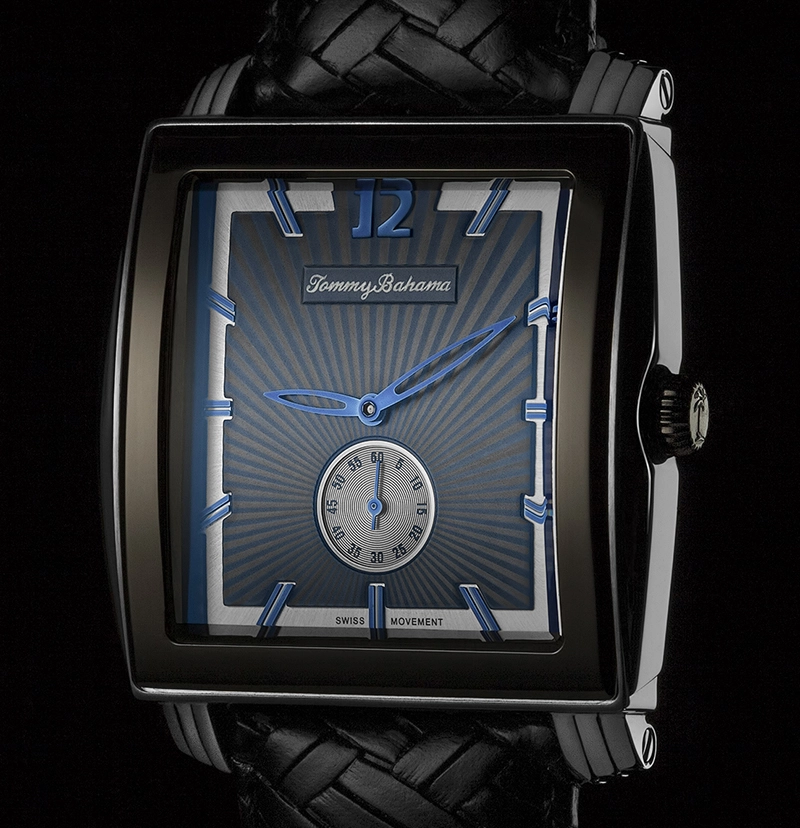
Photographing “Tommy Bahama” watch
image by Max Sivyi
Many of you have already seen this shot on Photigy’s Facebook group and now giving the opportunity I can expand little bit more about it.
I want to apologize in advance for the poor image quality of the lighting setup. Didn’t think that I may need them at this level : ) but I did try to enhance is little bit for better viewing.
In the Gearbox |
|
|
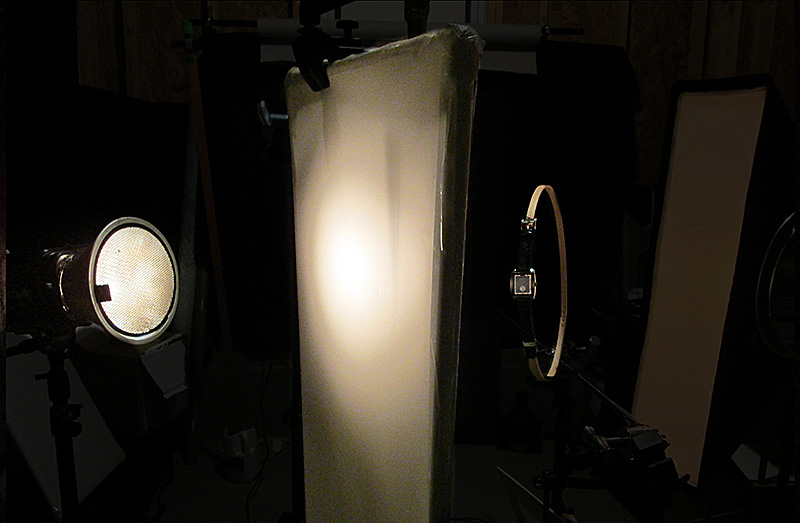
Camera: Canon 30D Lens: Canon EF 100mm 2.8f macro Lighting: 3 Paul C Buff strobes (2 – Einsteins, 1 – White Lightning) Light Modifiers: DIY diffuser , 2 – honeycomb grids 10 degree, 1 P.C. Buff stripbox Other Equipment: 12″ Wood Embroidery Hoop, Stands, clamps, etc. |
About the shot:
Why did I choose this angle– because of the watch’s crown. It has a cool little palm tree on it and I thought it’s a nice detail to show and it would add a nice touch to the picture. If I am not mistaking it’s “Tommy Bahama” trademark.
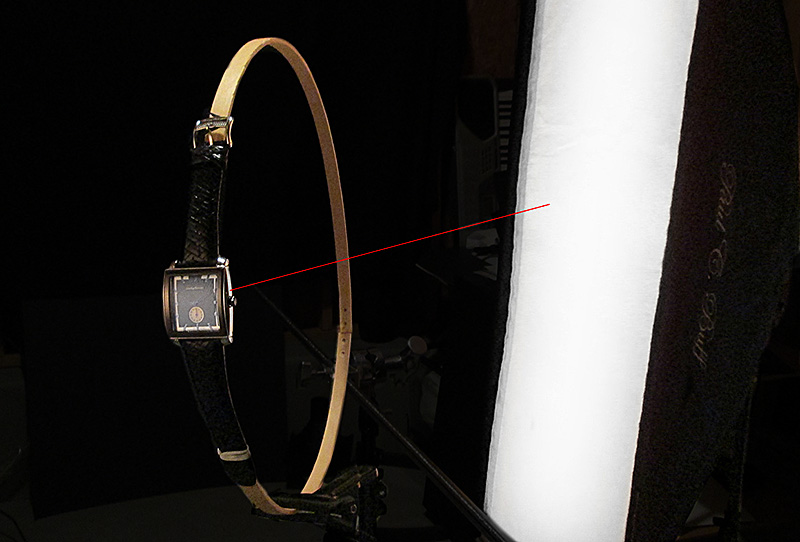
Fixing the watch in place – To give the watch a slight curve I used wooden embroidery hoop. Never used it before but it actually turned out to be a very useful and cheap piece of equipment to have when photographing a watch. I will even buy few more in different sizes for the different curve bend.
Lighting:
I used 3 lights for the shot.
Light #1 on the left, also the main light, is set to light the front of the watch. To defuse the light I used DIY diffuser made of PVC and Savage translucent plastic.
I decided to use a spot-light vs stripbox because when I positioned it on relatively sharp angel to diffuser it created an oval spot and with watch’s slightly curved face it created a nice gradient with dark going up and down and soft deem light on the bracelet… oh and the spot was also equipped with 10 degree honeycomb grid to reduce the light spill even more.
Where stripbox wouldn’t produce the same result.
Light #2 – with stripbox on the right
This light is set to highlight the right side of the watch where the crown is and also it gave a nice highlight to the right edge of the bracelet so it doesn’t disappear in to the black background.
The watch body has glossy metal surface and so the reflection doesn’t distract the eye from the front of the watch I turned the power output almost all the way down.
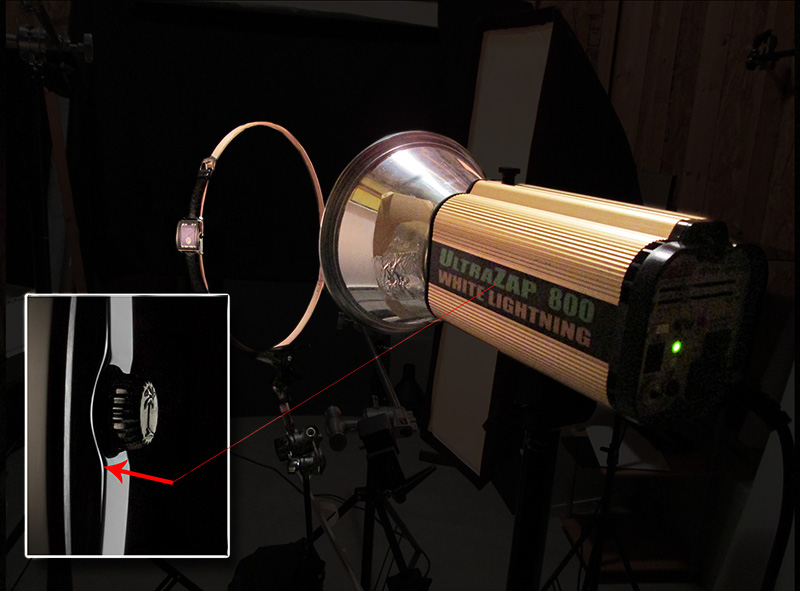
Light #3 – equipped with 10 degree honeycomb grid
Purpose of this light is to add that nice thin curved line to the left of the crown. I had to play with its positioning little bit until I got the result I liked.
Post-Production:
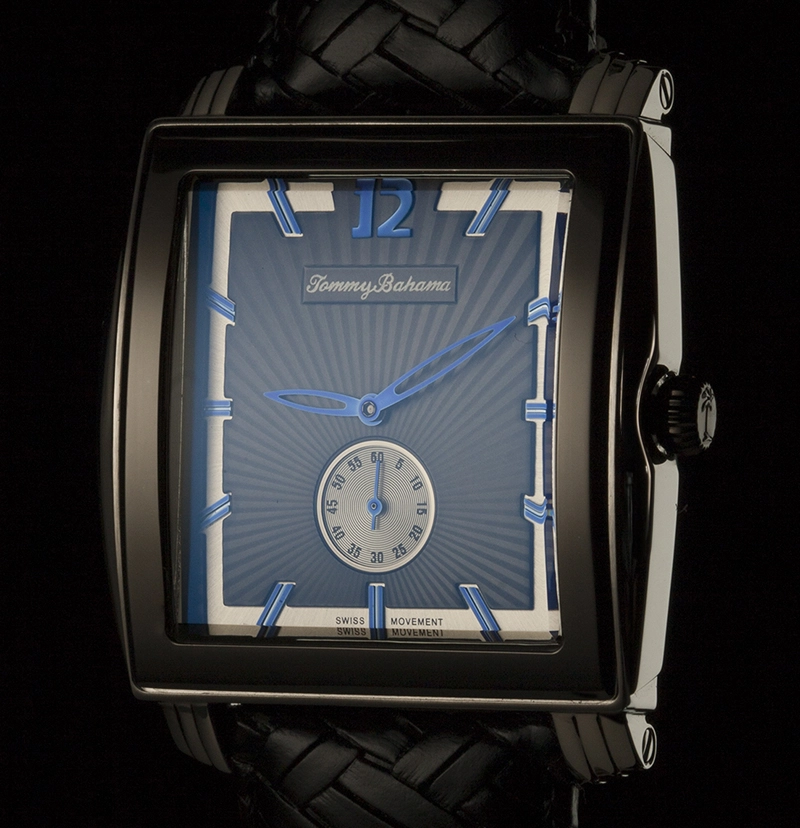
I didn’t do anything special here and image below of “Before and After” will give you a pretty good idea of what was done but I will lay it out the steps anyway.
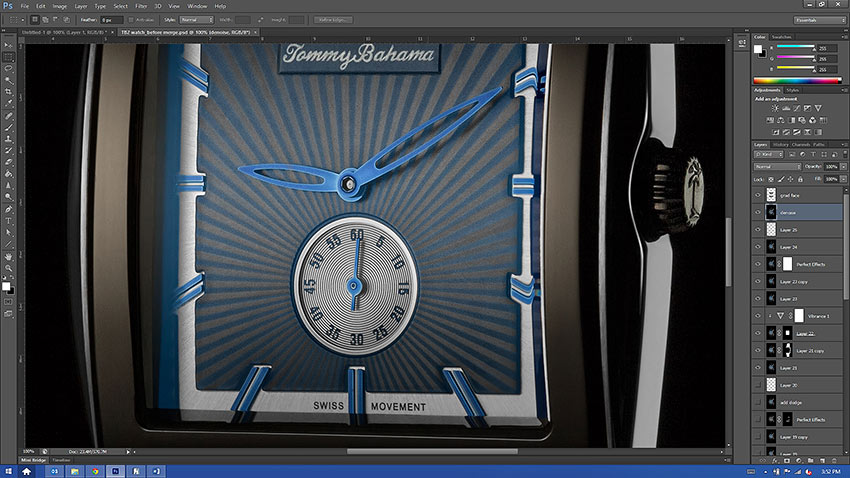
First thing I did is some minor adjustments in Adobe RAW like exposure correction, boosted up clarity a bit, little of vibrance etc.
Next step – I duplicated the layer, converted it to gray scale and applied the inverted mask. Then using white brush I painted over the parts I wanted to reveal. This was done to eliminate any warm colors in metal and bracelet.
This step was the most time consuming. The removal of a dust particles and unwanted reflections. This is a good exercise to train your patience : )
Almost forgot to mention… in order to stop the watch I had to pull the crown out. In the ‘After’ image you will see how it jumps back in to place so don’t be surprised : )
Yes, I had to cut it out and move it back in so it doesn’t stick out too much. This was the only moving part of the image.
When everything looked nice and clean I removed noise, which my camera produces in excess, using Topaz DeNoise and added sharpness using Topaz InFocus.
Well… this is it :- )
Photographing this watch was a great learning experience for me, time well spent.
I would like to add that everything I know about studio photography so far and able to apply I learned here on Photigy.com.
If you are serious about investing in yourself learning product photography this is the place to be!
Thank you for taking your time reading it :- )


