Using Artificial Ice In Advertising Photography:
BTS of an Ice Tea Shot

Hello, my name Aleksandr Vlassyuk, a photographer from Almaty, Kazakhstan. I studied graphic arts at university, and have worked more than 10 years as a graphic designer.
Photography had been my hobby since childhood, and it become a passion when I created a small photography studio.
I enjoy advertising photography as well as landscape, portrait and wedding photography and I shoot a lot for photo stock agencies such as shutterstock.com
Using Artificial Ice In Advertising Photography: Ice Cold Teas
In this BTS you’ll learn how I created this image:
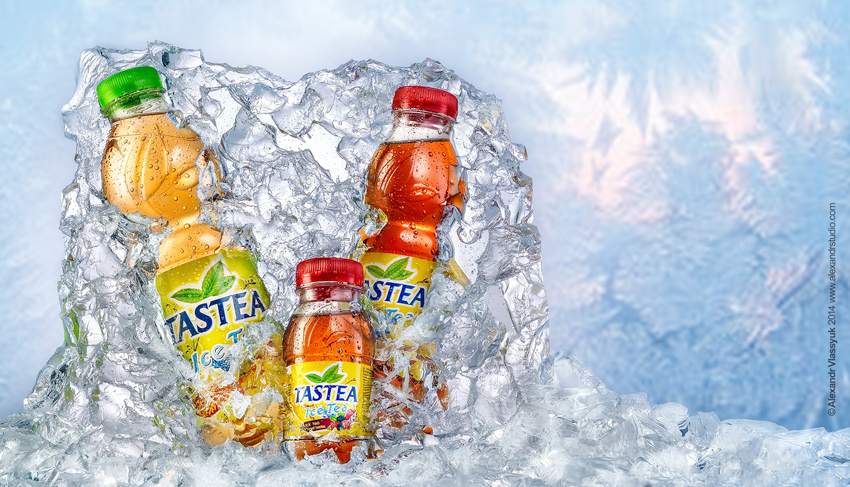
While working on this assignment I got the idea to shoot bottled products partially frozen in the ice for a summer visual advertising piece.
After negotiations with the client, I went to my studio and I began to ponder how to implement the conceived idea. First I decided to try to do it with actual ice.
Bottles Frozen In Real Ice:

 Only for Pro Club Members
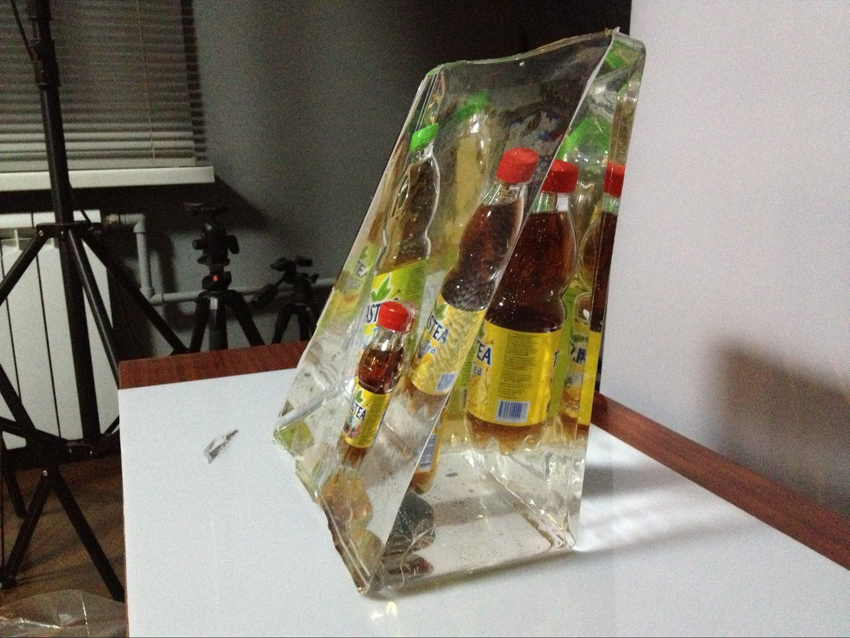
I placed the tea bottle in a container and poured distilled water into the container and placed the container in the freezer. After a while I got this piece of ice with bottles (above) and immediately realized that this was not a viable option: firstly, the ice and frozen tea in the bottles did not look appealing, and secondly, to handle natural ice is not easy; it just melts in the studio under studio lights, and it would be way too tricky to shoot the assignment in a freezer.
After this experience, I sat down and began to search for online information on replacing this with artificial ice. After reviewing all the options I focused on Encapso K – this was the most suitable material, and this is how I came up with using artificial ice in the advertising photography assignment.
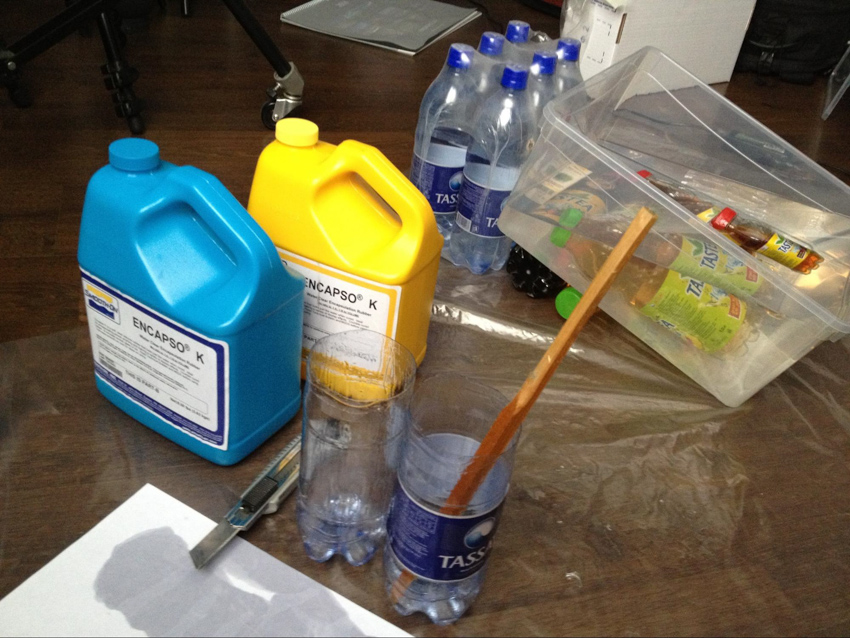
The Composition and Shading of Encapso K
Using Artificial Ice In Advertising Photography
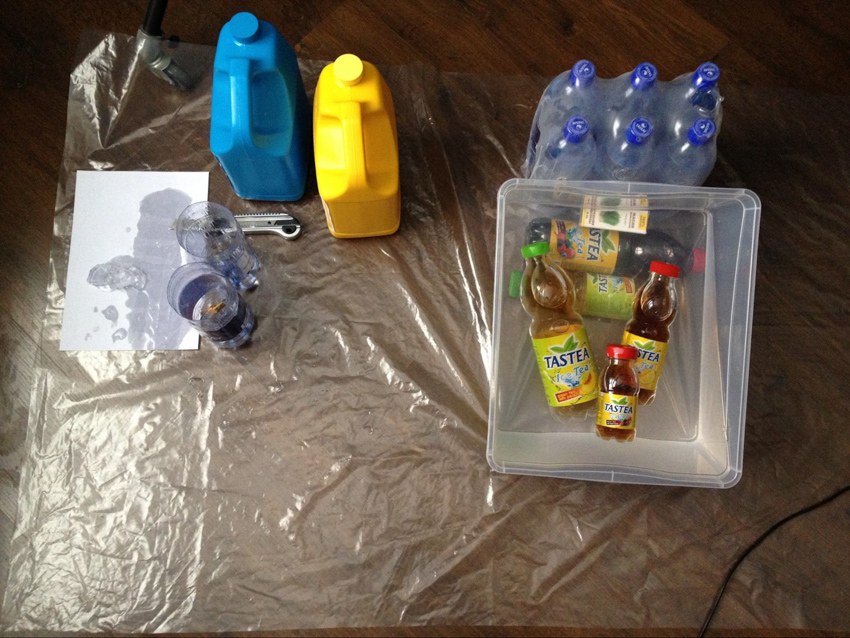
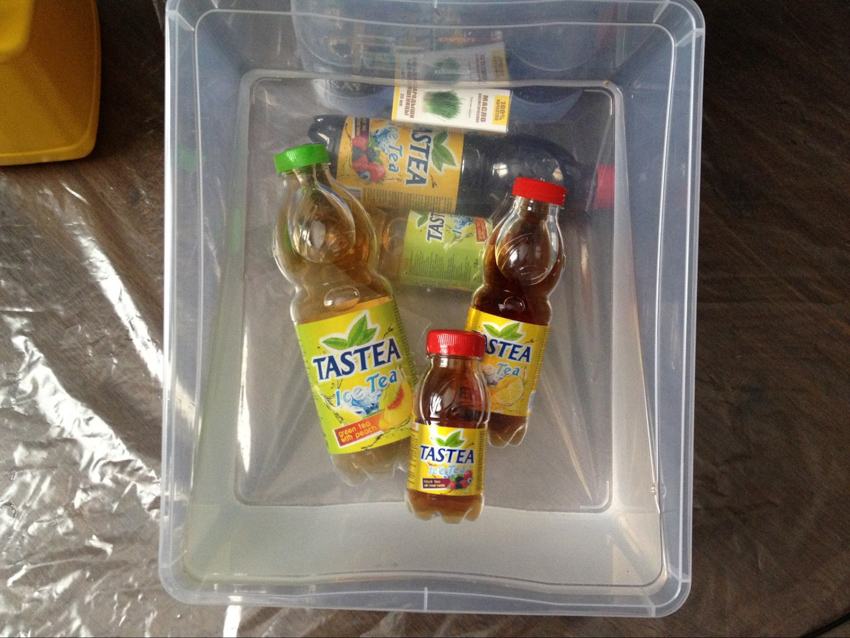
After I found a suitable container, I started to create a silicone solution by mixing in the appropriate proportions of Enkapso K ( A + B 1:1 ratio ).
I filled the first layer with one liter and gave it some time to dry – this consisted of stacking the bottles according to the composition. Then I waited about 24 hours for the first liter to dry, then with the second layer I almost completely covered the bottle. Finally, I mixed a little more solution after the second layer dried out with the third bottle set covering all of the bottles completely.
Working with Enkapso K
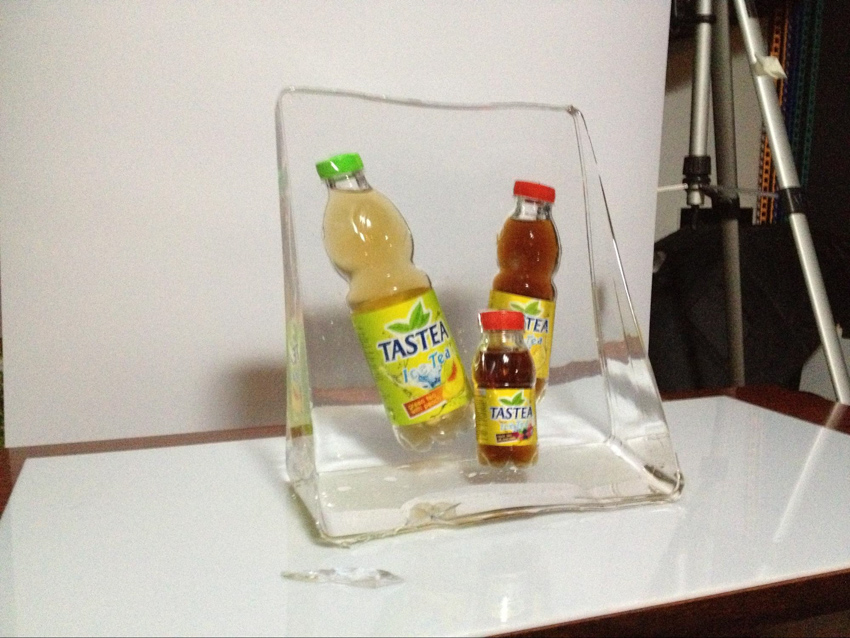
As the mixture completely dried up I put the silicone brick of “ice” on the table and and started “crushing” it with a knife. Silicone is easy to cut with a knife and it was not a problem to create the composition you see below.
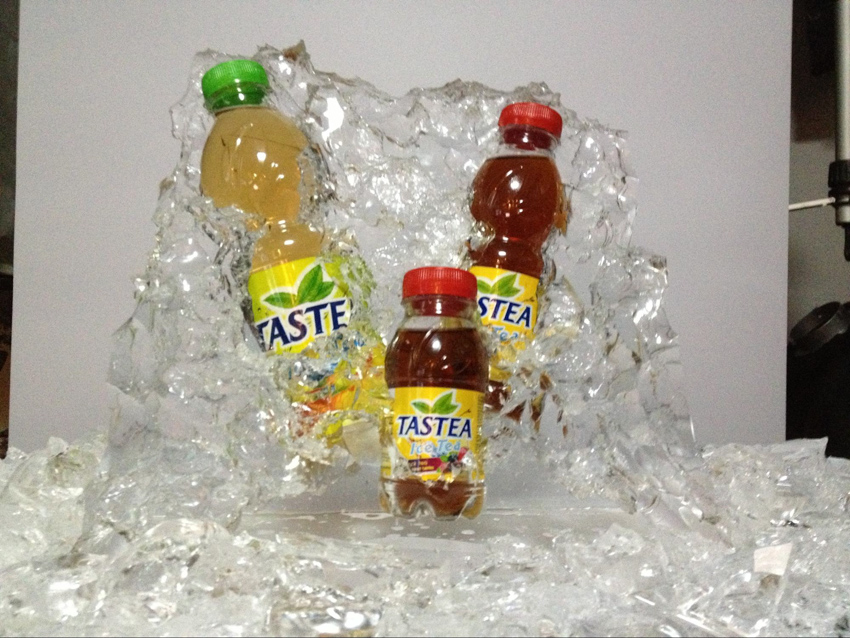
I’ve used broken pieces of silicone to simulate crushed ice around the bottle. It makes a very good imitation of ice: it has no bubbles and it is crystal clear.
Now, the photography part
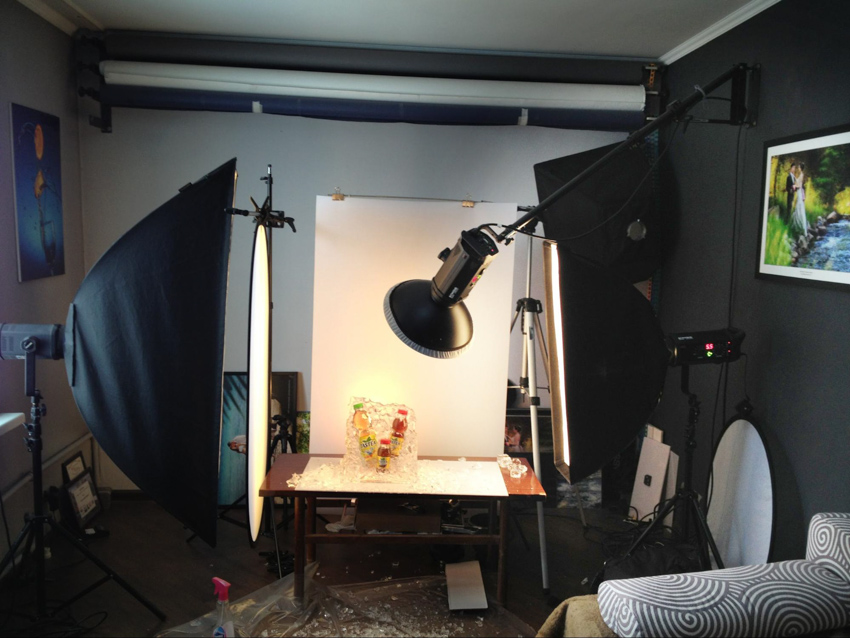
The Lighting Setup
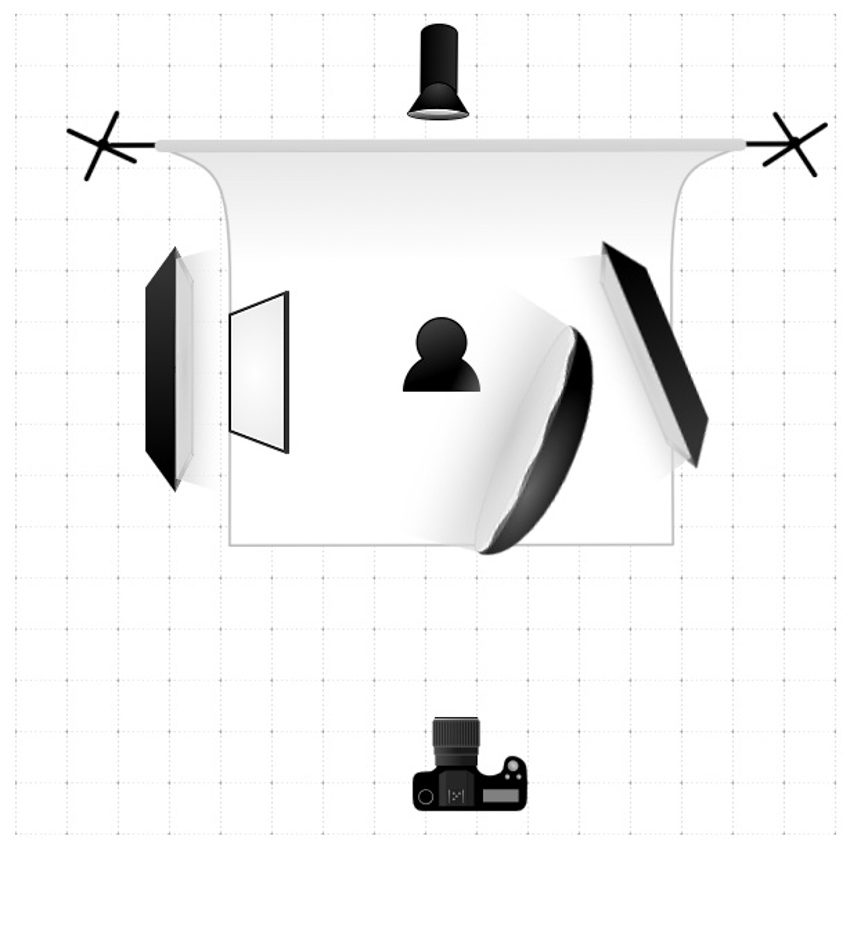
This is what the lighting setup looked like:
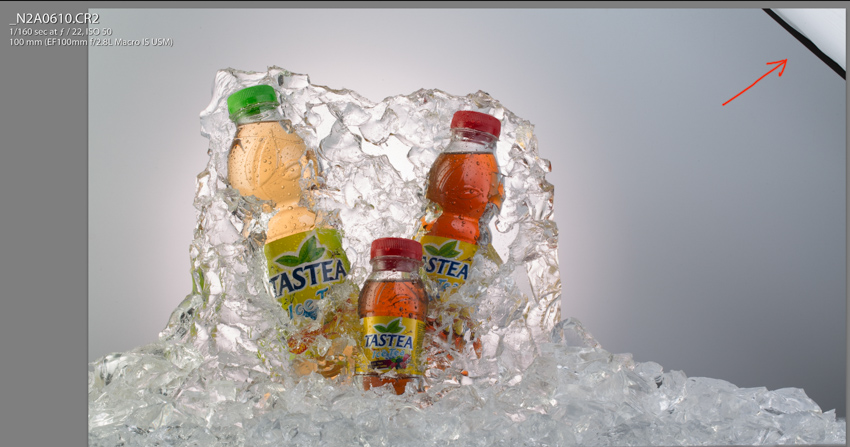
Let me walk you through the shooting process and show the outcome from each step
- After the first few shots, I realized I didn’t like the harsh reflections from the beauty dish and the right side strip box – see red circles:

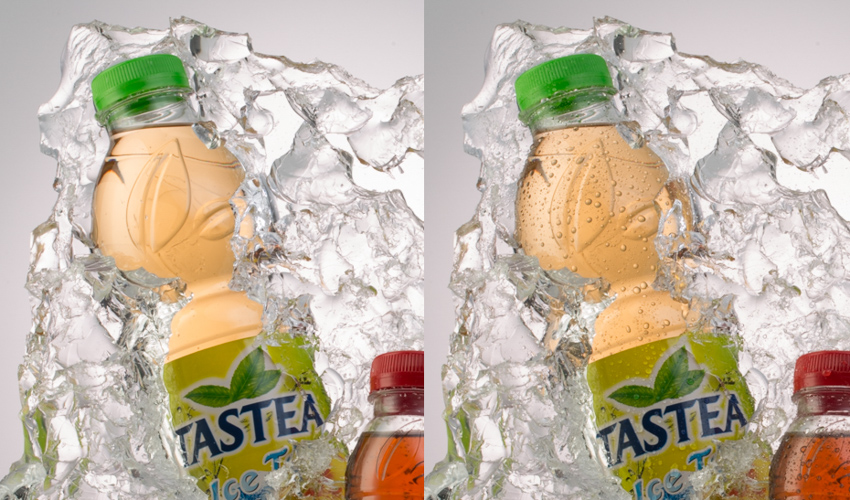
- To fix the issue with the reflection from the BD (beauty dish), I added a white diffuser, which softened the reflection from the right light:
- to create a sensation of a cold drink, I bought normal glycerin at the pharmacy and sprayed it on the bottle to create the water-like drops on them:
After this last step everything was Ok and I made my final shots, making it ready for post-production.
Post Processing
After selecting the best images in Lightroom, I opened the final shot in Adobe Camera Raw and made the following adjustments:
- Corrected the white balance to remove the blue color cast from the image.
- Made a slight correction of light and dark areas of the image.
- Added Clarity and Vibrance
- Turned on ‘Enable Profile Corrections’ and ‘Remove Chromatic Aberration’.
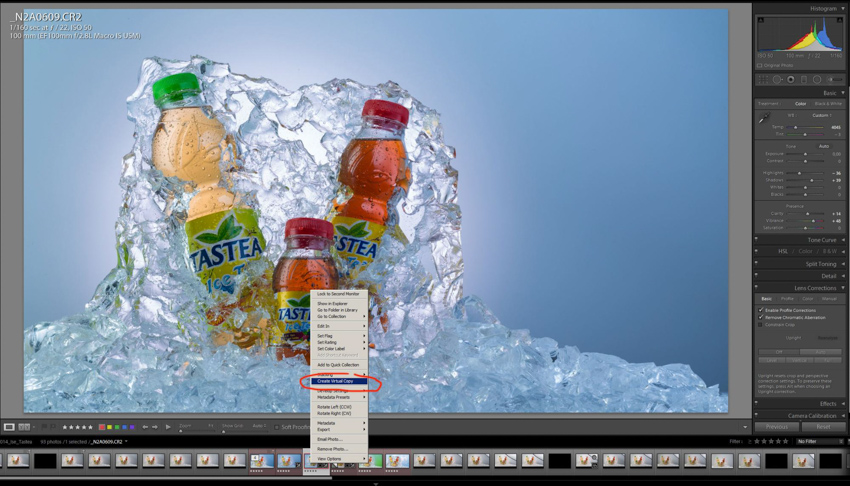
Next, I created a virtual copy of the image and adjusted the color temperature to a warmer tone, then opened both variants in Photoshop

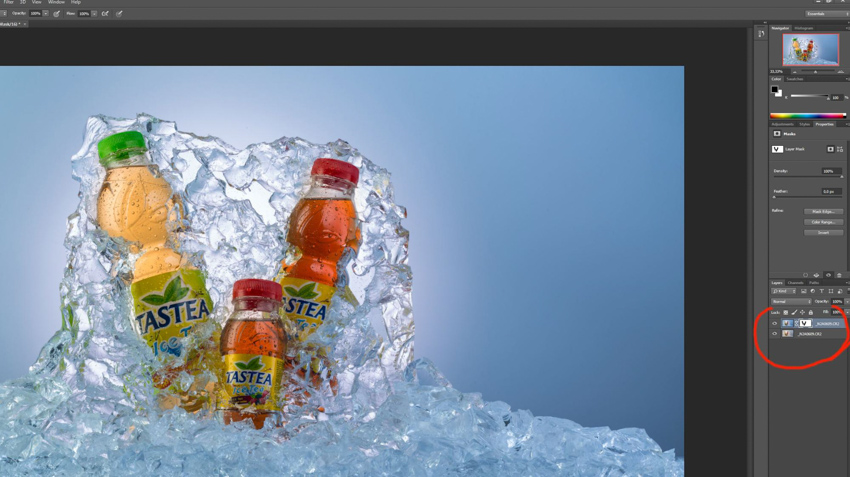
I set the “cold tone” layer on top of the “warm tone” layer, and created a layer mask, then picked a soft brush and created a mask to bring out the warm tone where it was necessary:
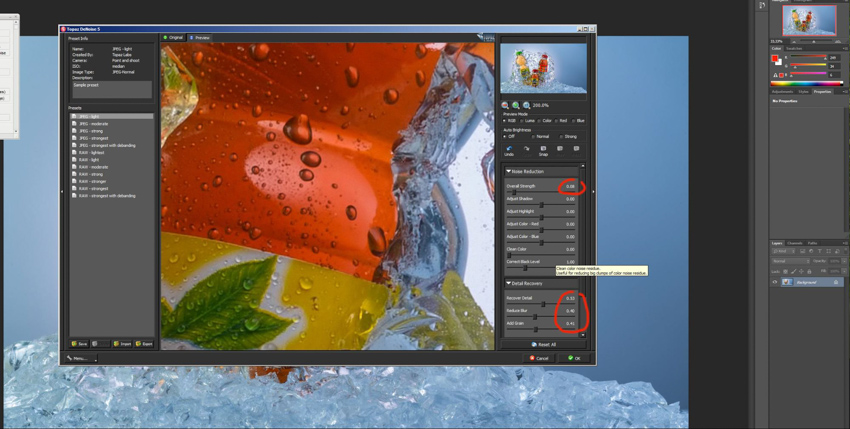
The next step was noise reduction using Topaz DeNoise:
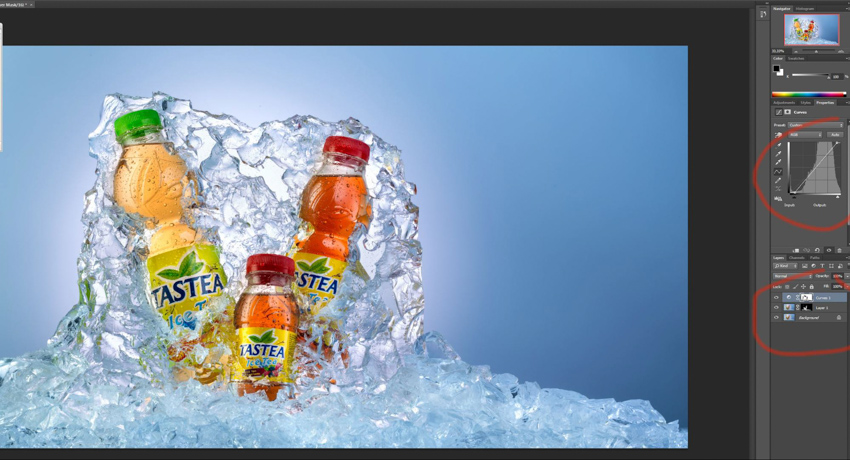
Then I duplicated the layer overlay mask and painted it with a soft brush with 20% opacity to brighten the labels and other parts of the bottle. Afterwards I created an Adjustment Curves layer and used the brush to increase contrast in the right areas and then I merged all of these layers.
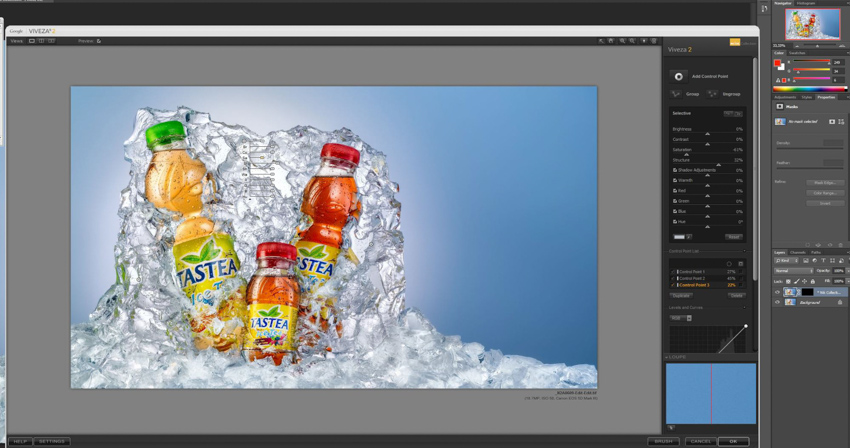
With the Vivesa 2 plug-in, I created more contrasting textures and muted the ice saturation quality and then merged the masked ice layers.
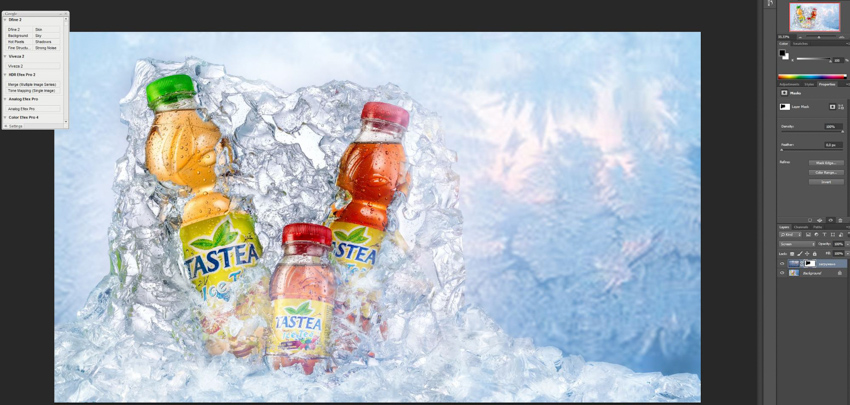
Now I created the background:
I used a stock image for the icy background. I inserted the background image on top of the final image of the tea bottles in ice and used the overlay mask and a soft brush with the opacity set to about 30% and started brushing from the center to the edges of the ice, reaching the desired resulting merge layers. That’s a cool action picture for advertising that is season ready.
After this the final image was ready:

I hope it will be useful for fellow photographers across the globe:-)
Alexandr Vlassyuk
Shooting Specifications: The Lighting:

In the Gearbox
![]()
Bowens 500,
stripbox 140×40,
stripbox 90×20,
Beauty dish 40 cm.
standard reflector 7″
Camera: Canon 5D Mark III
lens: AF Canon 100mm 2.8L Macro IS USM
My shutter speed was 1/160 sec f/22, ISO 50